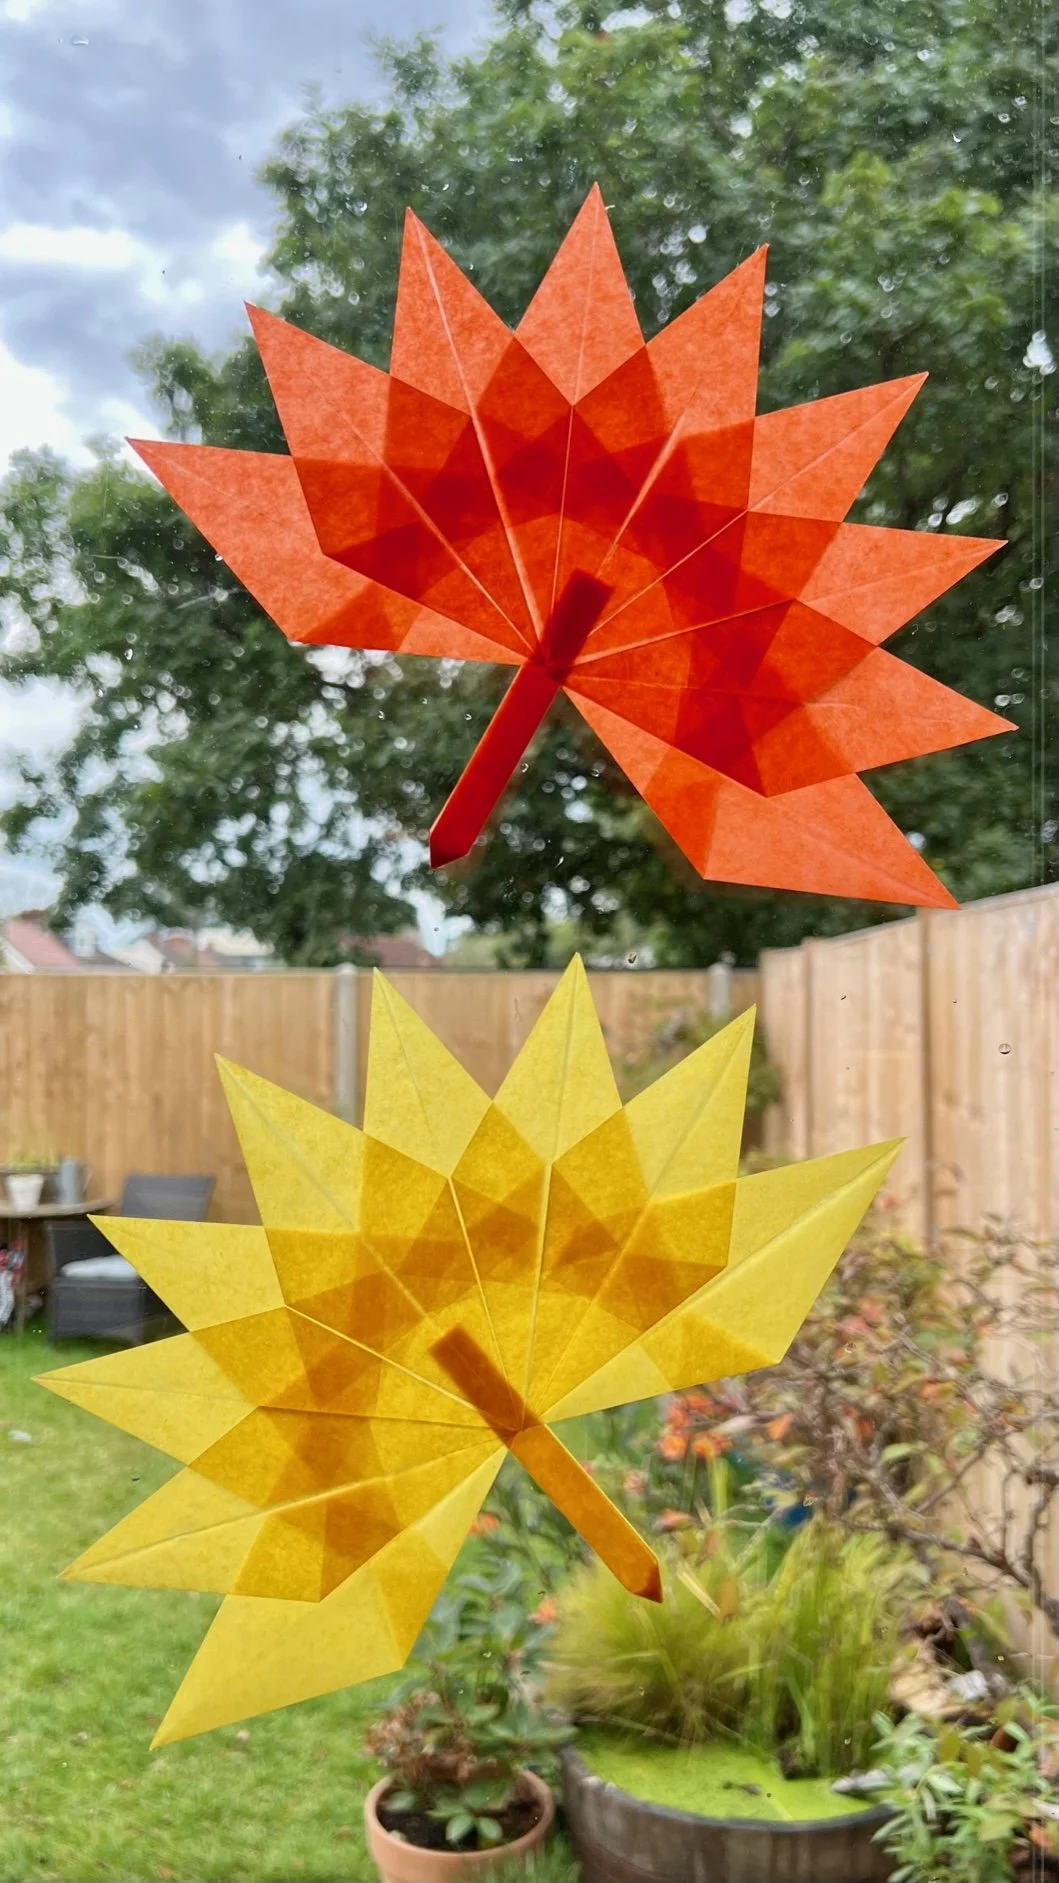
Maple leaf window transparencies

Colourful maple leaf window transparencies brighten up your home with lovely autumnal colours. Transparencies look especially beautiful mounted on a window with the sun shining through them.
This activity is part of our October Mud & Bloom box which includes everything you need to make two of these gorgeous maple leaves along with lots of other nature-inspired activities!
What you will need:
Wax paper in autumnal colours
Glue stick
Blue tac or sellotape
What you need to do:
1. Take 10 coloured wax paper squares, cut to 9cm square. You can either choose a set of all the same colour, or alternate your colours on the same leaf.
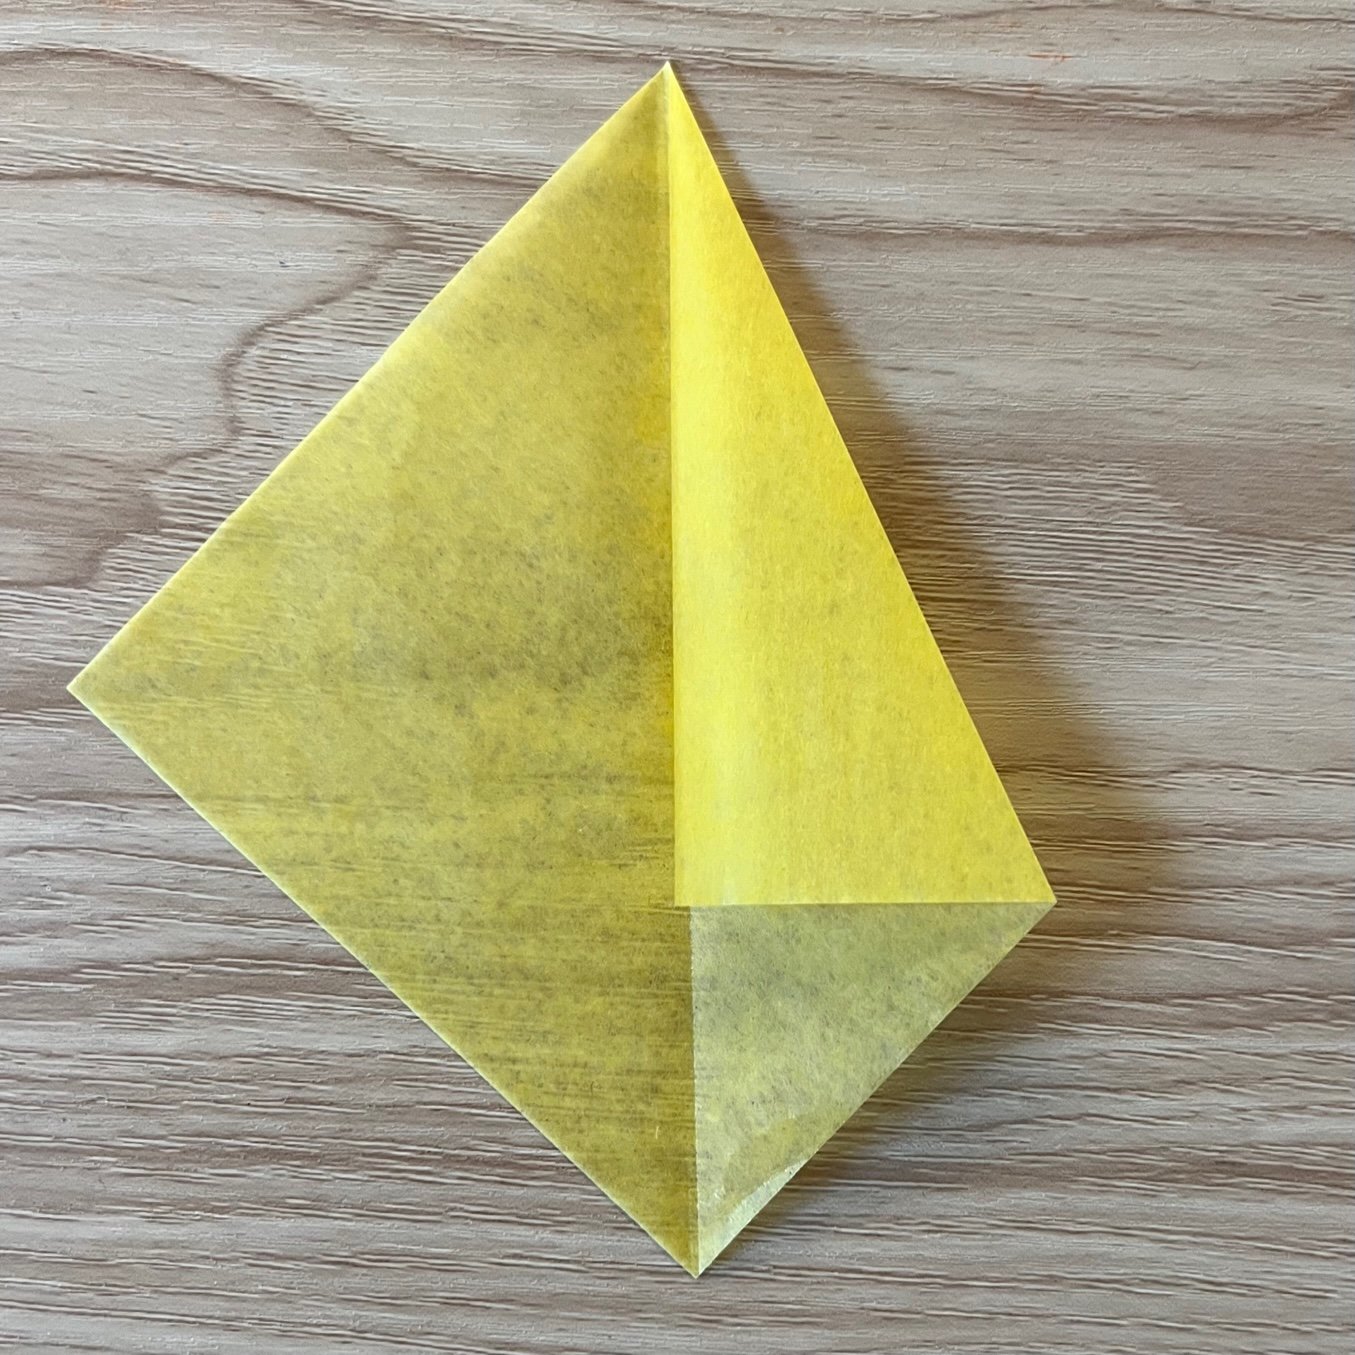
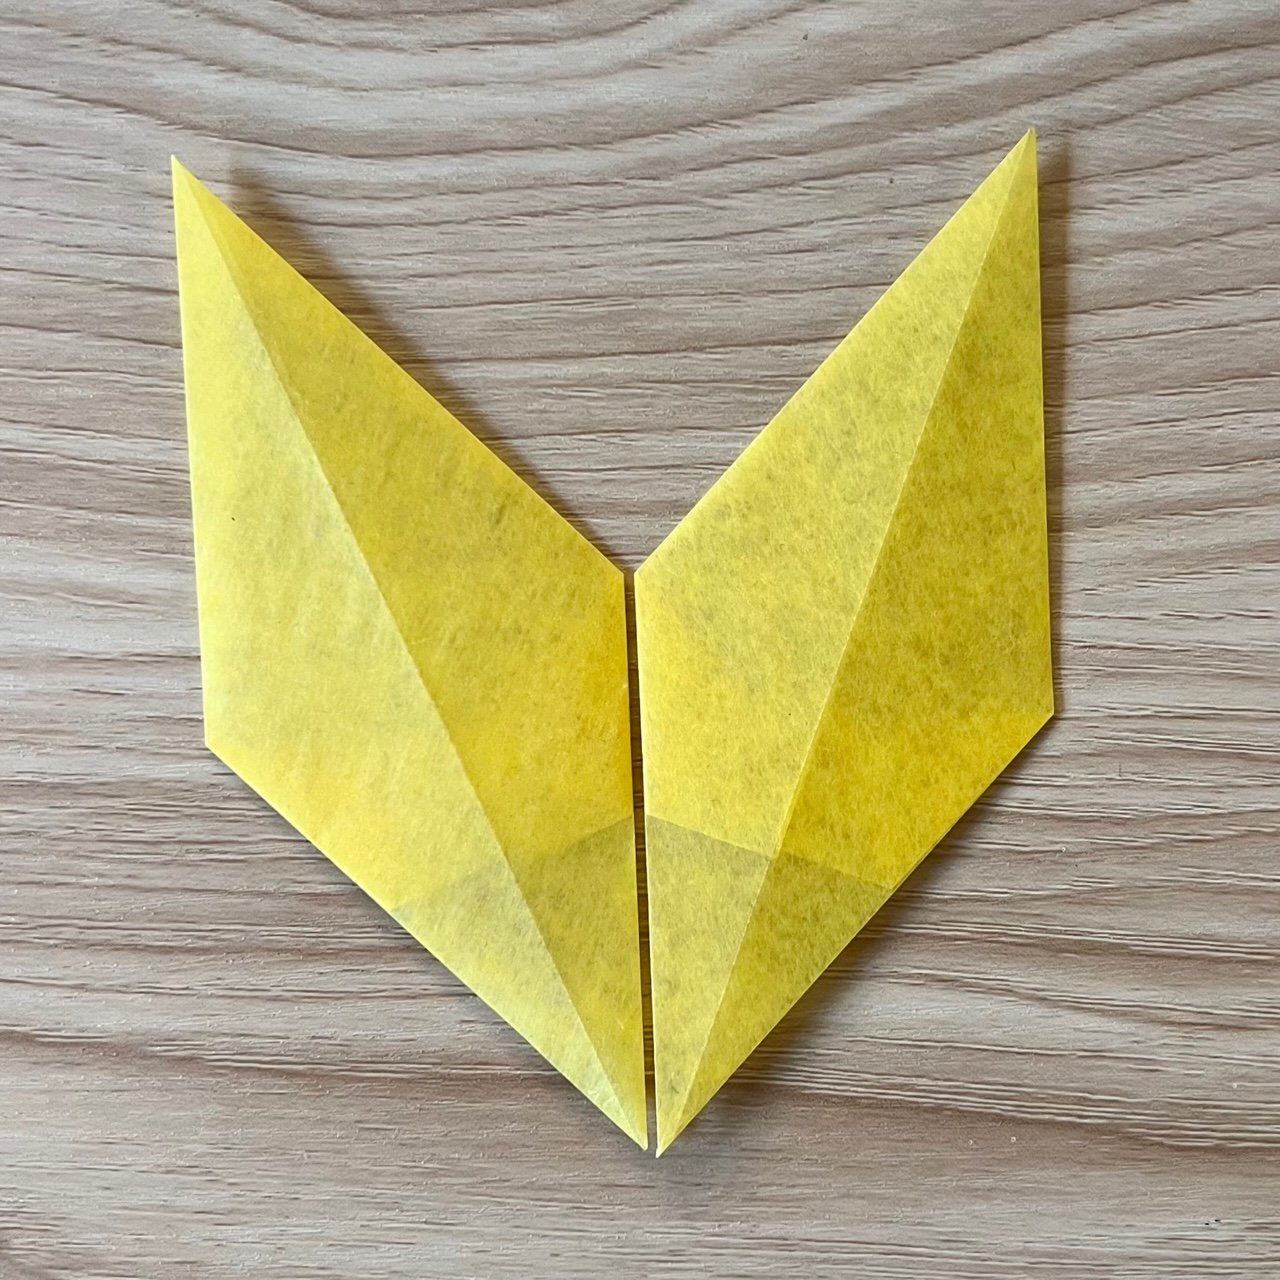
2. Lay one square of your wax paper on the table in front of you. Fold it in half diagonally to make a crease, like in picture 1, then open it out again with the crease running vertically.

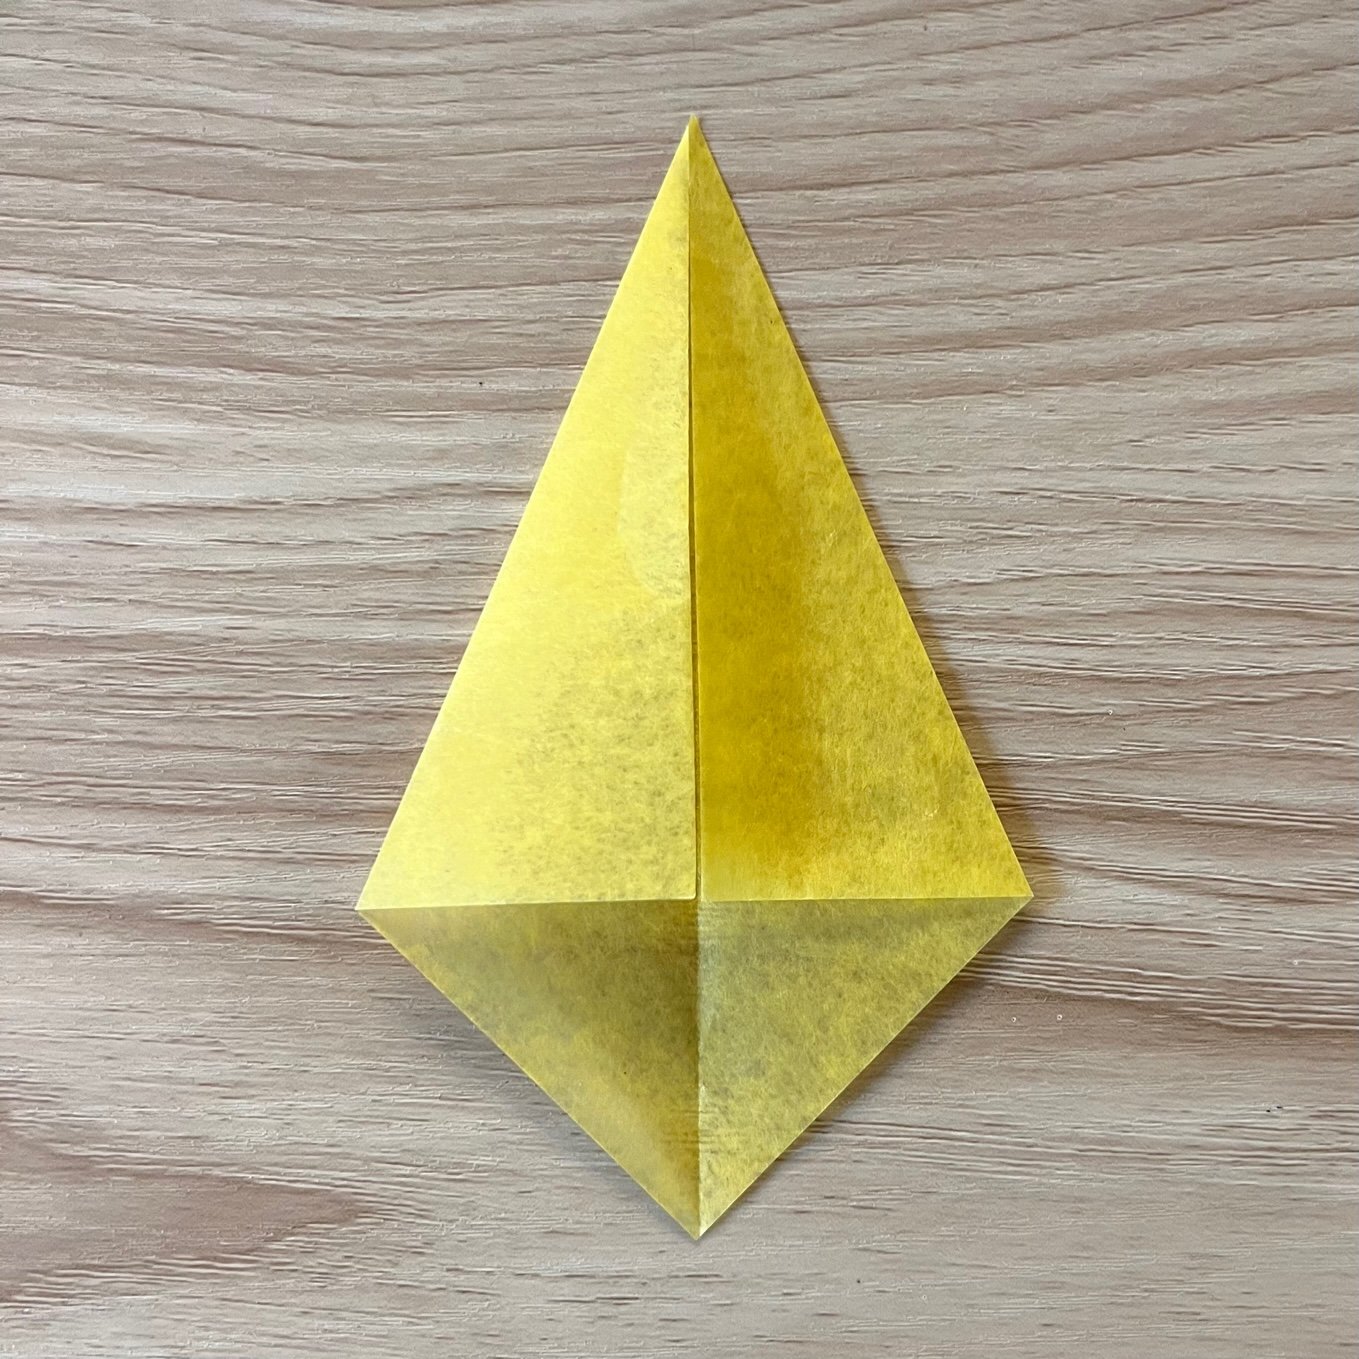
3. Working from the top point, fold the the two side corners in to meet the middle crease, as shown in pictures 2 and 3, with the top two sides running along the middle crease, making a kite shape.
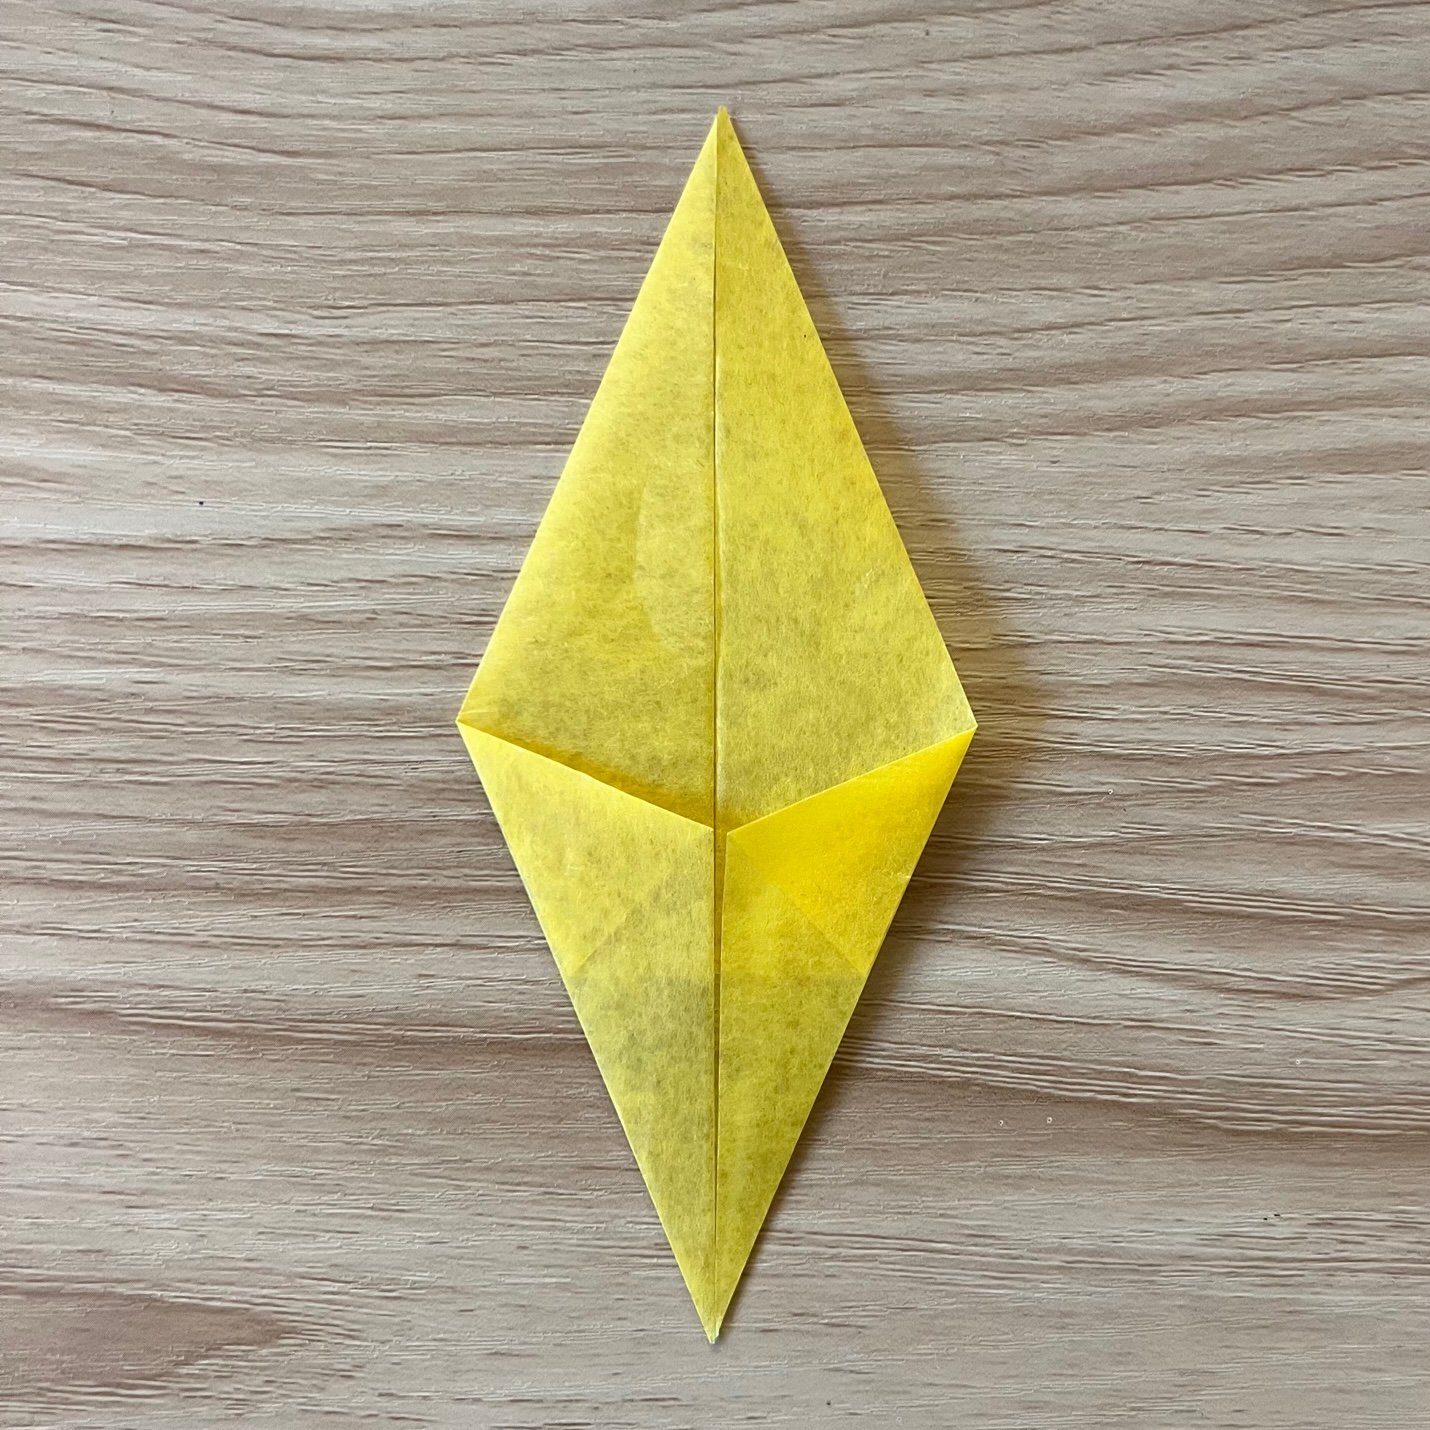
4. Then, do the same again but this time working from the bottom point and folding so that the bottom two sides run along the middle crease, as shown in pictures 4 and 5.

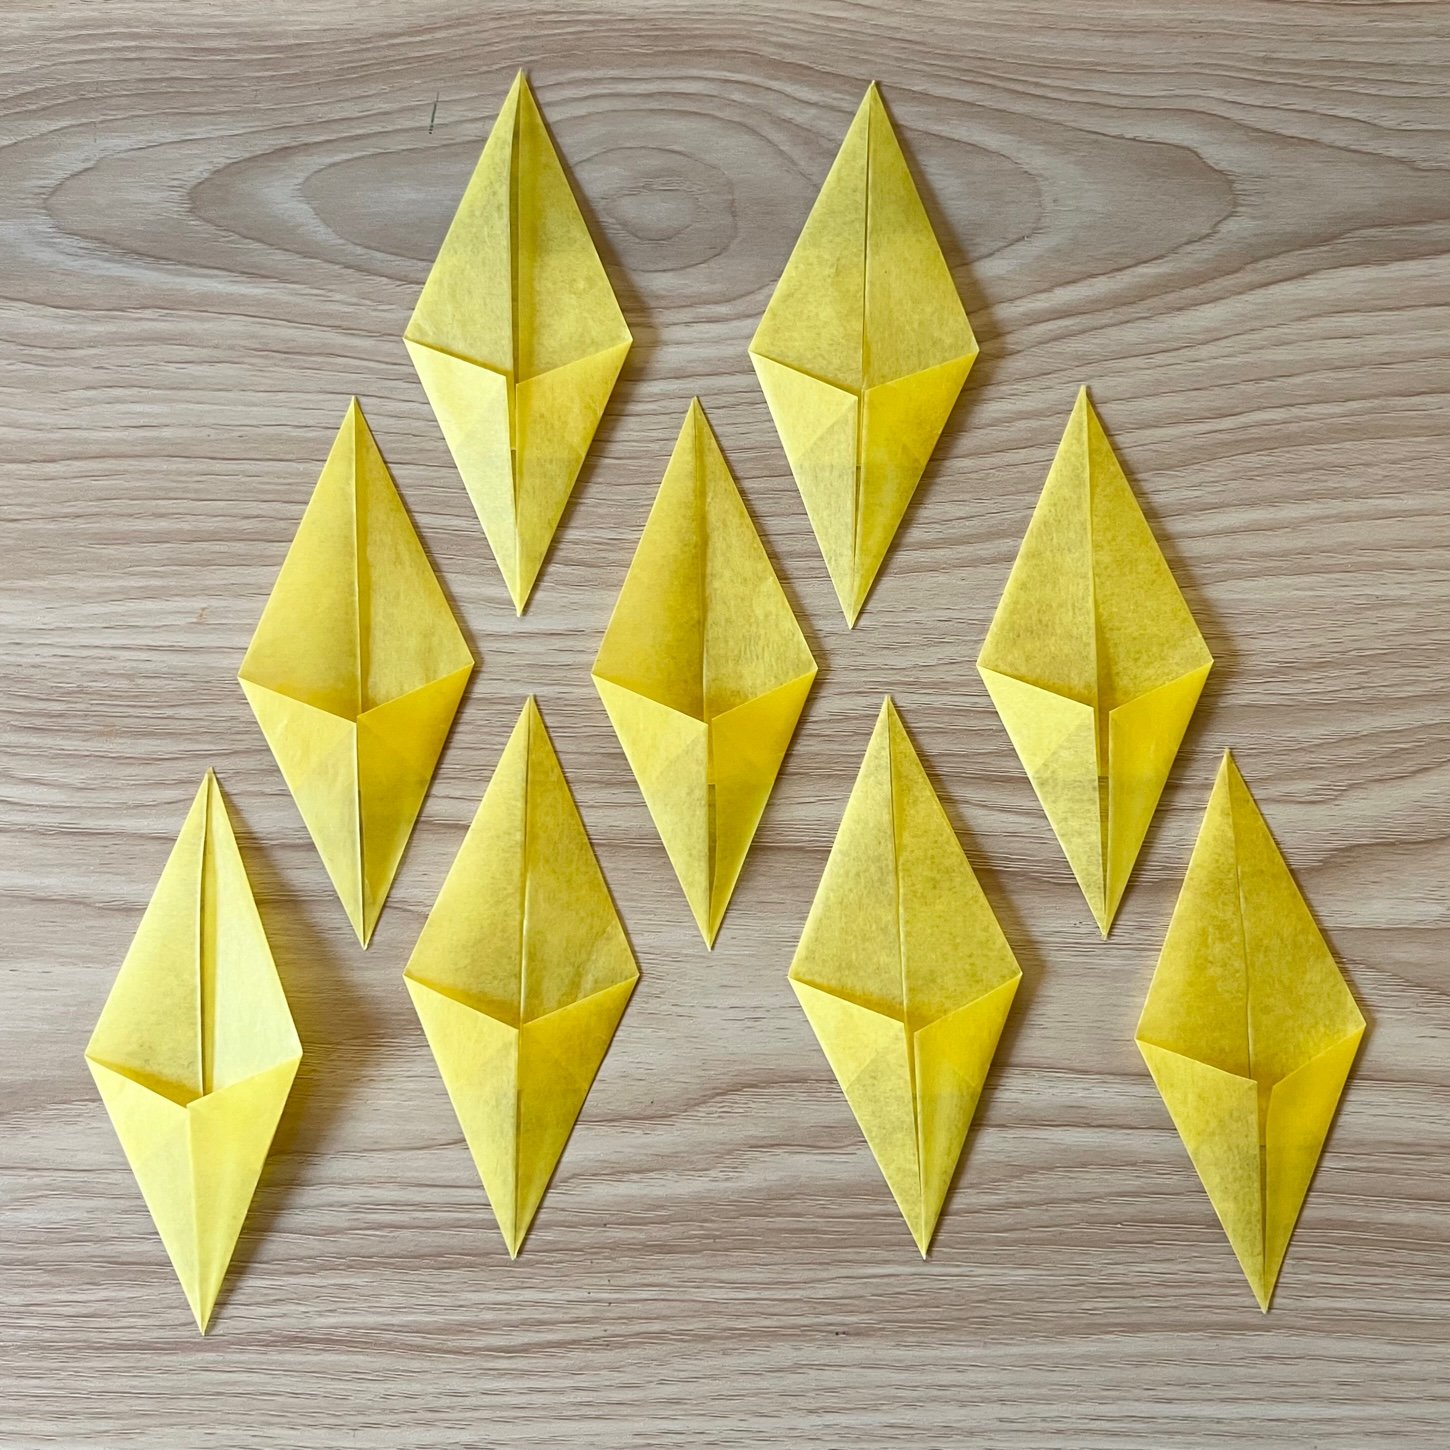
5. Repeat steps 2, 3 and 4 with eight more of your squares of wax paper, leaving the tenth one for the stem.
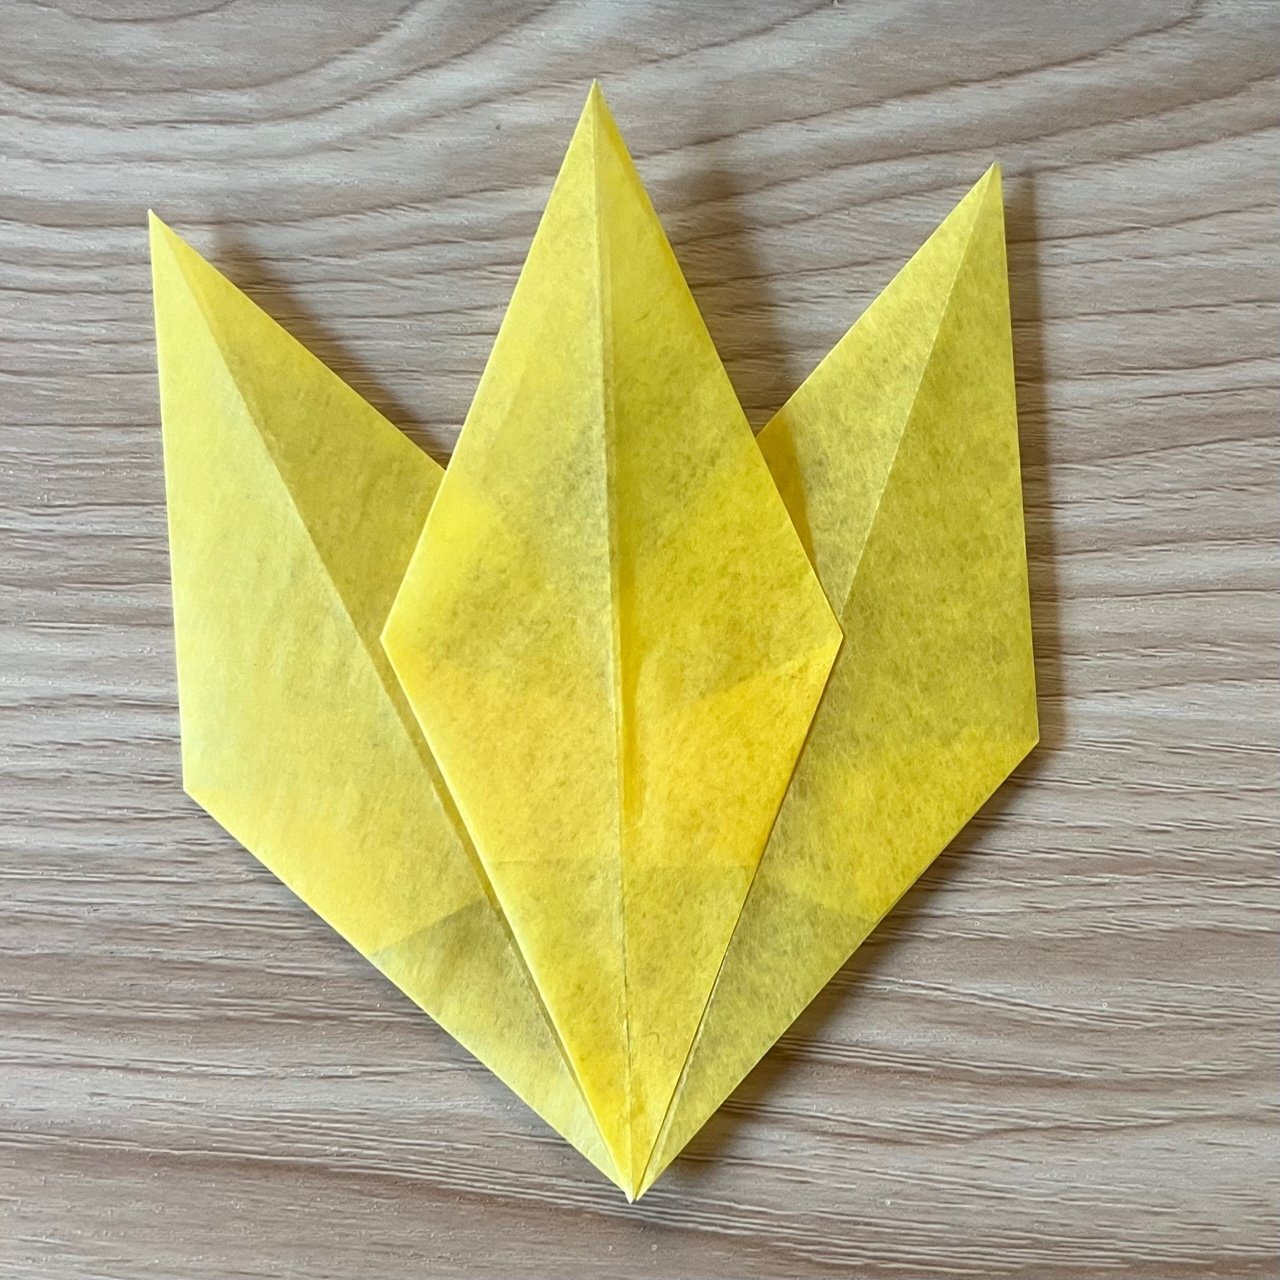
6. Take two of your folded kite shapes, turn them over so that the folds are at the back, and put them next to each other, like in picture 6.
7. Put some glue carefully onto each of them, on the bottom section that is closest to each other. Then take a third kite shape and stick it carefully overlapping both of them, so it looks like picture 7.
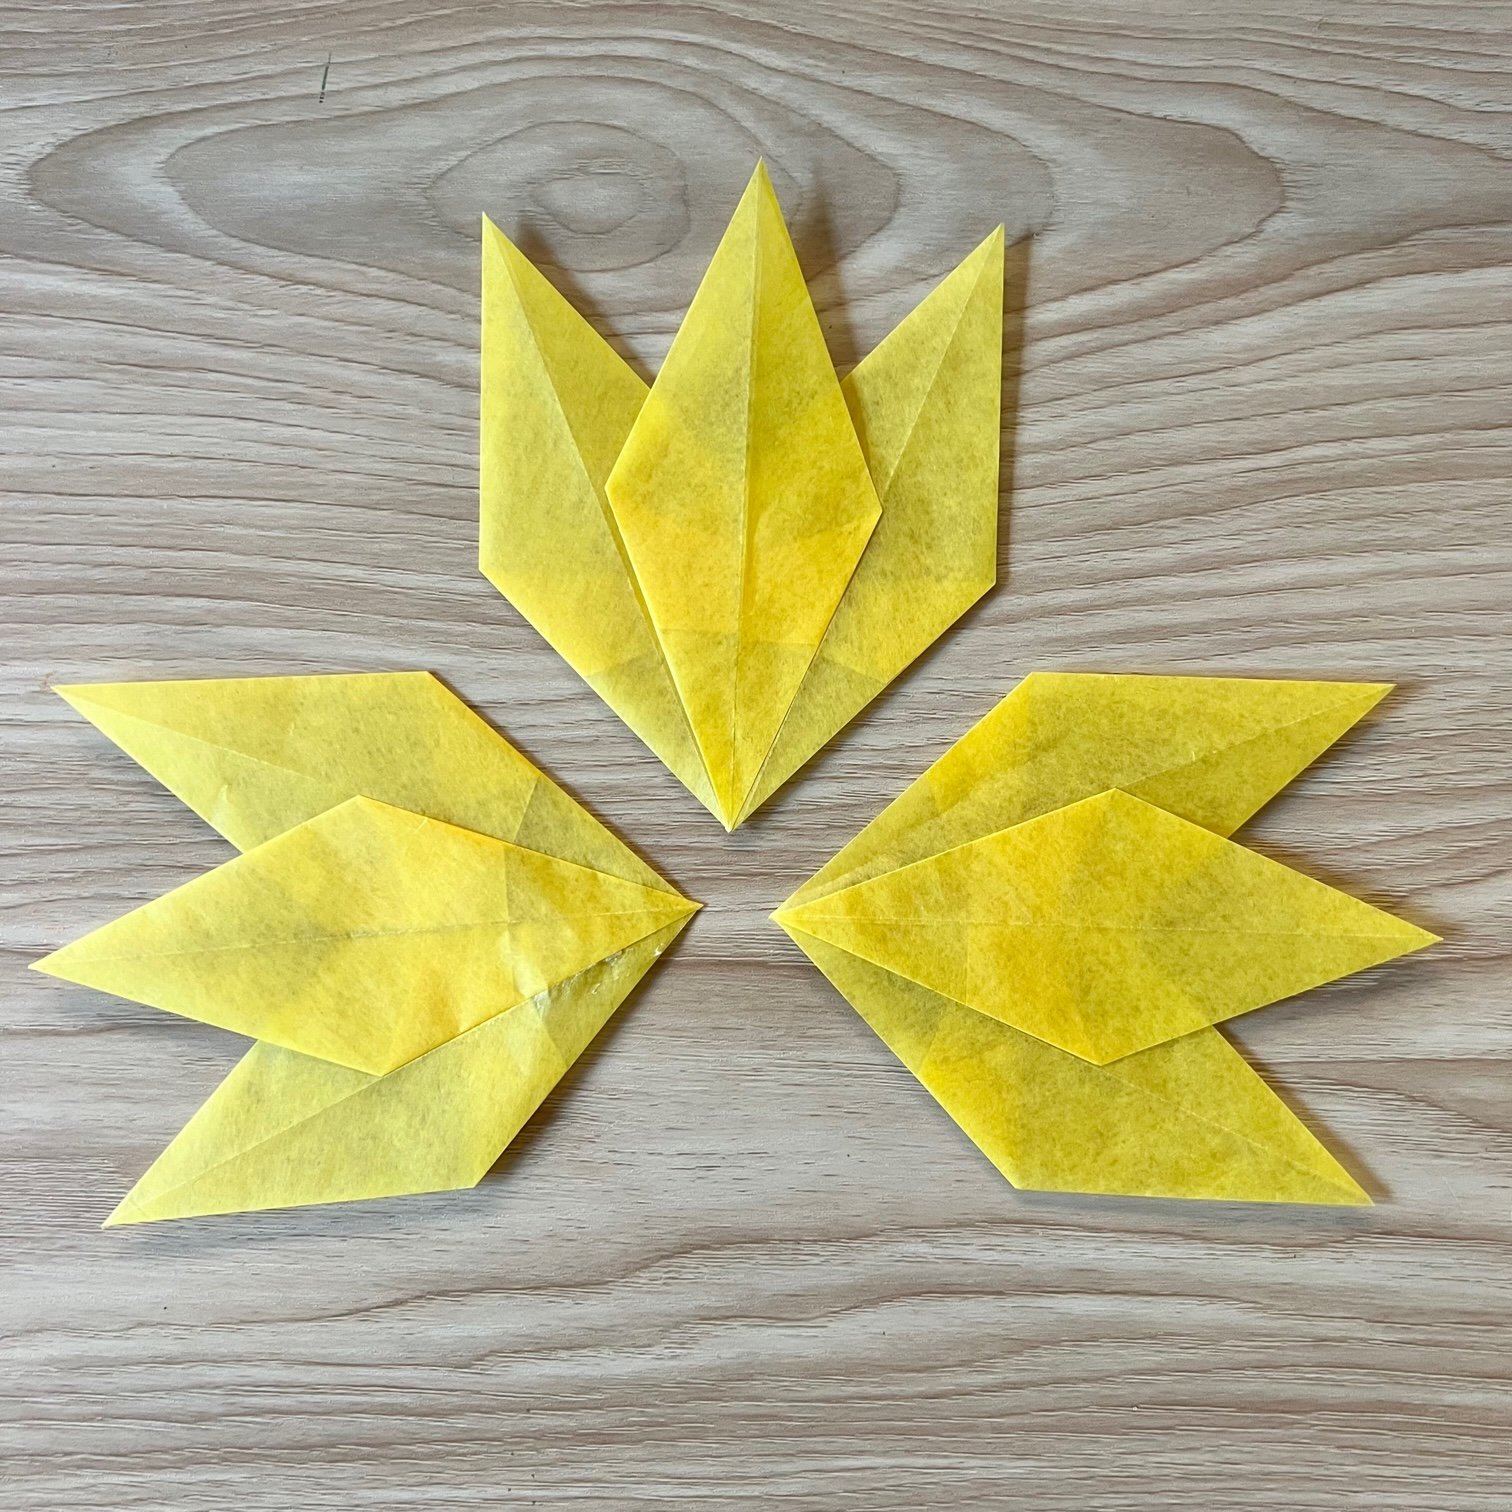
8. Do the same with the remaining six kite shapes, so you have three lots of three.
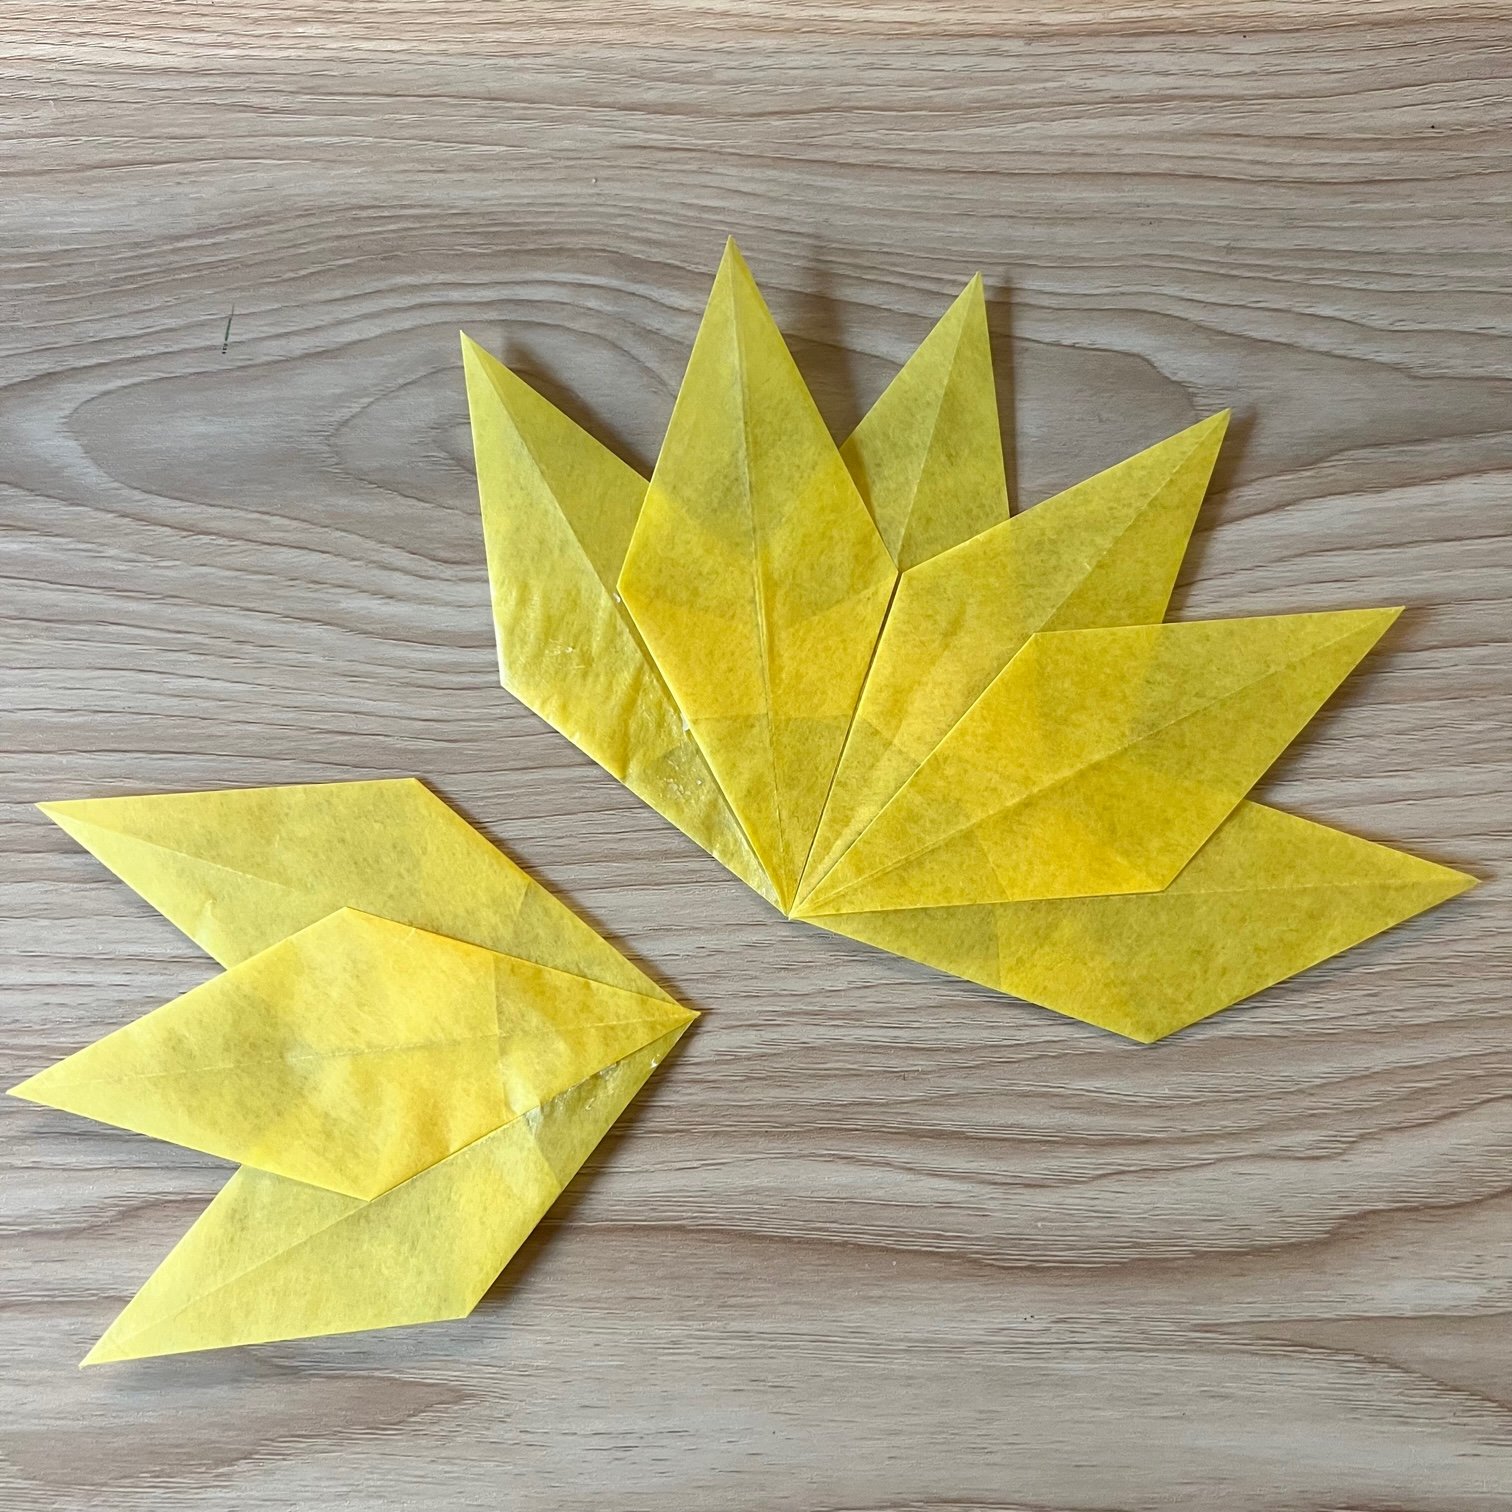
9. You then need to stick the three lots of three together. Do this by carefully smearing glue down the right side of one of your kite shapes and sticking another of the sections of three onto it so that it looks like picture 8. Make sure it sticks to the middle, folded, line.
10. Do the same with the final one, so it looks like picture 9.

11. Then take the tenth wax paper square and fold it several times length ways until you have a nice stem for your maple leaf, secure it with some glue. You can also fold in the bottom of the stem to make a point if you want to.
12. Cover one half of your stem with glue and stick it onto the back of your maple leaf, so it looks like the picture 10.

Picture 10
13. Using a bit of blue tac or sellotape, stick your maple leaf up on a window for everyone to see! A south-facing window will catch the most autumn light!
(You can also just dab a bit of your glue in the middle of your leaf and on each of the points to stick it to your window if you don’t mind giving our windows a bit of a clean when you take your leaves down!)
Photography: Denise Hope, home educating mum of two boys
This activity is part of our lovely autumnal October Mud & Bloom box. You can subscribe now to receive this box and you’ll receive nature craft activities like this alongside gardening activities for children every month. Once October has passed, you’ll be able to purchase this box as a one-off box on our past boxes page.