Branch weaving

Branch weaving is a really lovely nature craft that can be adapted for children (and adults!) of various ages. You can use left over bits of yarn, ribbon, twine and even found nature items such as grasses and feathers to weave onto your branch loom.
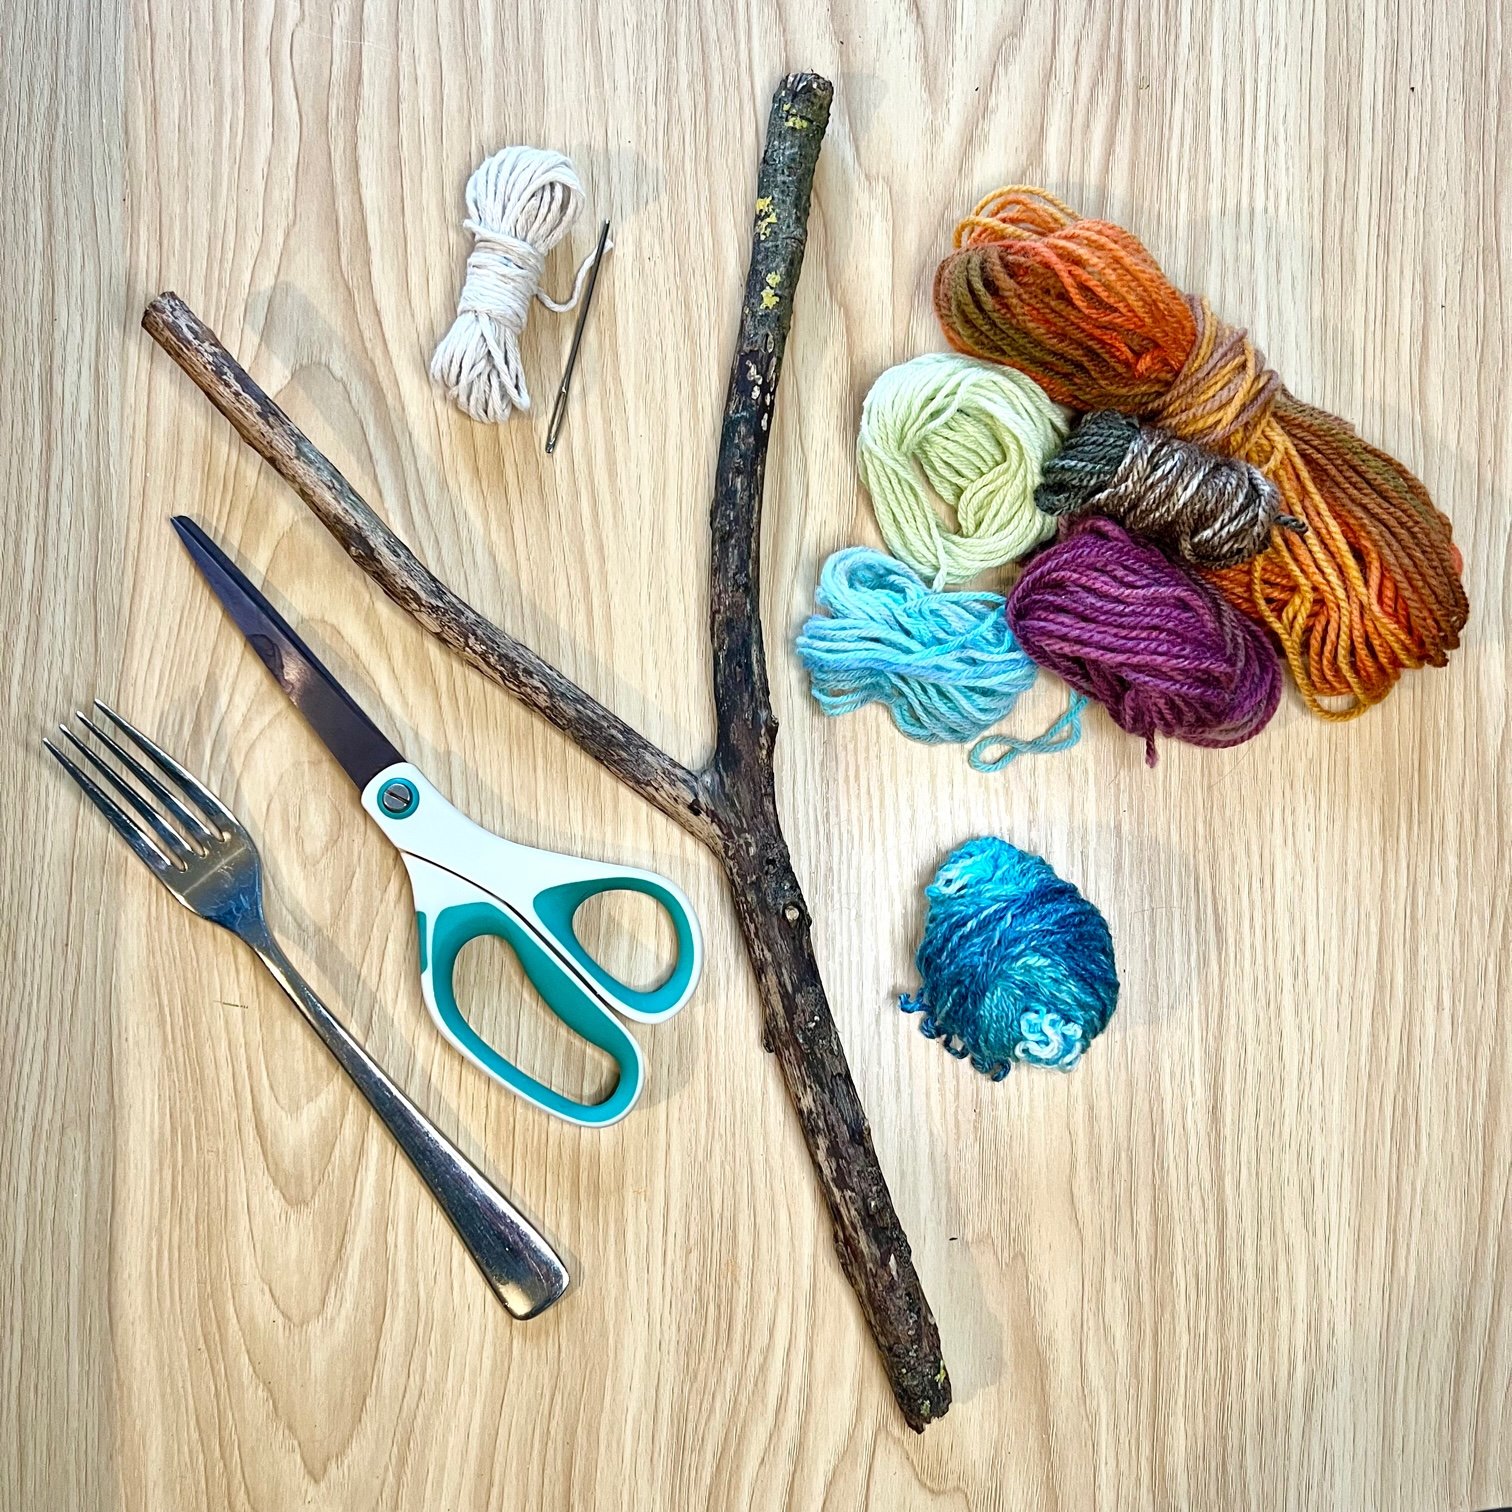
What you will need:
A sturdy ‘Y’-shaped stick
String
A selection of yarn, twine etc
Scissors
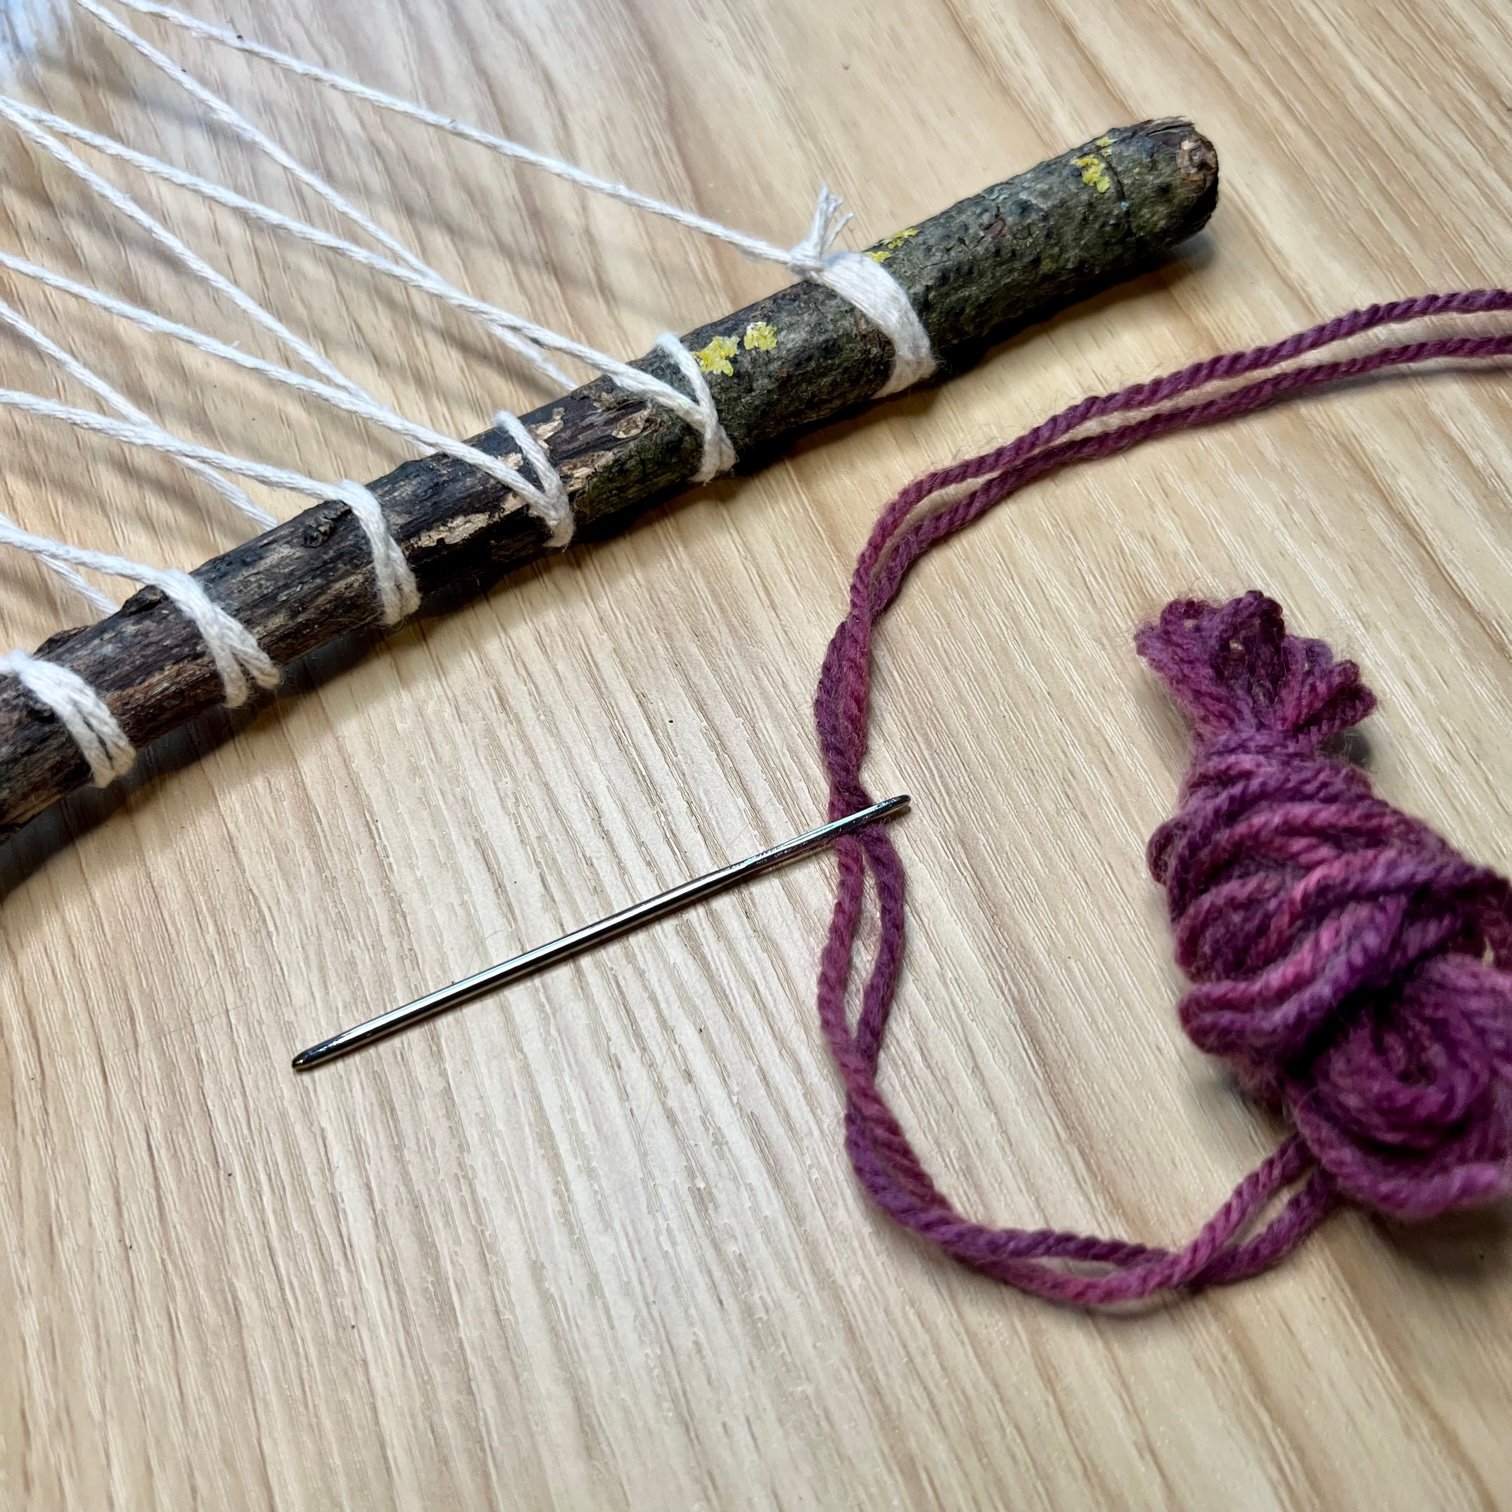
An embroidery needle. If you don’t have an embroidery needle, you could tie your thread to a hair pin instead or even something like a lollipop stick which would be great for younger children who might prefer something a little chunkier to grab hold of.
A fork (not essential but useful!)
What you need to do:
First you’ll need to find a suitable ‘Y’-shaped stick which you can use as your loom so go for a nature walk in a wooded area or ask your children if you can raid their stick collection! You will need to choose a stick that is sturdy and not brittle or bendy as it will need to withstand a bit of pulling and tugging. If the stick has too much give in it, the strings will slip when you’re weaving on it.
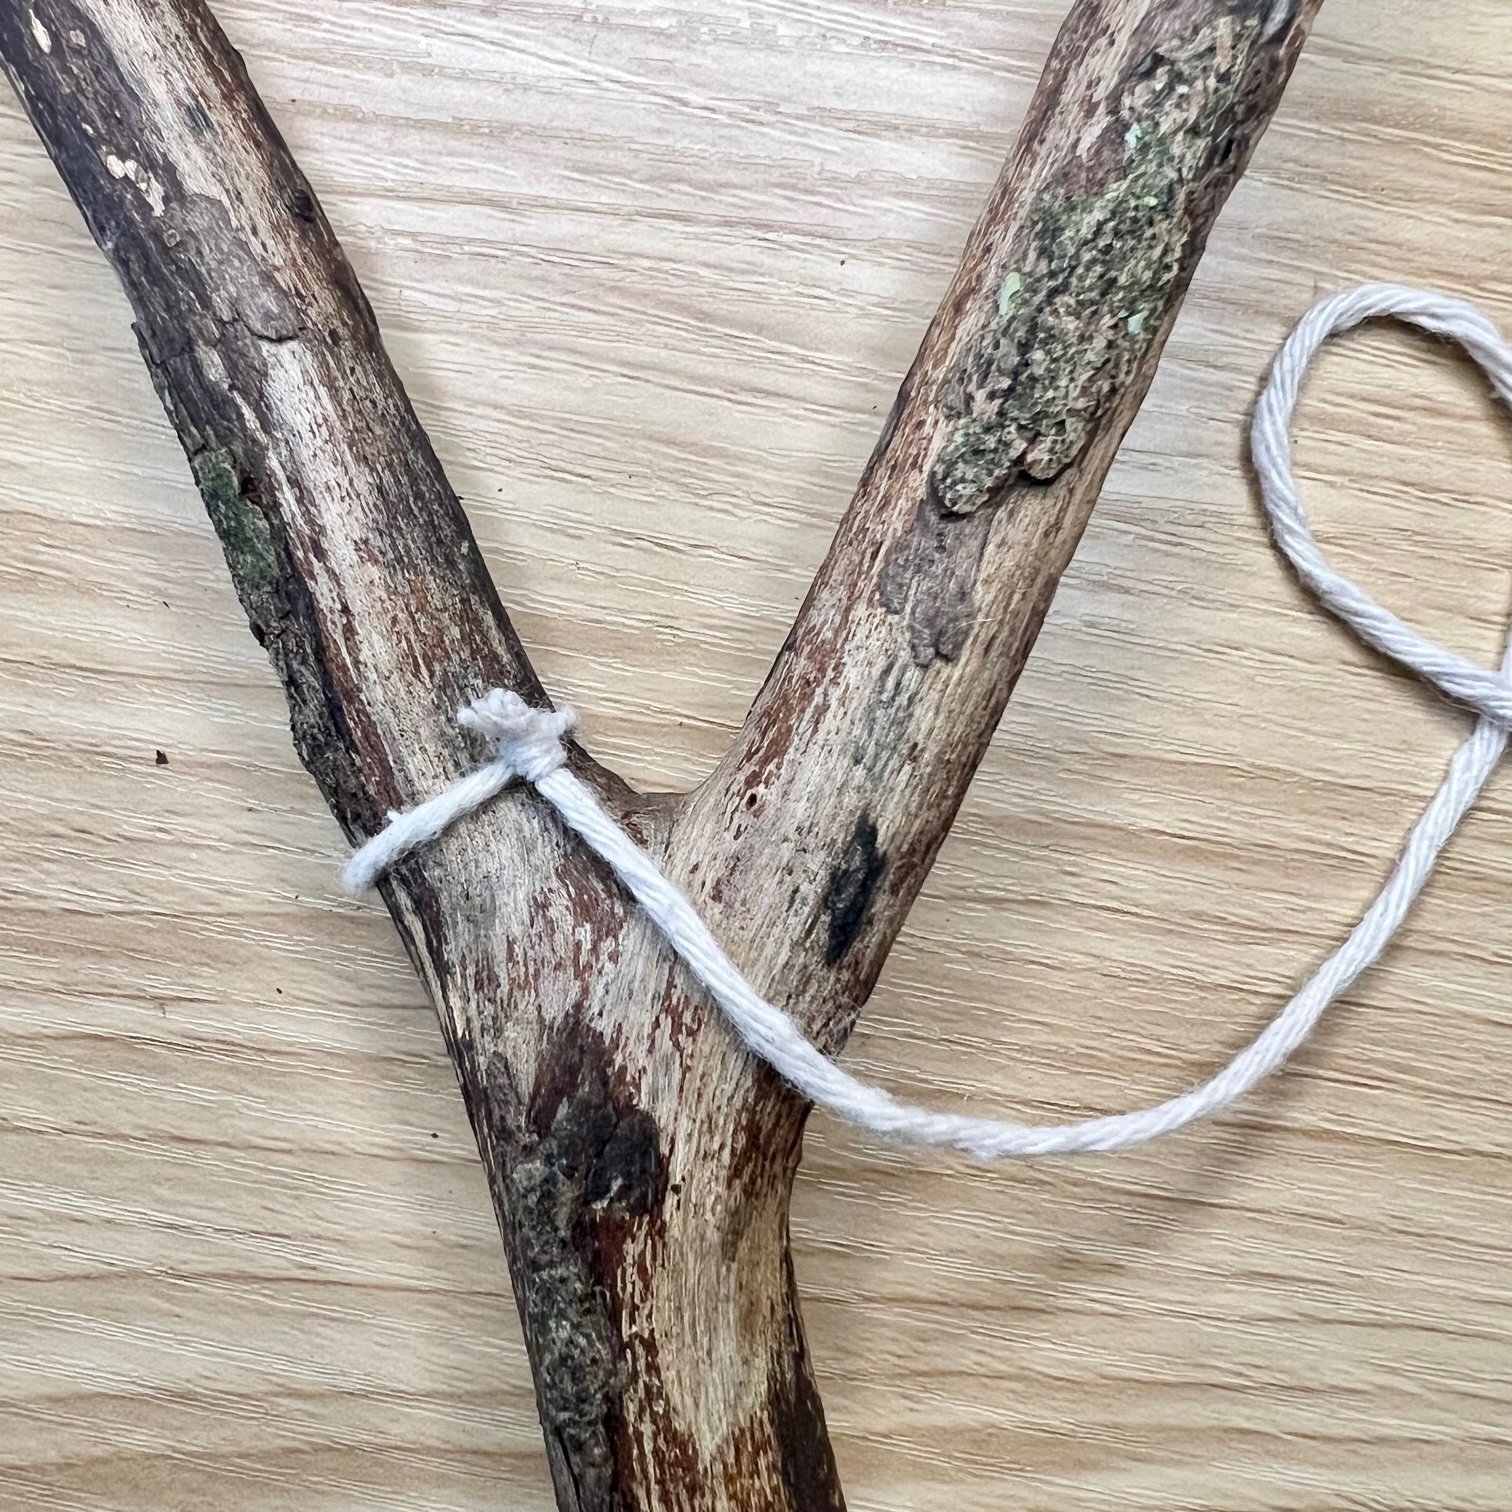
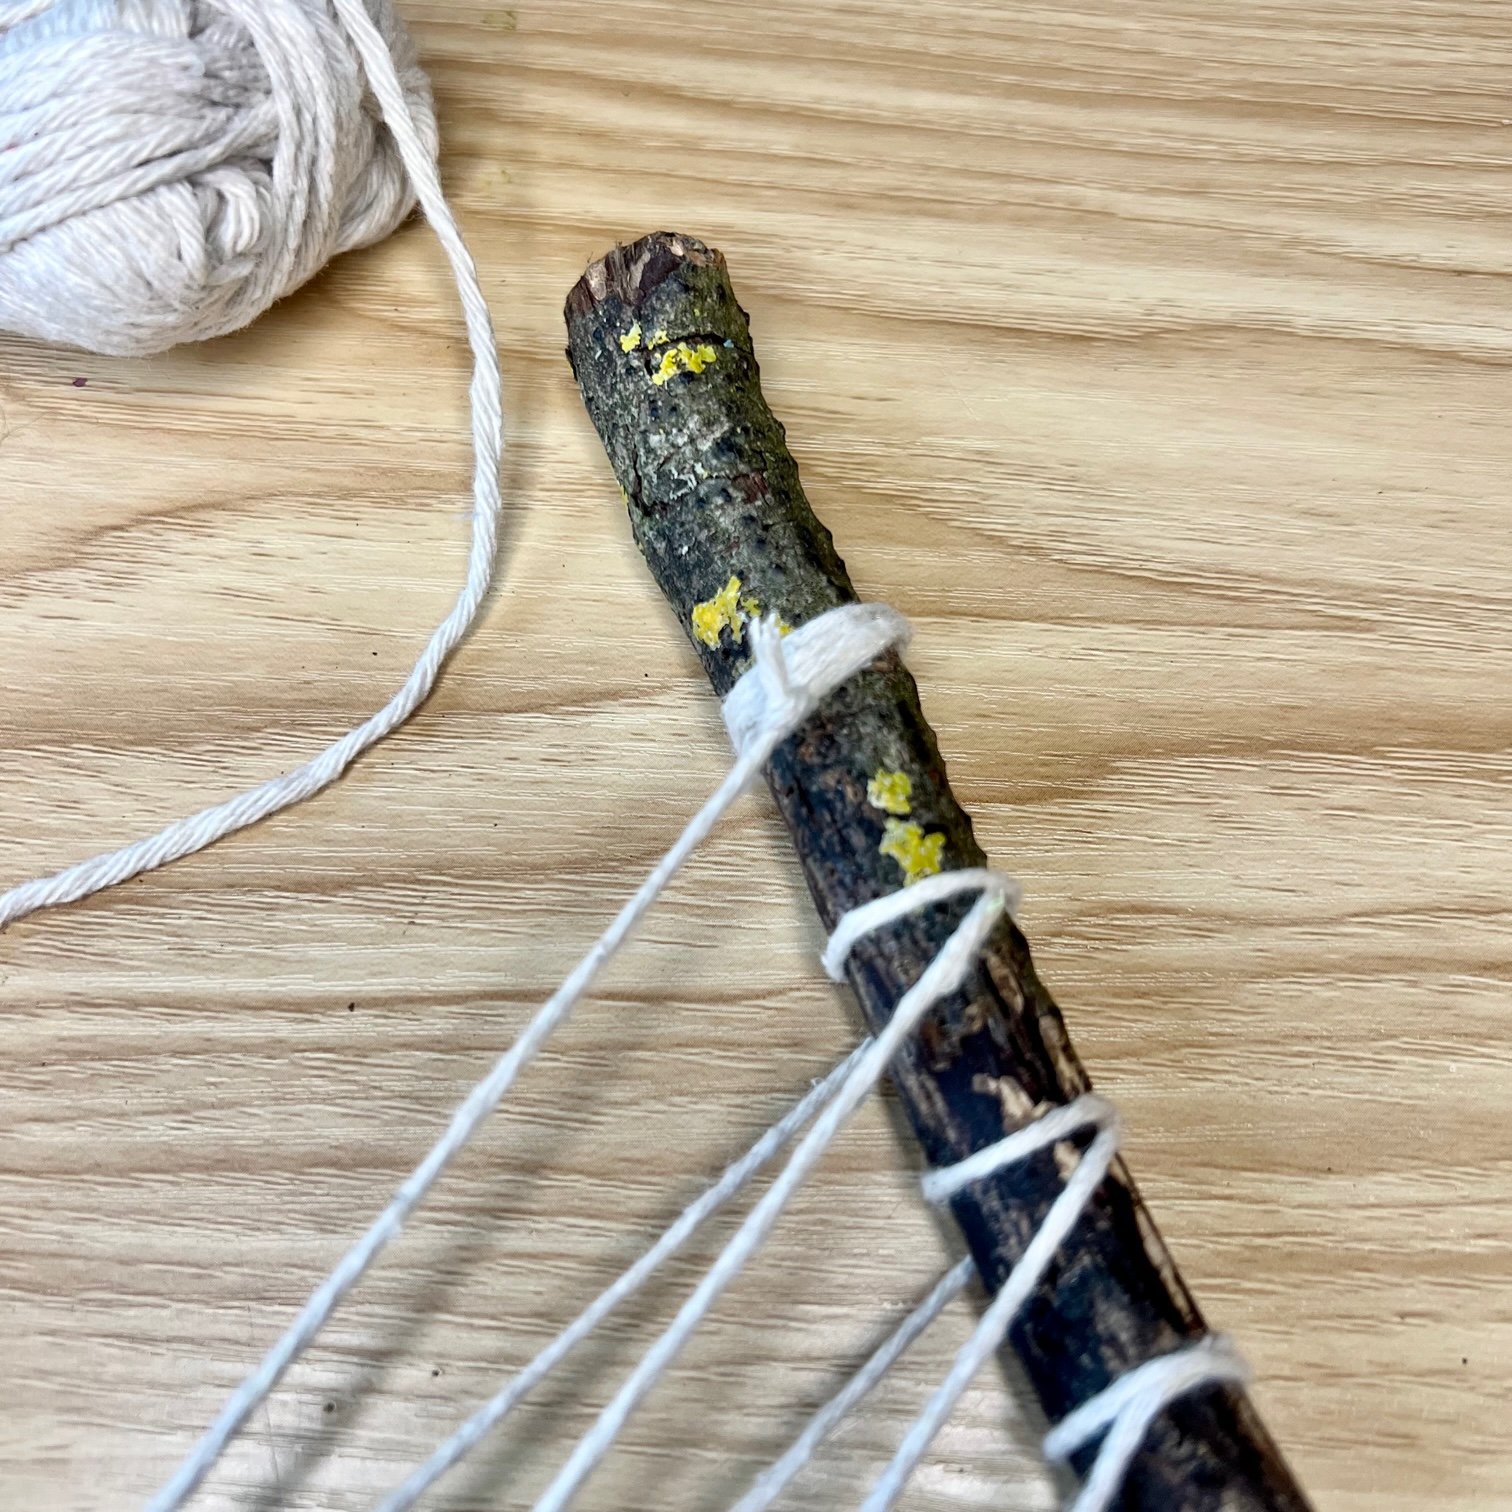
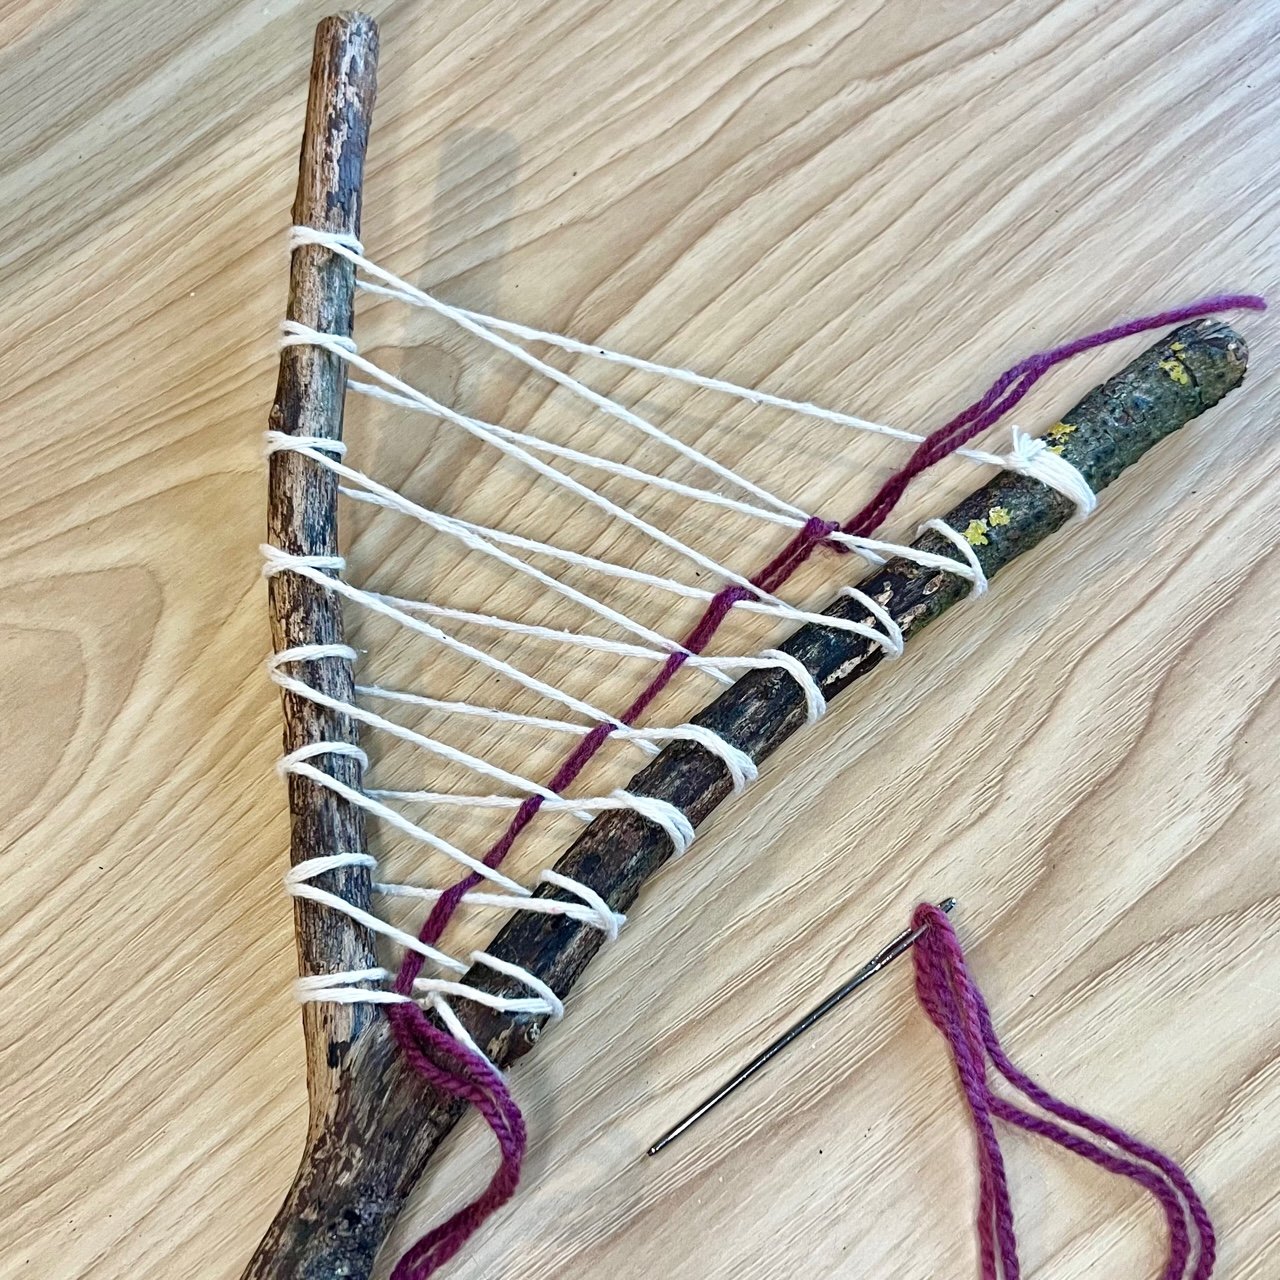
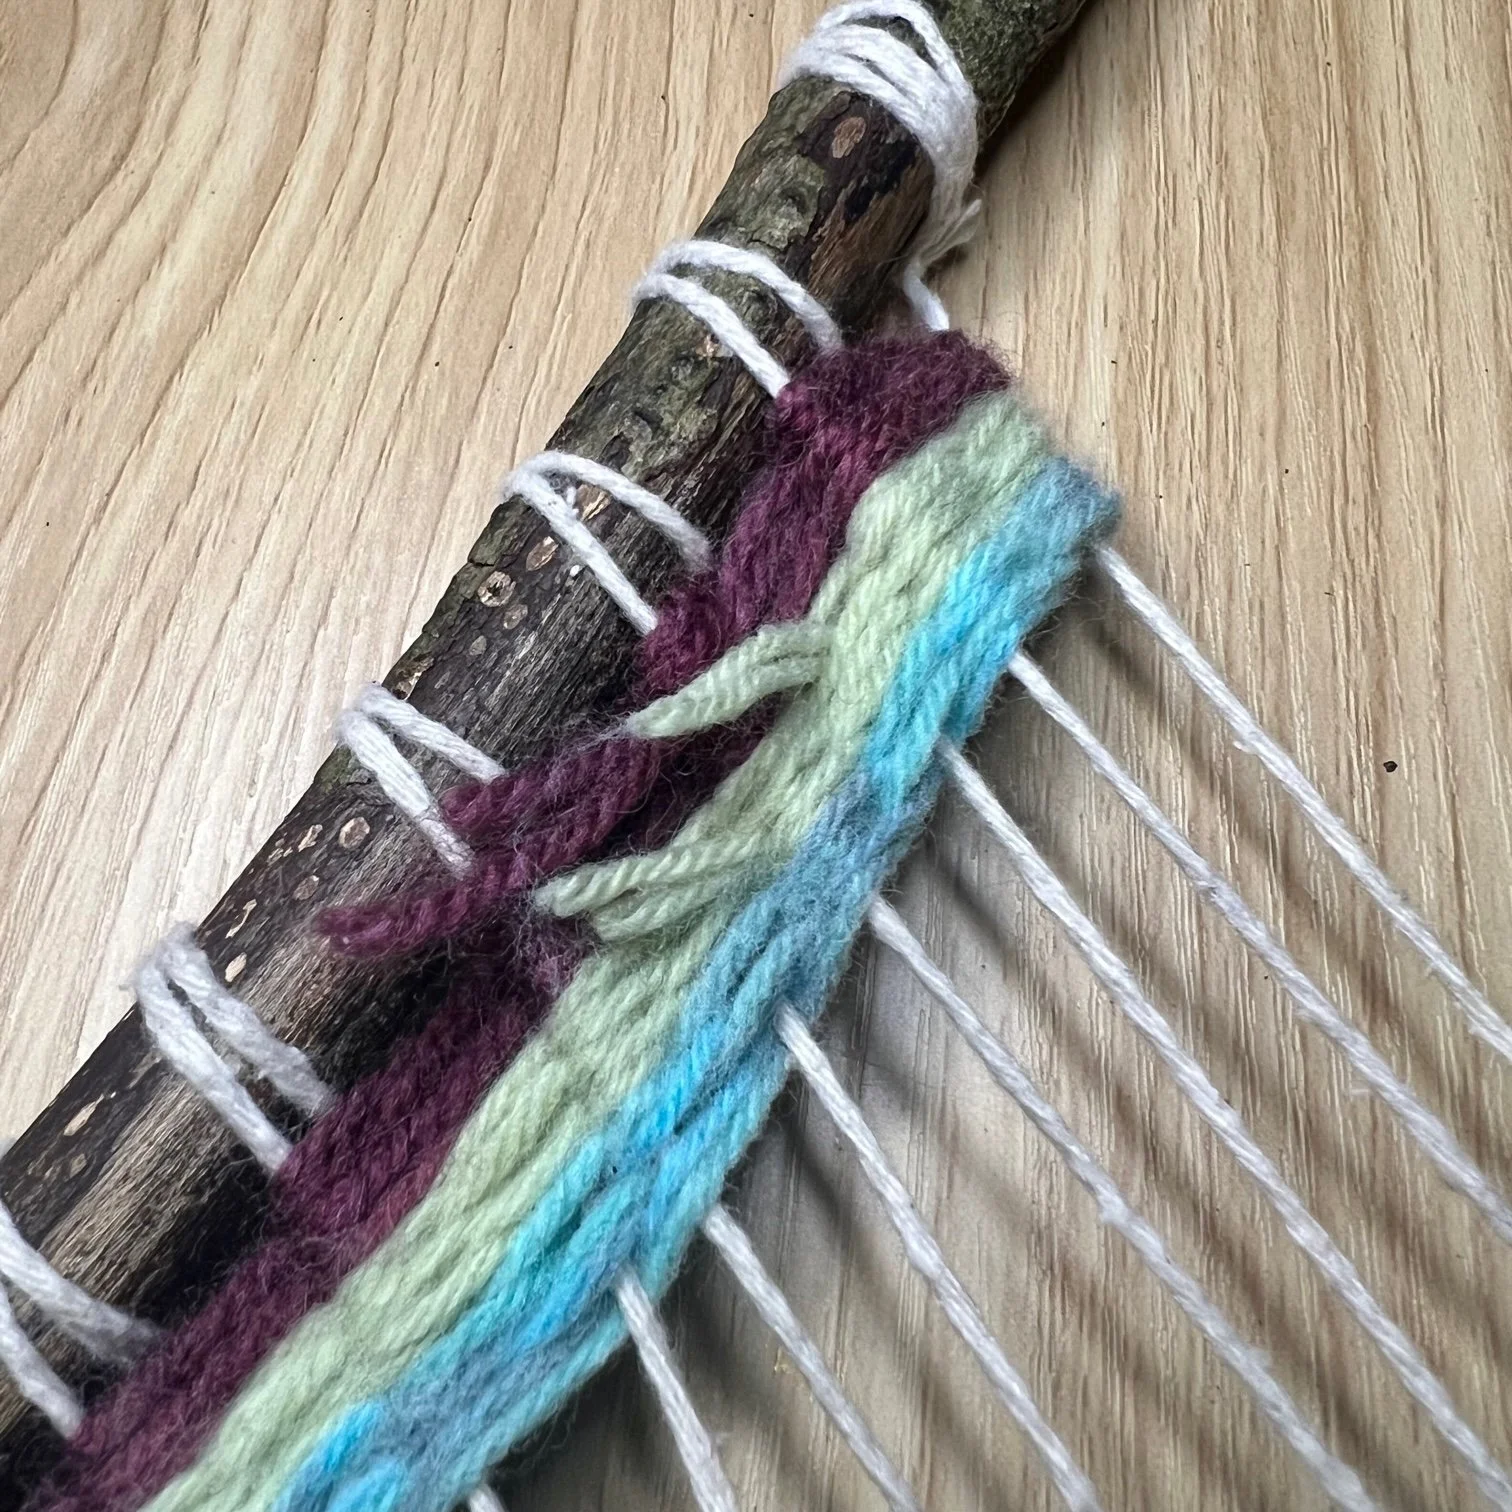
You’ll then need to attach a framework of string across the ‘V’ of your stick on which you can weave. This is called a warp. This bit is the trickiest part of this project and if you are doing this with young children, you might want to do this part for them.
Start by tying your string on the stick, towards the inside of where the two branches meet. Then pull the string across to the other side of the ‘V’ and loop under and around the branch twice. Wrap the string tightly, but not so tightly that you bend or weaken the branches.
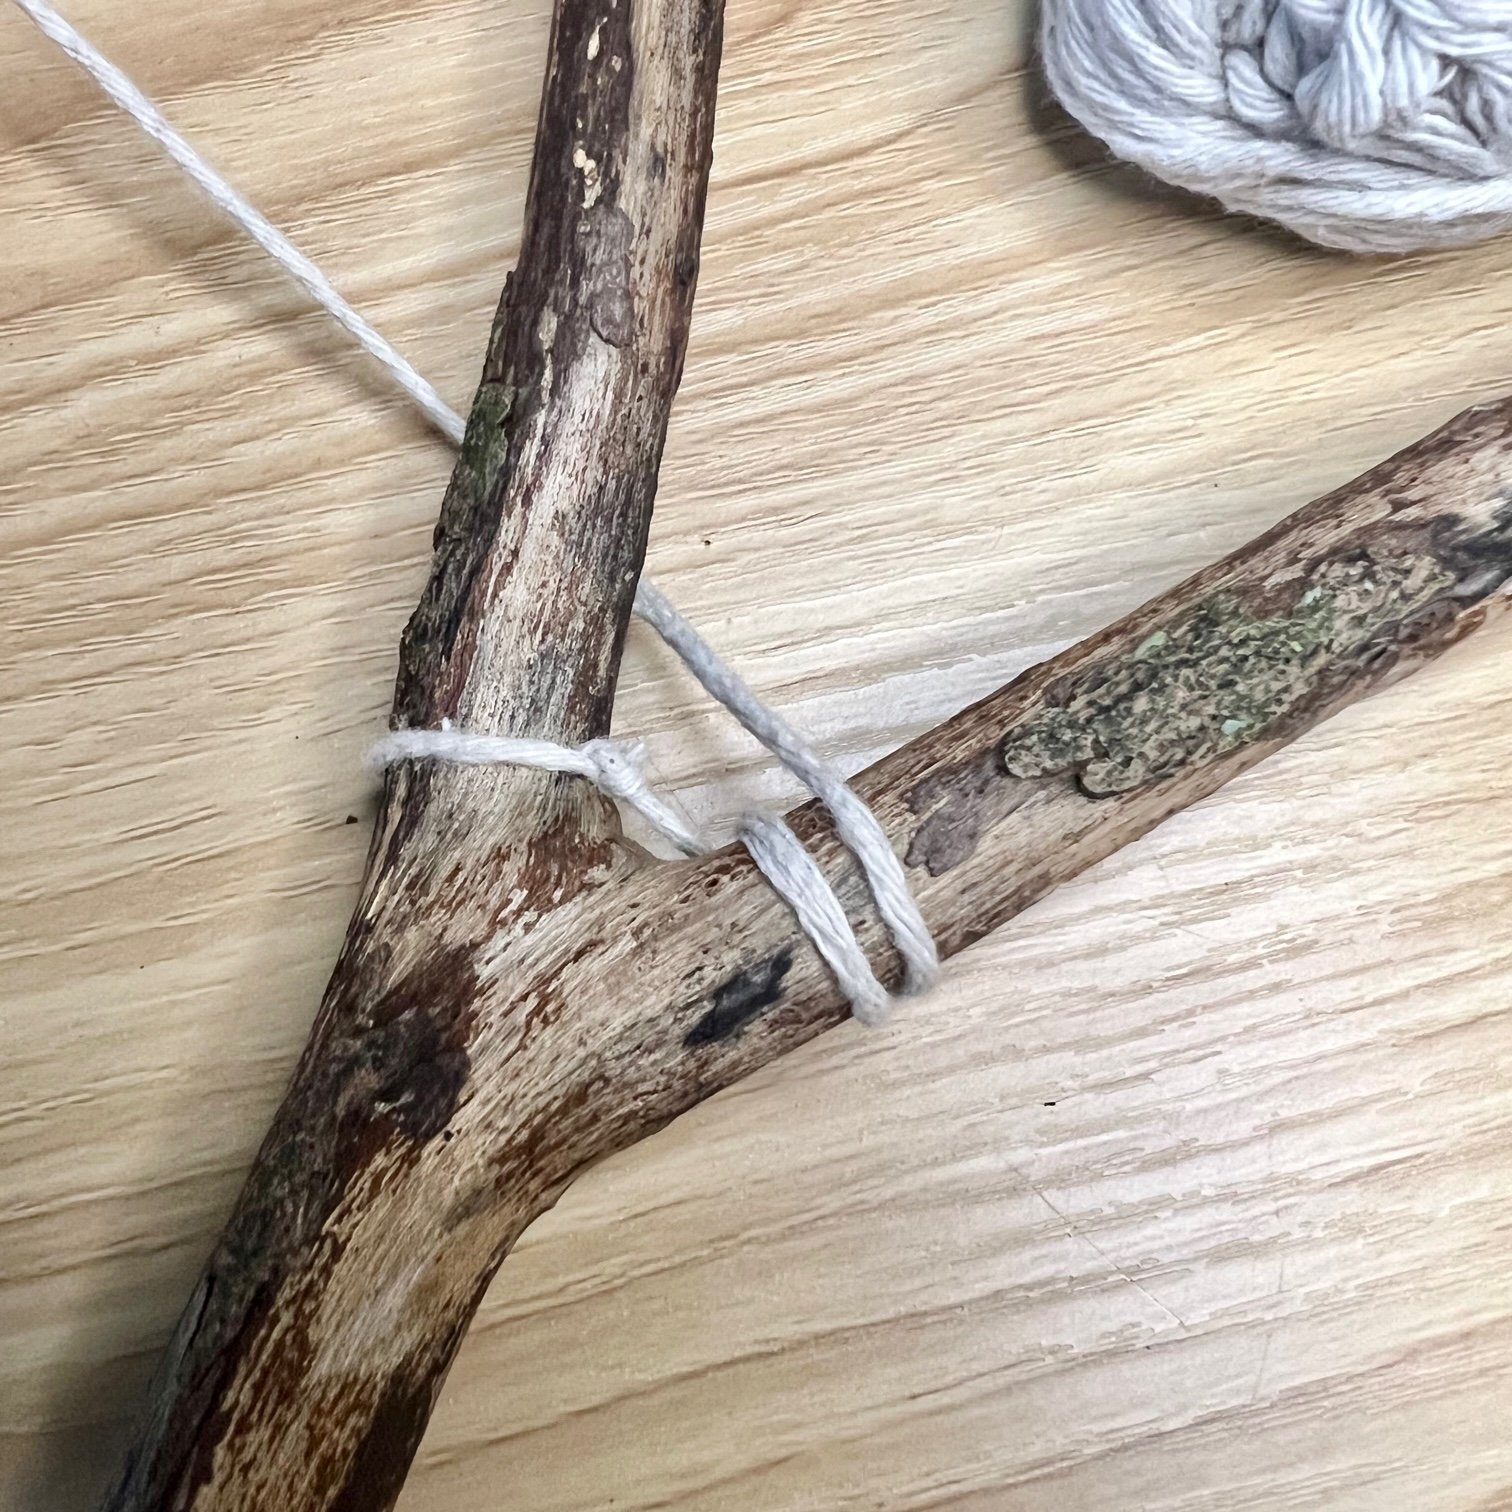
Take the string back across again to the other side of the ‘V’ and loop your string under the branch and then around twice.
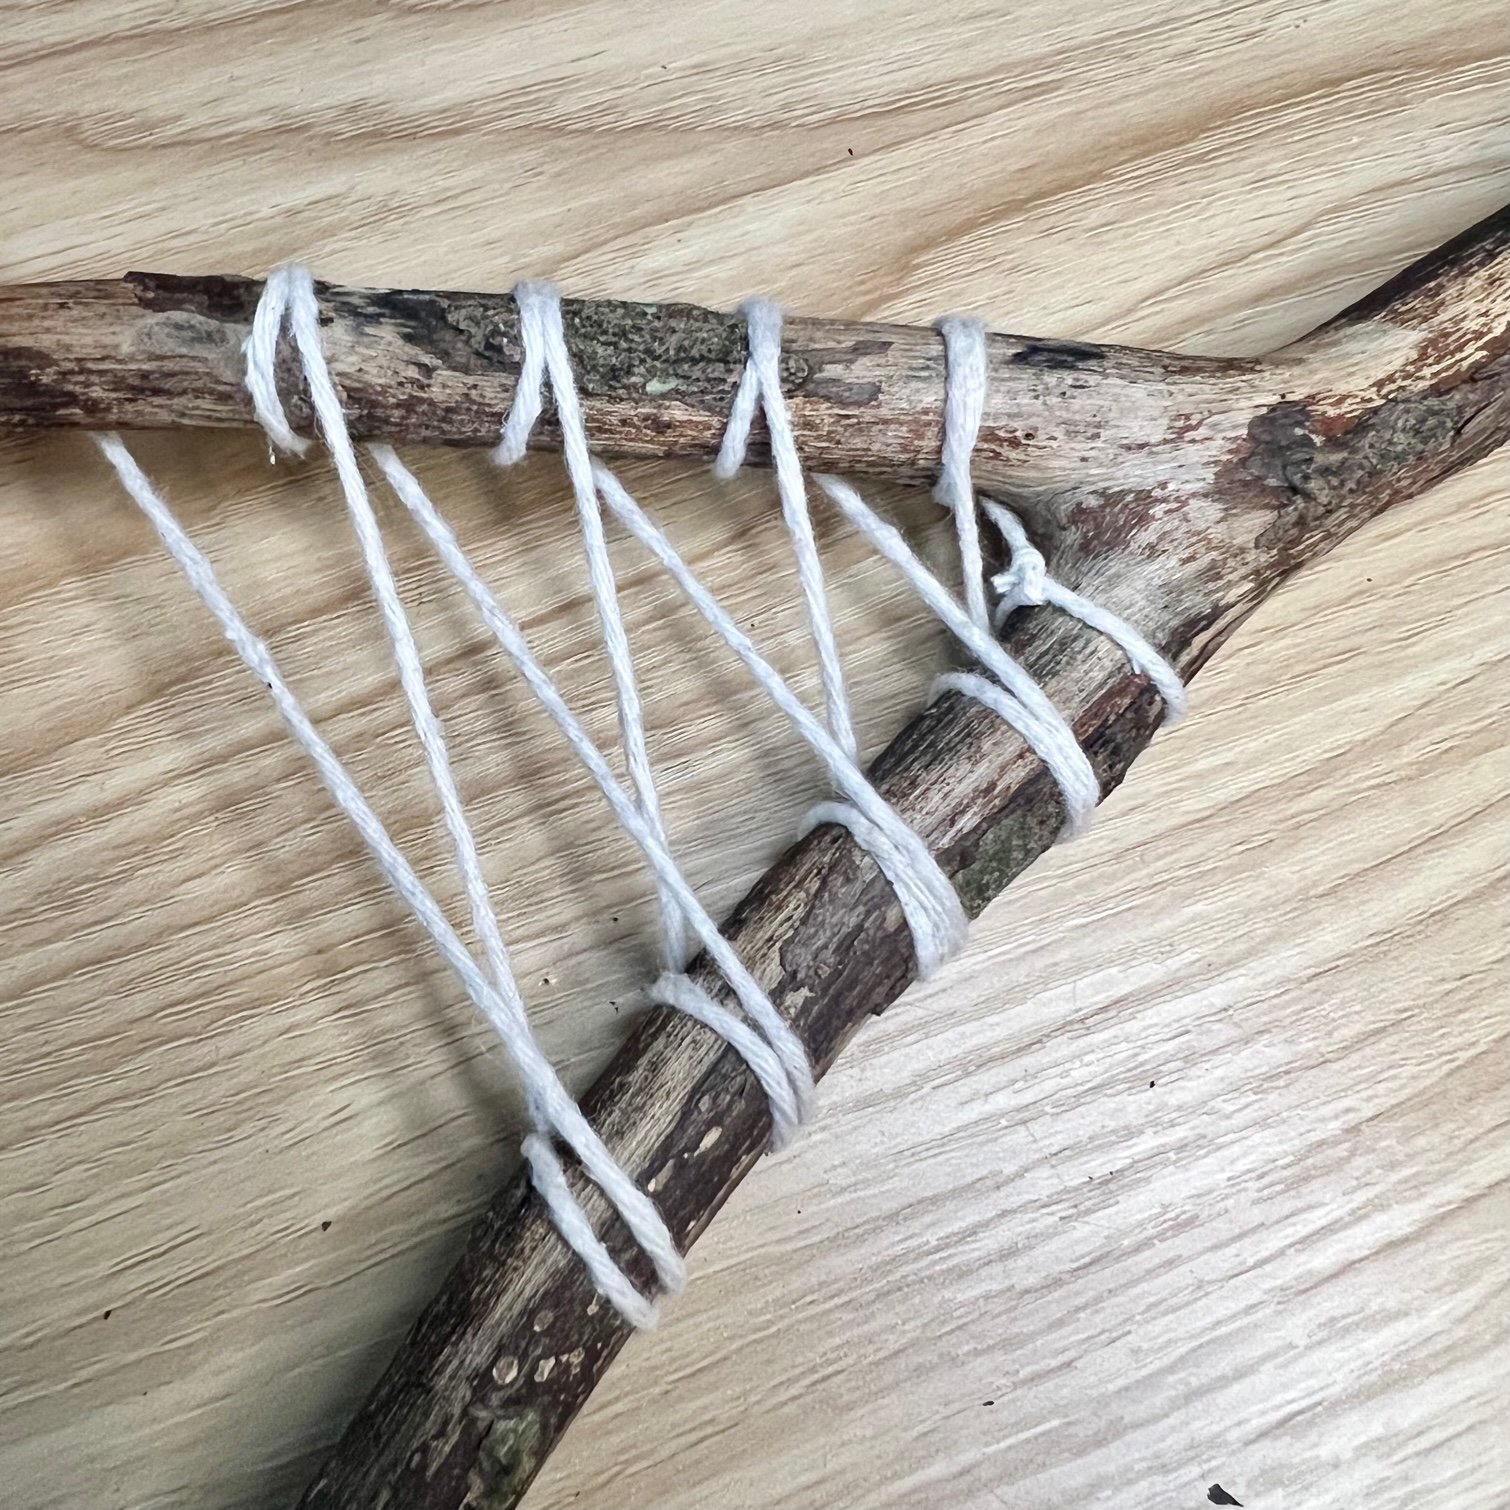
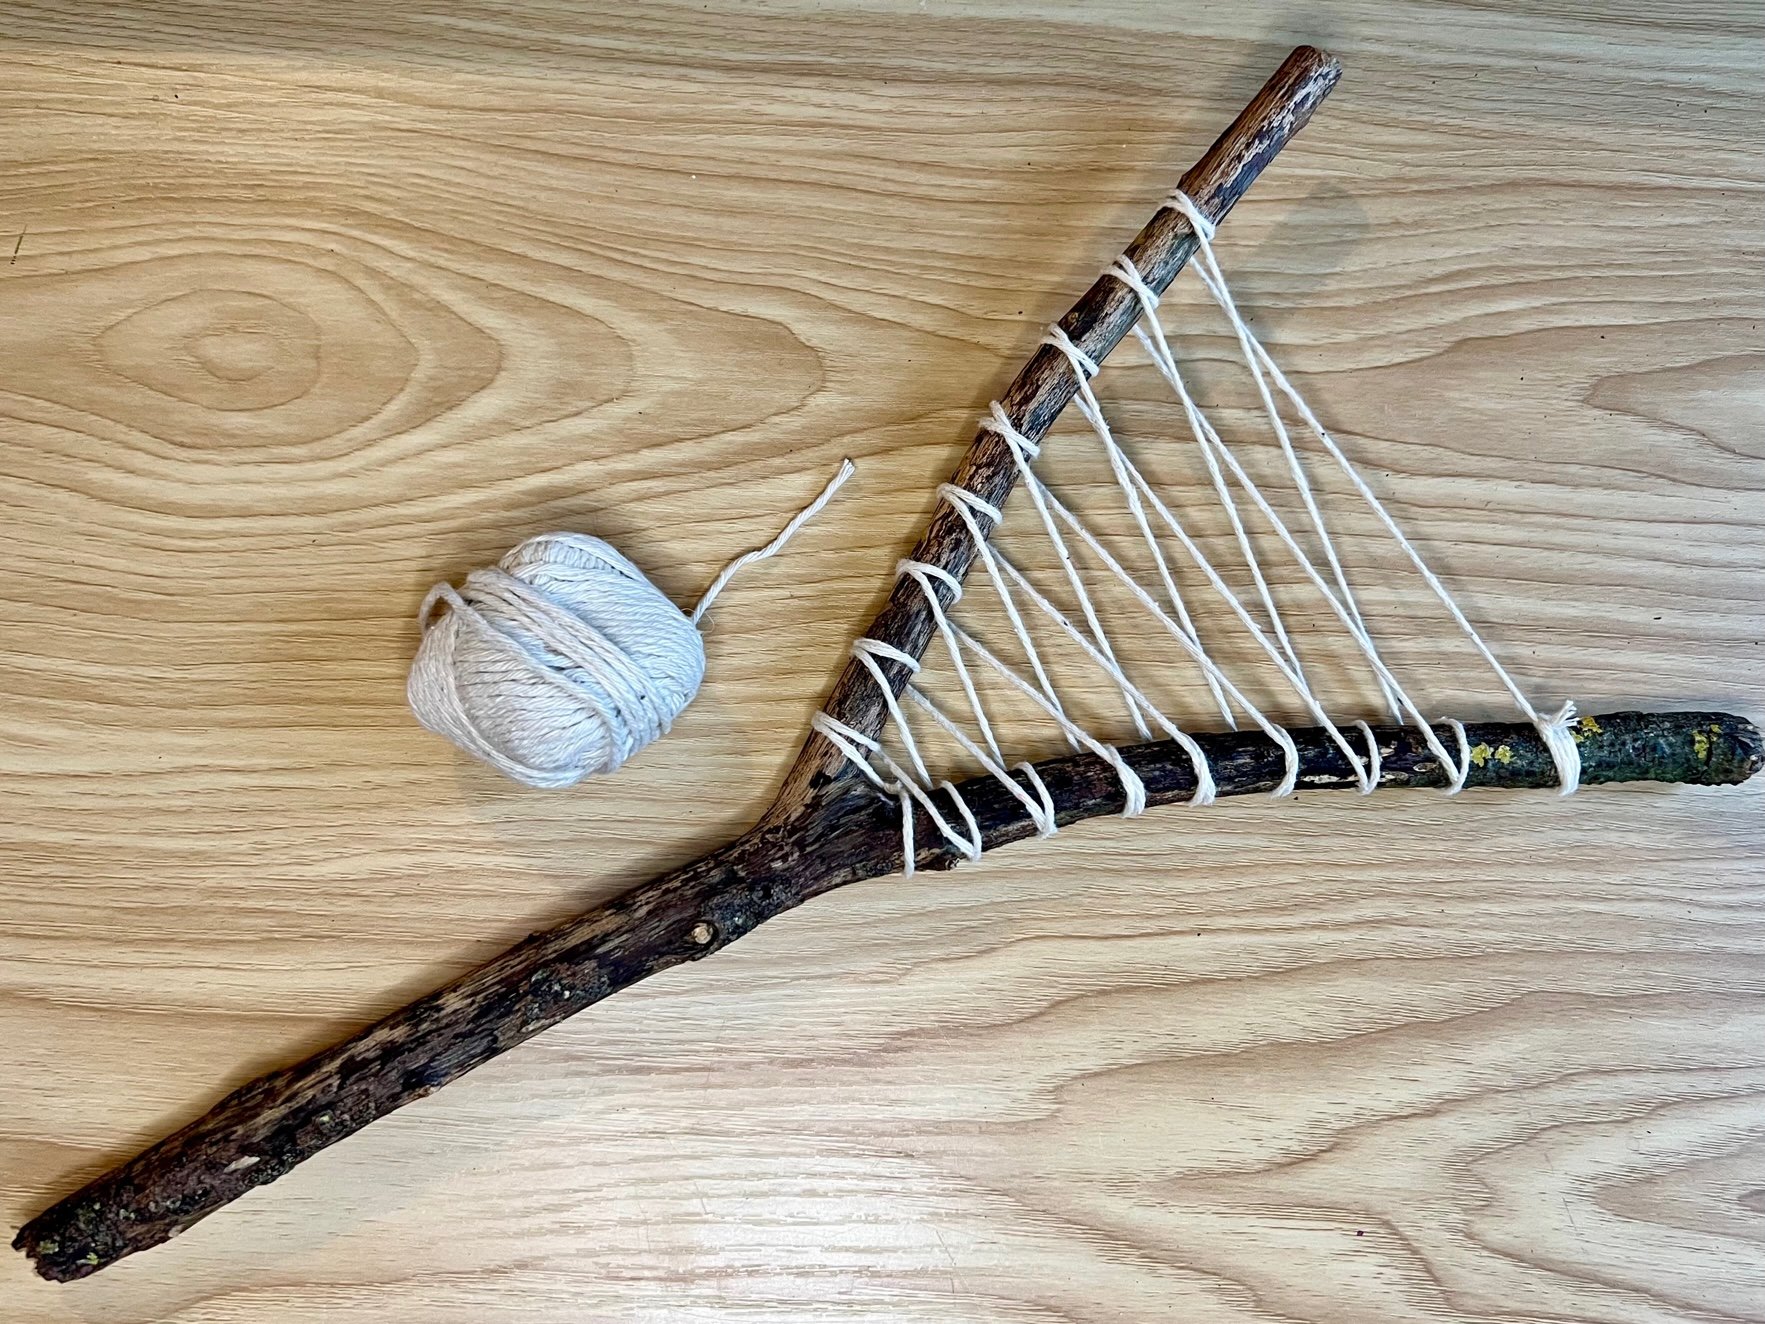
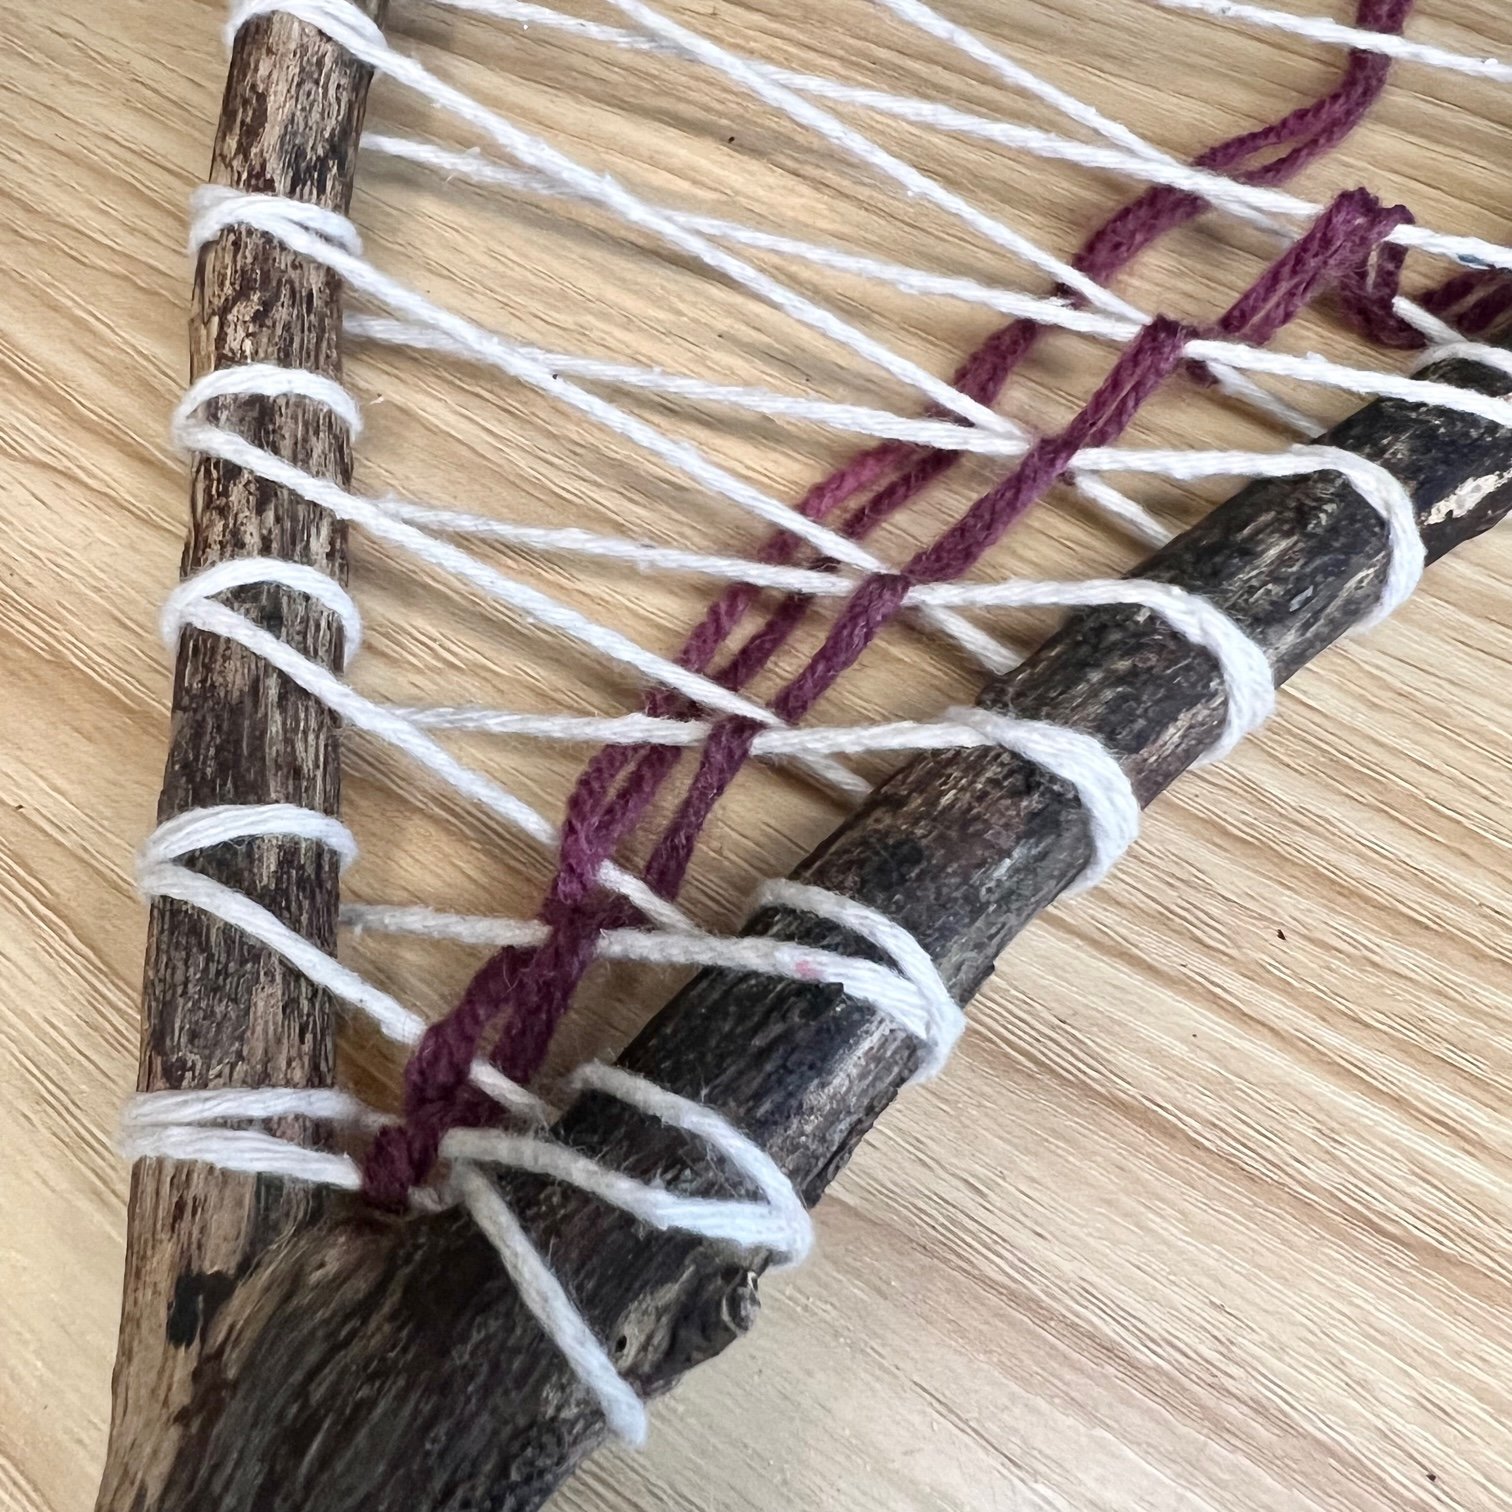
Keep on going back and forth across the ‘V’ with your string making sure you loop around each side twice and by always looping from the top of one branch to the bottom of the other so that your string will cross the branches in a figure of 8 pattern.
Leave some space between each row of string so you’ve got enough room to weave in. For younger children, you might want to leave a bigger gap between the rows.
Continue in this way until you reach the top of your branches or where you want to stop. Loop the string around a few times, tie a double knot to secure it and then trim off the excess string.
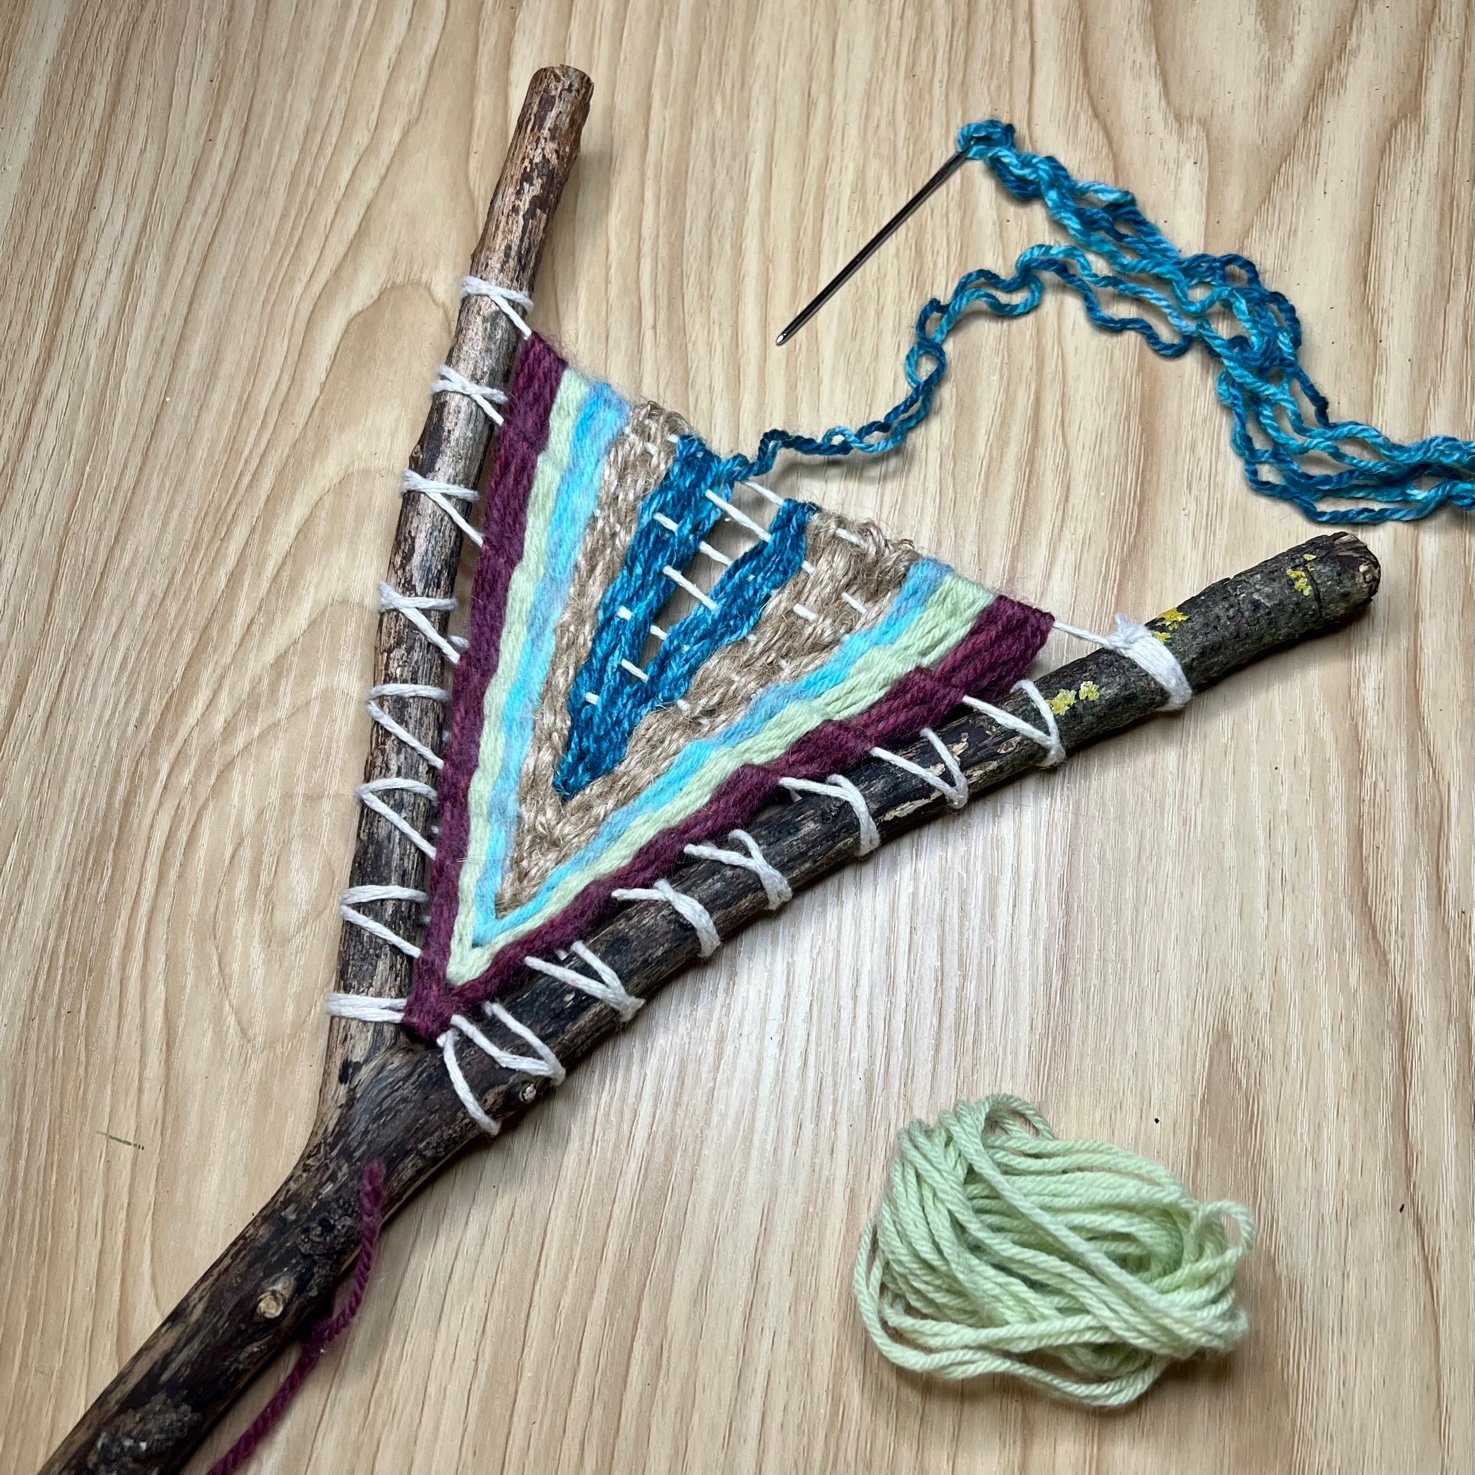
Now you can start weaving! When you weave you will be making the weft, which is the yarn that weaves through the warp.
Start by selecting the yarn you want to begin with and decide if you want to weave with one strand or whether to double it to make it thicker. I decided to double up my yarn for this project.
Cut a piece of yarn that’s roughly the length of your arm (double and fold in half if you will be weaving with double strands) and thread it through the eye of your needle. For young children, you can tie the yarn in a knot so that it stays attached to the needle.
Starting at the top end of the ‘V’, weave your threaded needle in and out of the warp threads running across the loom, alternating between going over and then under each string.
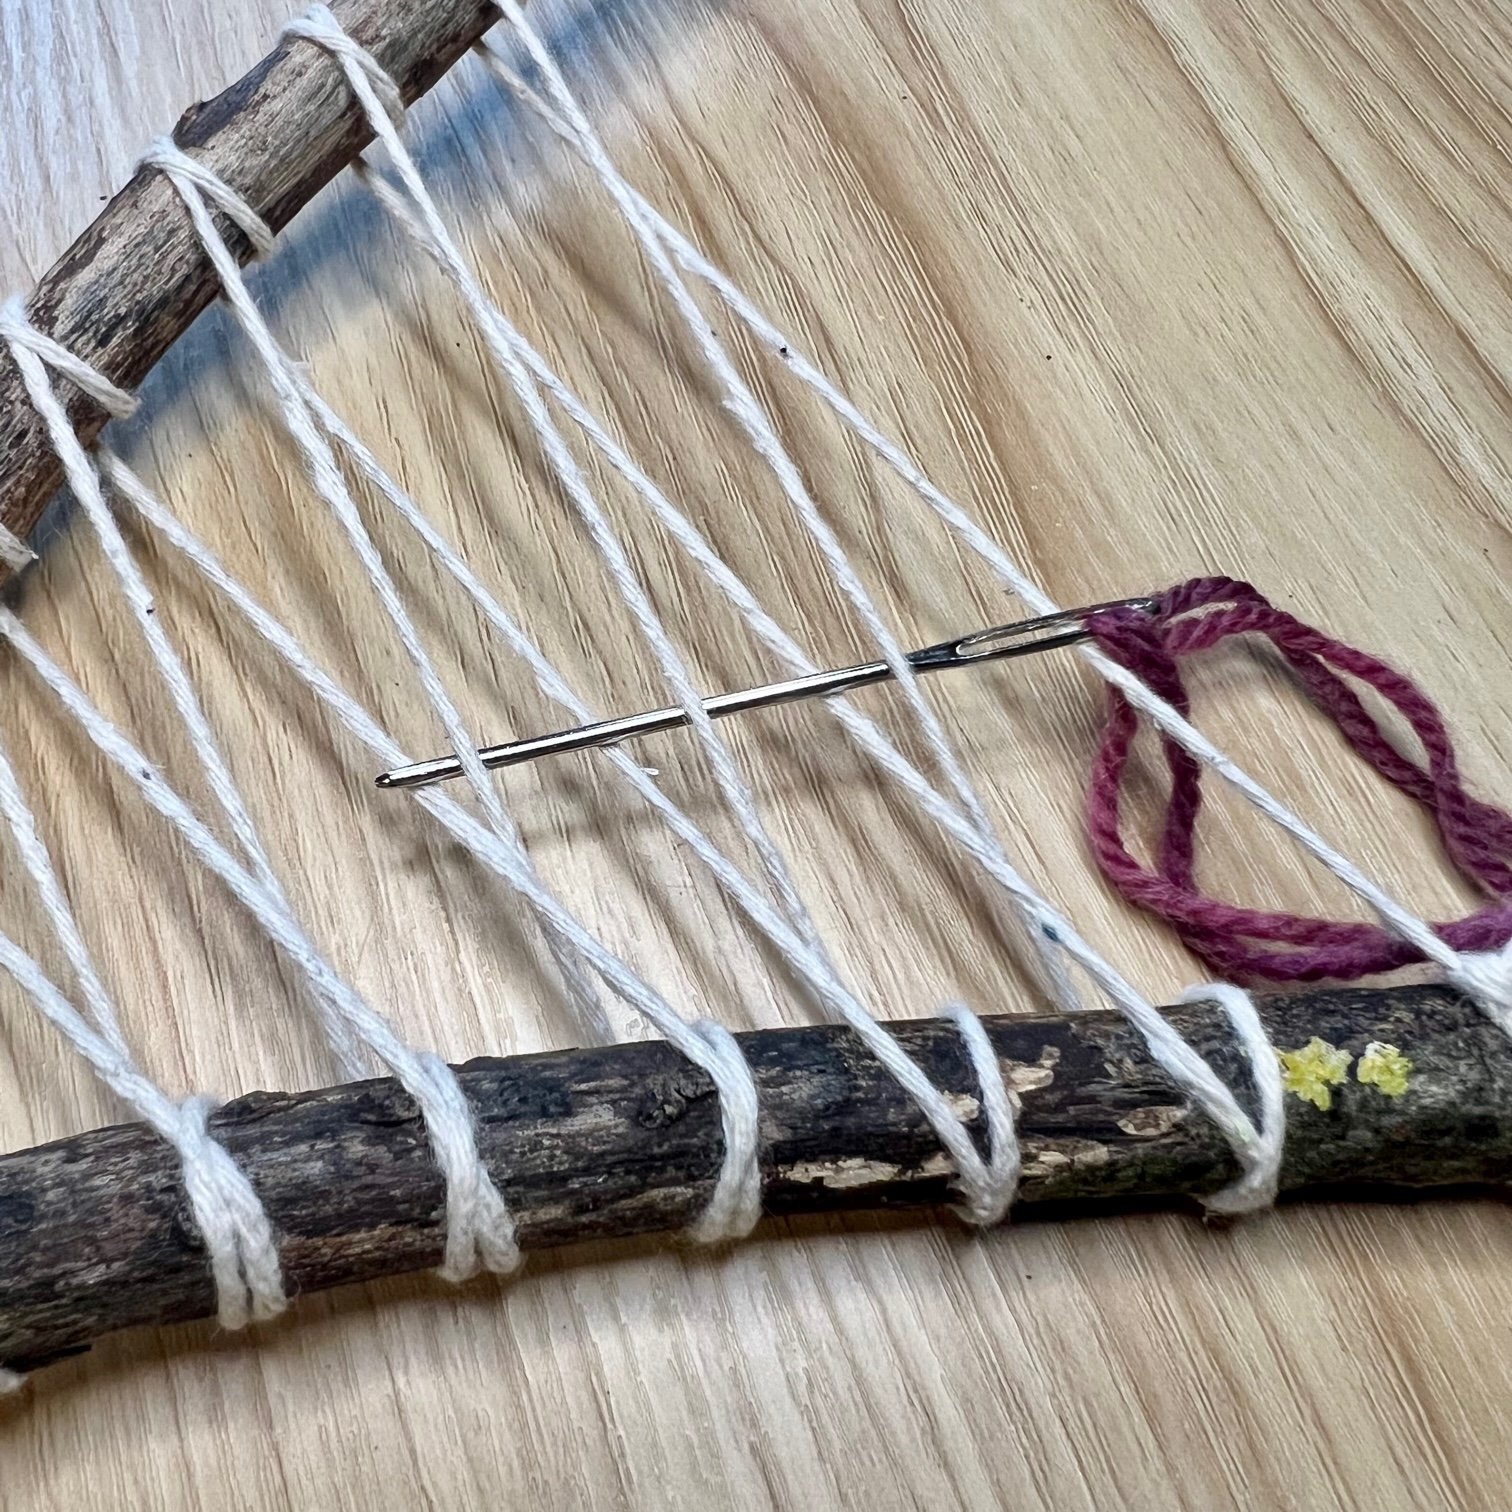
When you reach, the bottom of the ‘V’, pull the yarn through leaving 5cm or so of yarn hanging at the open end of the warp. You can tie this to the string for younger children so that they don’t pull the thread all the way through. The end can be woven in later or at the end of the weaving project.
Now reverse direction, looping the yarn around the bottom string, and continue the over-under pattern back up the warp. You will see that you will now be weaving under the strands that you previously wove over and over the ones you went under.
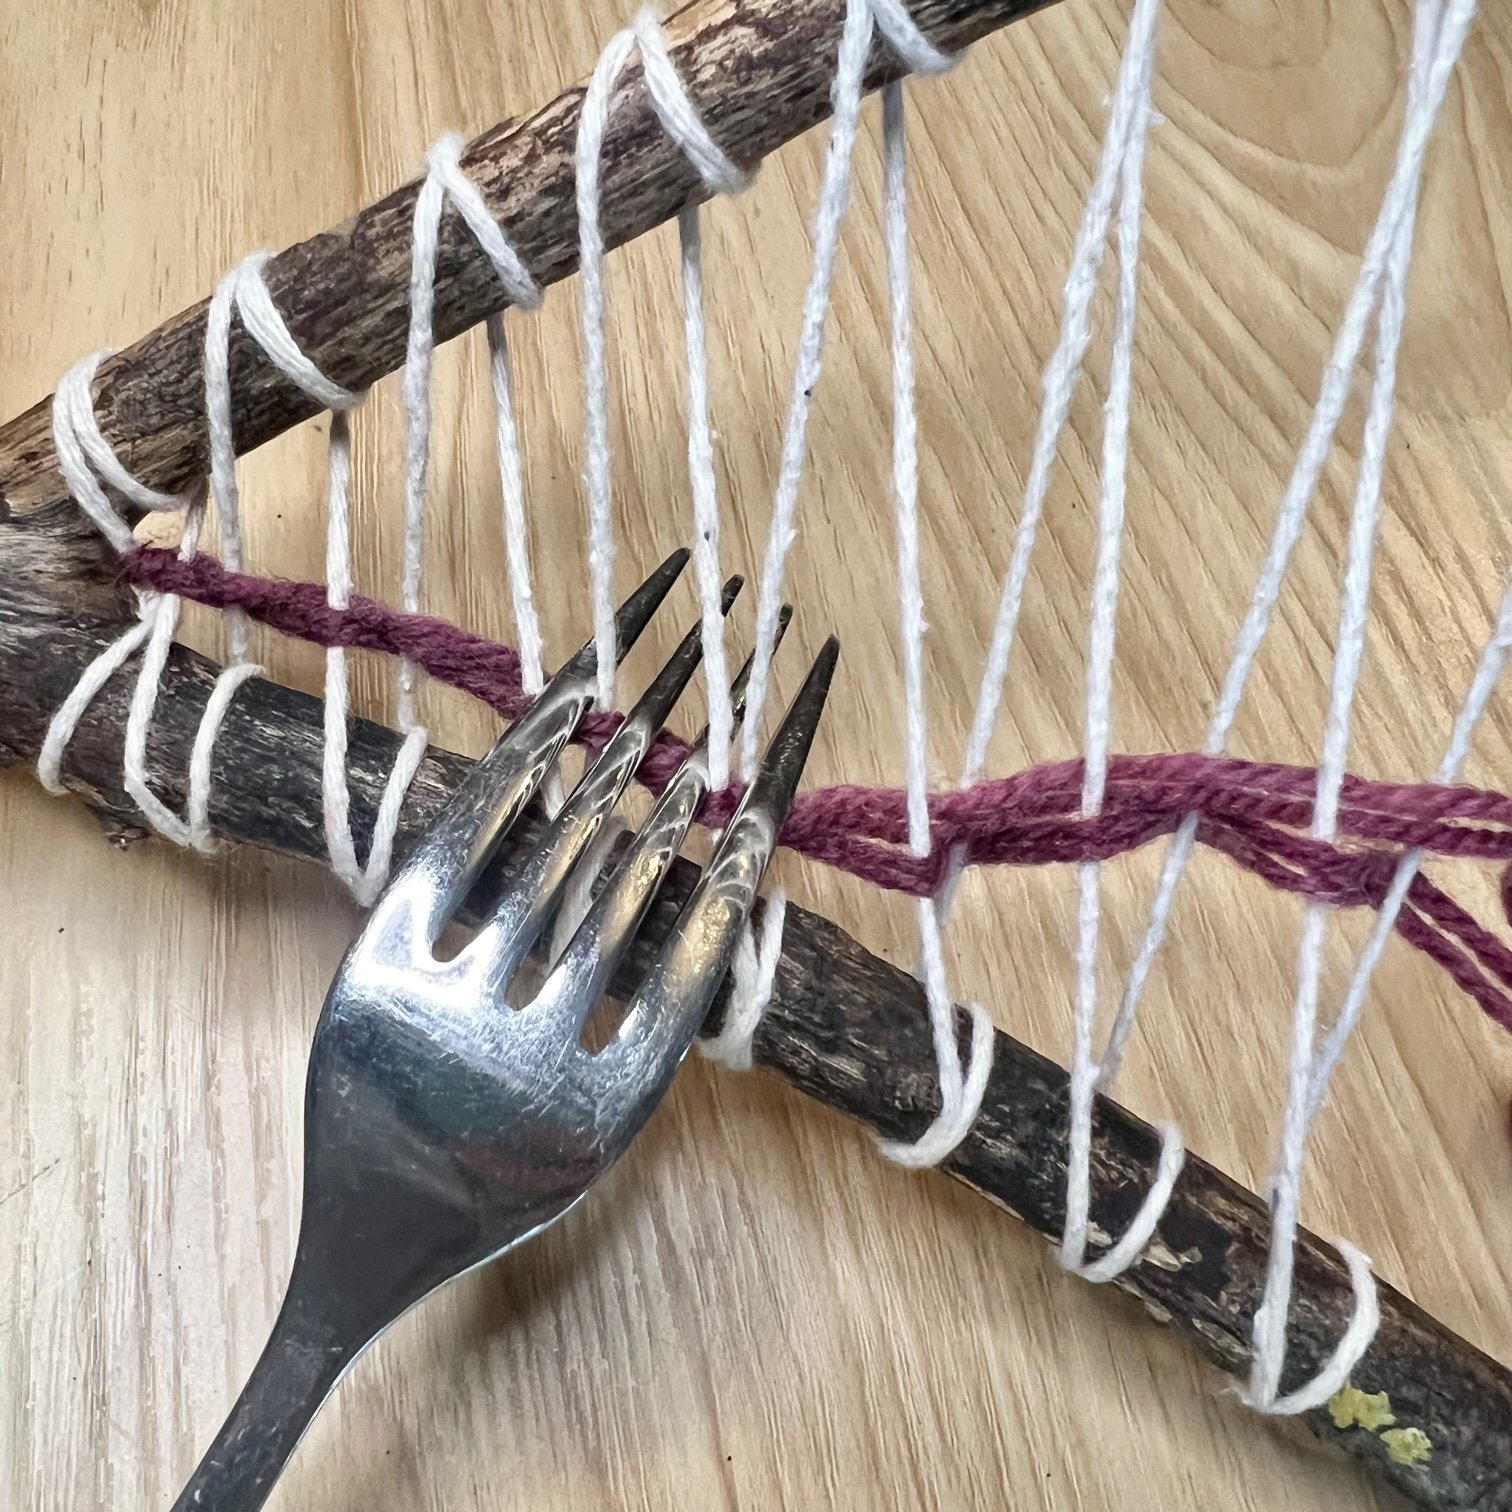
Use your fingers or a fork to push the yarn in tight after it’s woven.
Carry on weaving up and down the warp until you don’t have enough yarn to do another row. Leave the tail end hanging at the top or bottom of the warp and trim it so it’s about 5cm long.
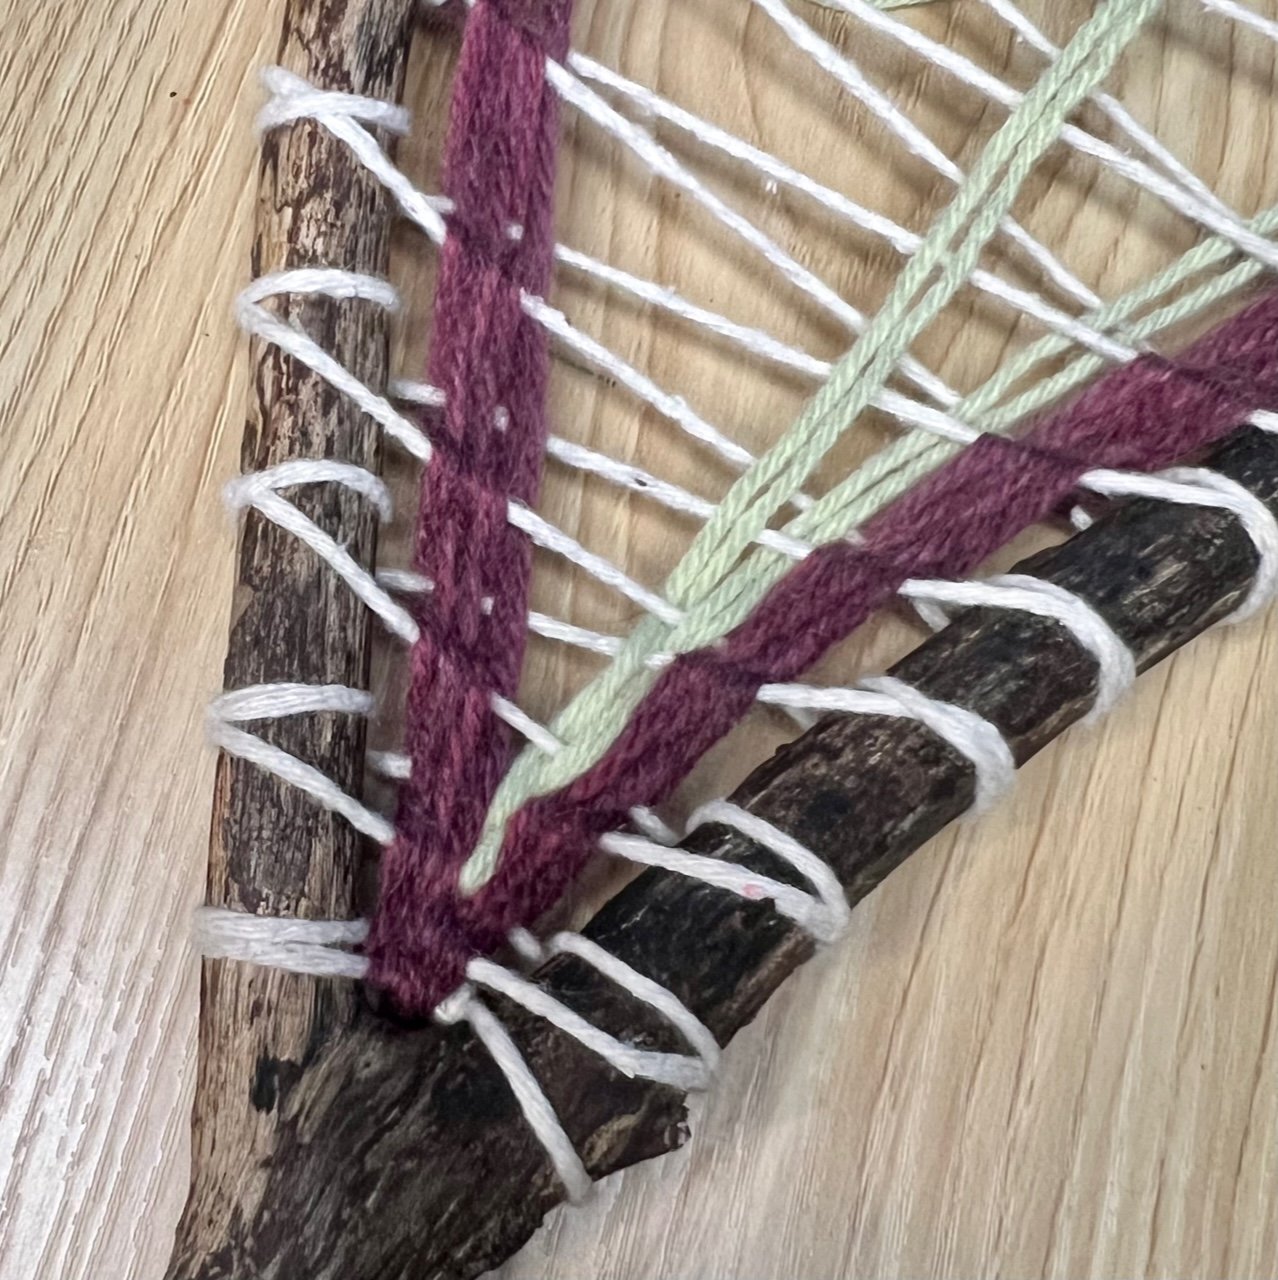
Start again with another length of yarn, either the same colour or different. I chose to weave mine so it sits on the other side of the warp, making a ‘V’ shape but you can also carry on weaving in stripes.
Once you’ve done a few rows and they sit tightly together, you can start to tuck your loose threads into the back of your weft. The rows will be tight enough now that the yarn won't come out.
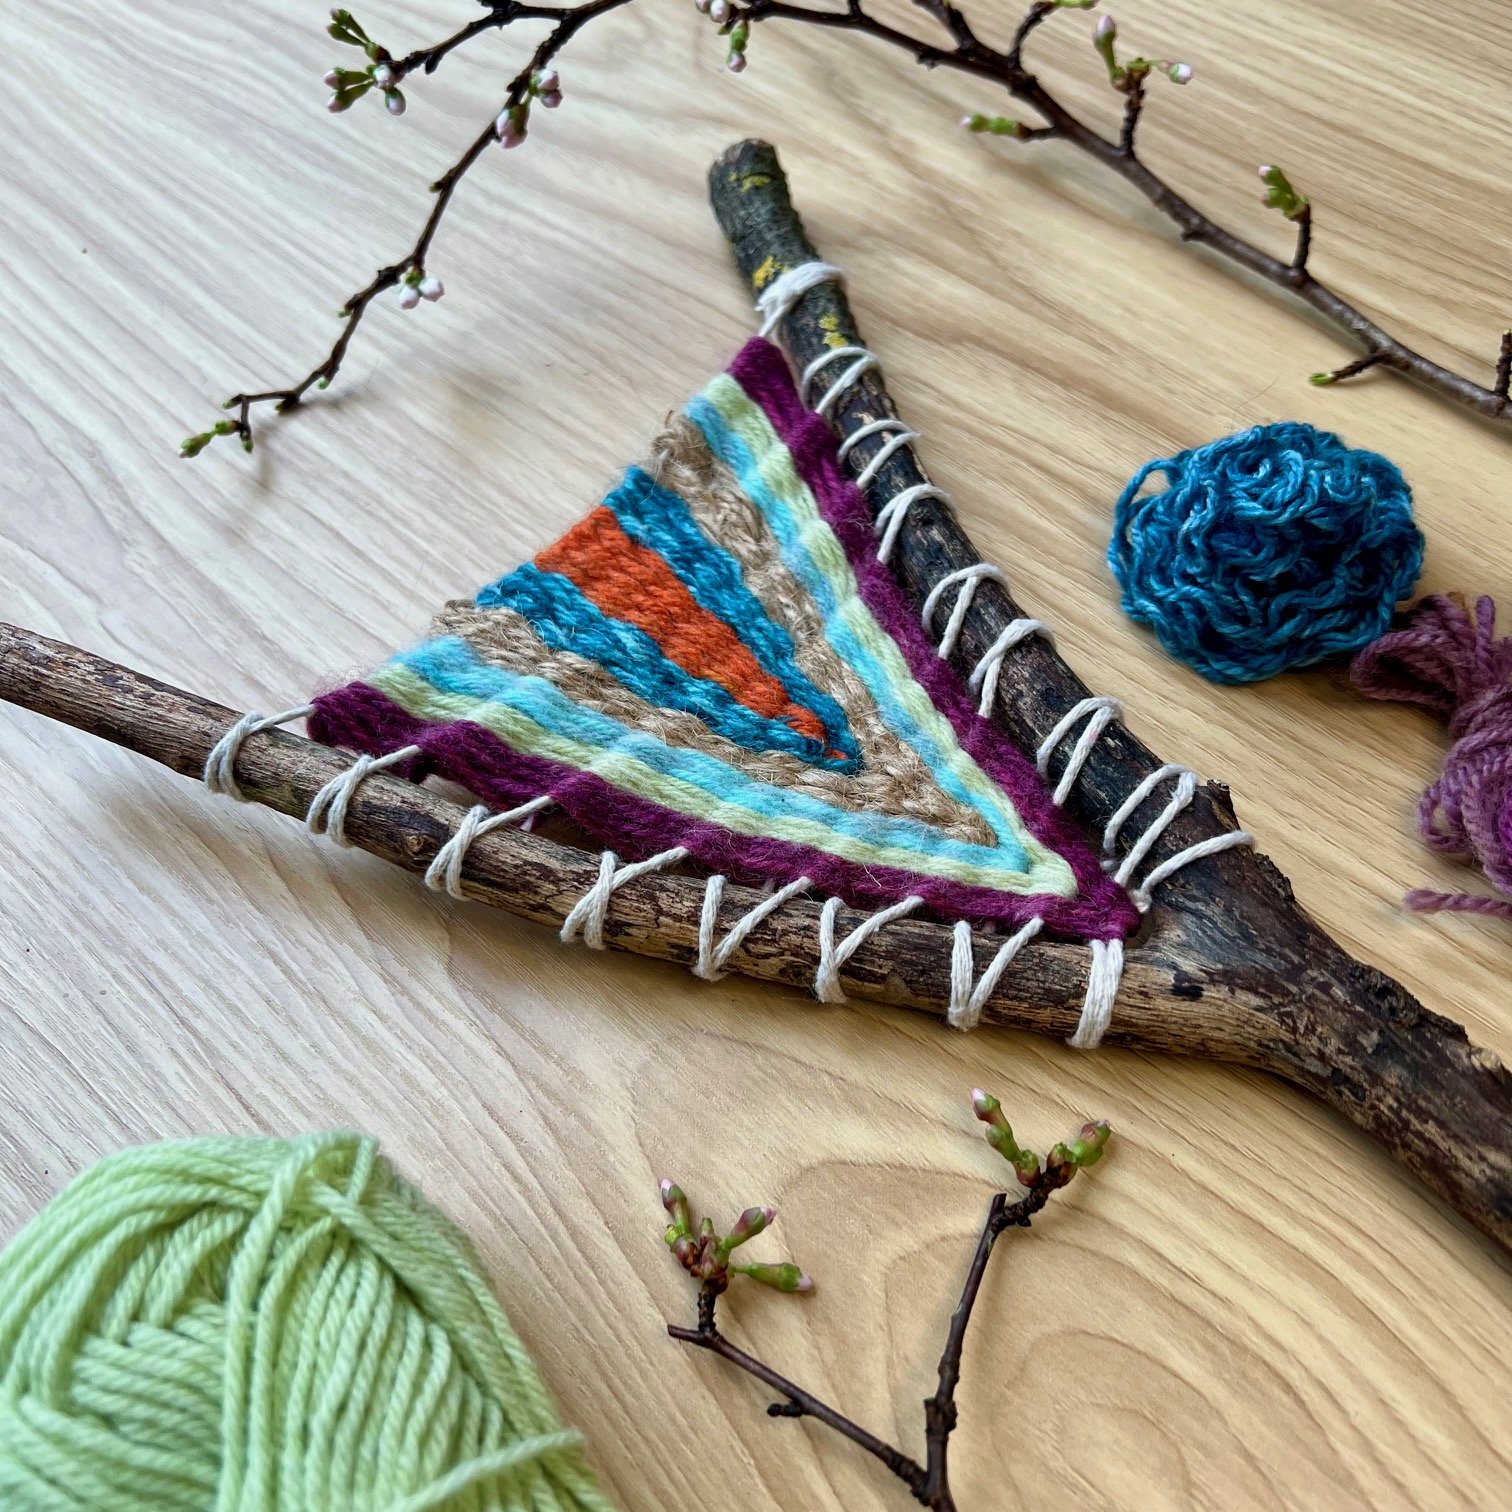
Continue to change colours of yarn as you weave. You might find using different thicknesses of yarn make interesting patterns. Ribbons, twine, and other items that could be used as ‘threads’ would work too or you could make your own thread by cutting up lengths of old fabric. You could even weave in leaves, grasses, flowers or feathers! This would be a really lovely way to commemorate a place or a trip by using found items and weaving them into your design. I think this would be a perfect craft to do on a camping trip!
Once you have completely filled your loom with yarn, tuck in any loose ends around the back. Now your branch weaving is finished! I hope you enjoy it!
Author: Denise Hope, home educating mum of two boys
If you’d like to receive regular nature craft activities like this alongside gardening activities for children, subscribe below to receive a monthly Mud & Bloom box! Each monthly Mud & Bloom box contains at least two craft activities for children as well as two growing activities.