Whittled stick characters

Whittling is a great way to introduce children to safe knife skills and making these whittled stick characters is a great beginner activity for young children who haven’t whittled before.
What you will need:
A stick - about the length of your elbow to your fingertips and straight. The best wood for whittling is young, fresh wood that’s not dried out. Soft woods are better for beginners. Try to avoid sticks with lots of knots and nobbles!
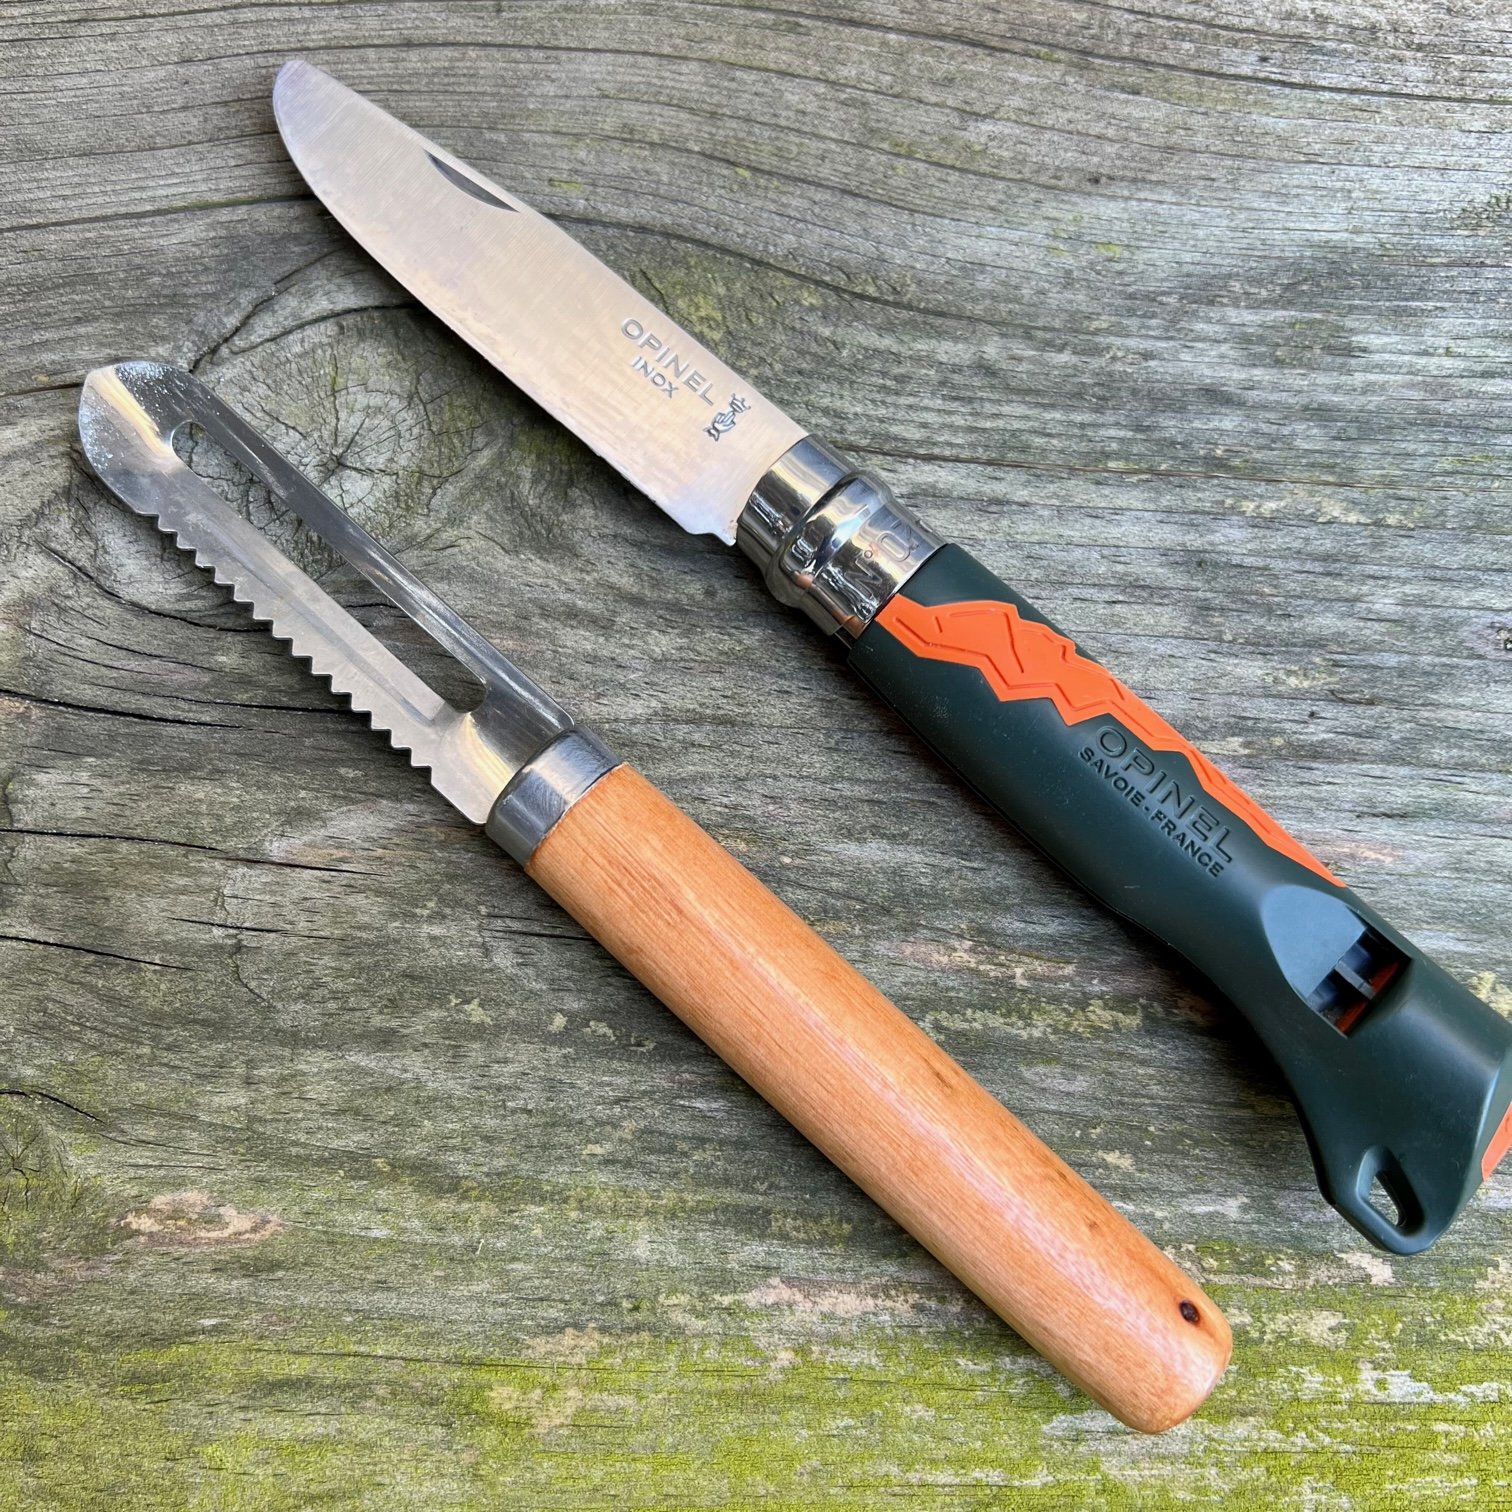
A whittling tool - A peeler is a great tool for young children or children new to whittling, providing a safe and easy way to learn how to hold and use a carving tool. Older or more experienced children can use a knife. We used the peelers that were in the March Mud & Bloom box. You can also purchase them from our online shop.
Sandpaper (optional)
Marker pens, paint or paint pens for decorating.
How to whittle safely:
There are a few rules that you should follow when whittling with young children to keep it safe and fun. You should always supervise any whittling activity until you feel sure that your child has fully understood the safety rules and will stick to them at all times.
Have at least an arm’s length space all around you, away from others.
Always push the blade away from your body and the hand holding the stick.
Don’t hold the stick in your lap, hold it so the end of the stick that you are cutting is past your knees or to the side of them.
Pare off small pieces at a time. It is easier to lose control of your whittling tool when pressing hard to remove larger chunks.
Don't walk around holding your whittling tool.
What you need to do:
Start by sitting down, holding the stick to one side of your body or leaning forwards slightly so that you are holding the stick past your knees.
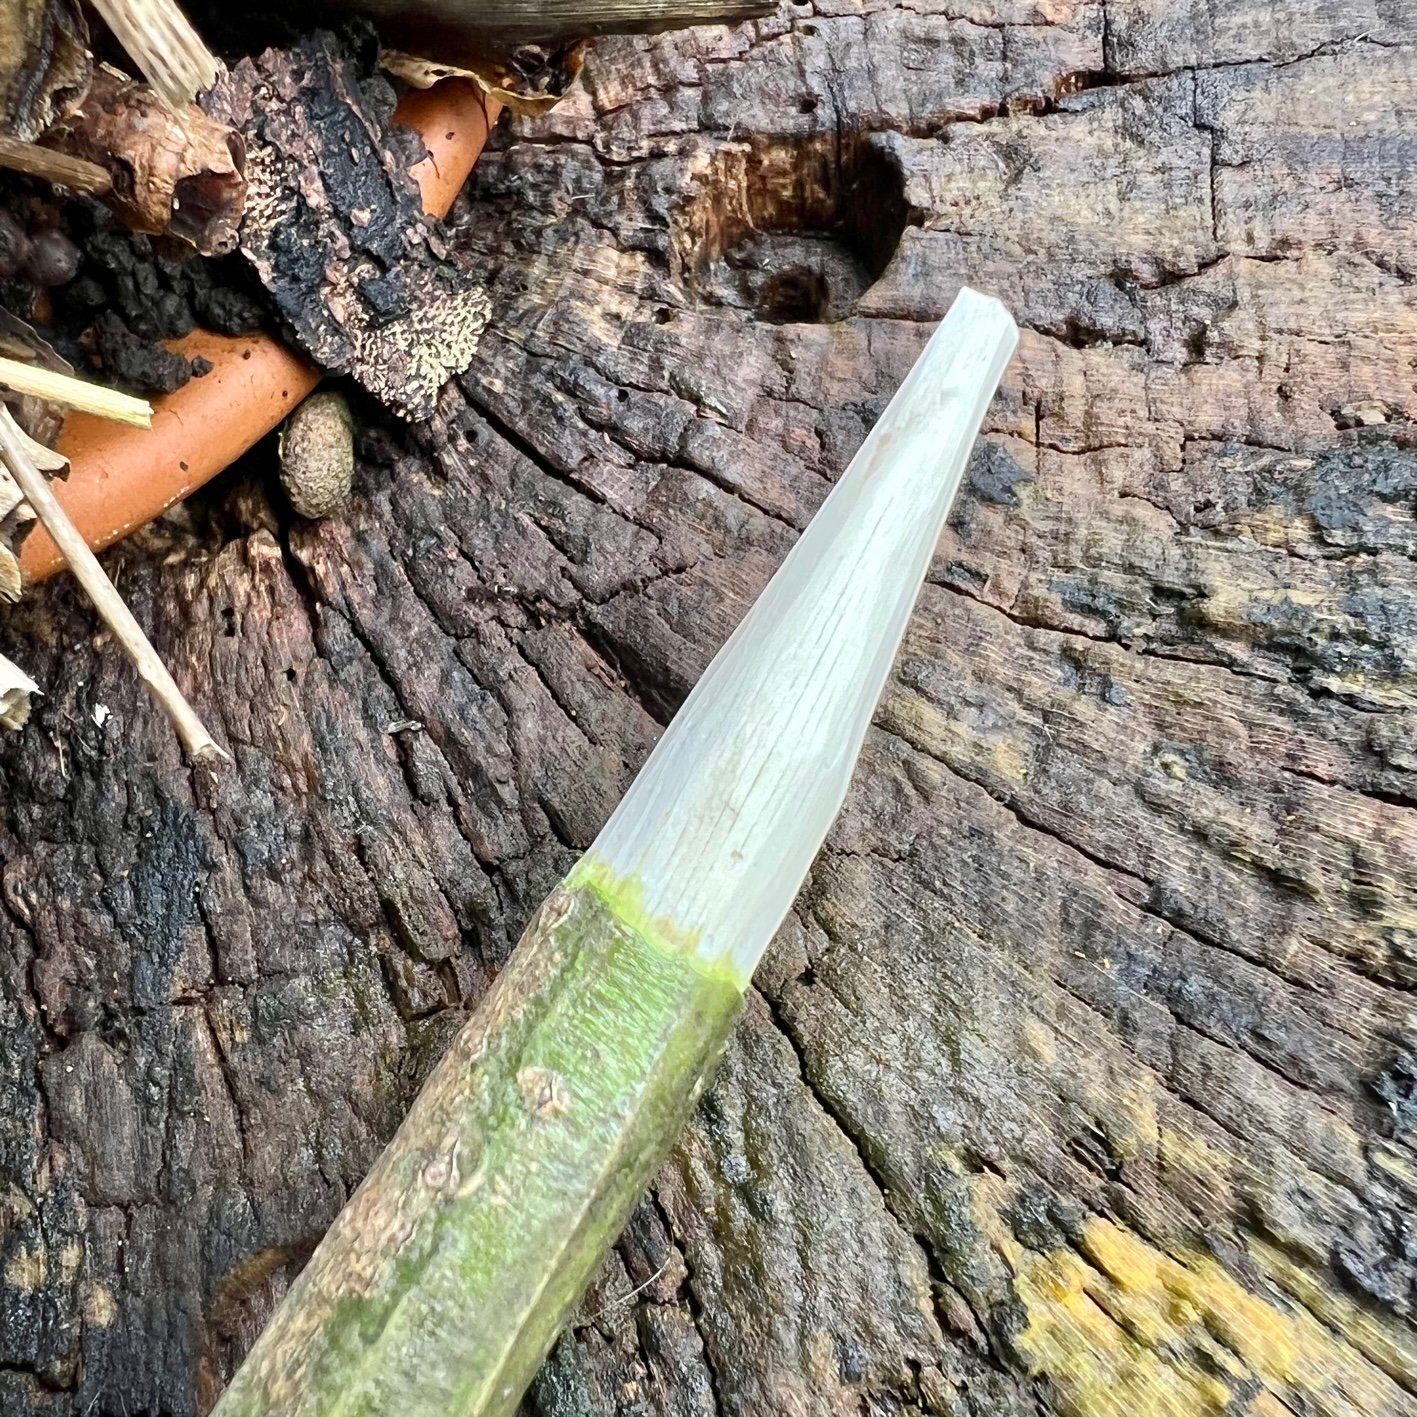
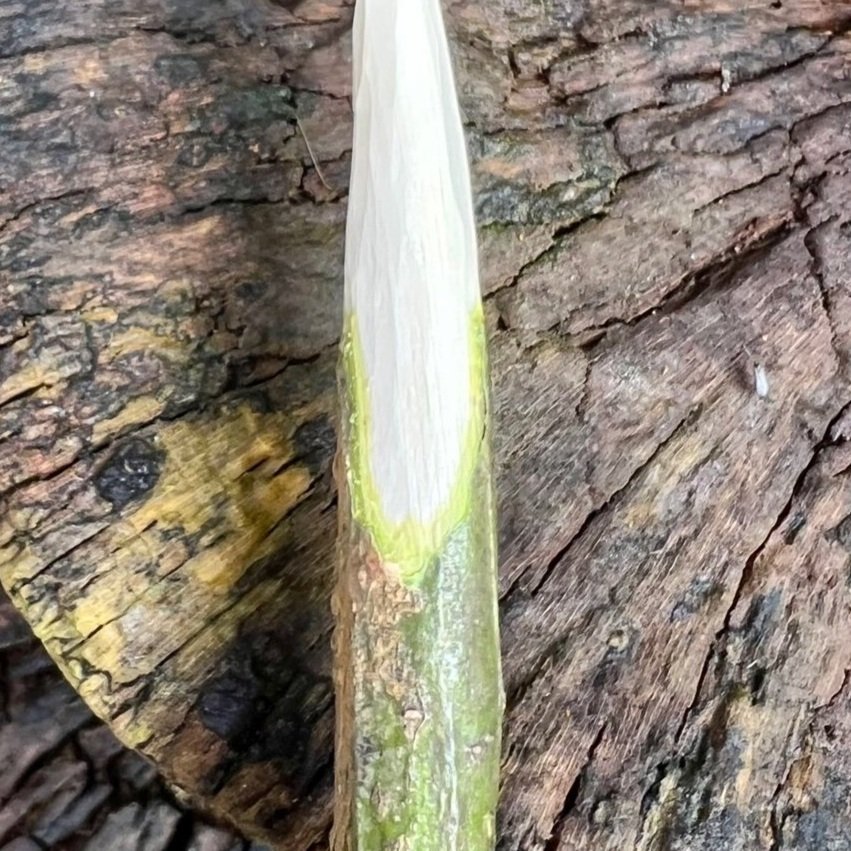
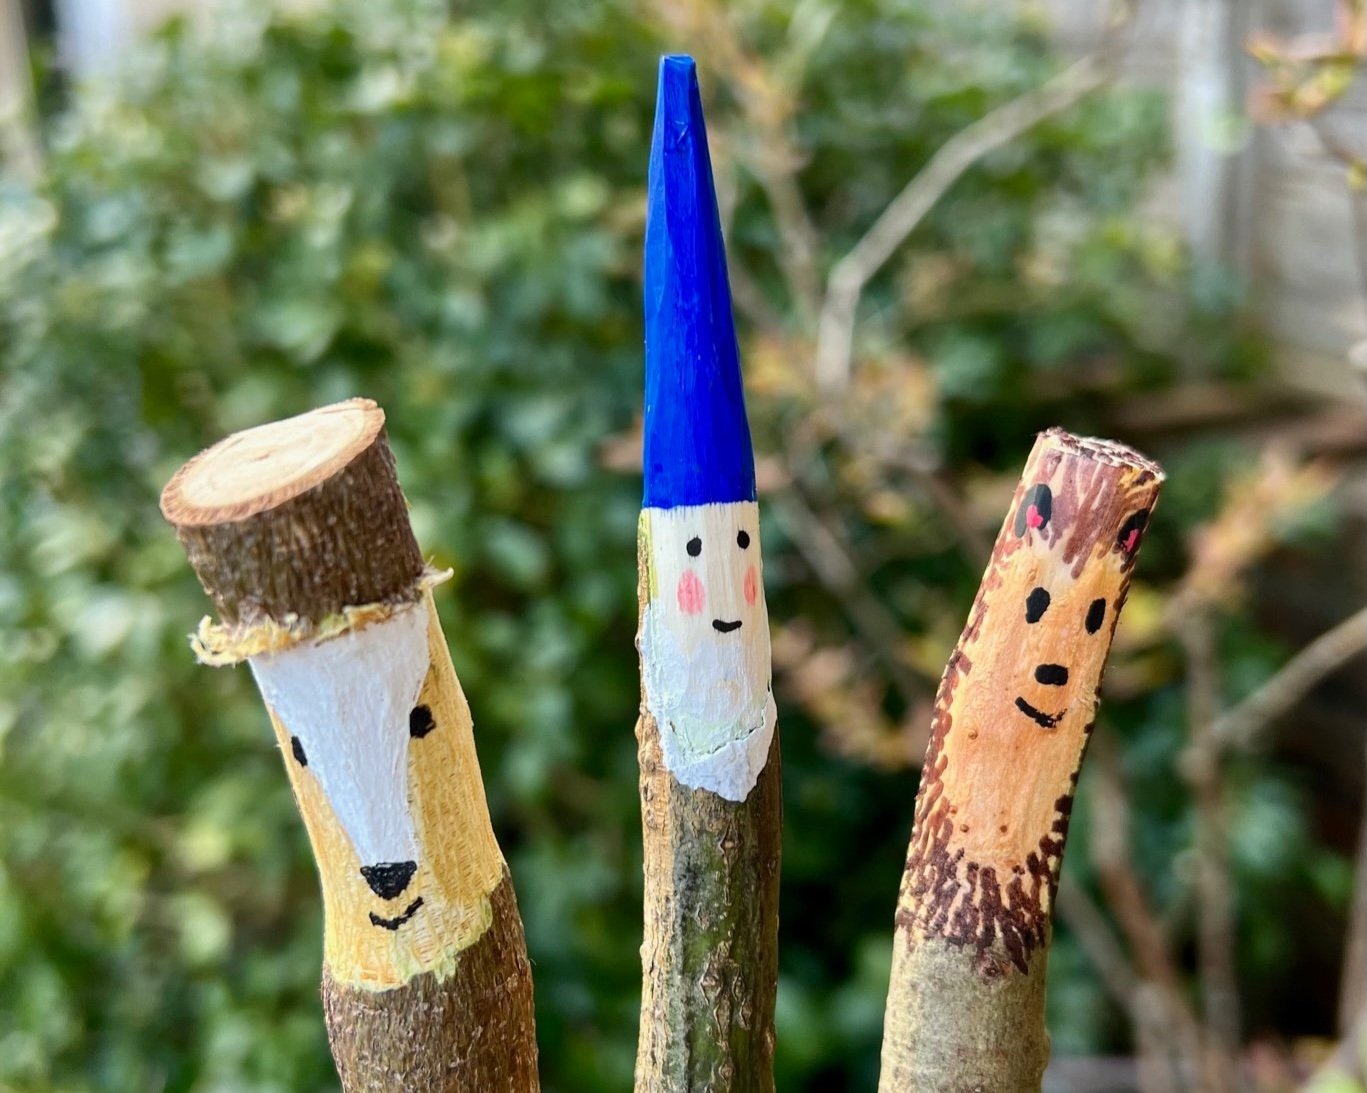
To create a gnome, you will need to define the hat area by shaving up from the the bottom of the hat to the top of the stick.

Shape the hat into a cone shape. Once the hat is the general shape that you want it to be, use lighter strokes to smooth out any ridges.
Once you are happy with the hat, carve a face on one side of the stick.
You can also try making different shaped heads and faces. To make a fringe like I did, you can peel a small amount of the wood at the top of the face and stopping before you peel the wood off. You can create curly hair in a similar way, by gently peeling a longer piece and the bark will curl up.

If you want to make your face and hat nice and smooth, you could sand the whittled parts with a piece of sandpaper.
Now your stick is ready to decorate!
Other easy whittling projects to try include making marshmallow toasting sticks or a magic wand. You could even just make different patterns on your wood.
Author: Denise Hope, home educating mum of two boys