Watercolour critters

This is a really fun art activity to do with bug-loving children, done by blowing watercolour paint around through a straw! I did this with my 13 year old but it’s great for younger children as well.
What you will need:
White watercolour or thick paper
Watercolours
Paintbrush
A straw
Fine black pen
A jar of water

What you need to do:
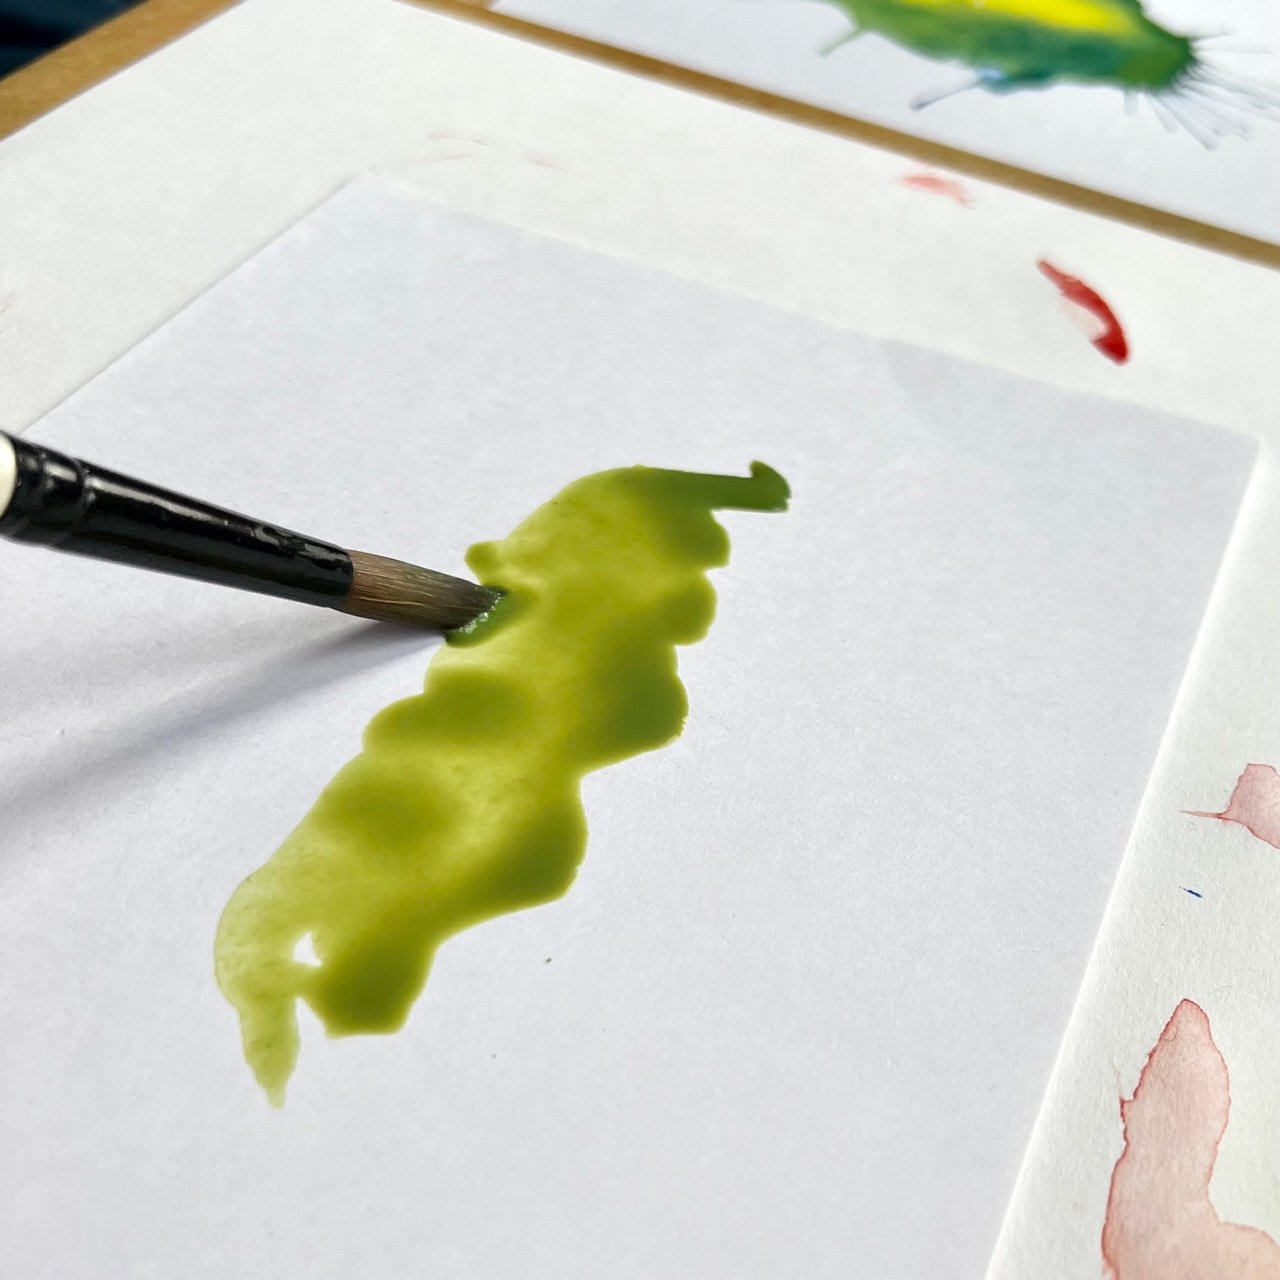
For this activity, we used Stockmar watercolour paints which I mixed and diluted into small jars. If you have solid watercolours in pans, you will first need to soften the paints by wetting each colour in the pan before you start. Do this by wetting your brush, and putting one large drop into each individual pan and then letting it sit for a couple of minutes.
Once your supplies are ready, have a look at some photo of insects, spiders and centipedes and see what things these little critters have in common, for example, how many legs do insects have and how many do spiders or centipedes have? How many body sections do they have? Your pictures don’t need to look anatomically correct, but the photos can provide some inspiration - you can make up your own critters if you want to!
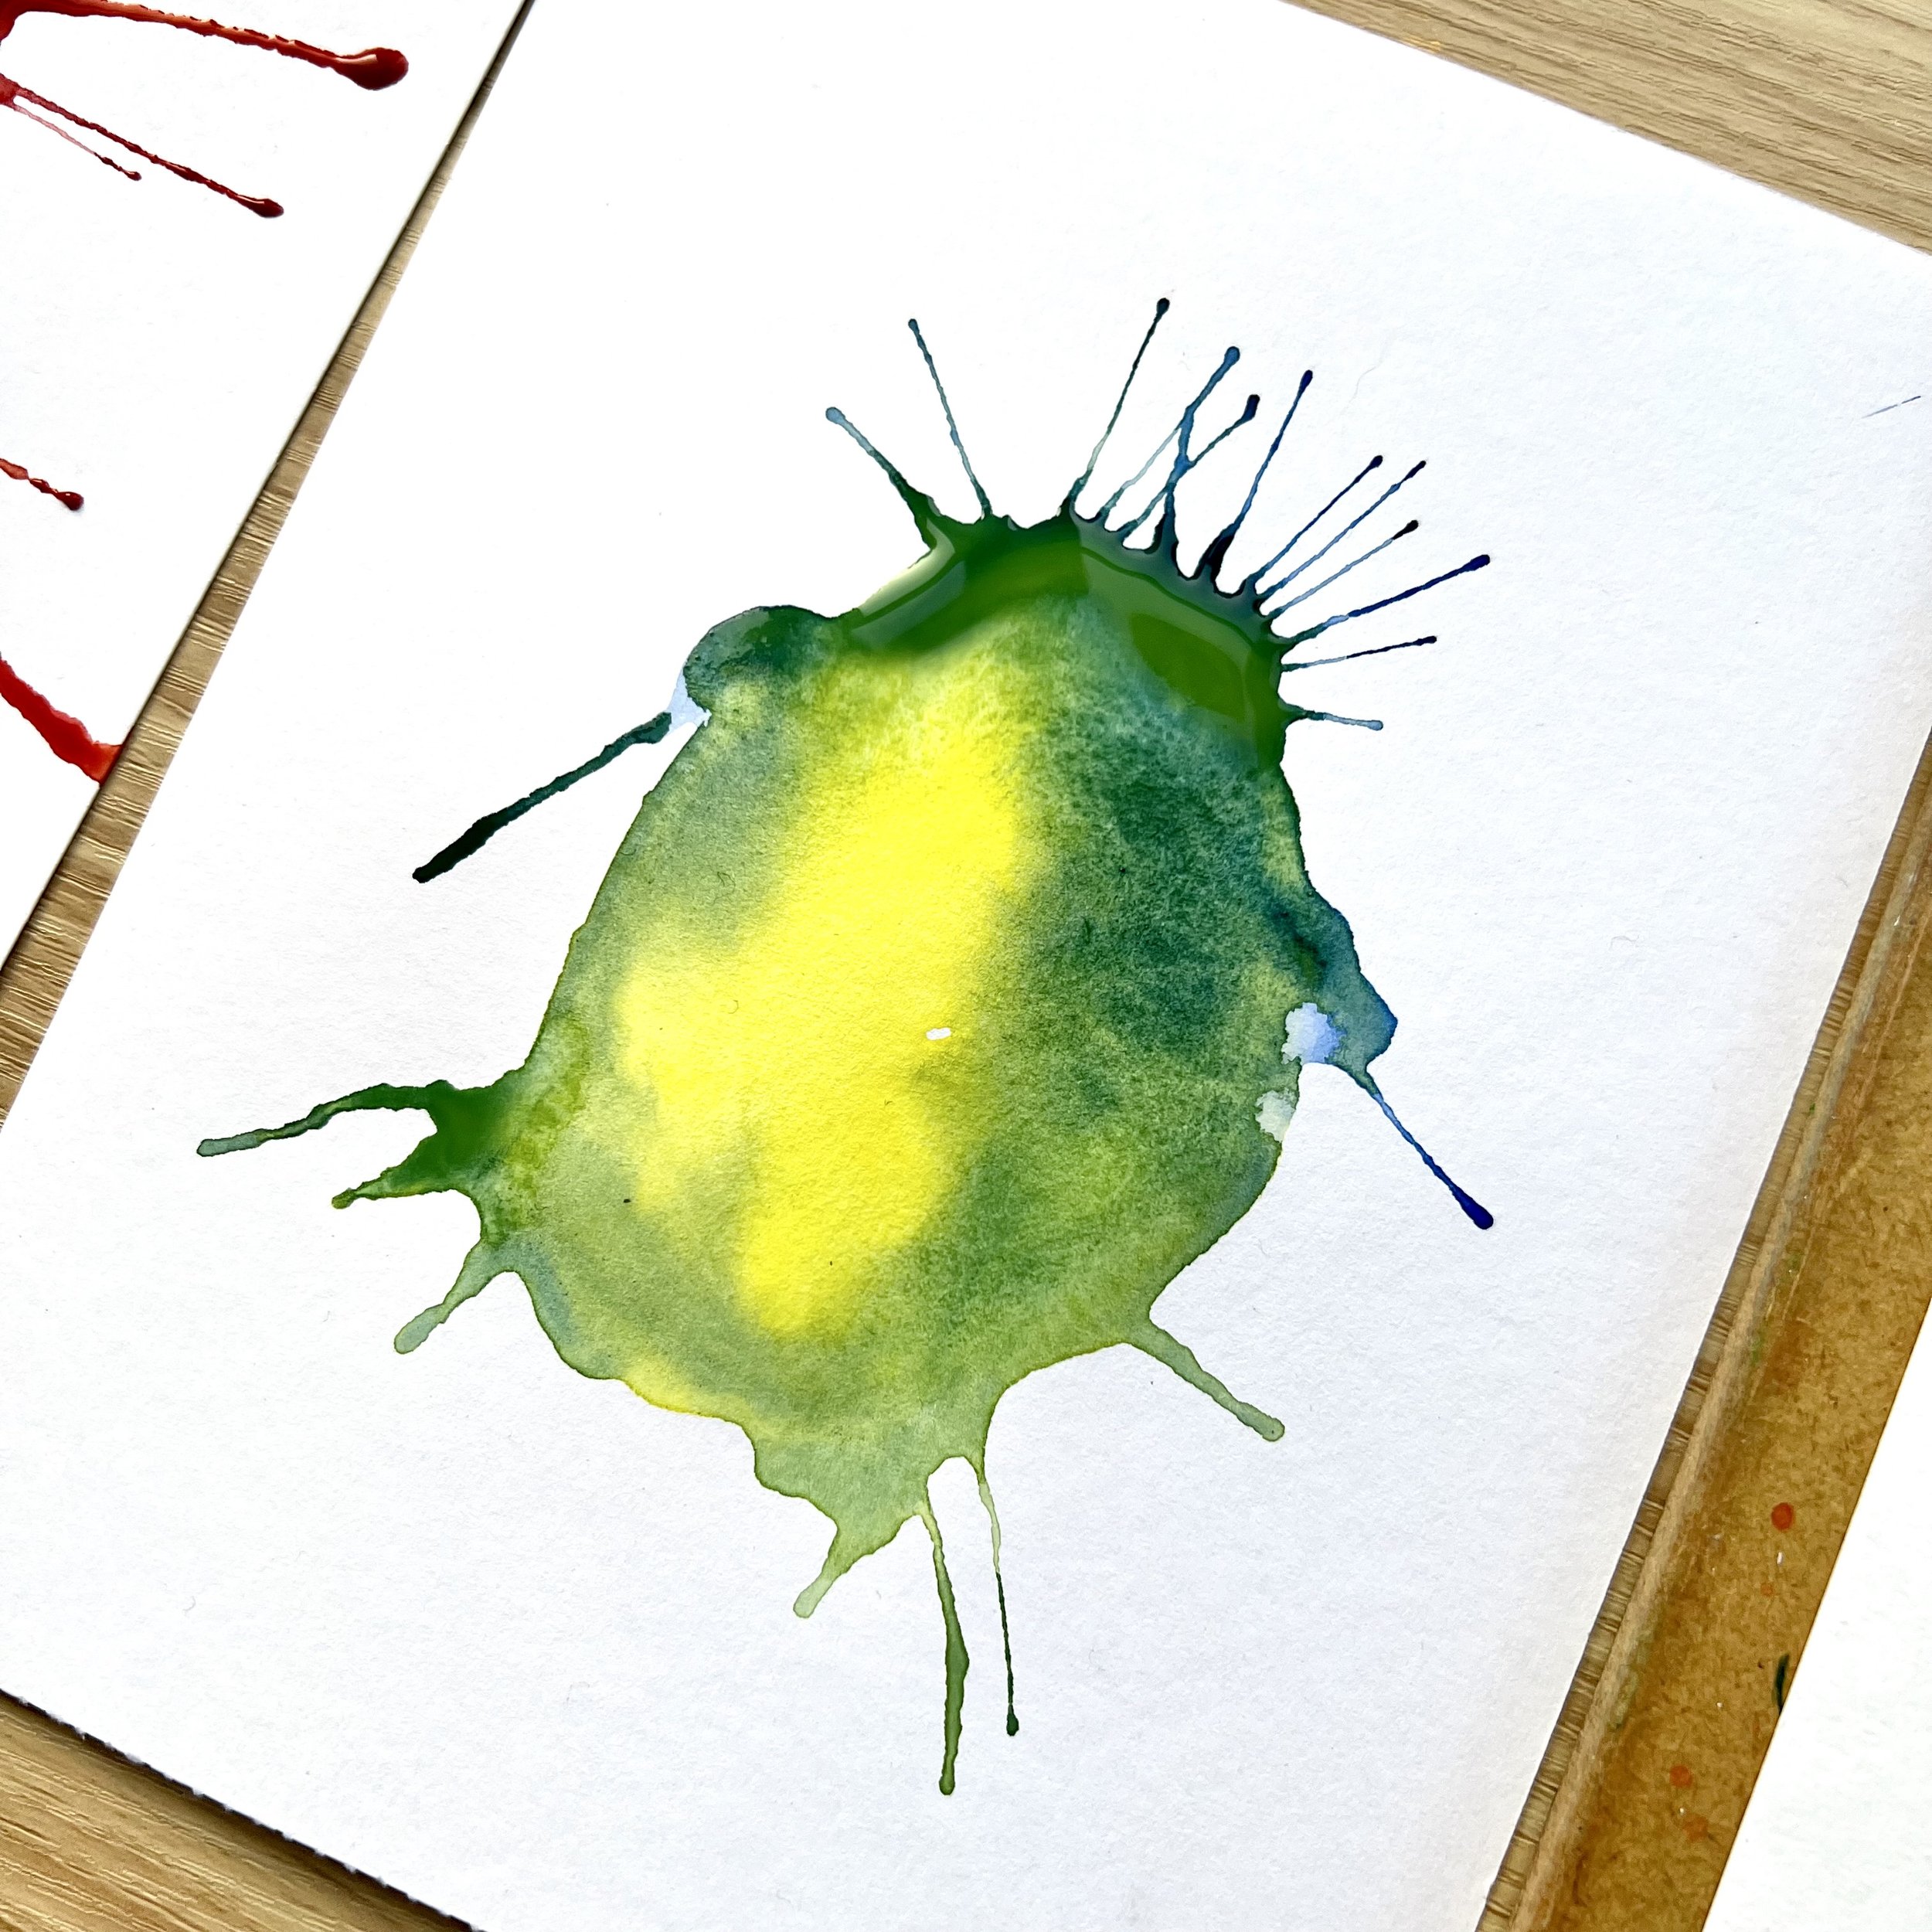
Load up your brush with lots of wet paint and, on your paper, create an insect shape with your watercolour paint. You could start with an oval shape for a beetle, perhaps, or a wiggly sausage shape for a caterpillar. Make sure that your shape has some puddles of wet paint on it.
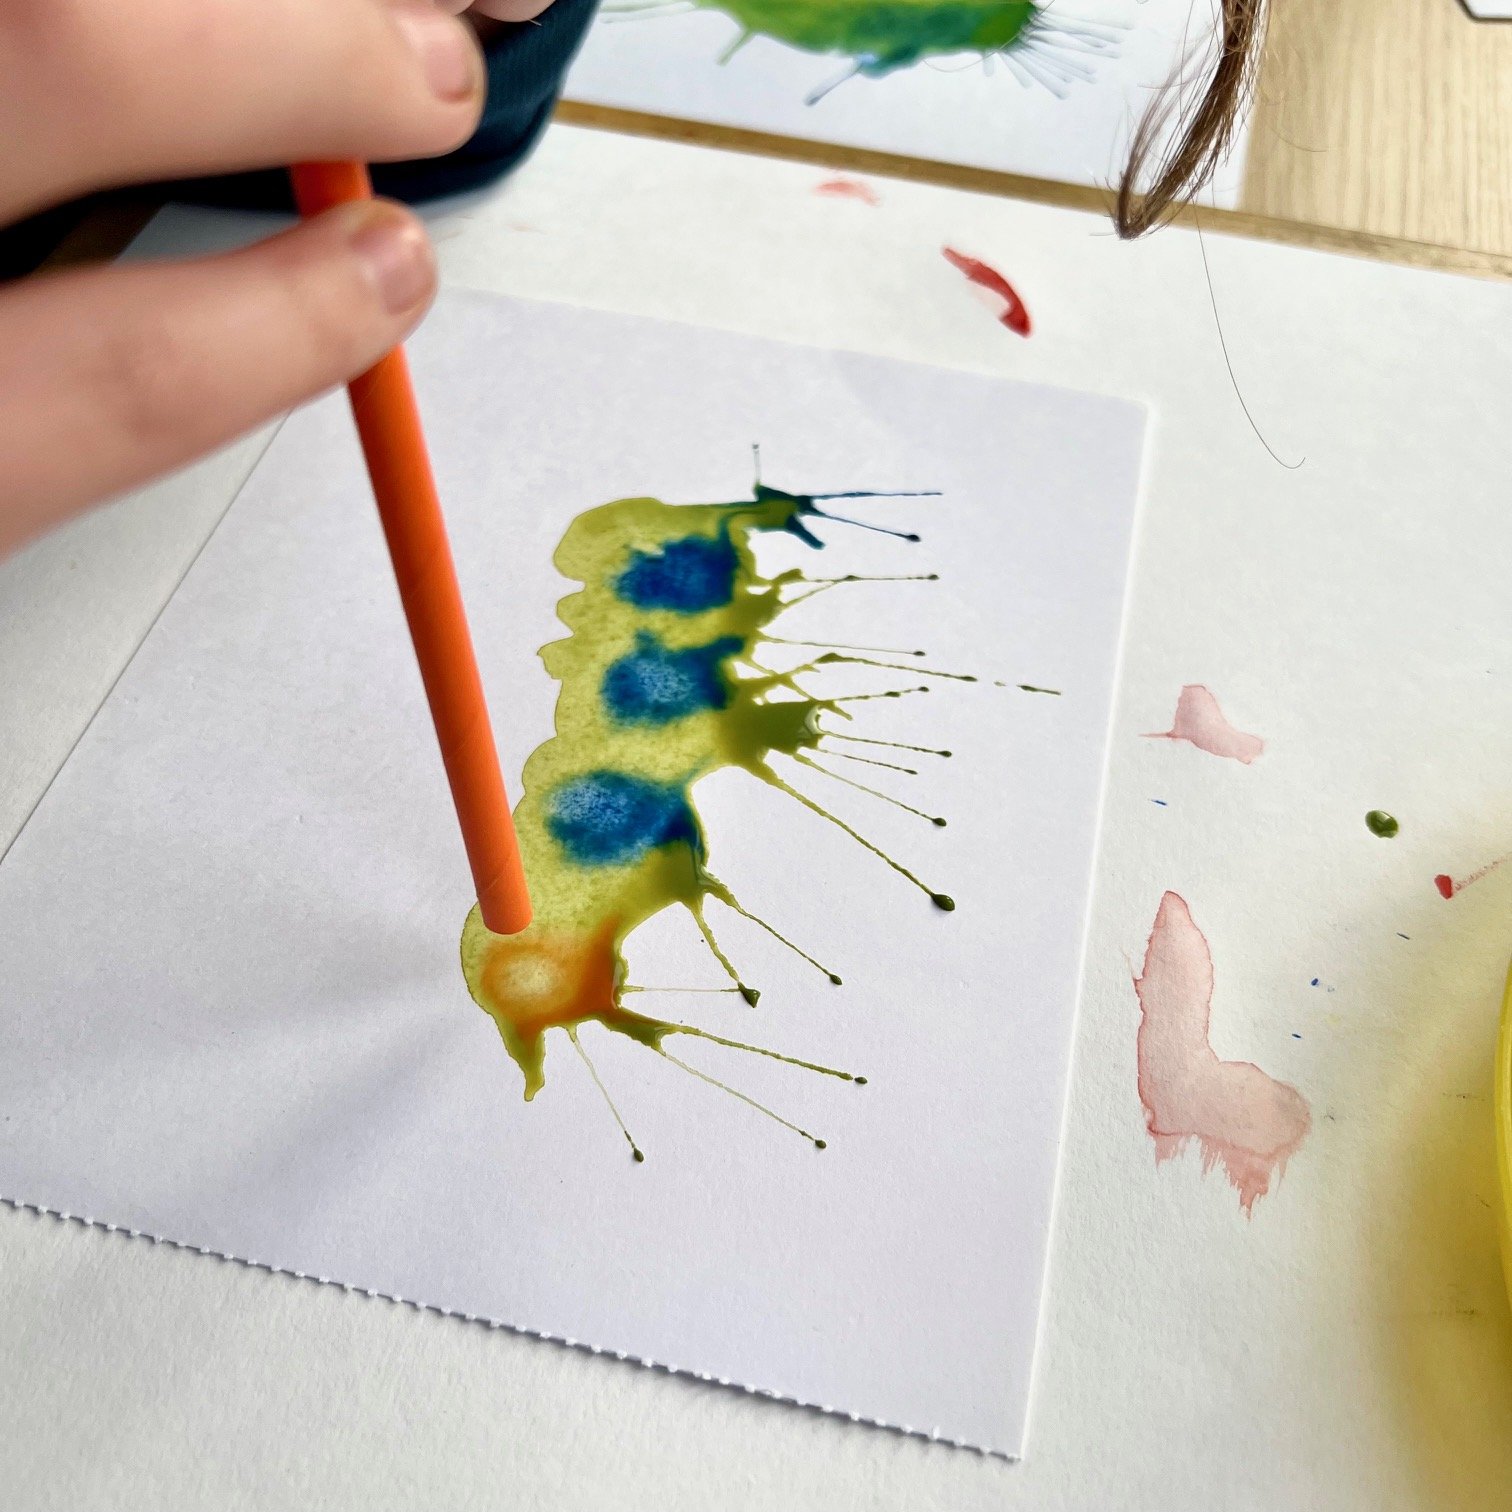
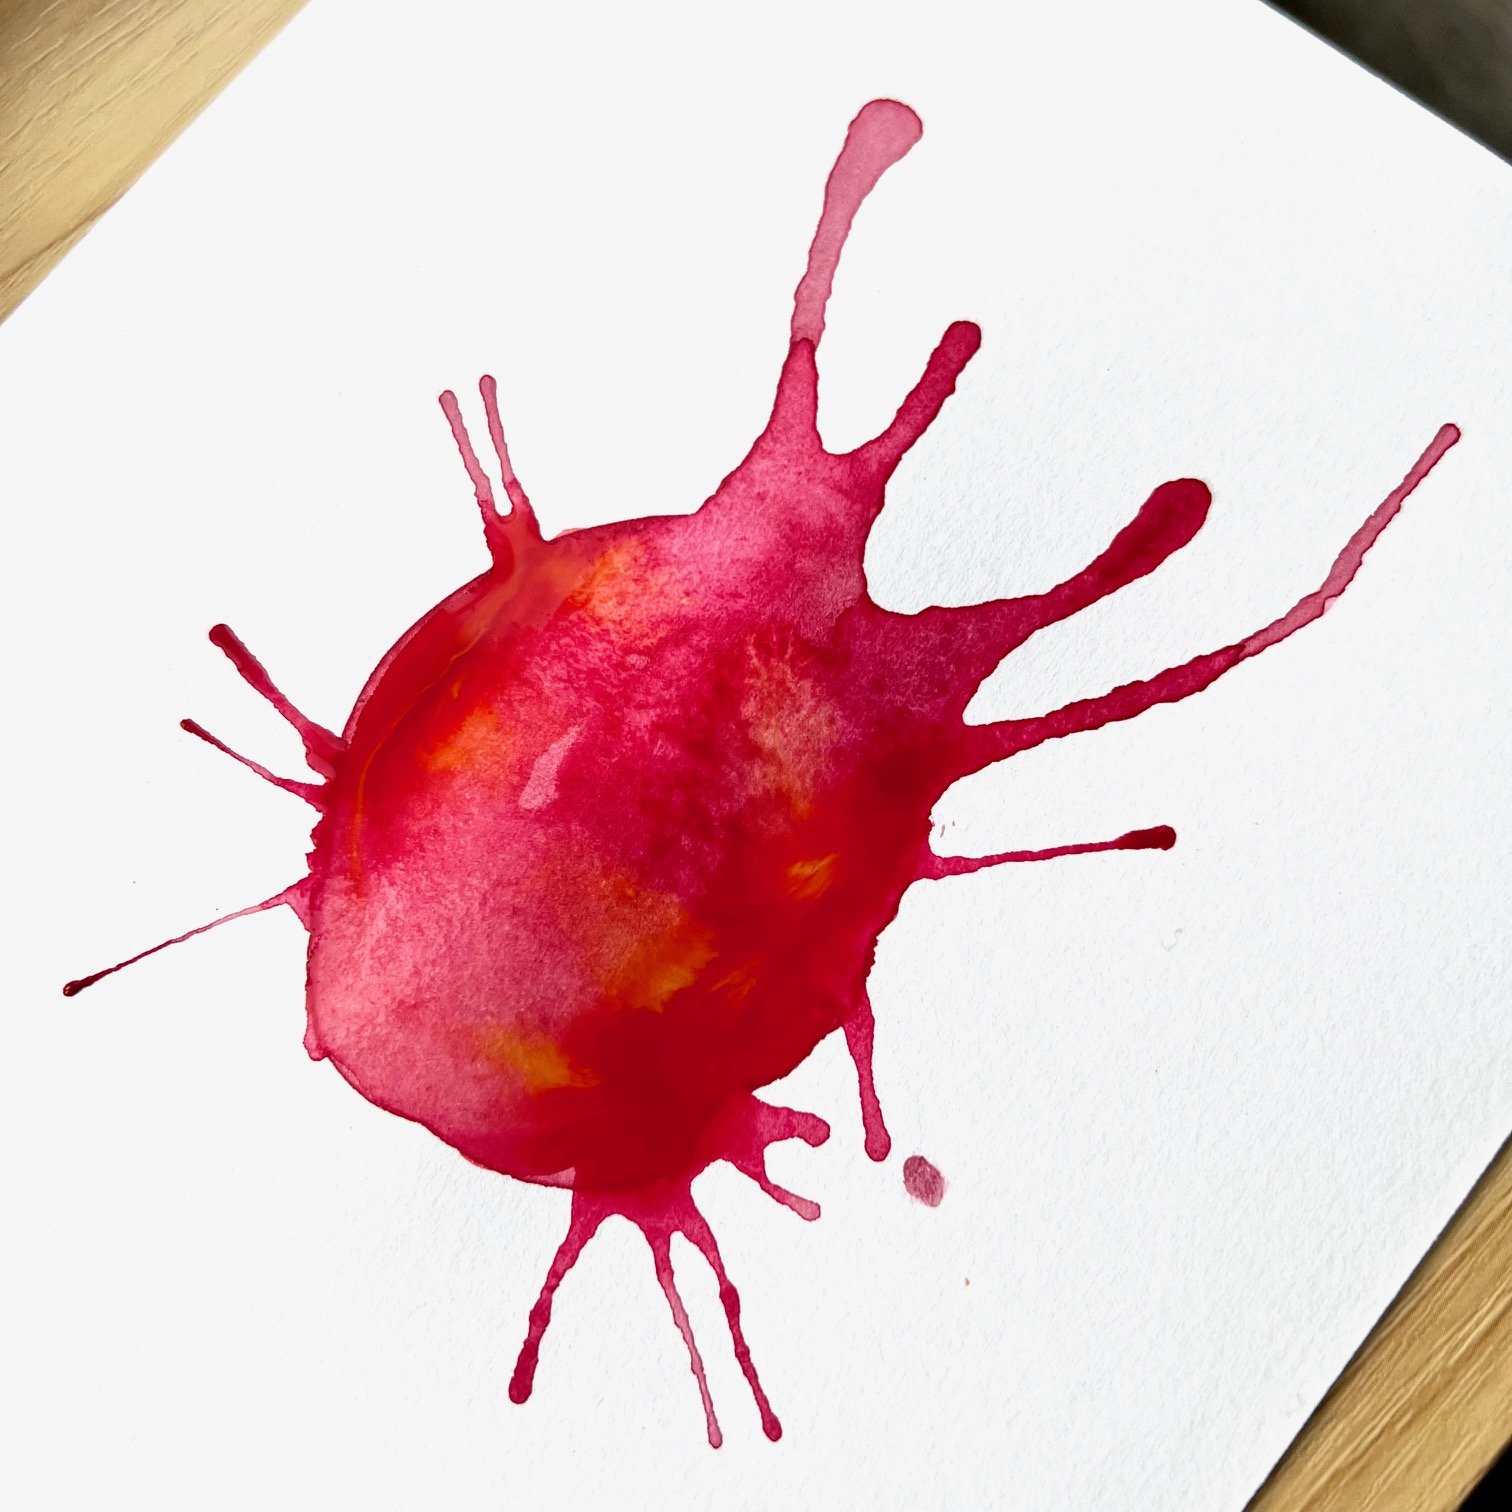
Now for the fun bit! Hold your straw just above where the paint has pooled and blow, forcing the paint to move along the paper in rivulets. You can use this technique to make hairs or horns on your caterpillars, legs on your centipedes or antennas and pincers on your beetles!
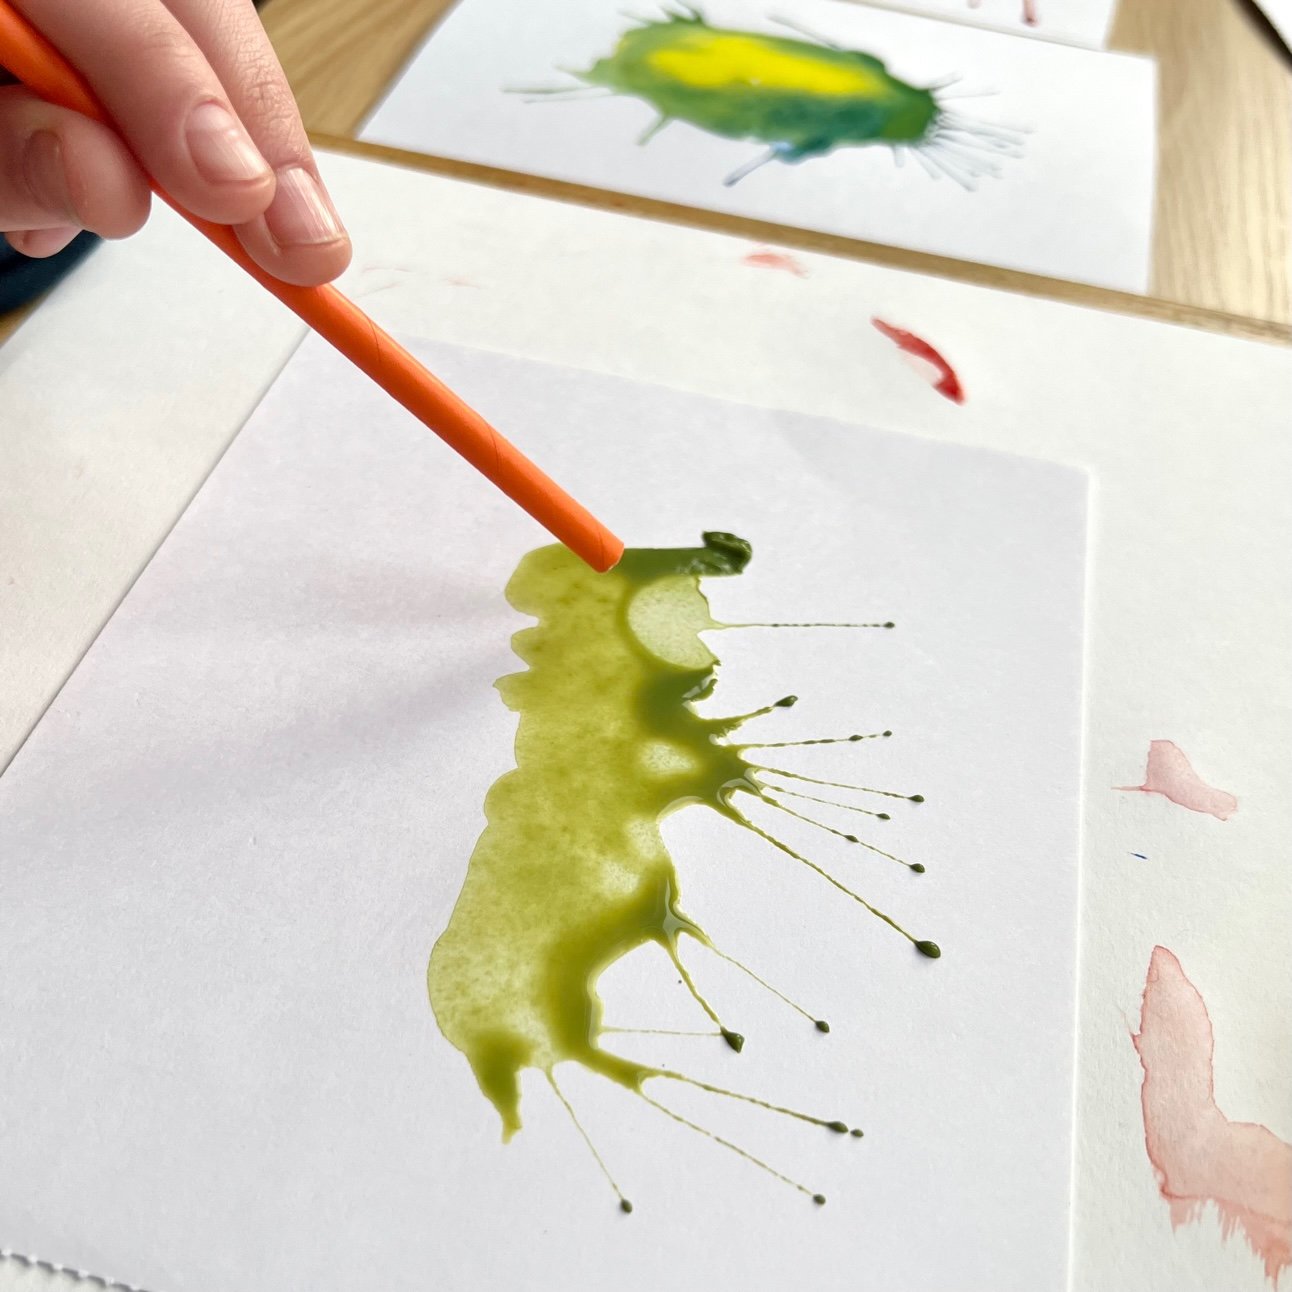
If you find it difficult to blow the paint, then cut your straw in half, so your blowing action is closer to the paint.
For a more colourful critter, you can add drops of another colour paint and blow through your straw again. It is so interesting to see the colours run together and mix. It’s best to stick to just a couple of colours for each critter, as otherwise the colours can turn a bit muddy when they mix together.

Once you are happy with your bug shape, set it aside to dry and paint some more!
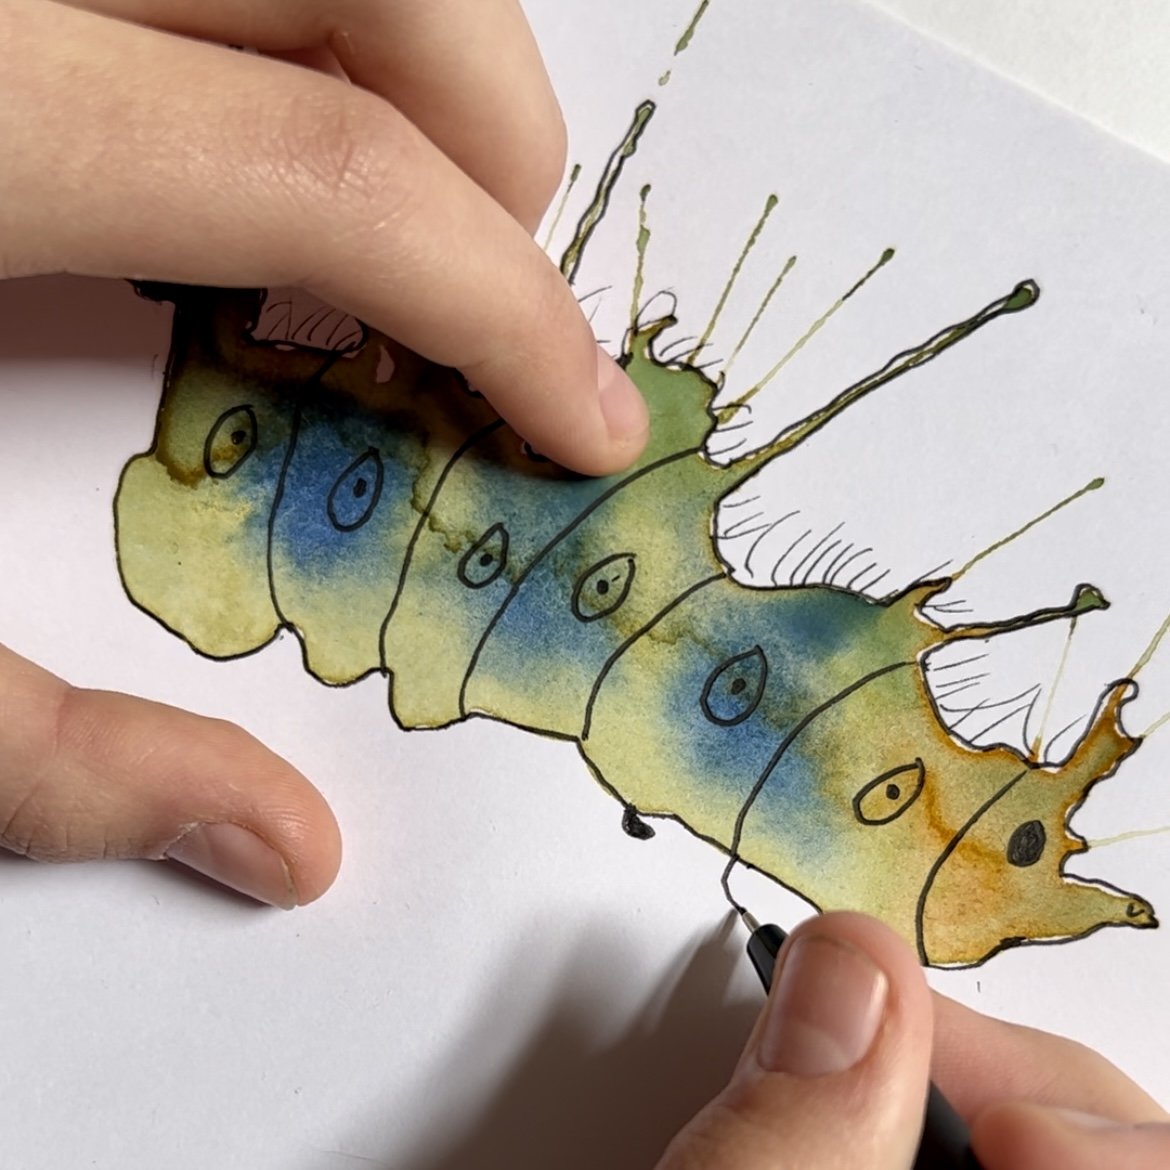
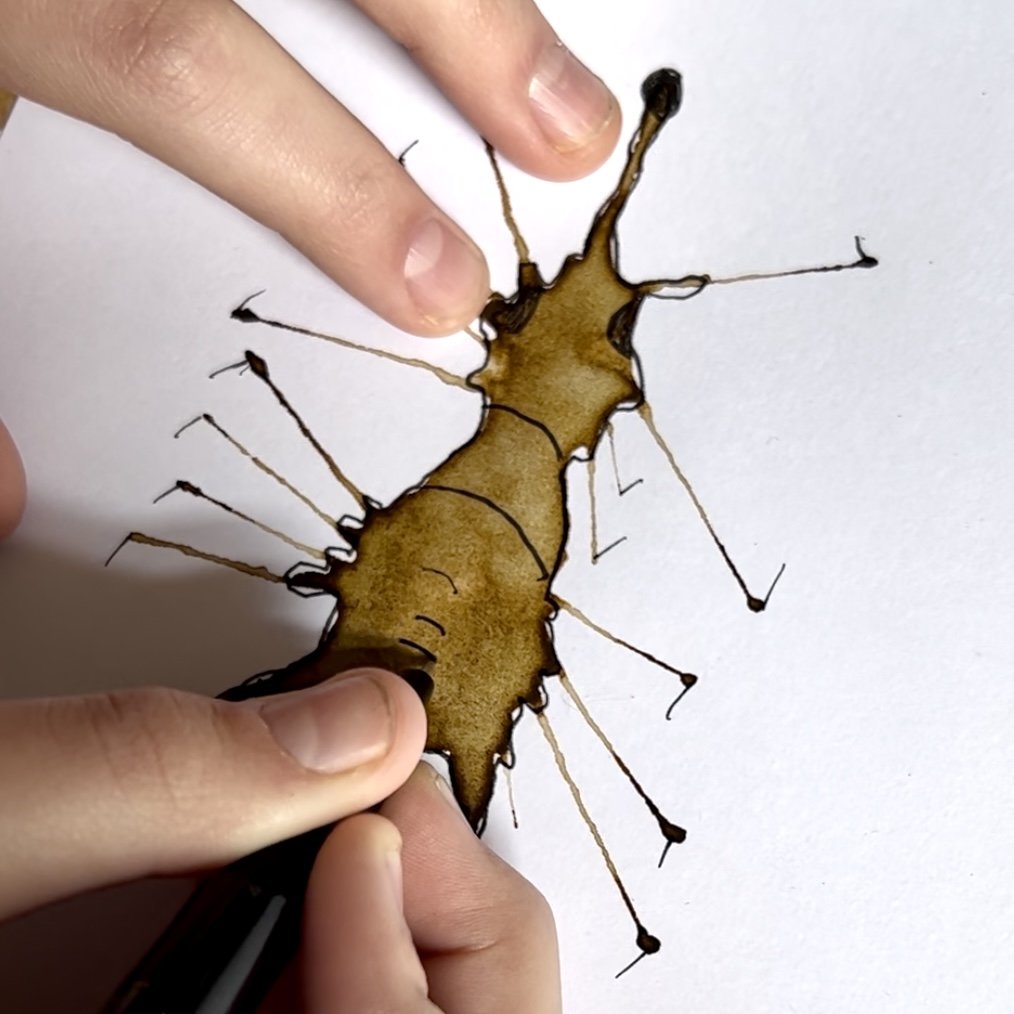
When the paint is dry, you can create bugs and other creatures out of the shapes using your black pen by adding features such as eyes, legs, antennas and wings. You can also outline the different sections of your insects.
We had so much fun with this!

Author: Denise Hope, home educating mum of two boys