Make a suncatcher with pressed flowers and leaves
Pressing flowers can be done in all seasons, but spring or summer, when the flowers are most colourful, are probably best. This activity needs to be done in two stages: the first stage involves collecting and pressing the flowers and the second is when you make the sun catchers. Pressing the flowers will usually take 1-2 weeks but you can also press them in a few minutes using a microwave.
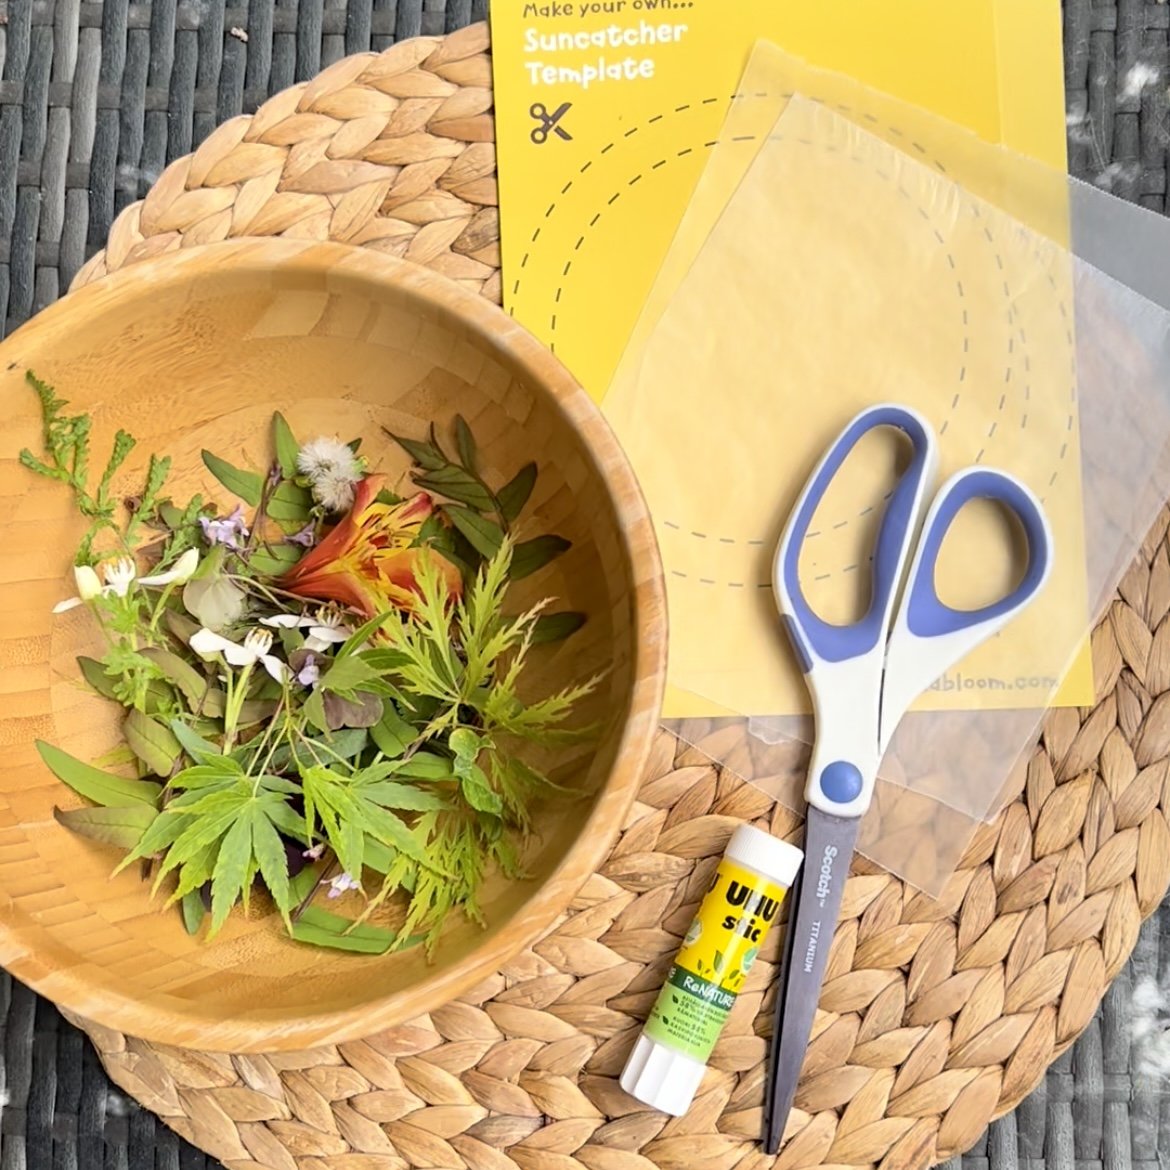
What you will need:
A container for collecting the flowers in
A pile of heavy books
Plain paper
Paper towels/kitchen roll
Some card and two plates or bowls of different sizes to draw around (I also used pre-made templates from a Mud & Bloom box)
A pencil
Wax paper (or tissue paper)
Scissors
Glue
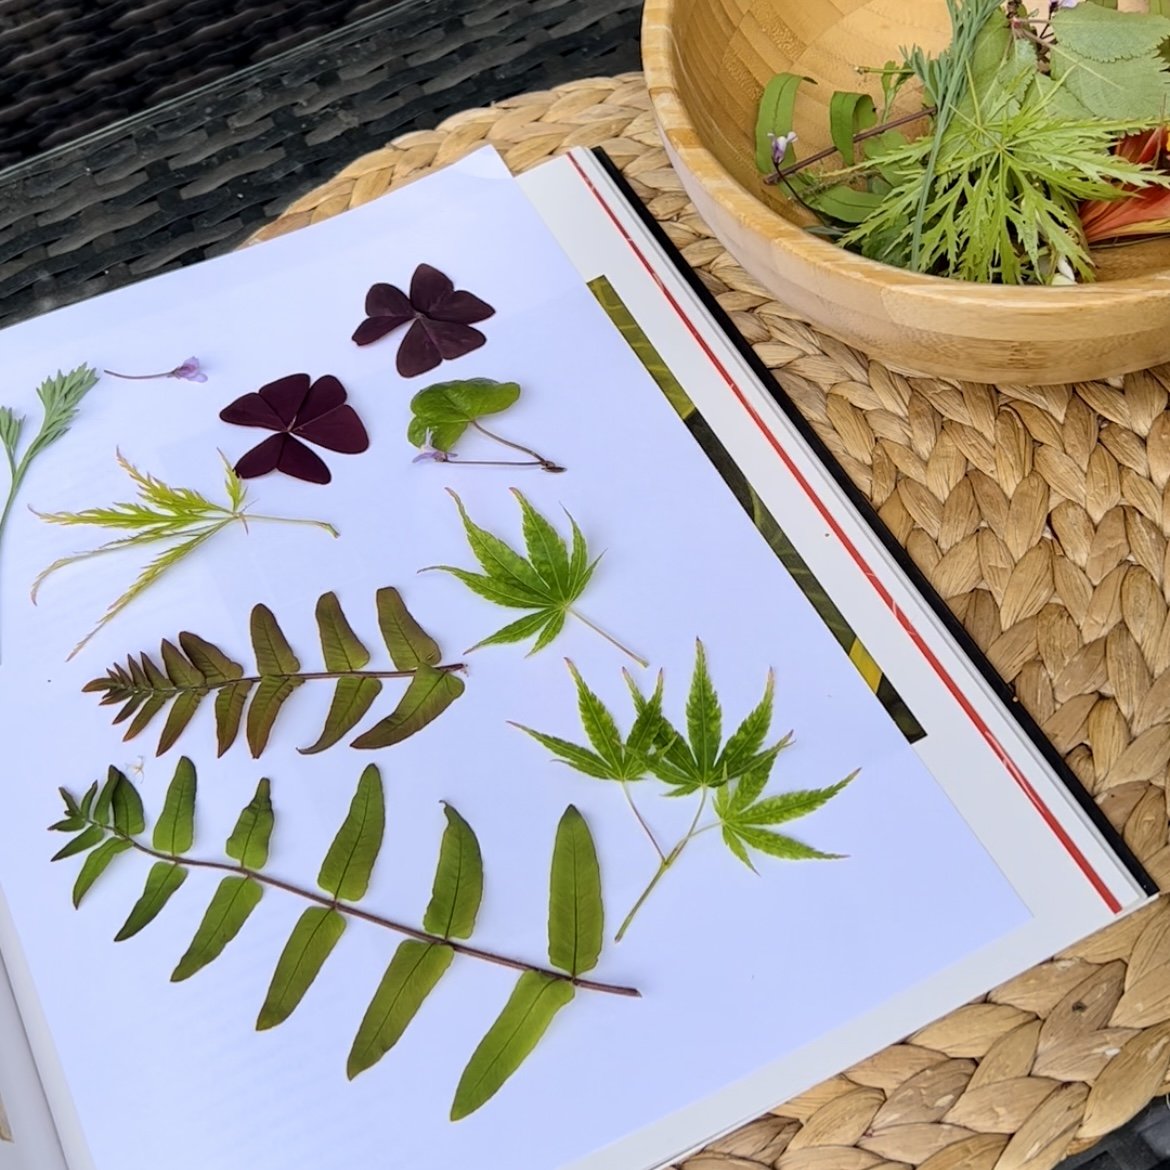
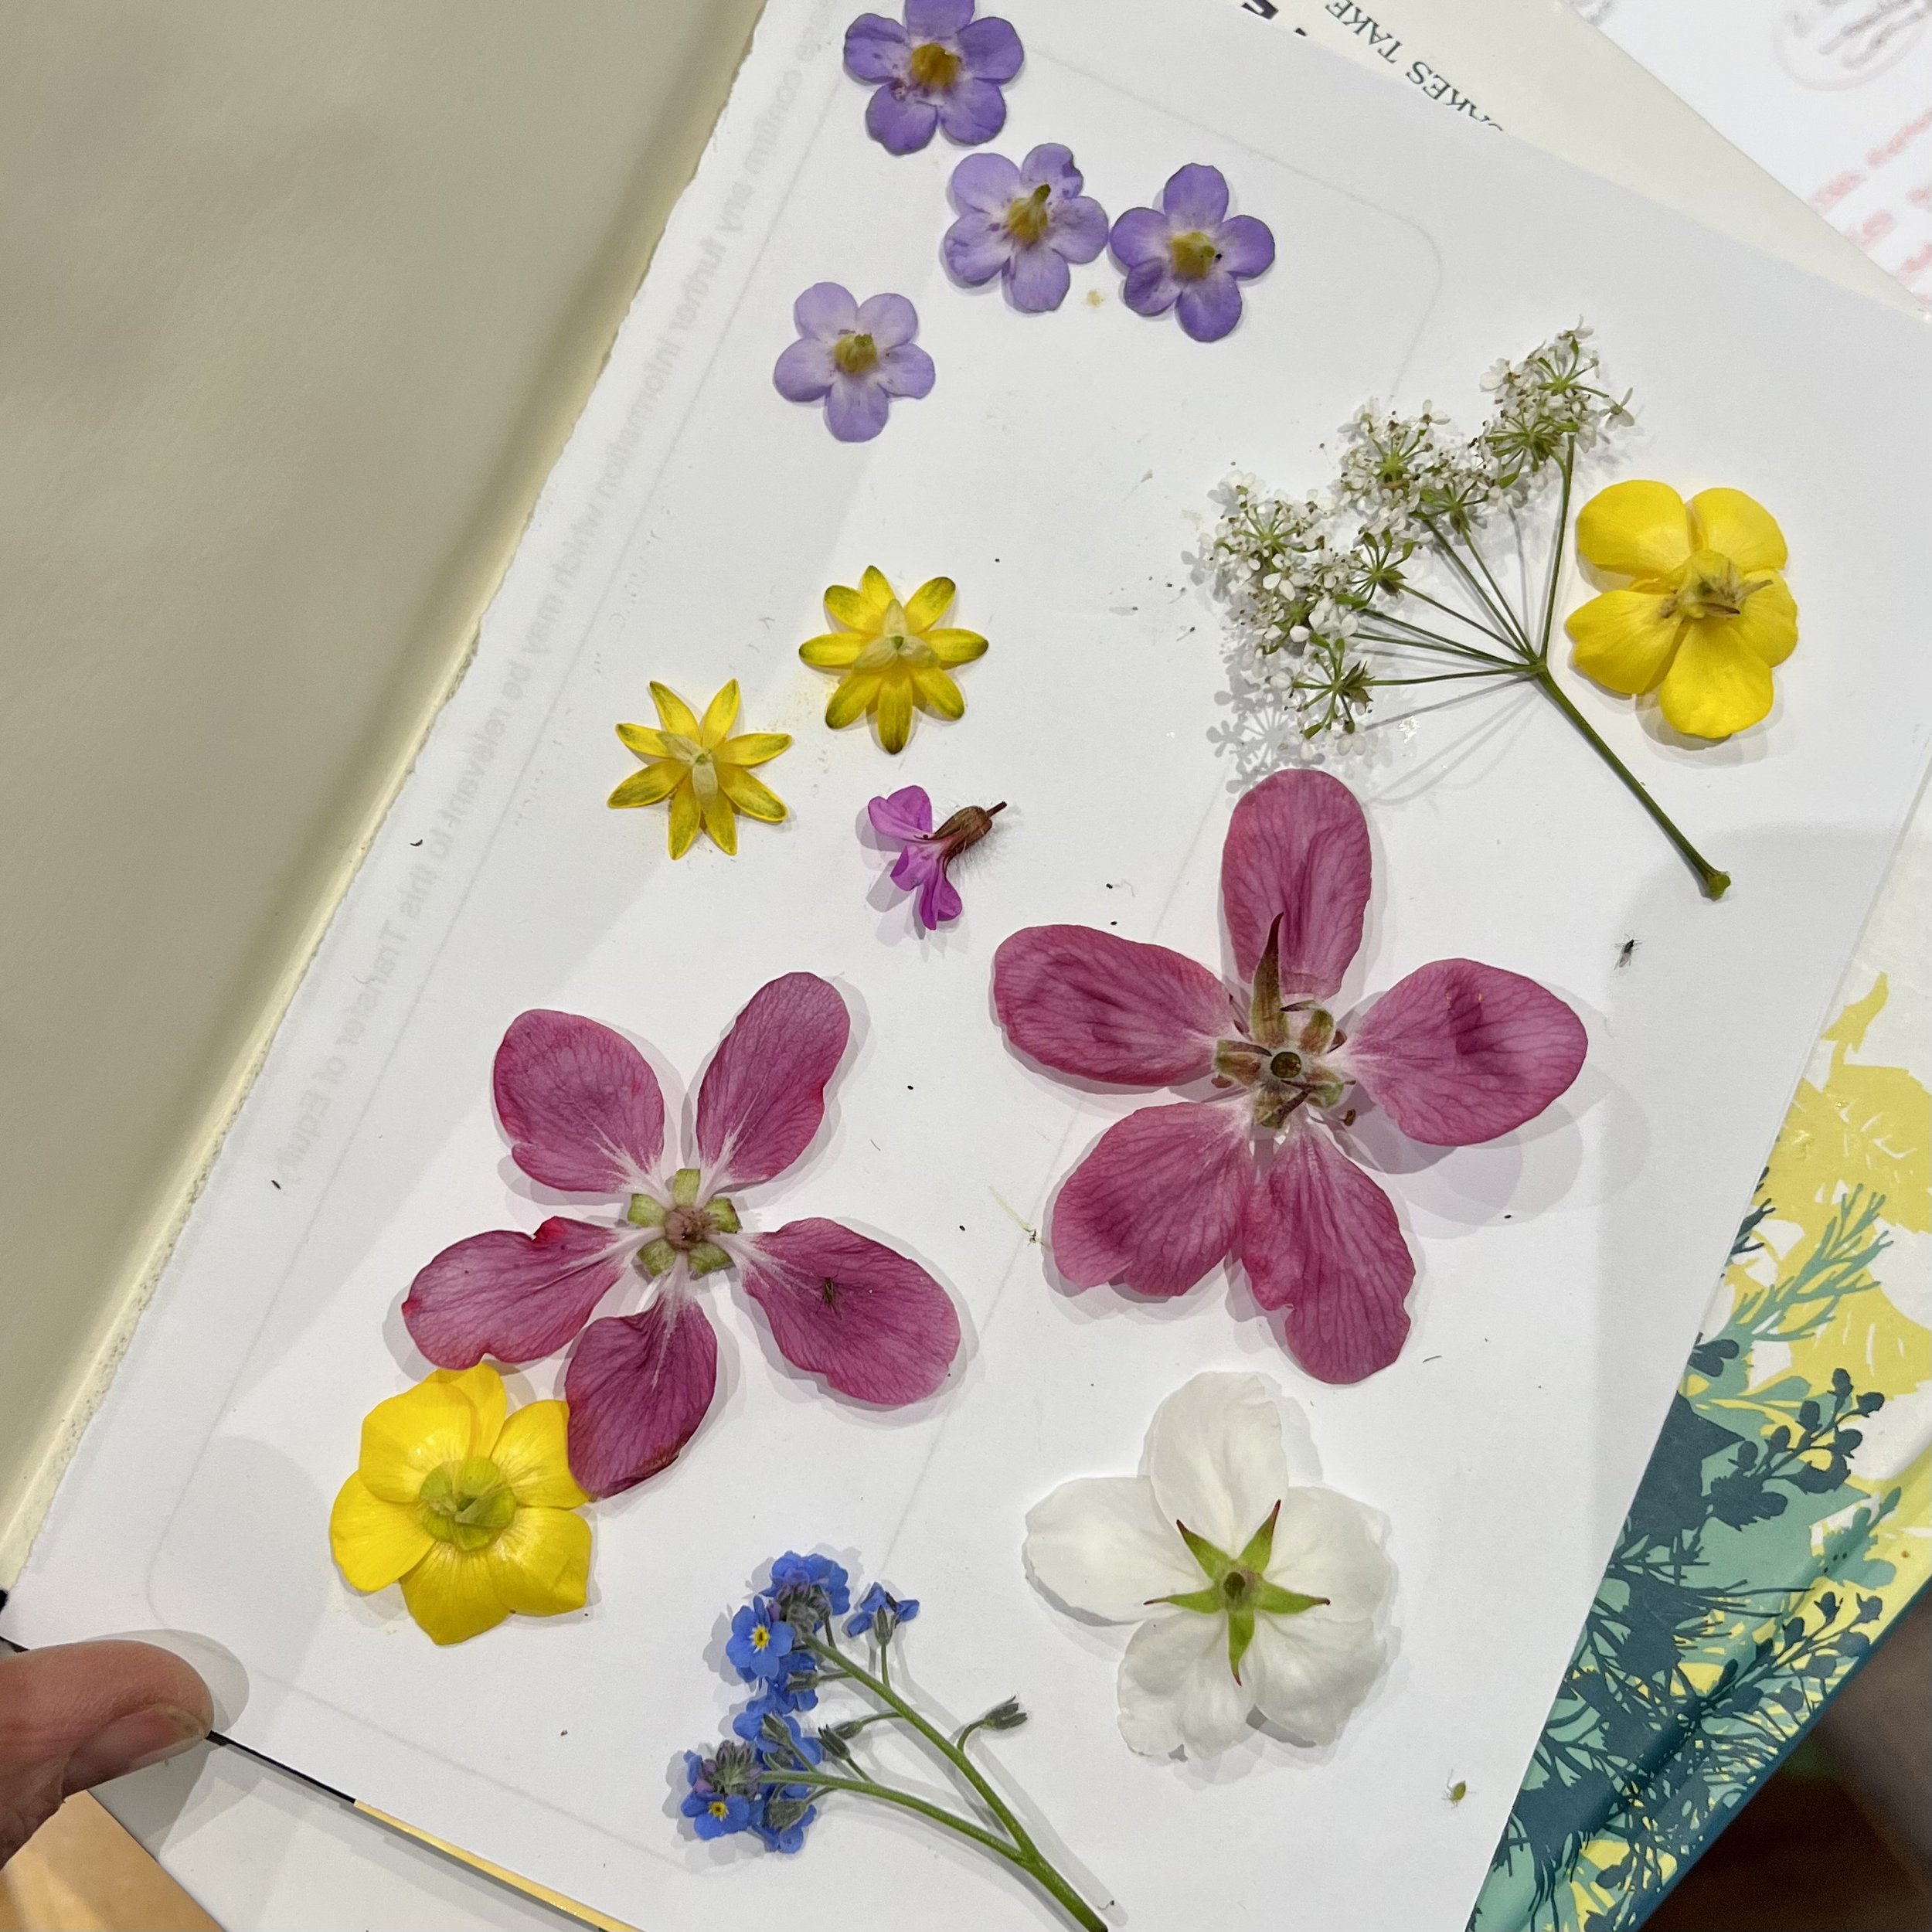
First collect your flowers, petals, grasses or whatever you fancy pressing. This is a nice thing to do with small children, they can each be given a basket and left to collect their own items for pressing. It’s best if you can go on a dry day and after the morning dew has evaporated so the items you pick aren’t wet. Flowers with naturally flat faces are the easiest to press but you can also press individual petals of larger blooms such as roses.
Once you've collected your flowers they will need to be pressed. Place a piece of plain paper on top of a sheet of kitchen roll or paper towel and then lay the flowers carefully on top of the paper. However you place your flowers and leaves will be exactly how they dry, so make sure petals are flat and smoothed out. Cover with another piece of plain paper and then a sheet of kitchen roll and place inside a heavy book. Weigh down the book by placing some heavy books on top of it. They will need up to two weeks to dry.
Alternatively, you can dry the flowers in a microwave which will only take a few minutes but you need to be careful not to overheat them as they will turn brown. With this method, you will just need to place the flower-paper sandwich in the microwave with a heavy microwave-safe dish on top and then heat on half power for 30 seconds at a time, allowing everything to cool between each heat cycle. This should only take a few minutes but check the flowers after each blast as the smaller flowers will dry out quicker.
Once the flowers have dried you can then make the actual sun catchers.
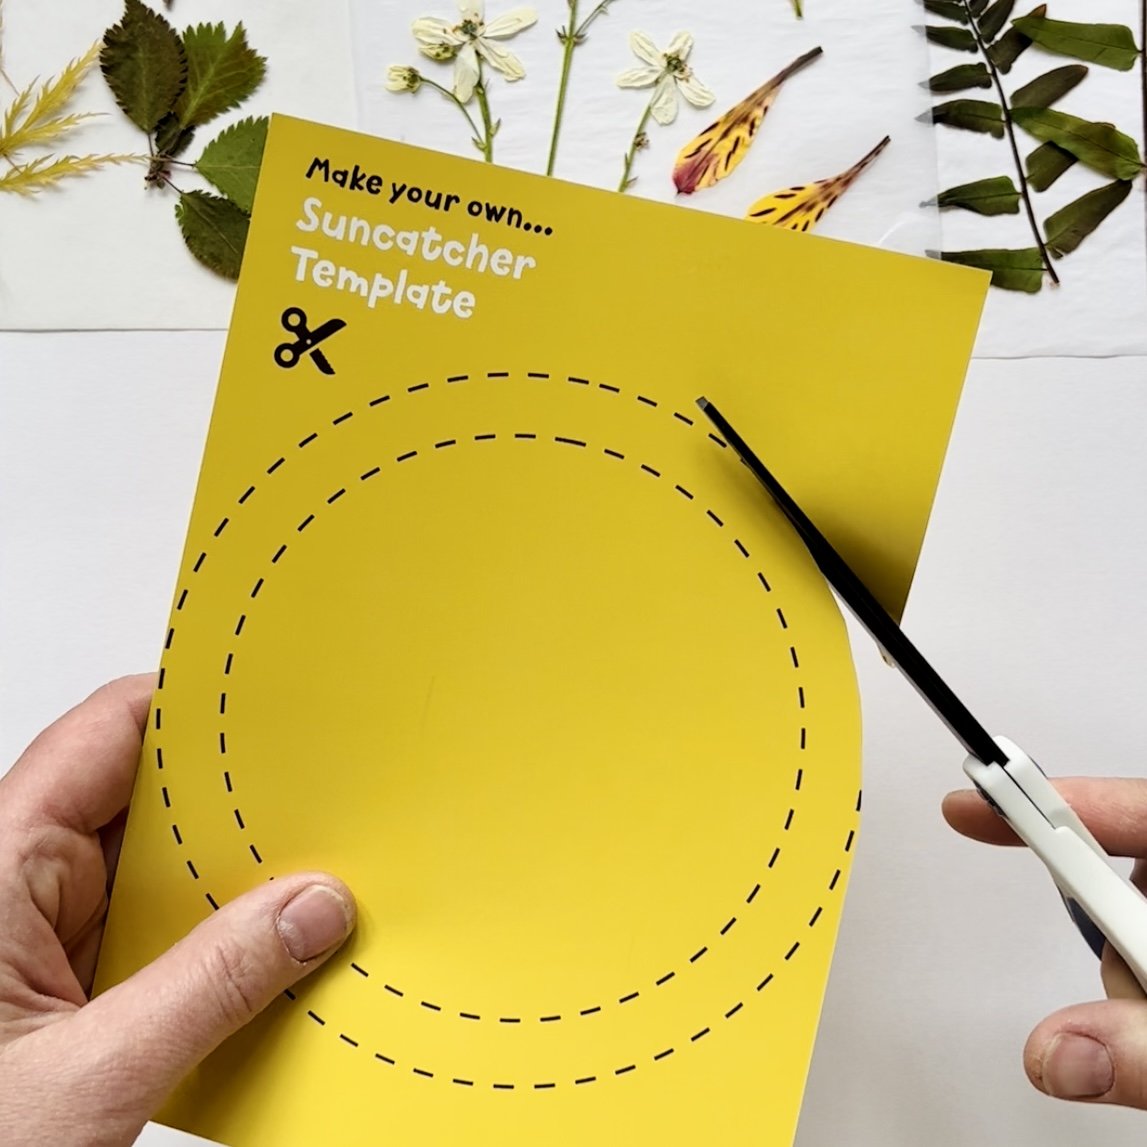
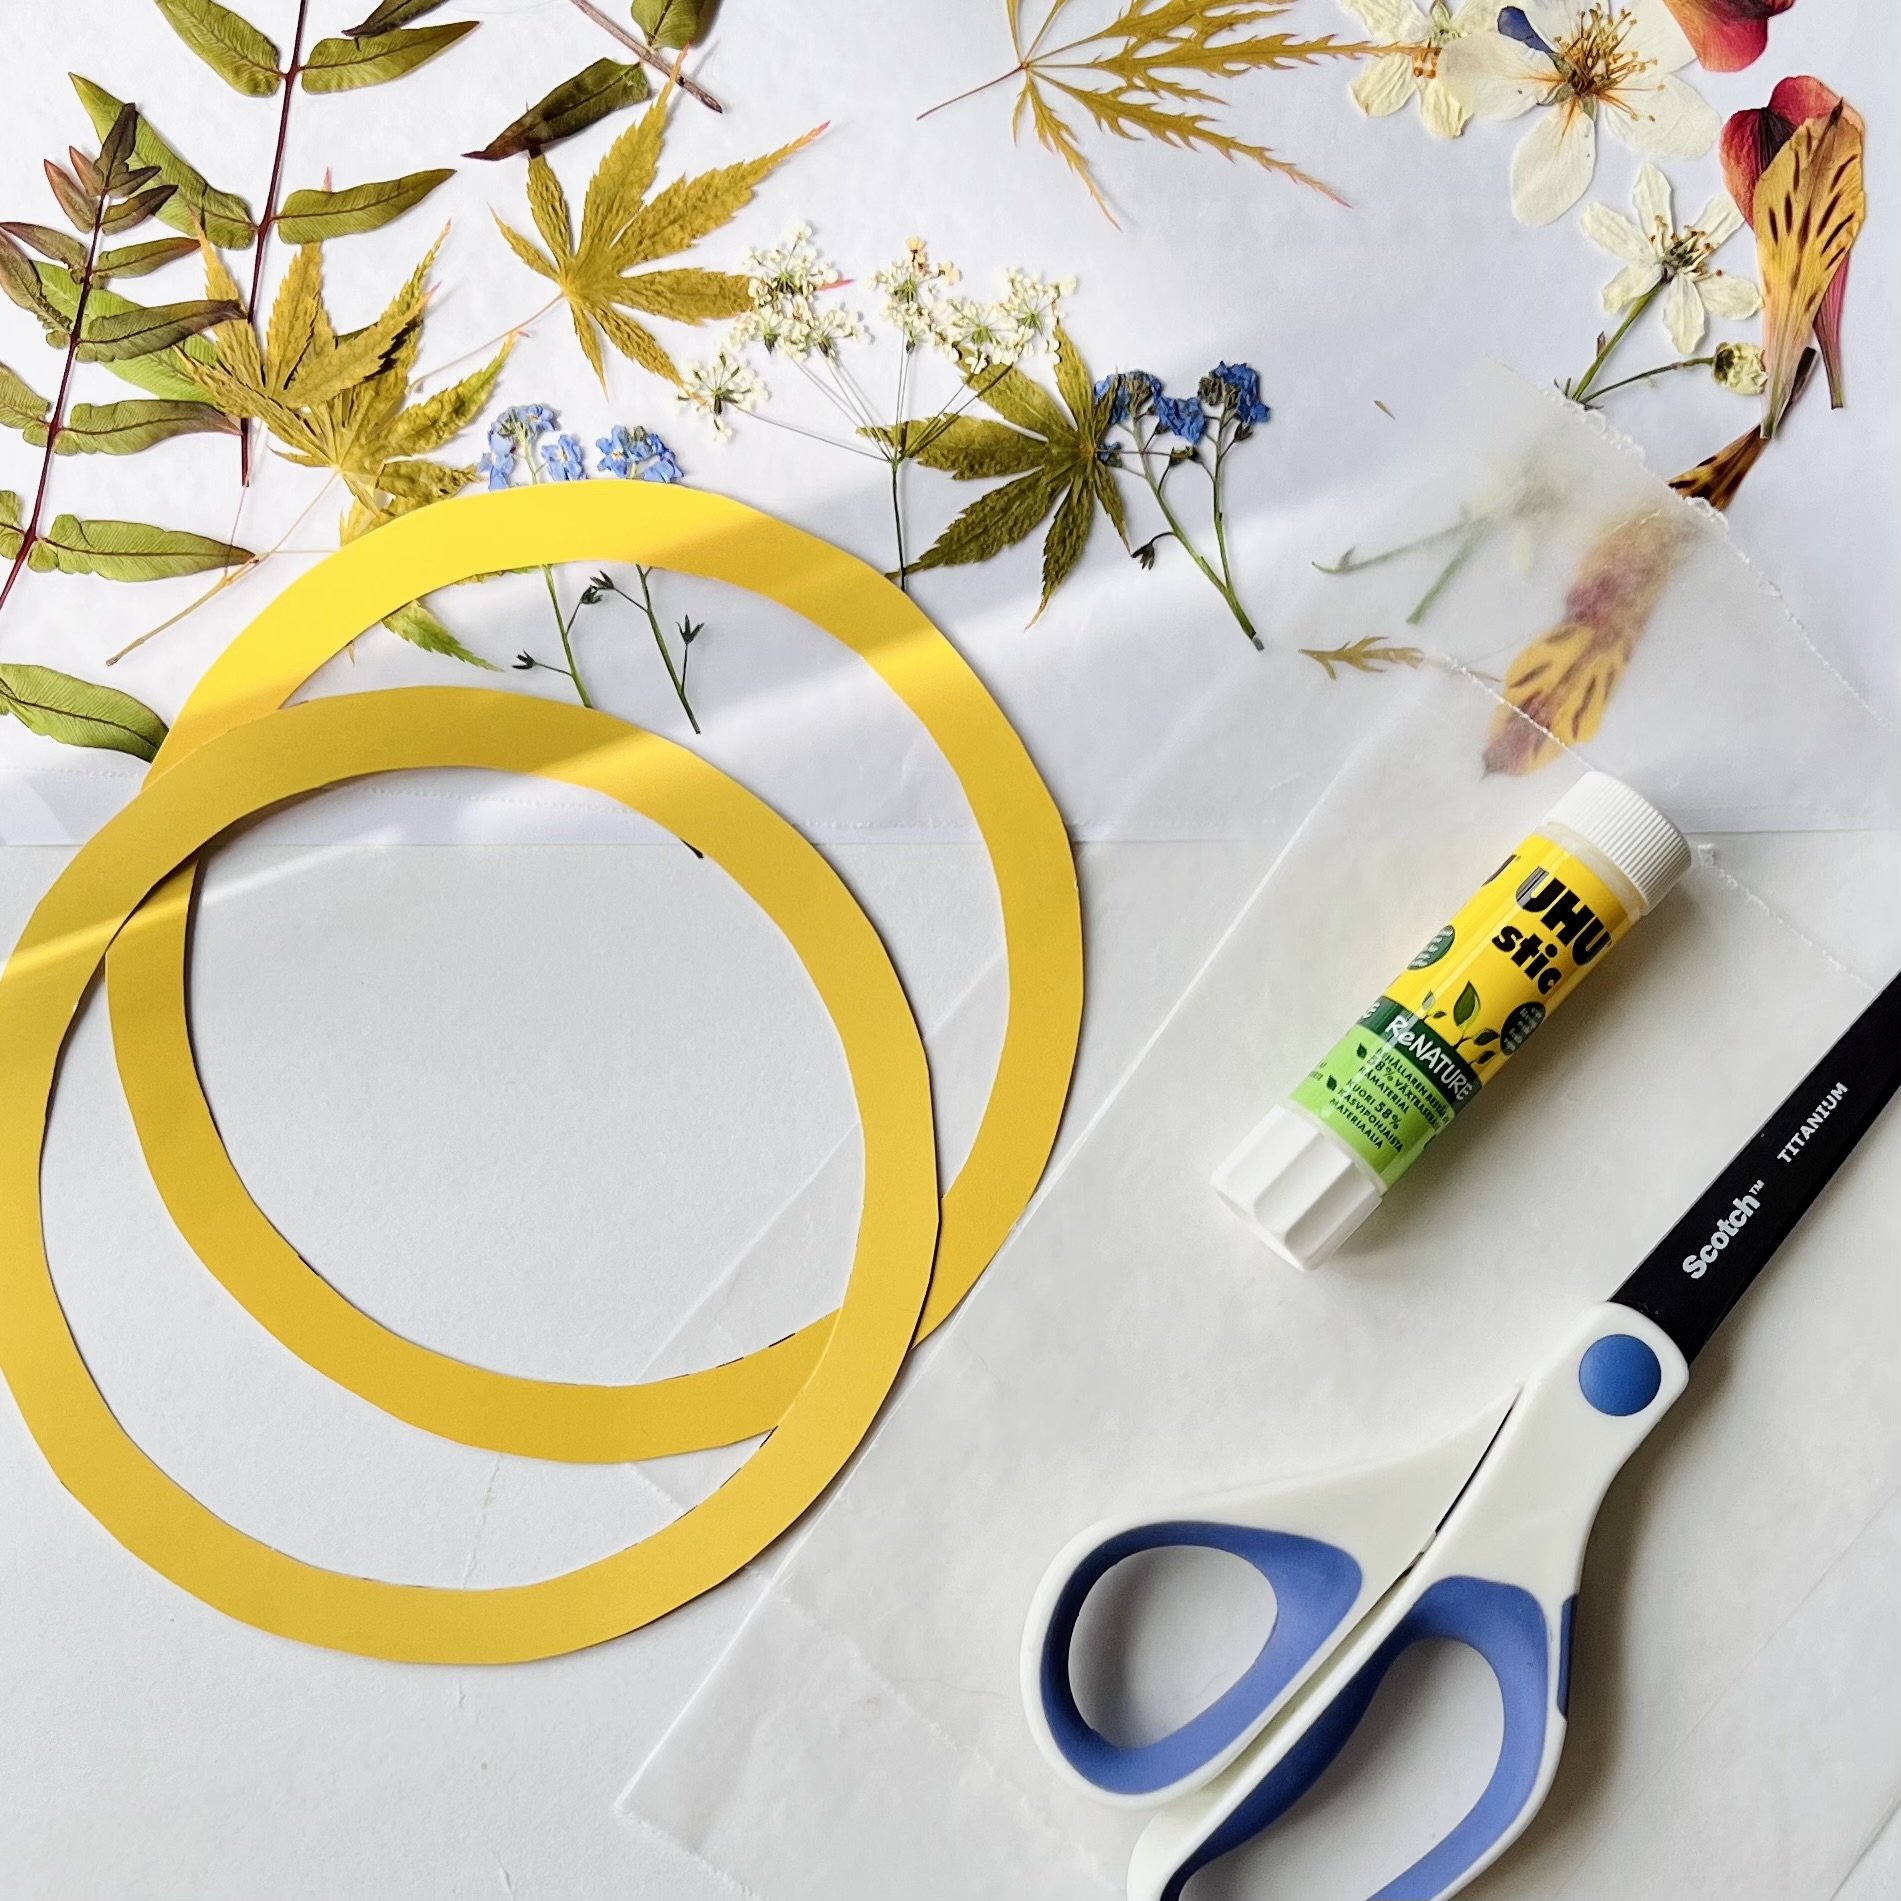
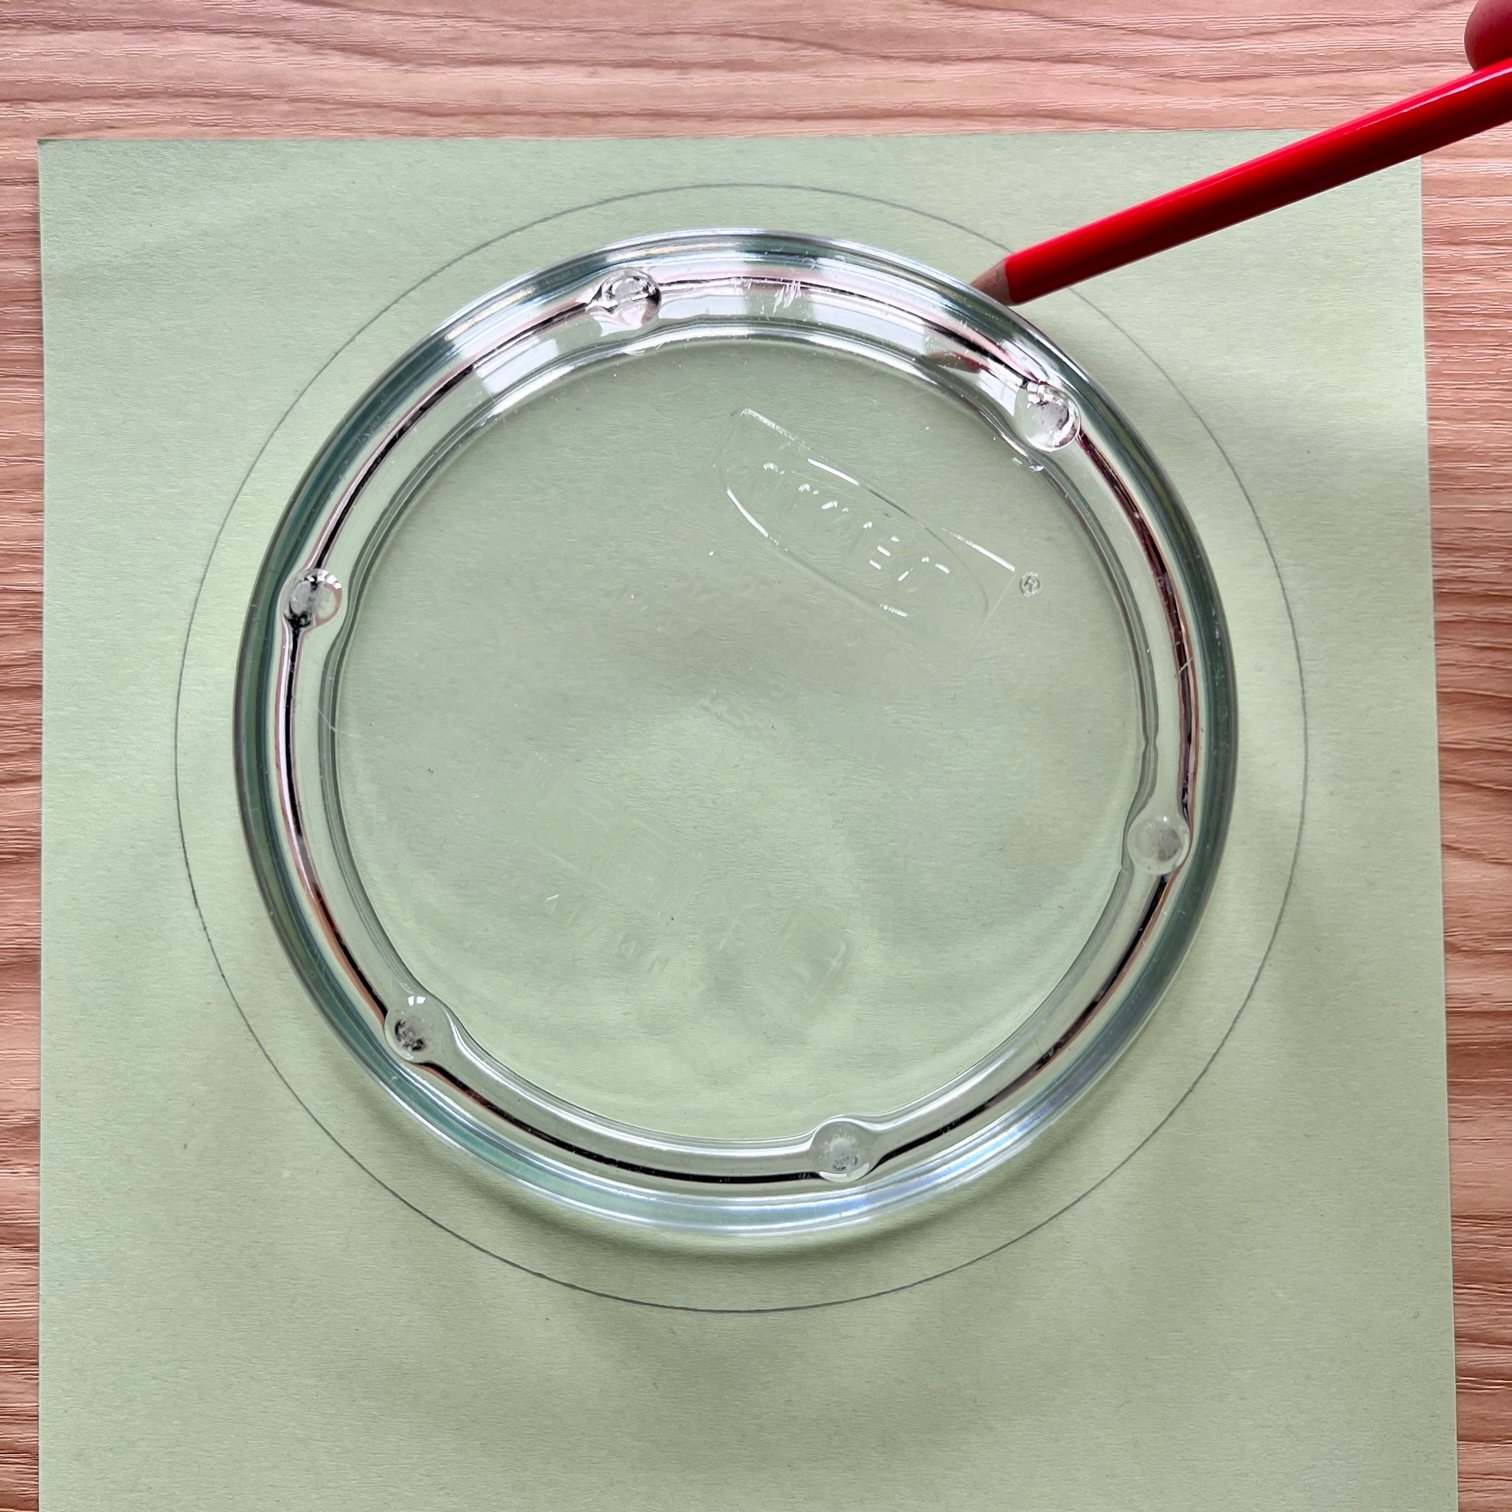
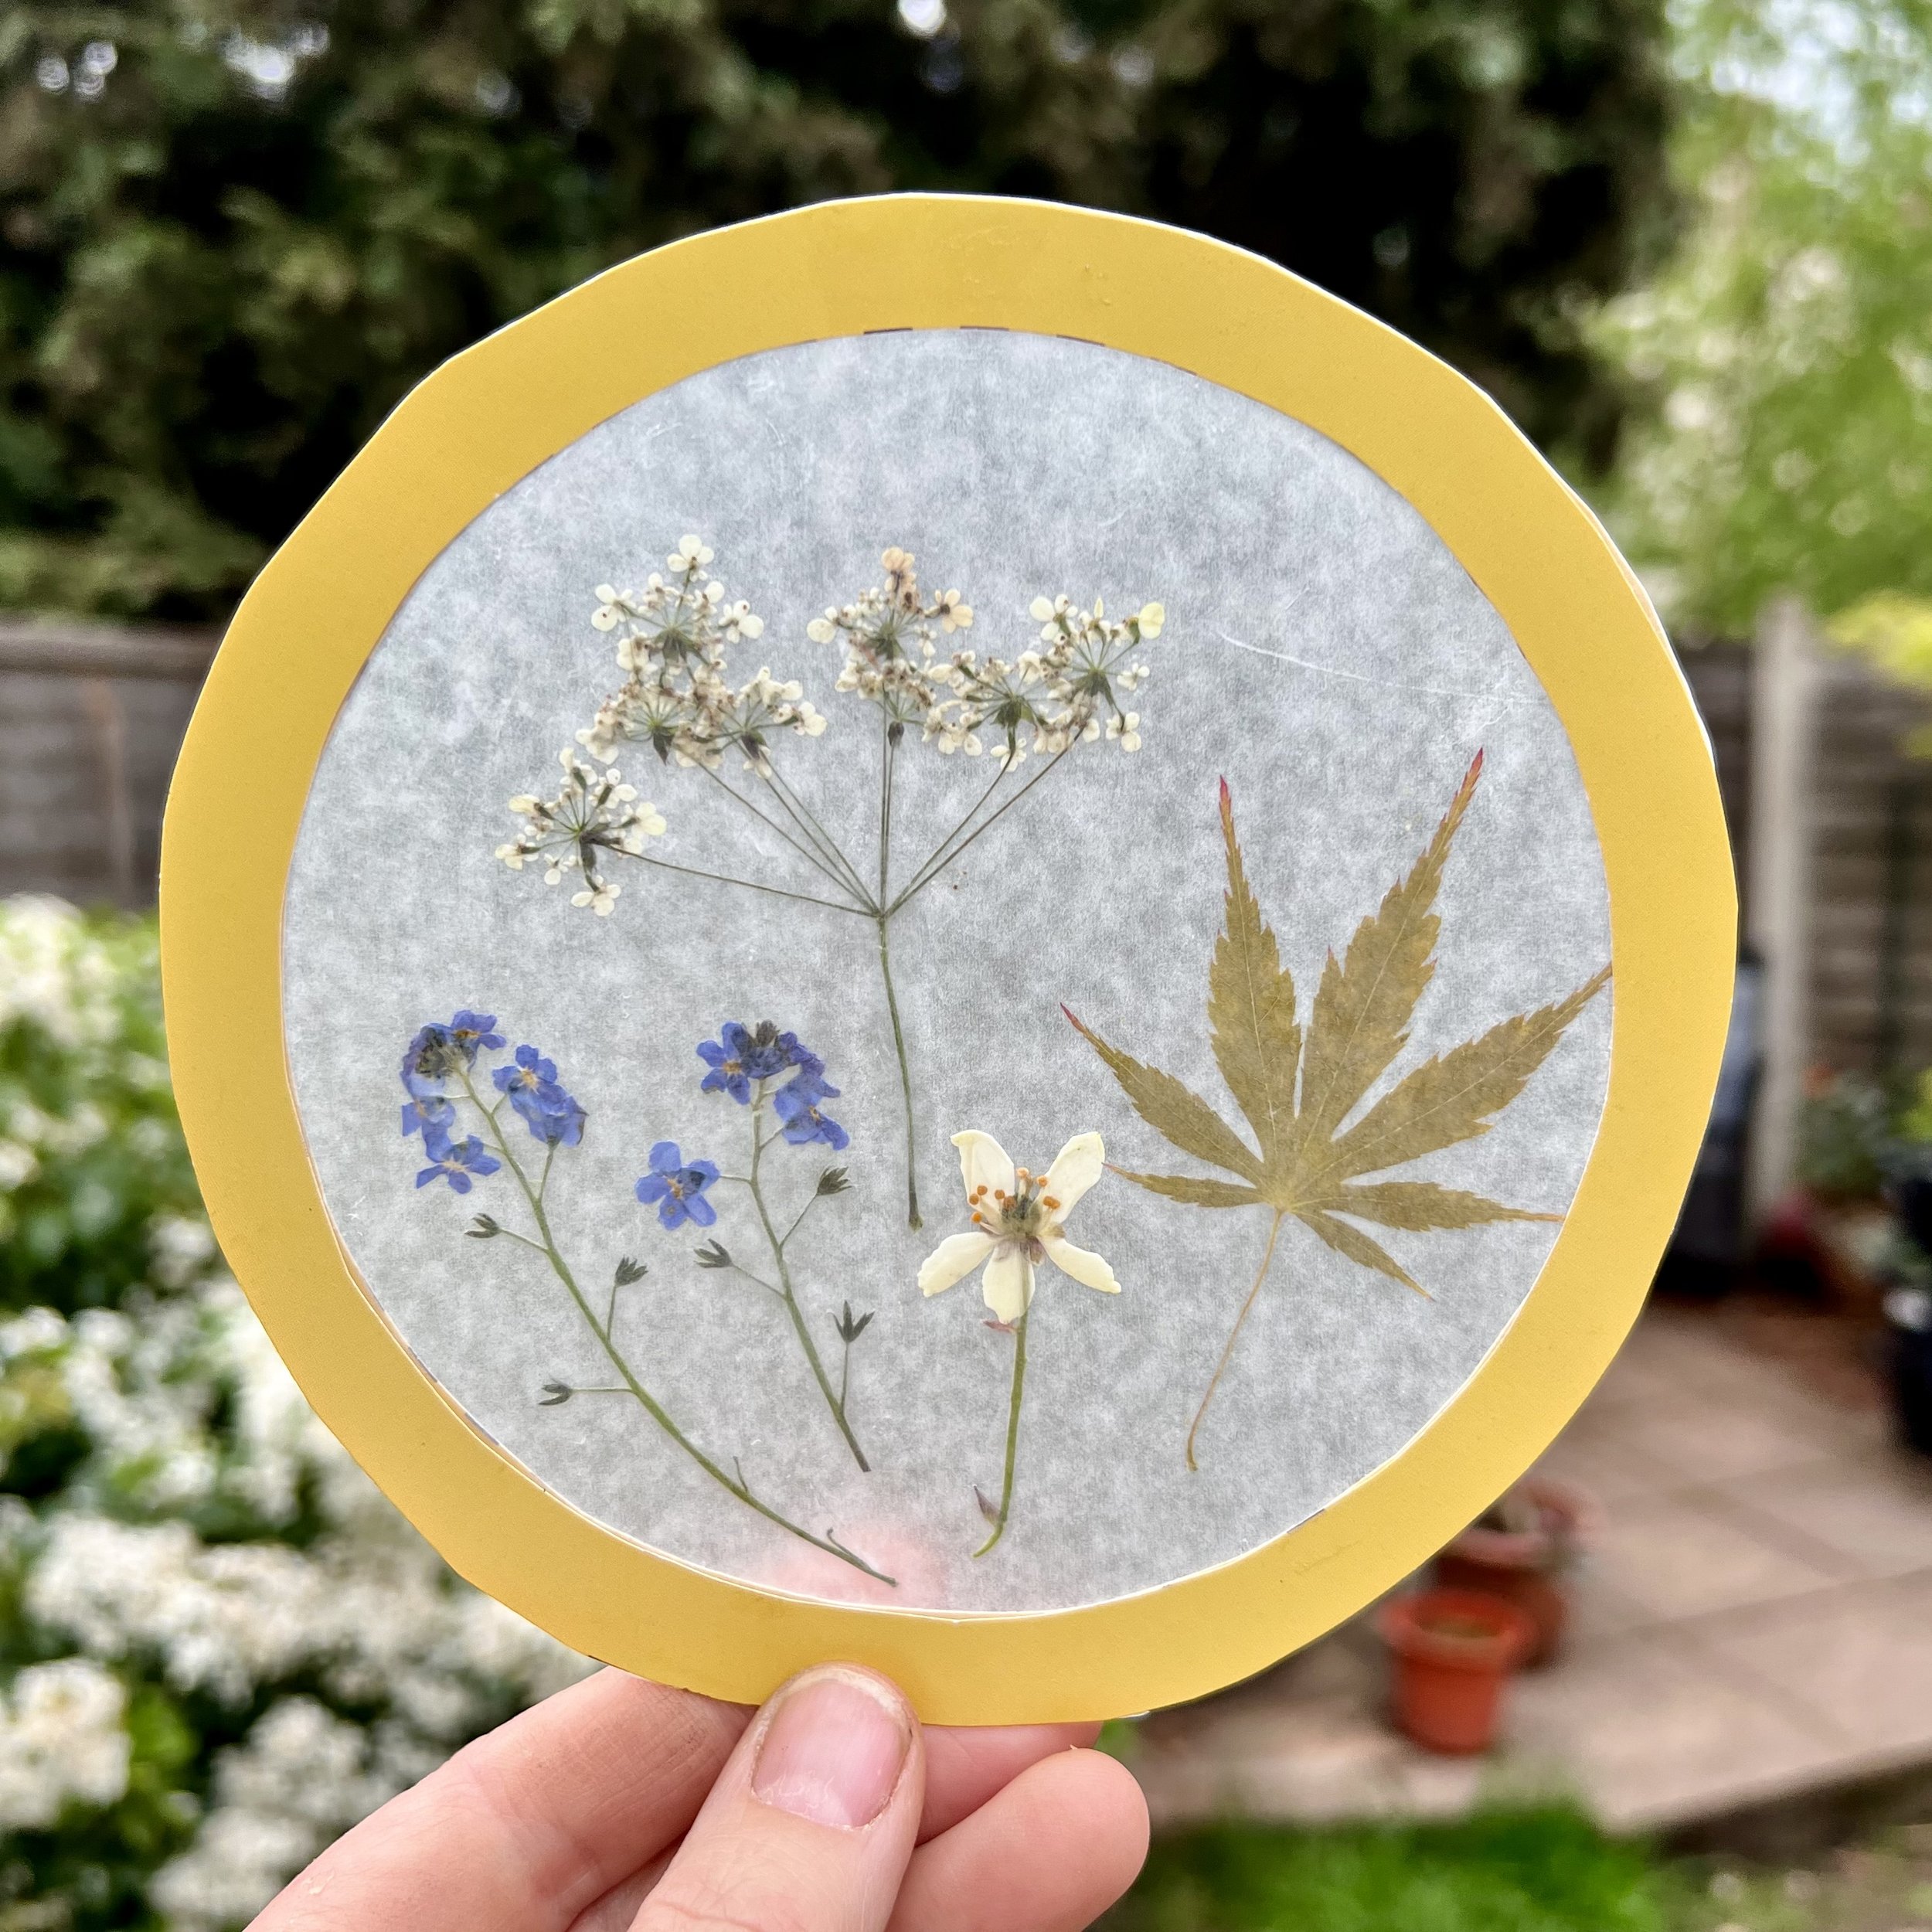
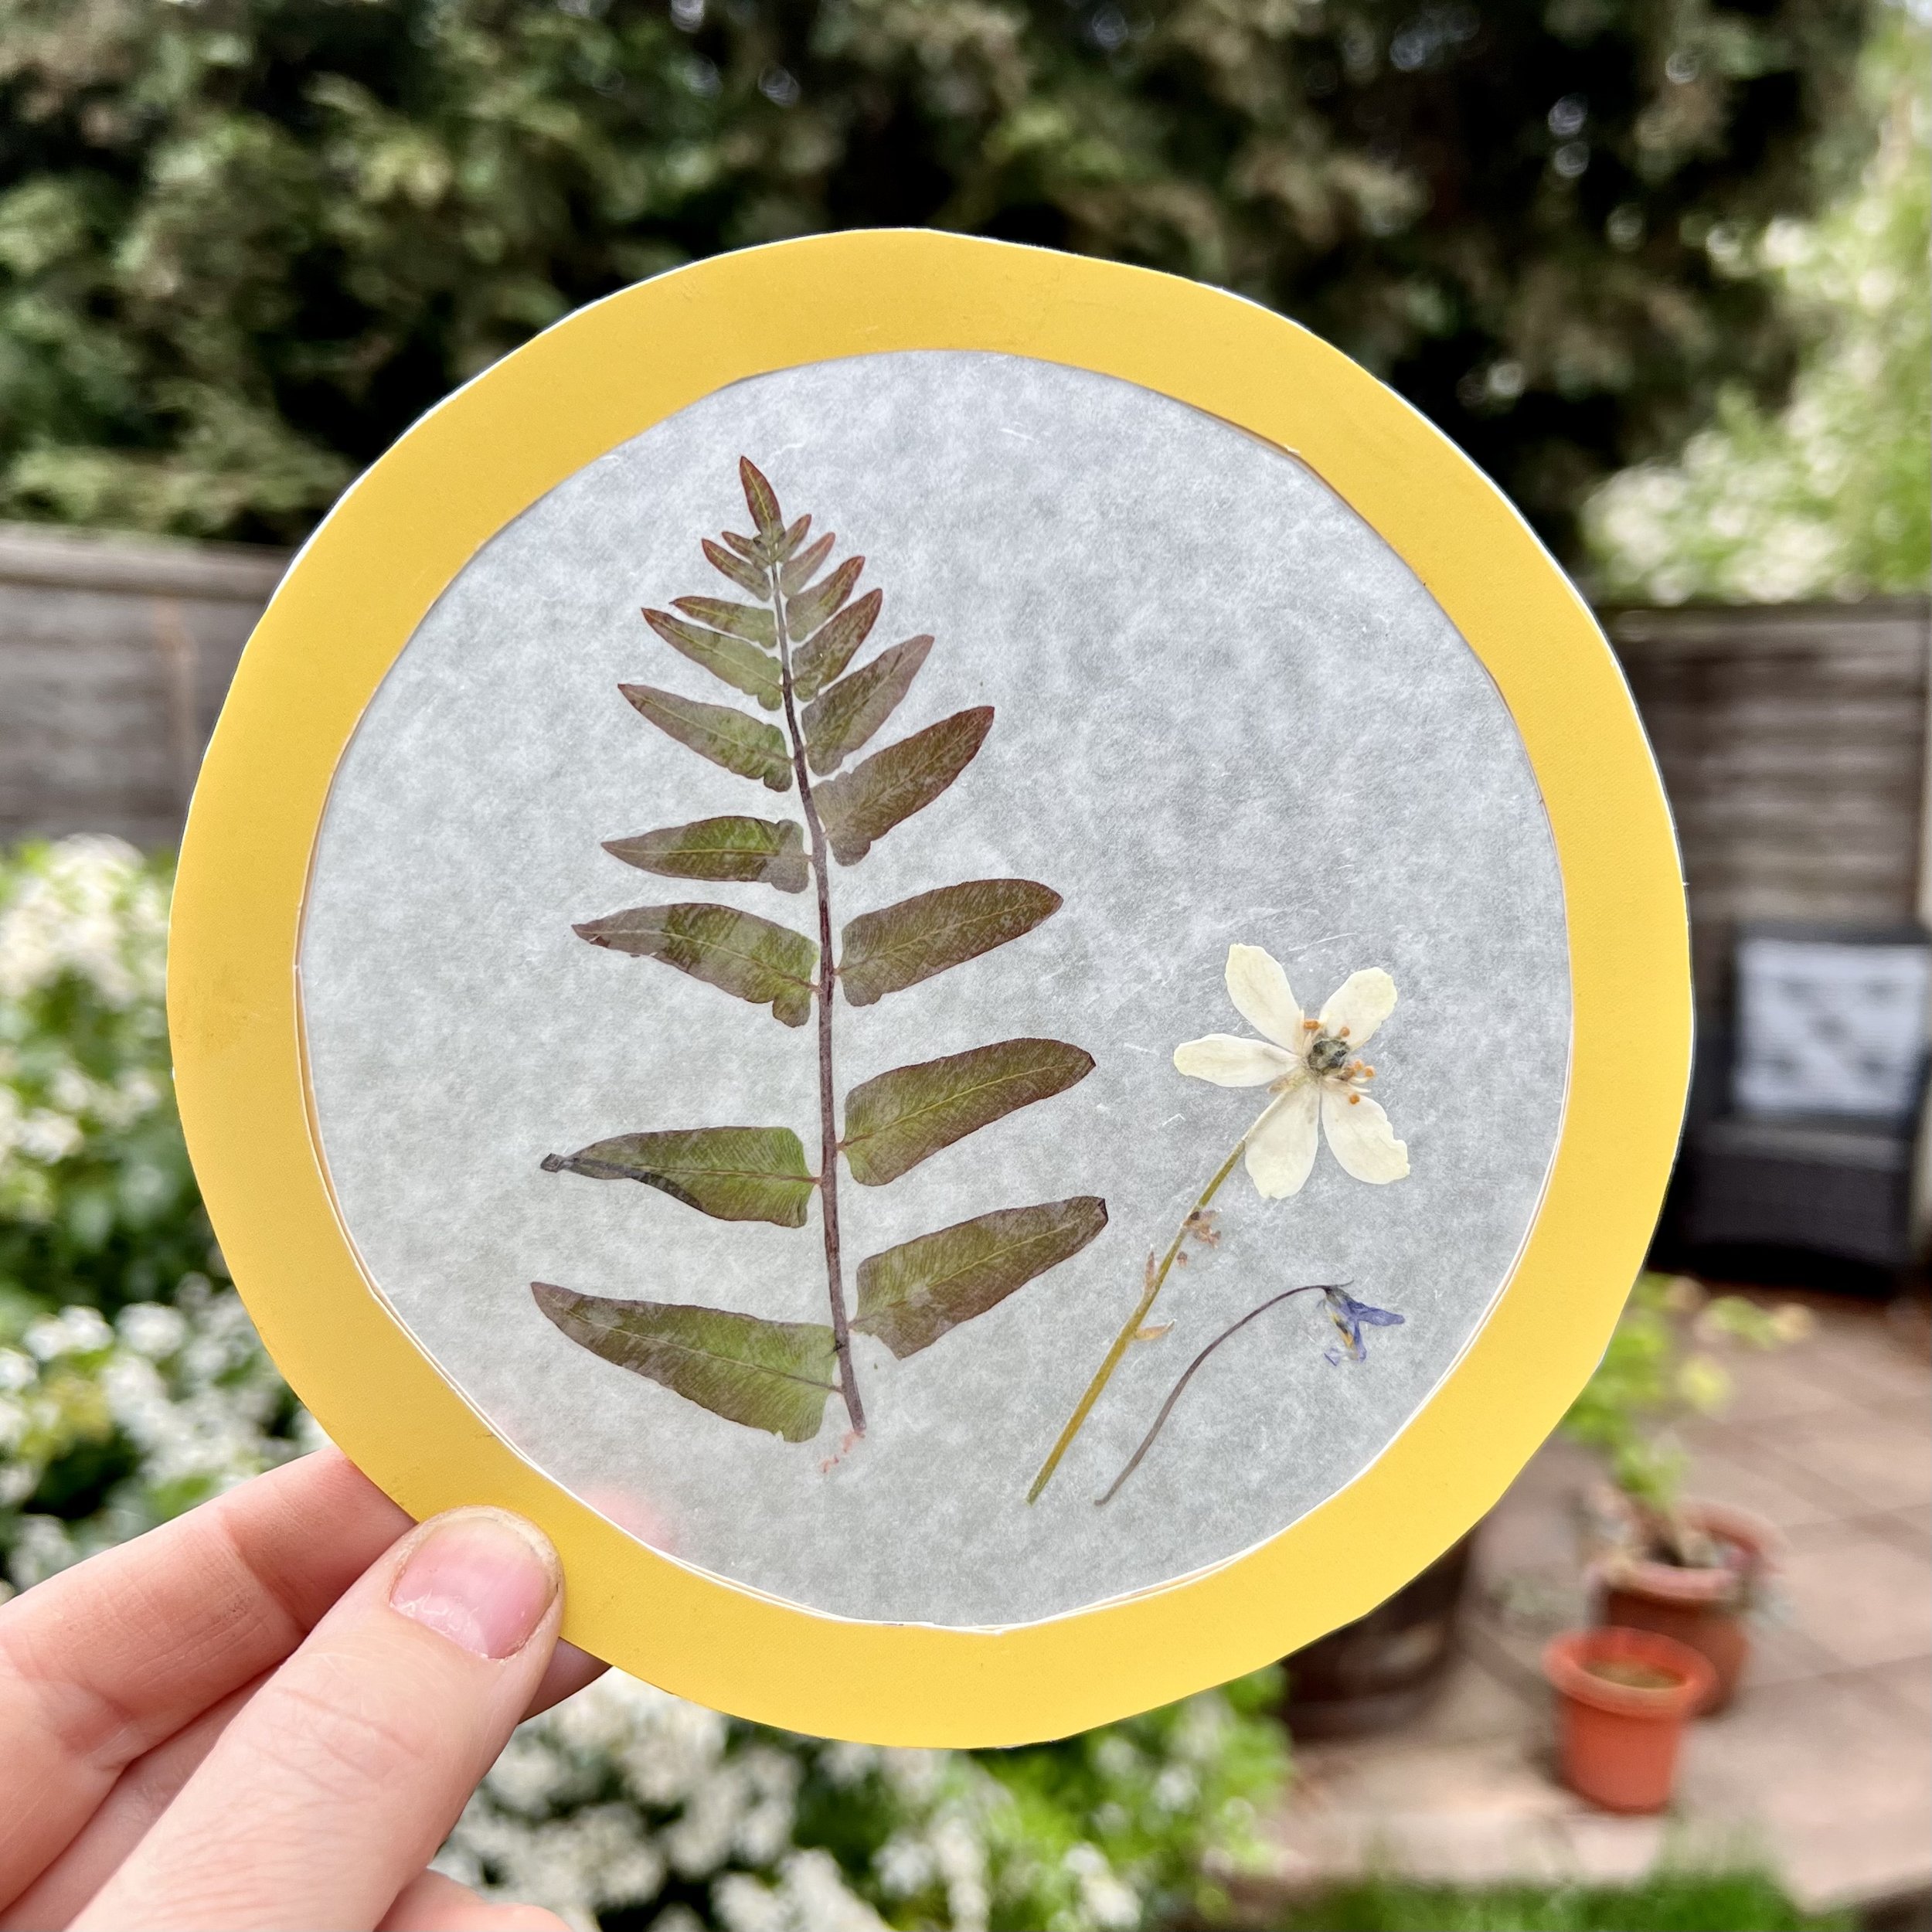
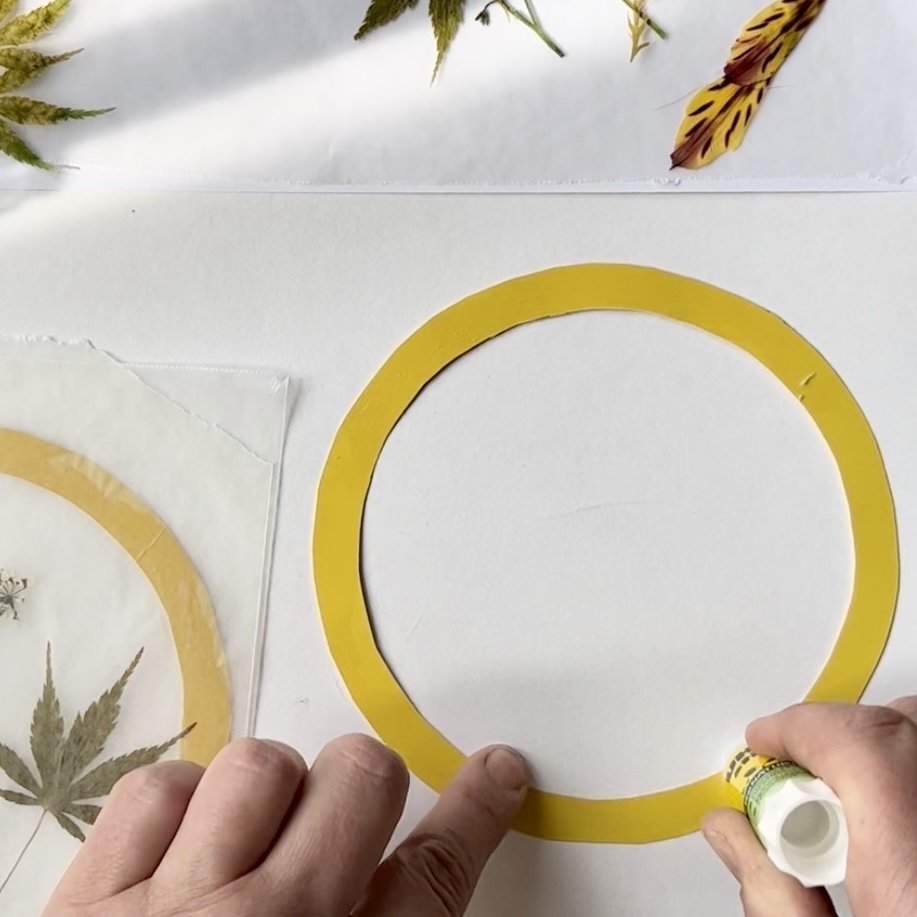
First you’ll need to make your suncatcher frame. I used some templates from a Mud & Bloom box but I also made one by drawing two circles, about a 1cm difference in size, on a sheet of card. I found it easiest to draw around a plate and a smaller bowl.
Then cut around the circles. To cut the inner circle, pinch or gently fold the card to make the first cut in the middle. You’ll need two circles for each suncatcher.
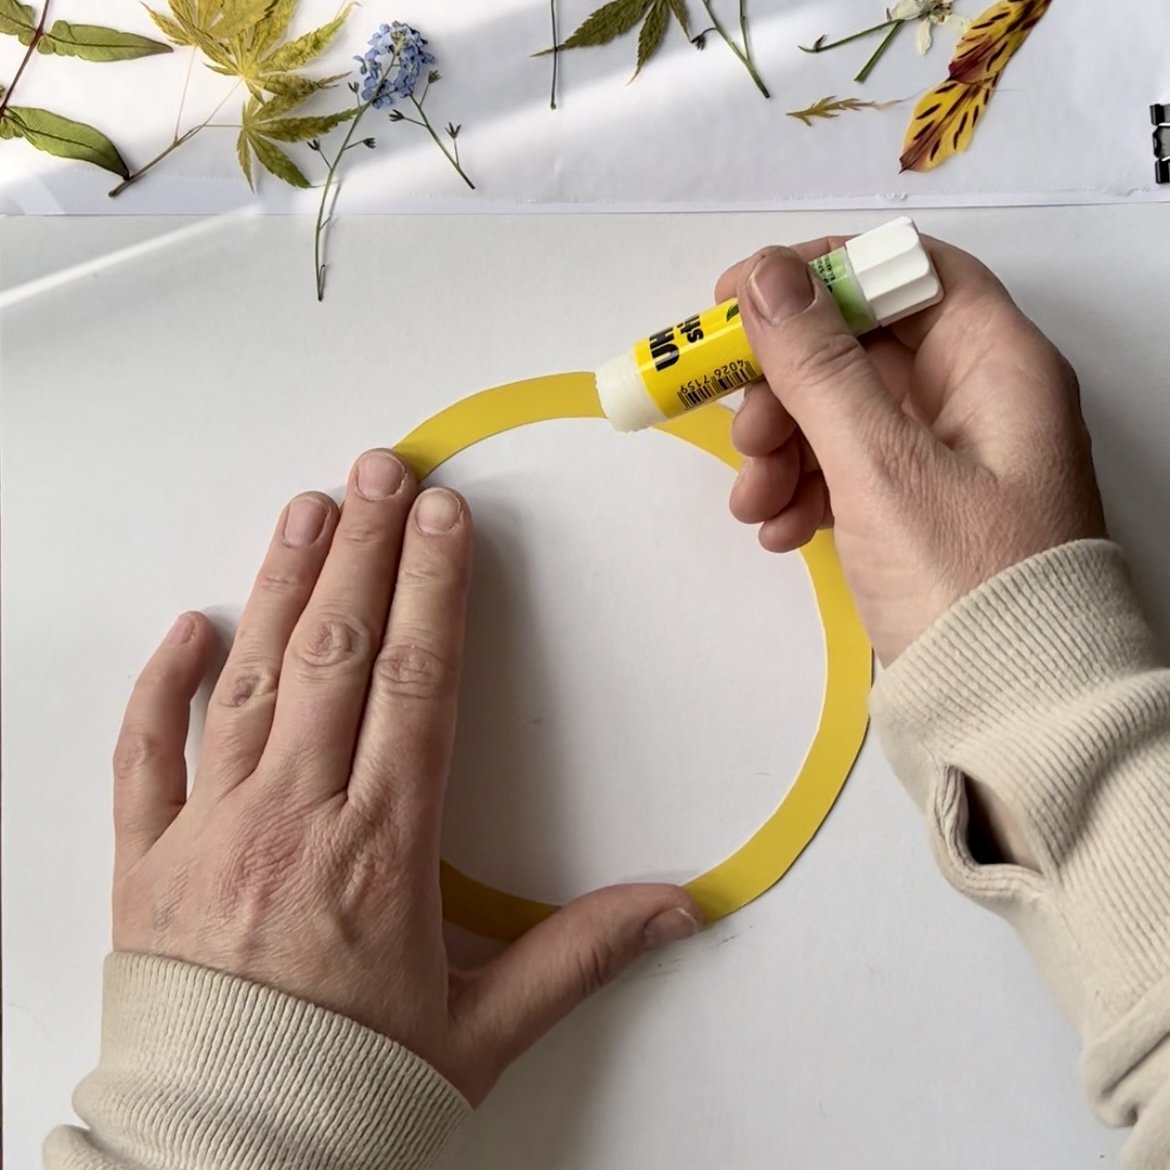
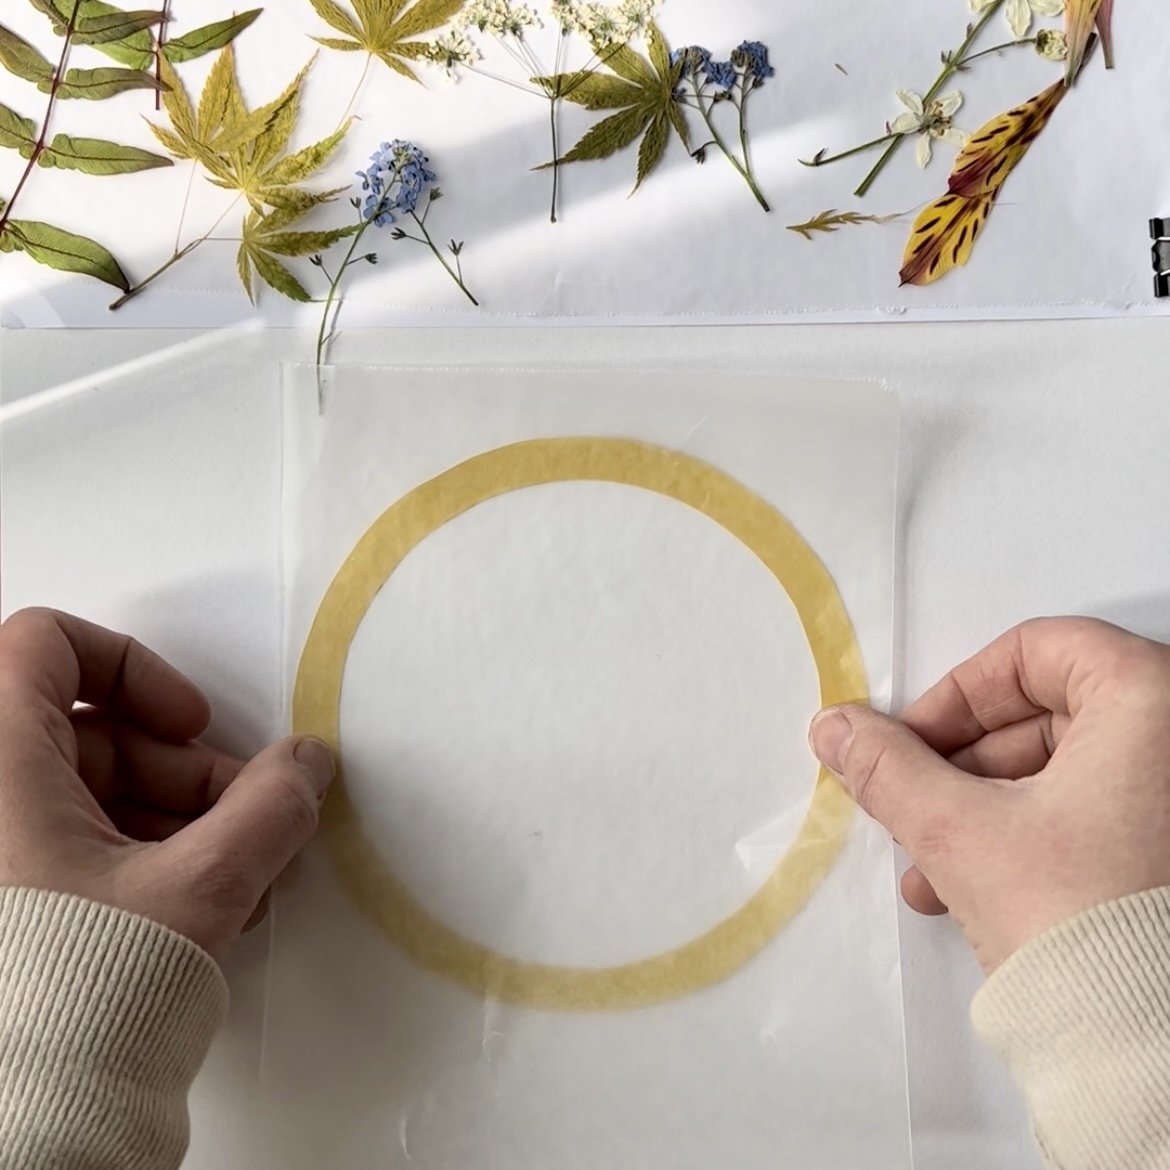
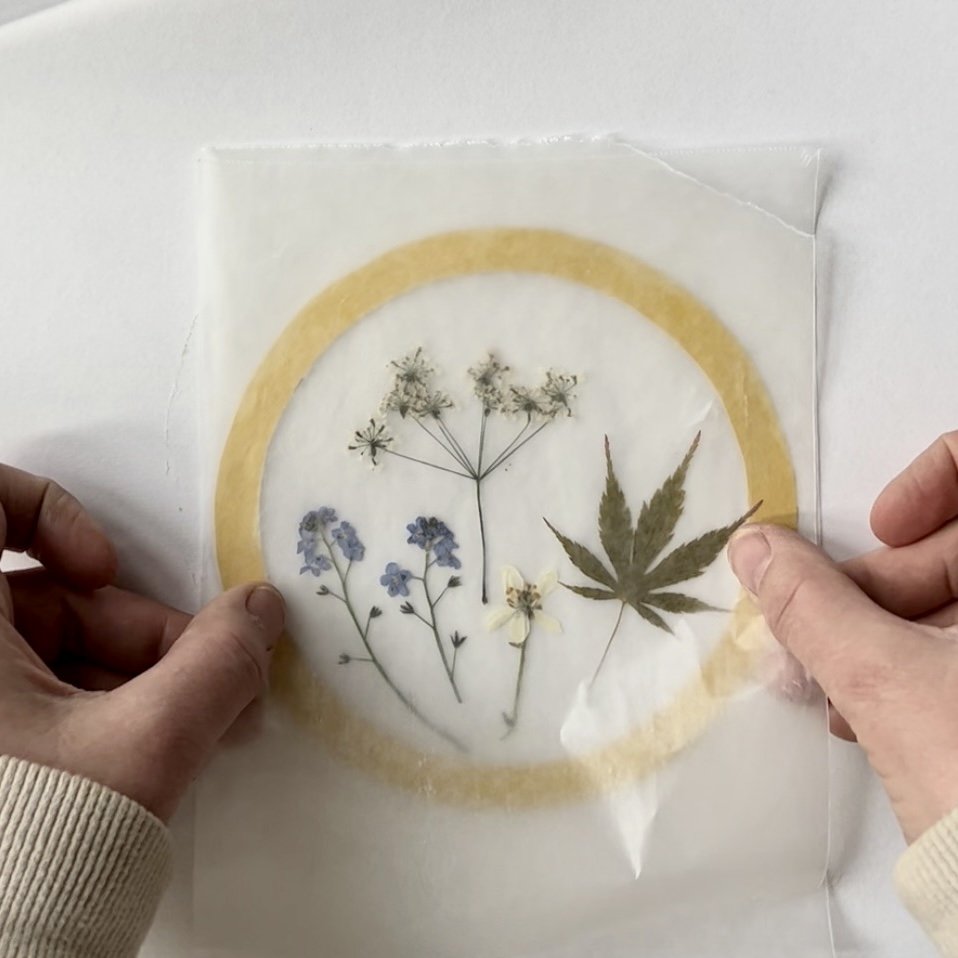
Glue around one of the circles and place a piece of wax paper (or tissue paper) on top of the circle. Then spread glue over the wax paper within the frame.
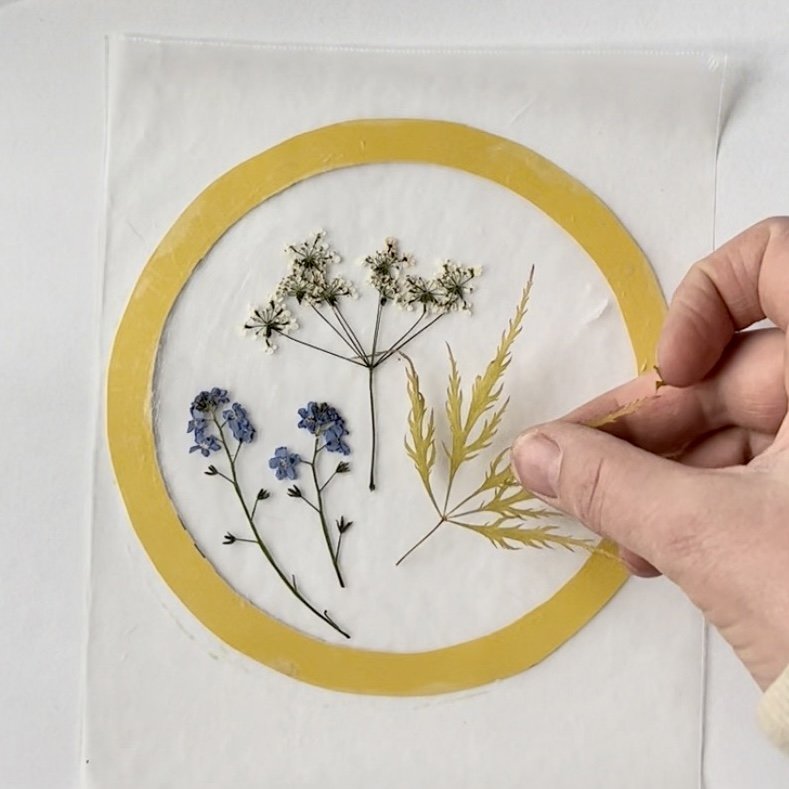
Arrange your flowers carefully onto the glued wax paper, making sure to keep them within the frame.
Once you’re happy with your design, spread glue over another piece of wax paper (or tissue paper) and carefully stick on top of your flowers pressing gently around each of the flowers and leaves to create a seal. Glue the second circle and place over the top and then trim away the excess wax paper.

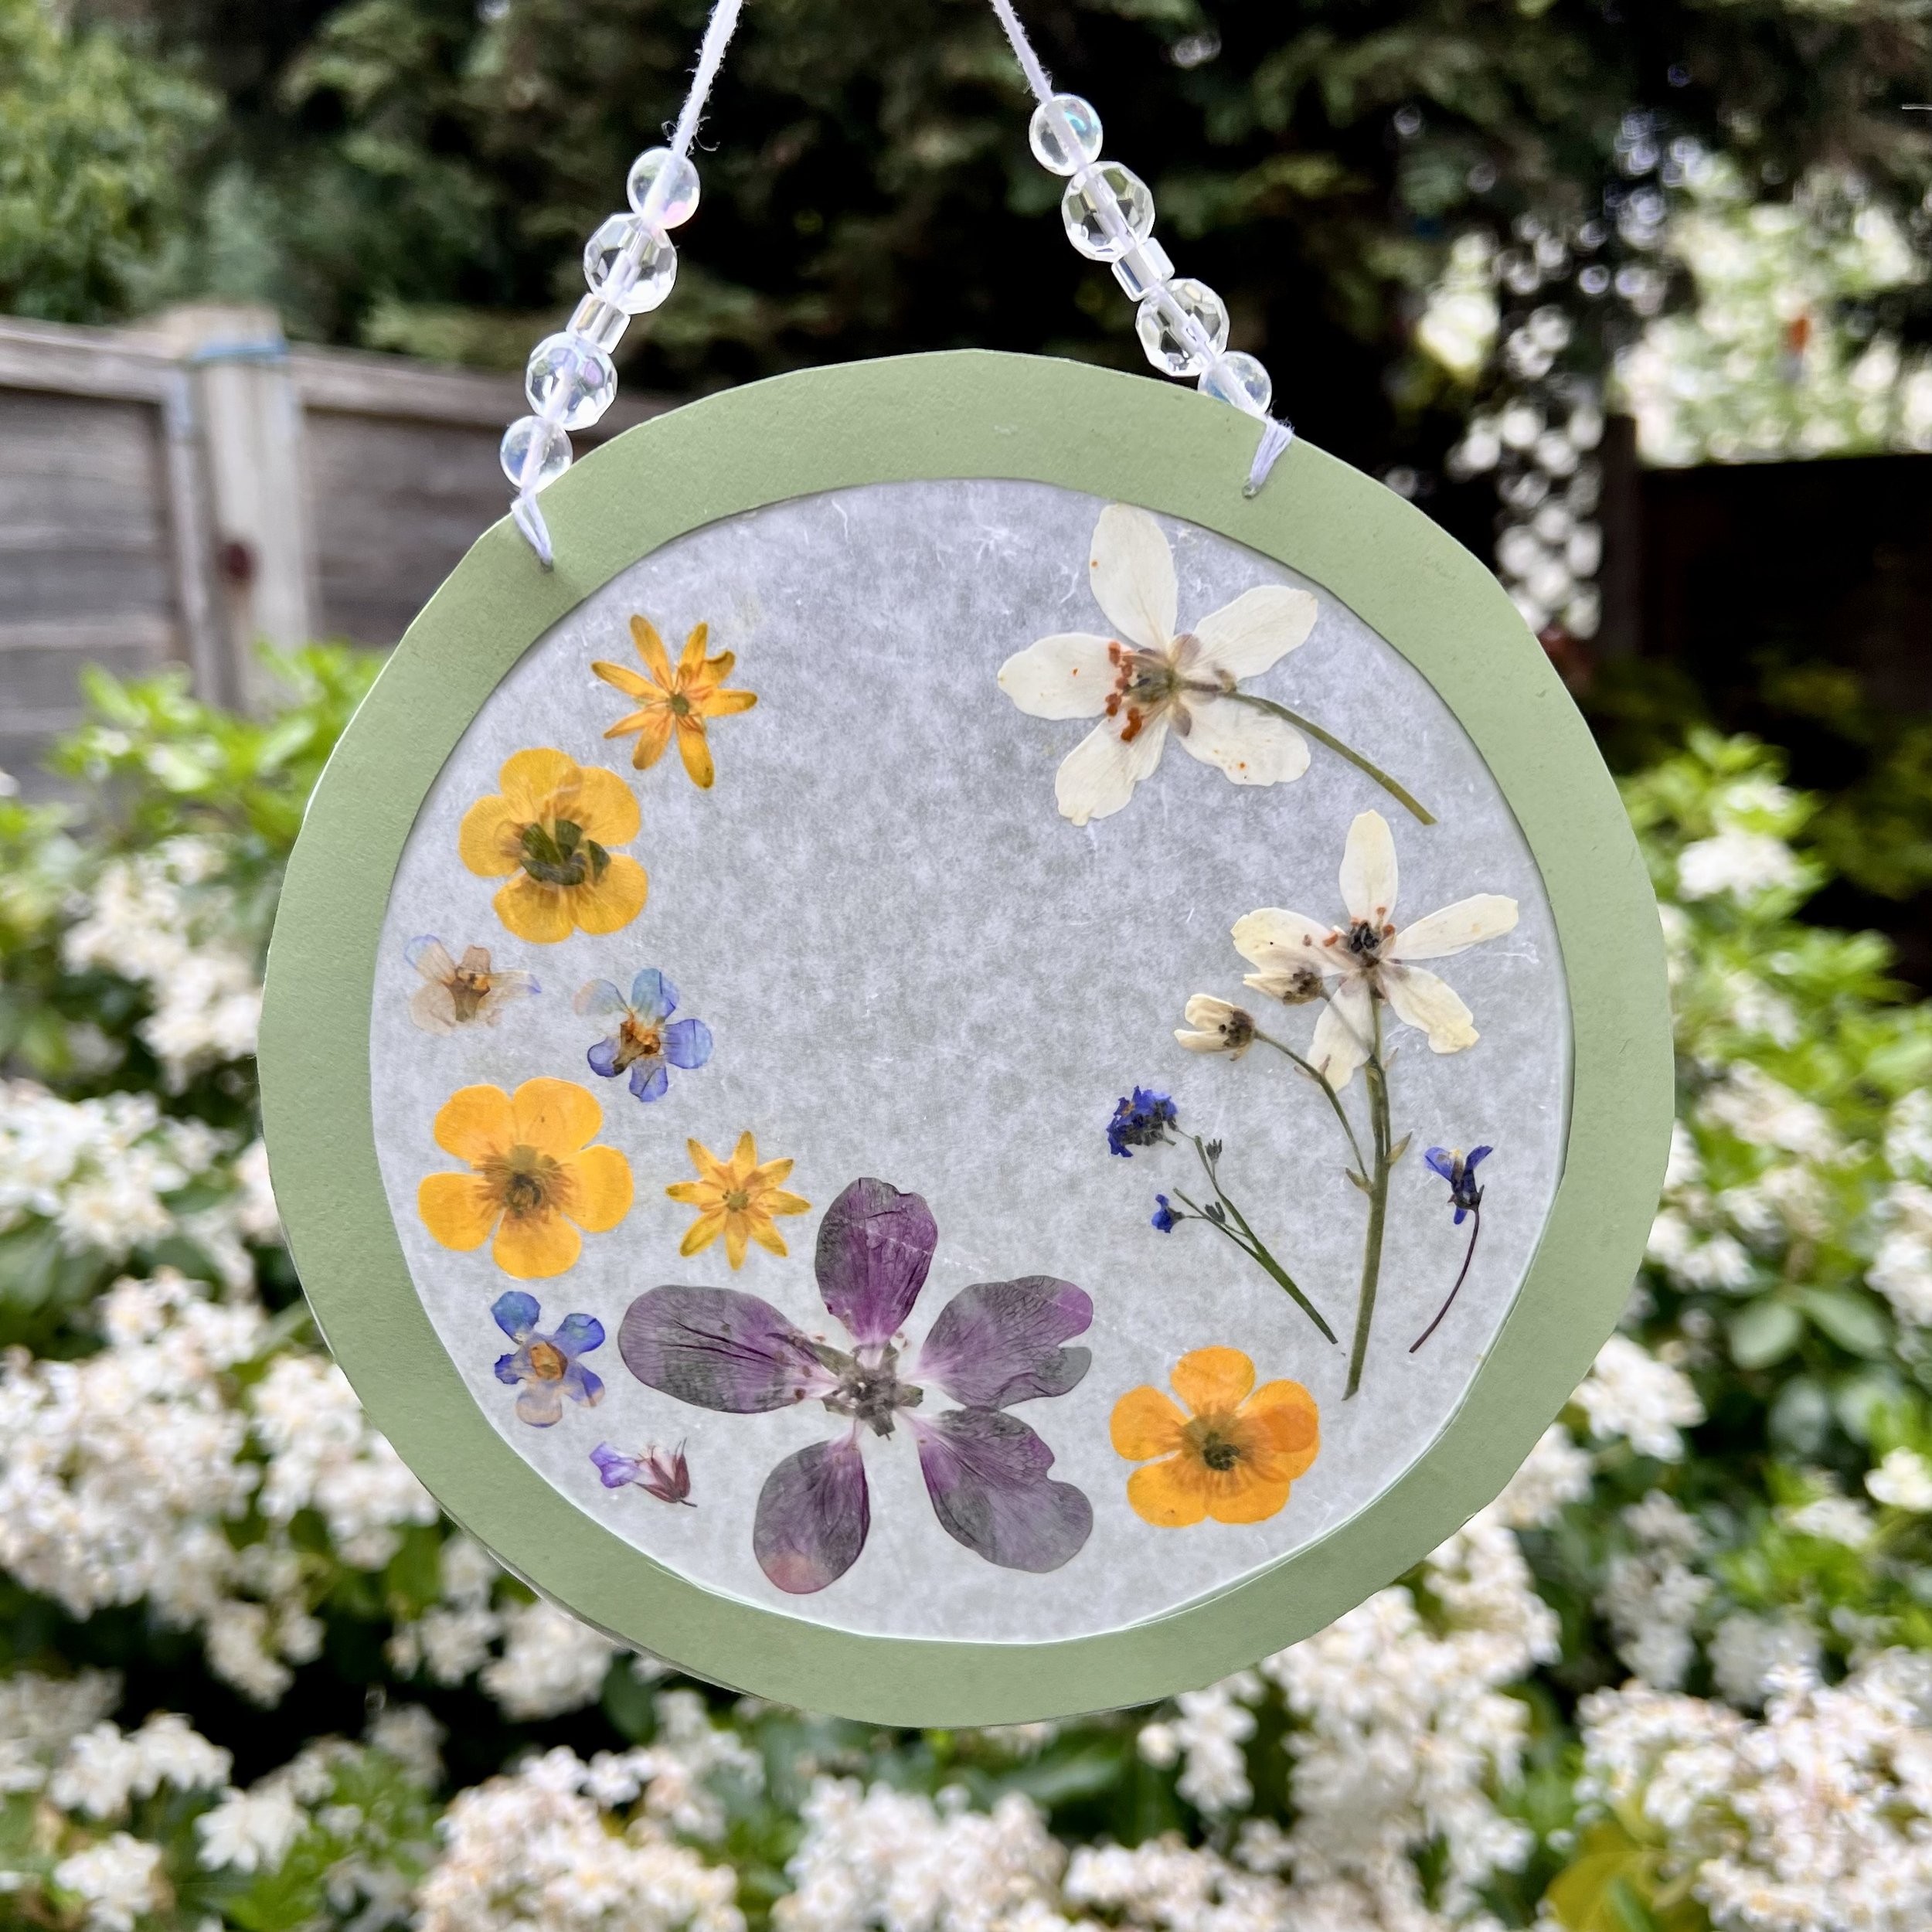
Your sun catcher is now finished! Stick it on a sunny window with a bit of blue tack or hang it on a piece of thread. We added some lovely clear beads to the hanging thread for a bit of sparkle!