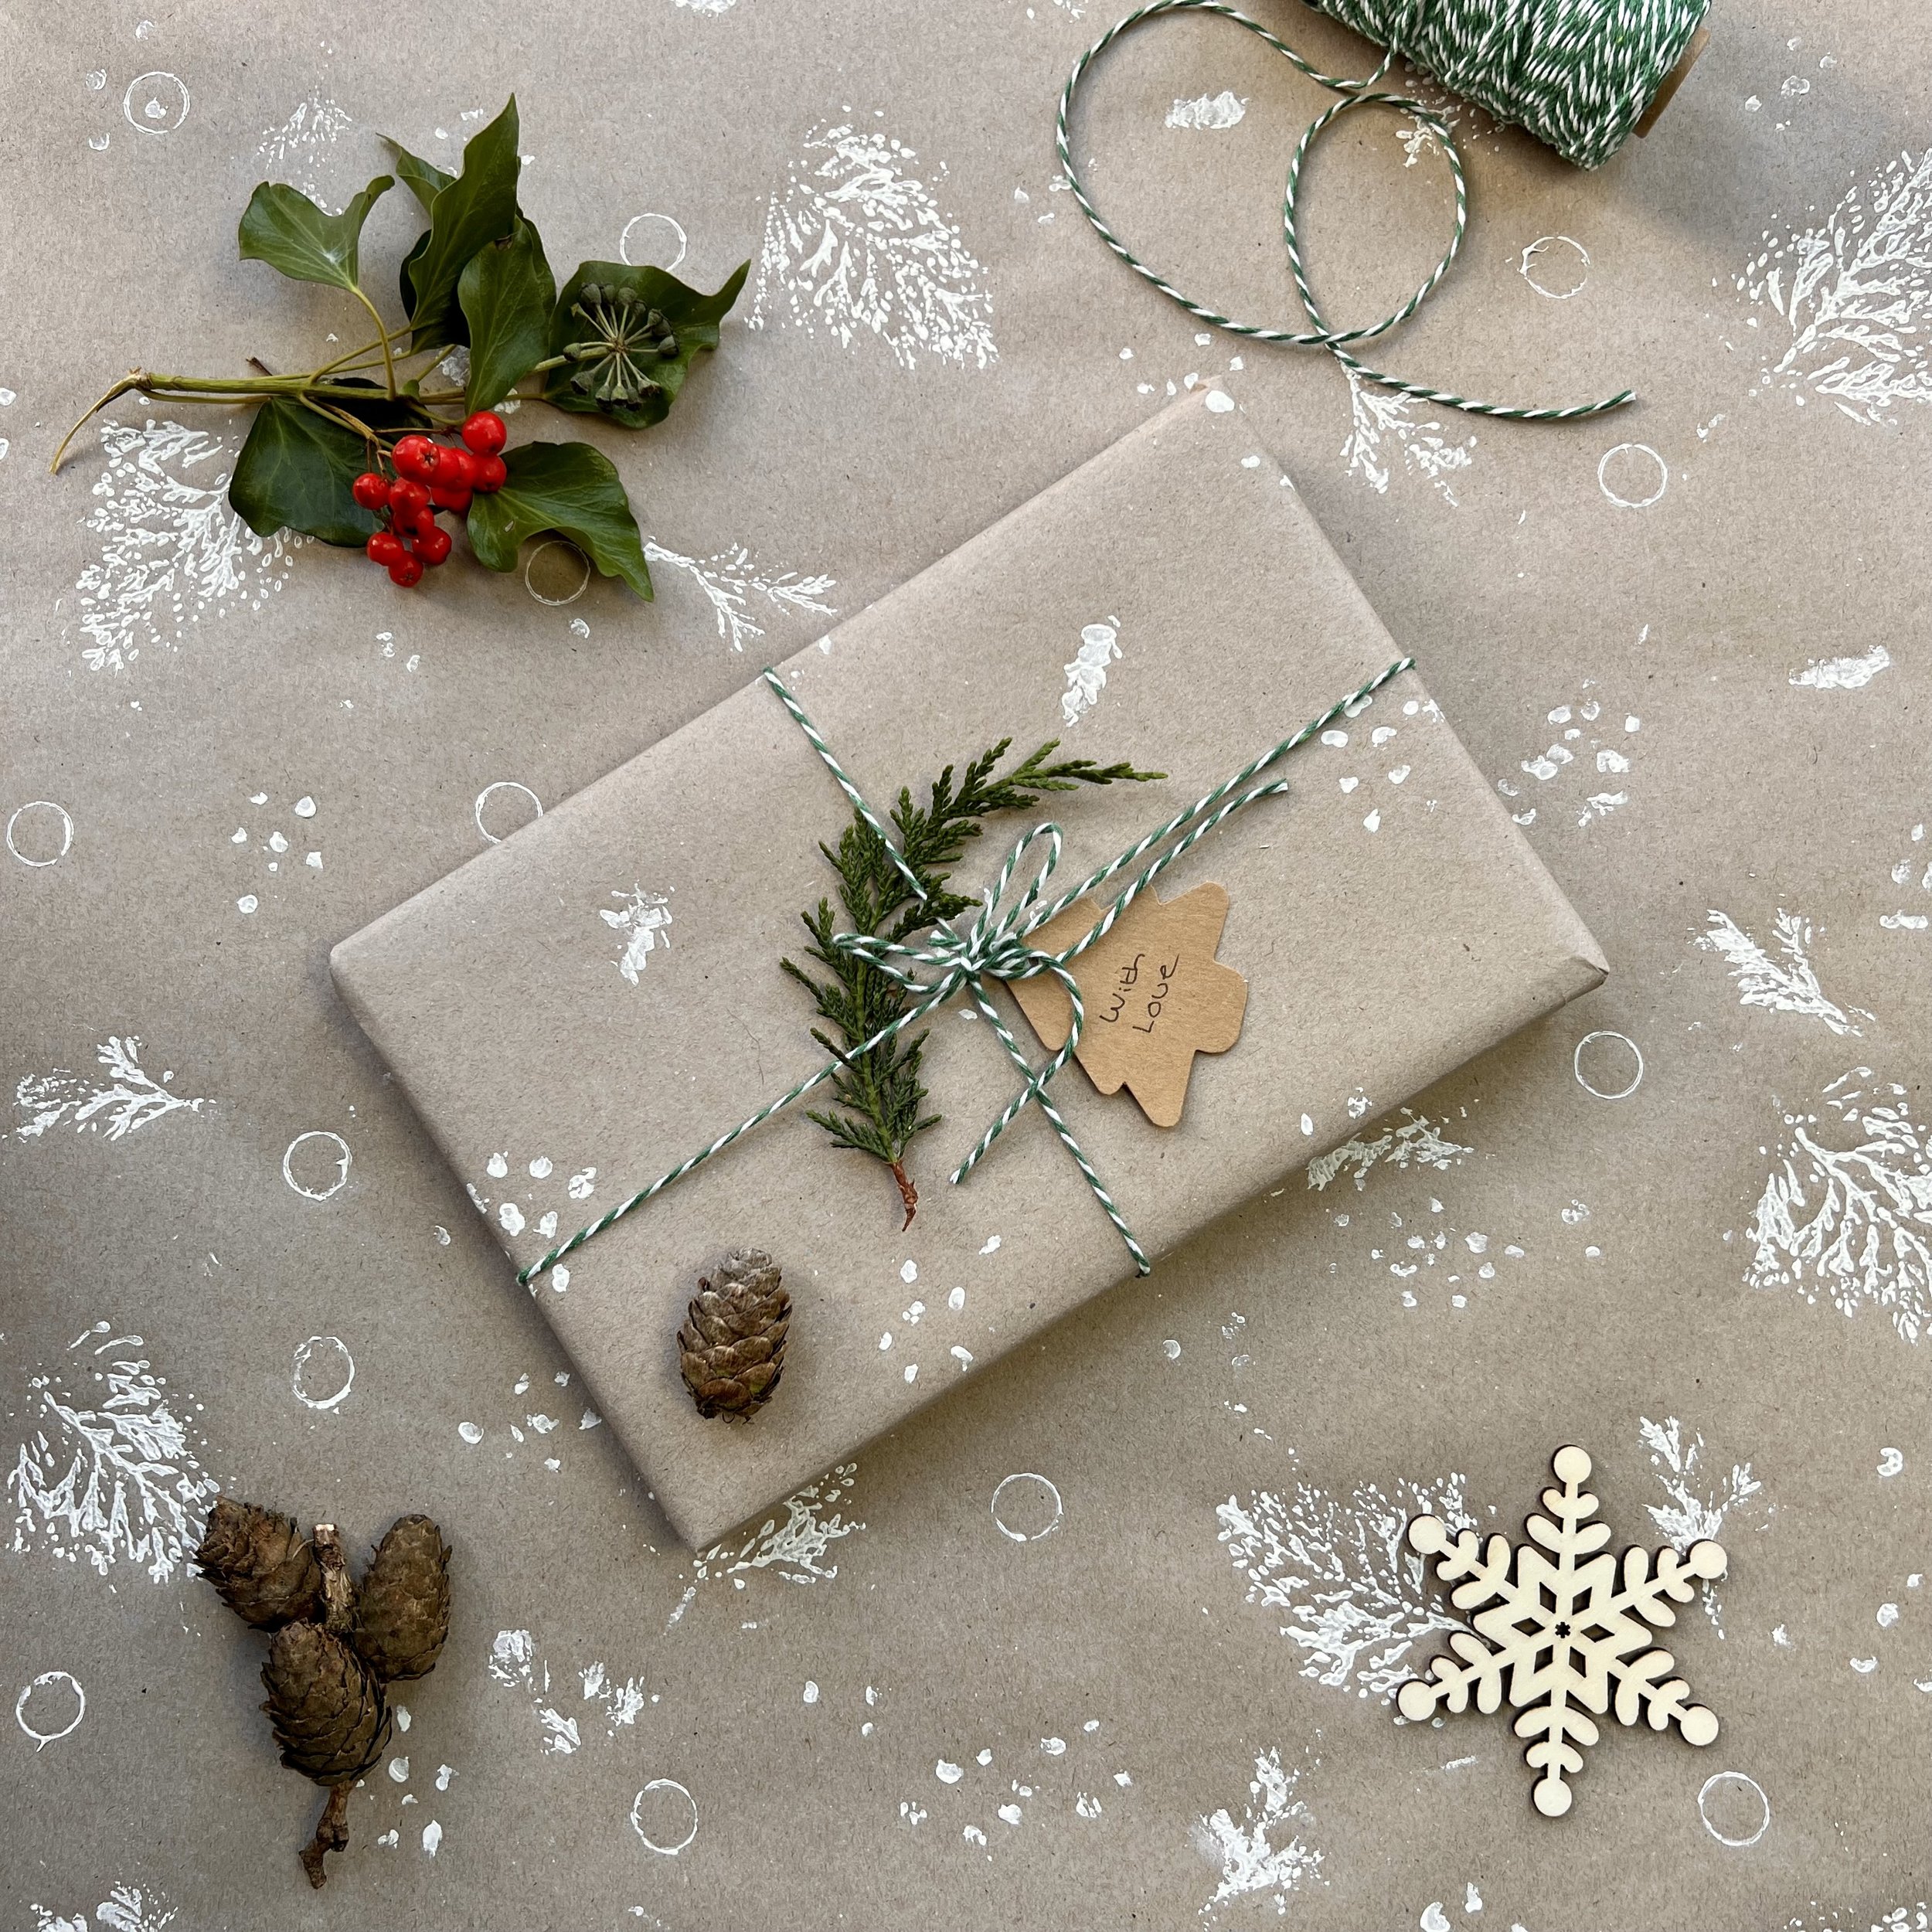
Make your own festive nature print wrapping paper
Making your own wrapping paper is a great way to add an extra personal touch to your gifts at Christmas and it’s a really fun festive art activity to do with young people as well! It can also be a money-saving option and eco-friendly if you save packing paper throughout the year to use for making your own wrapping paper or you can purchase large rolls of recycled packing paper or kraft paper quite cheaply. If you print with printing ink rather than paint, then your wrapping paper can also be recycled once it’s been used!
What you will need:
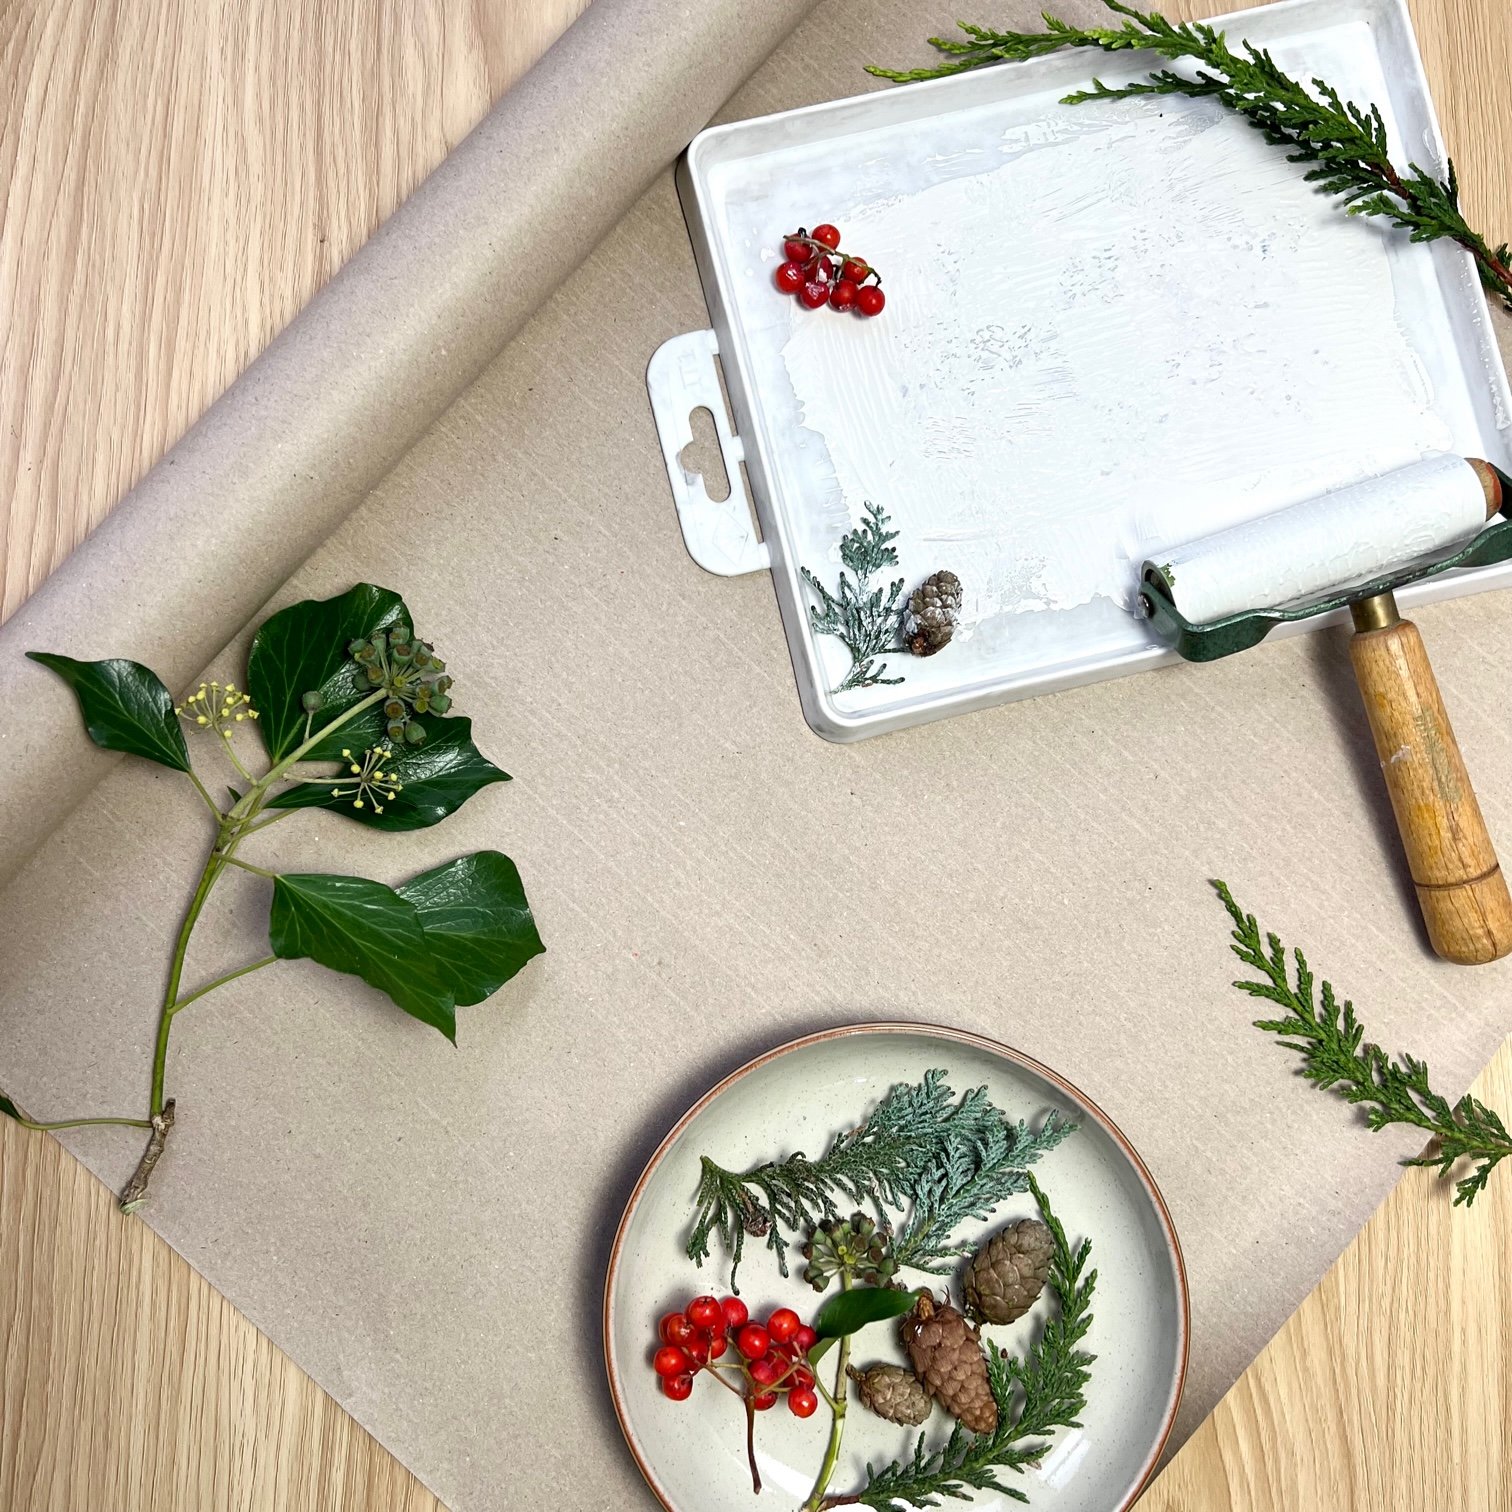
Brown parcel paper (reusing packaging paper from online orders is great for this!)
Nature items - leaves, tree cones, berries, acorn caps
Block printing ink or acrylic paint
A tray or flat surface for the paint/ink (raid your recycling bin - pieces of thick cardboard work well or paper plates)
A roller or something to spread out your ink/paint (a small piece of thick cardboard would work here as well!)
You might also want to use a printing baren or something like a small bottle to press the ink/paint-covered nature items onto the paper
What you need to do:
First you will need to wrap up warm and go for a walk to find some nature items that you can use to print with. Leaves and conifer needles are great for printing with but things like clusters of berries, tree cones and seed heads make interesting patterns too and you can use acorn caps to make small circles.
Once you are home and have warmed up you can get everything laid out ready for printing! First you’ll need to lay your packing paper, or a length from your roll of paper, on a flat surface. Use a little tape at the corners to hold the paper down.
If you are using printing ink, squeeze a dollop onto your tray and then use the paint roller to roll the ink around, creating an even and smooth layer of ink. If you are using paint, then you can use a small piece of sturdy cardboard to spread out the paint into a thin layer. I used white printing ink on my wrapping paper.
Take your first nature item and press it into your paint or ink and then lift and check to make sure it is evenly covered with a thin layer of paint/ink. Then you can press it onto your paper. You’ll need to be gentle with berries so they don’t squish! For leaves and needles, you’ll need to press down on each part of the leaf with your fingers to make sure the paint transfers to the paper evenly. You can also use a printing baren for this or something like a small glass bottle to roll over the leaf. When using tree cones or acorn caps or similar, you can just press them into the ink or paint and then onto the paper.
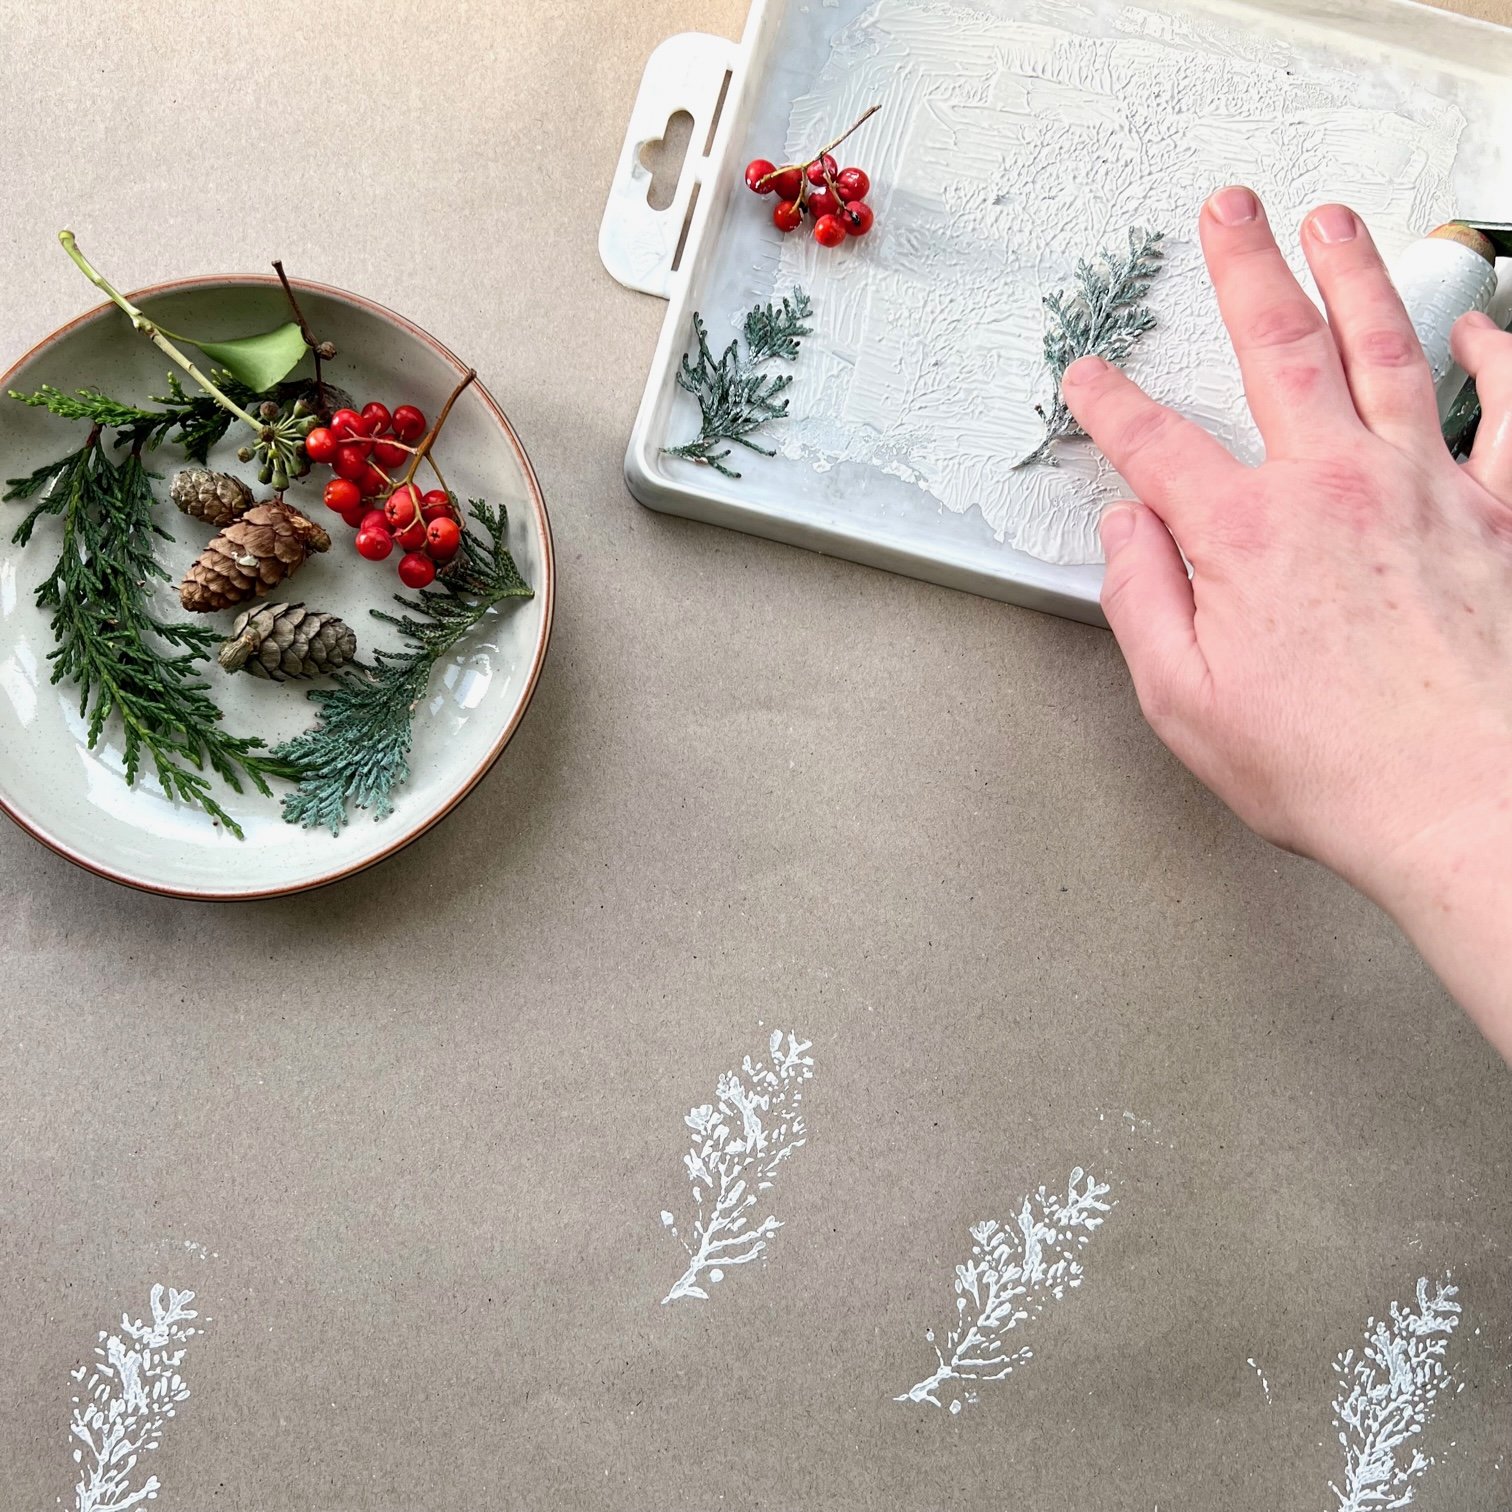
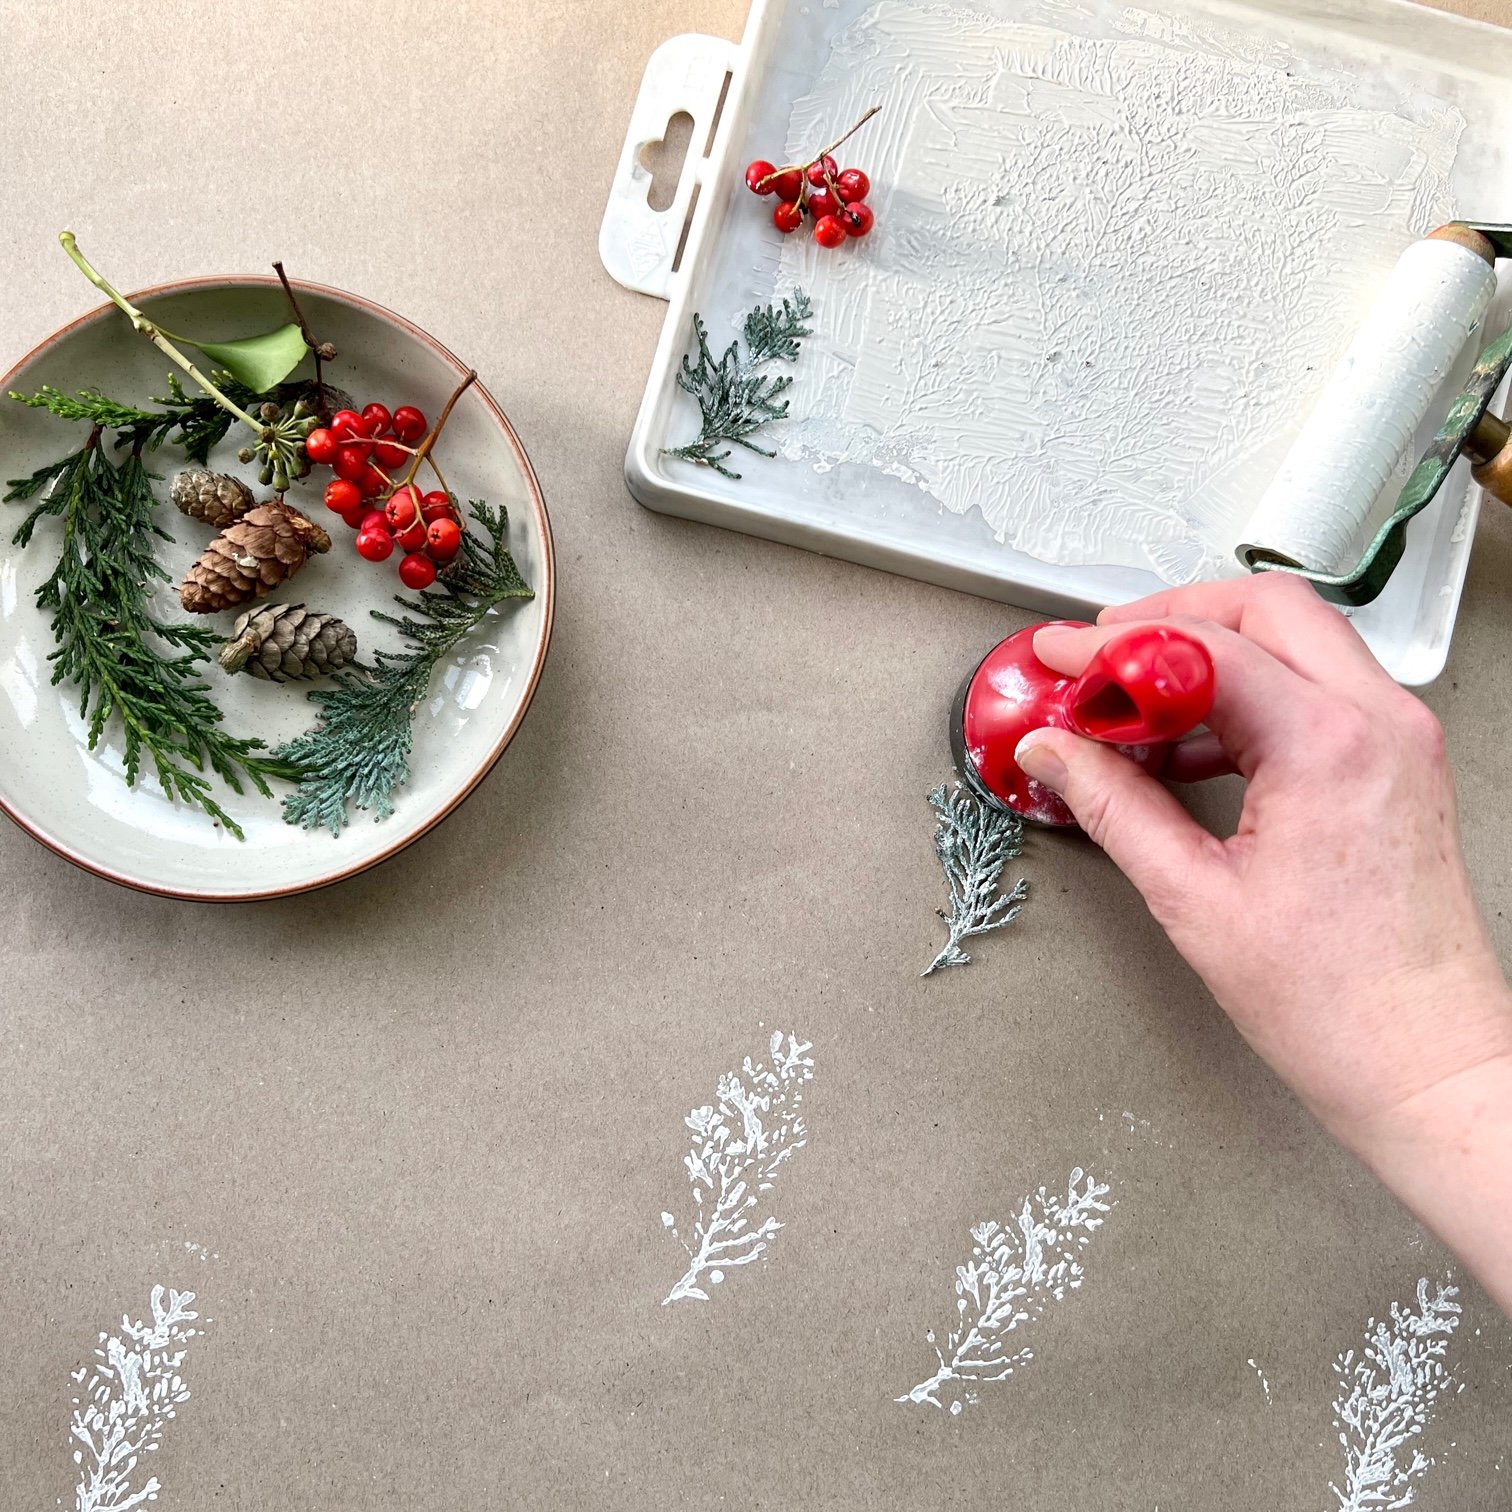
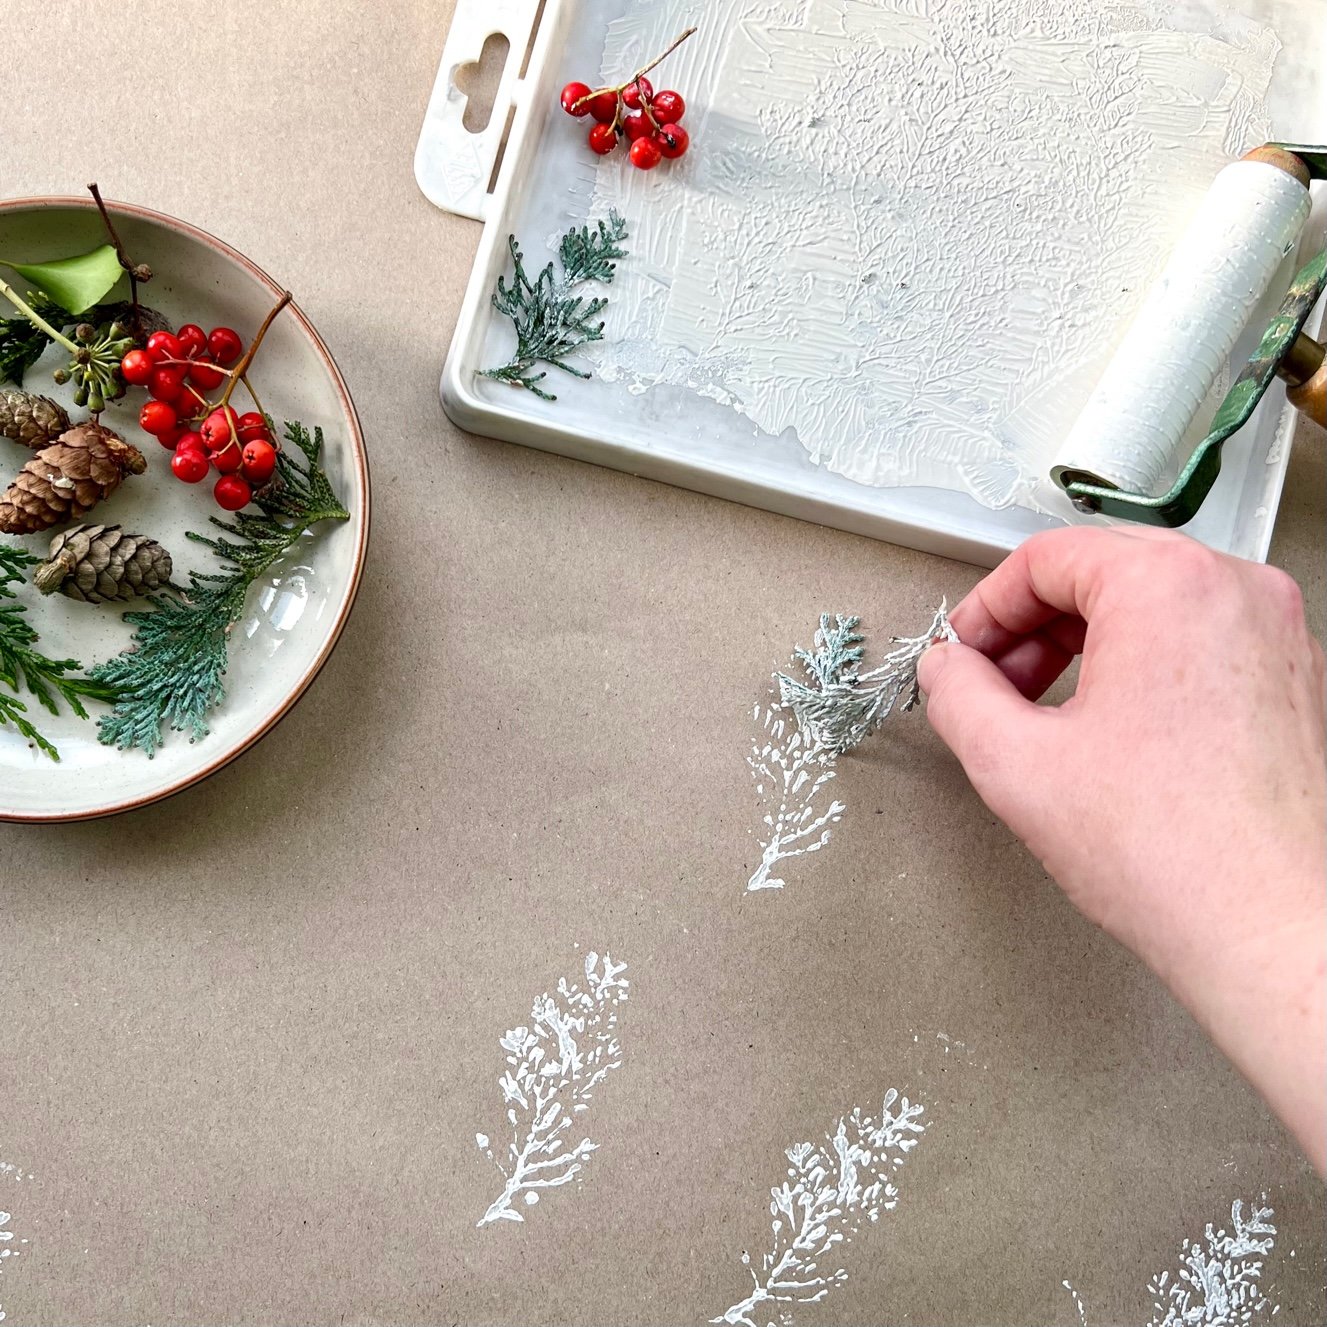
It’s a good idea to do a few practise prints onto a piece of scrap paper first to make sure you use the right amount of pressure and ink/paint.
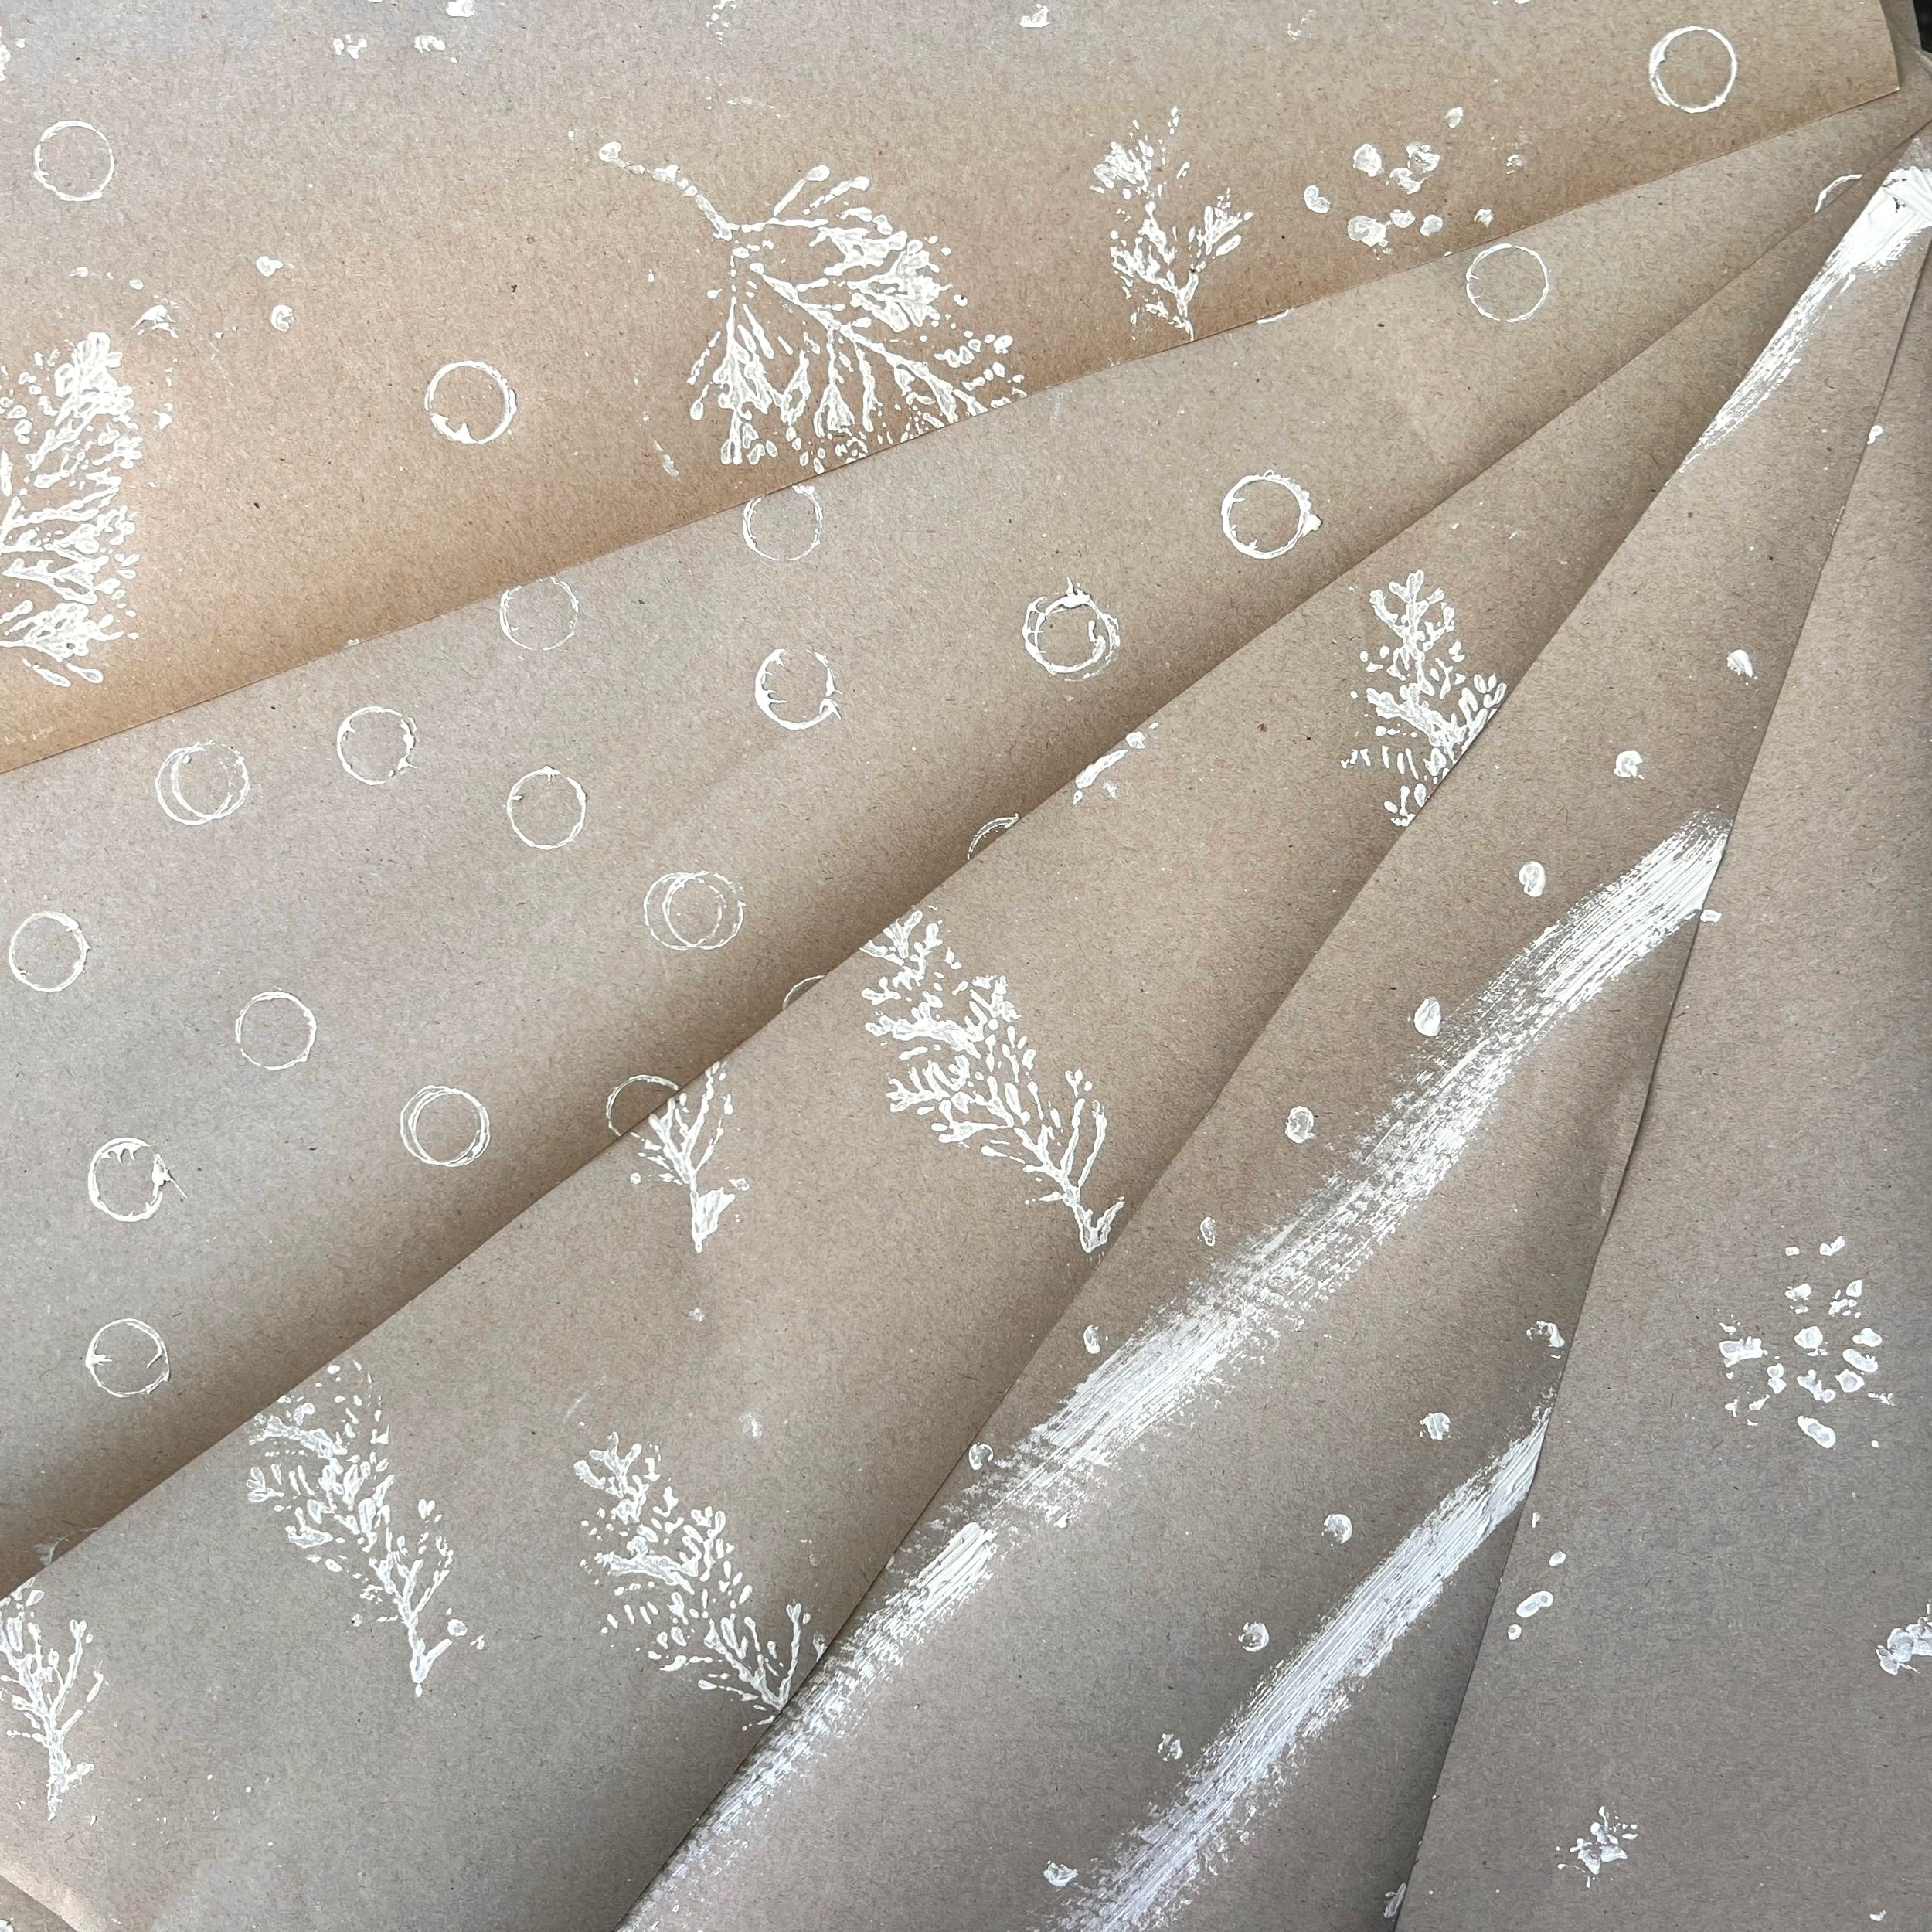
When you are ready, you can randomly print onto your paper or you can make repeating patterns - they both look great!

Once you’ve finished, leave your paper to dry. Ink takes a longer to dry than paint!
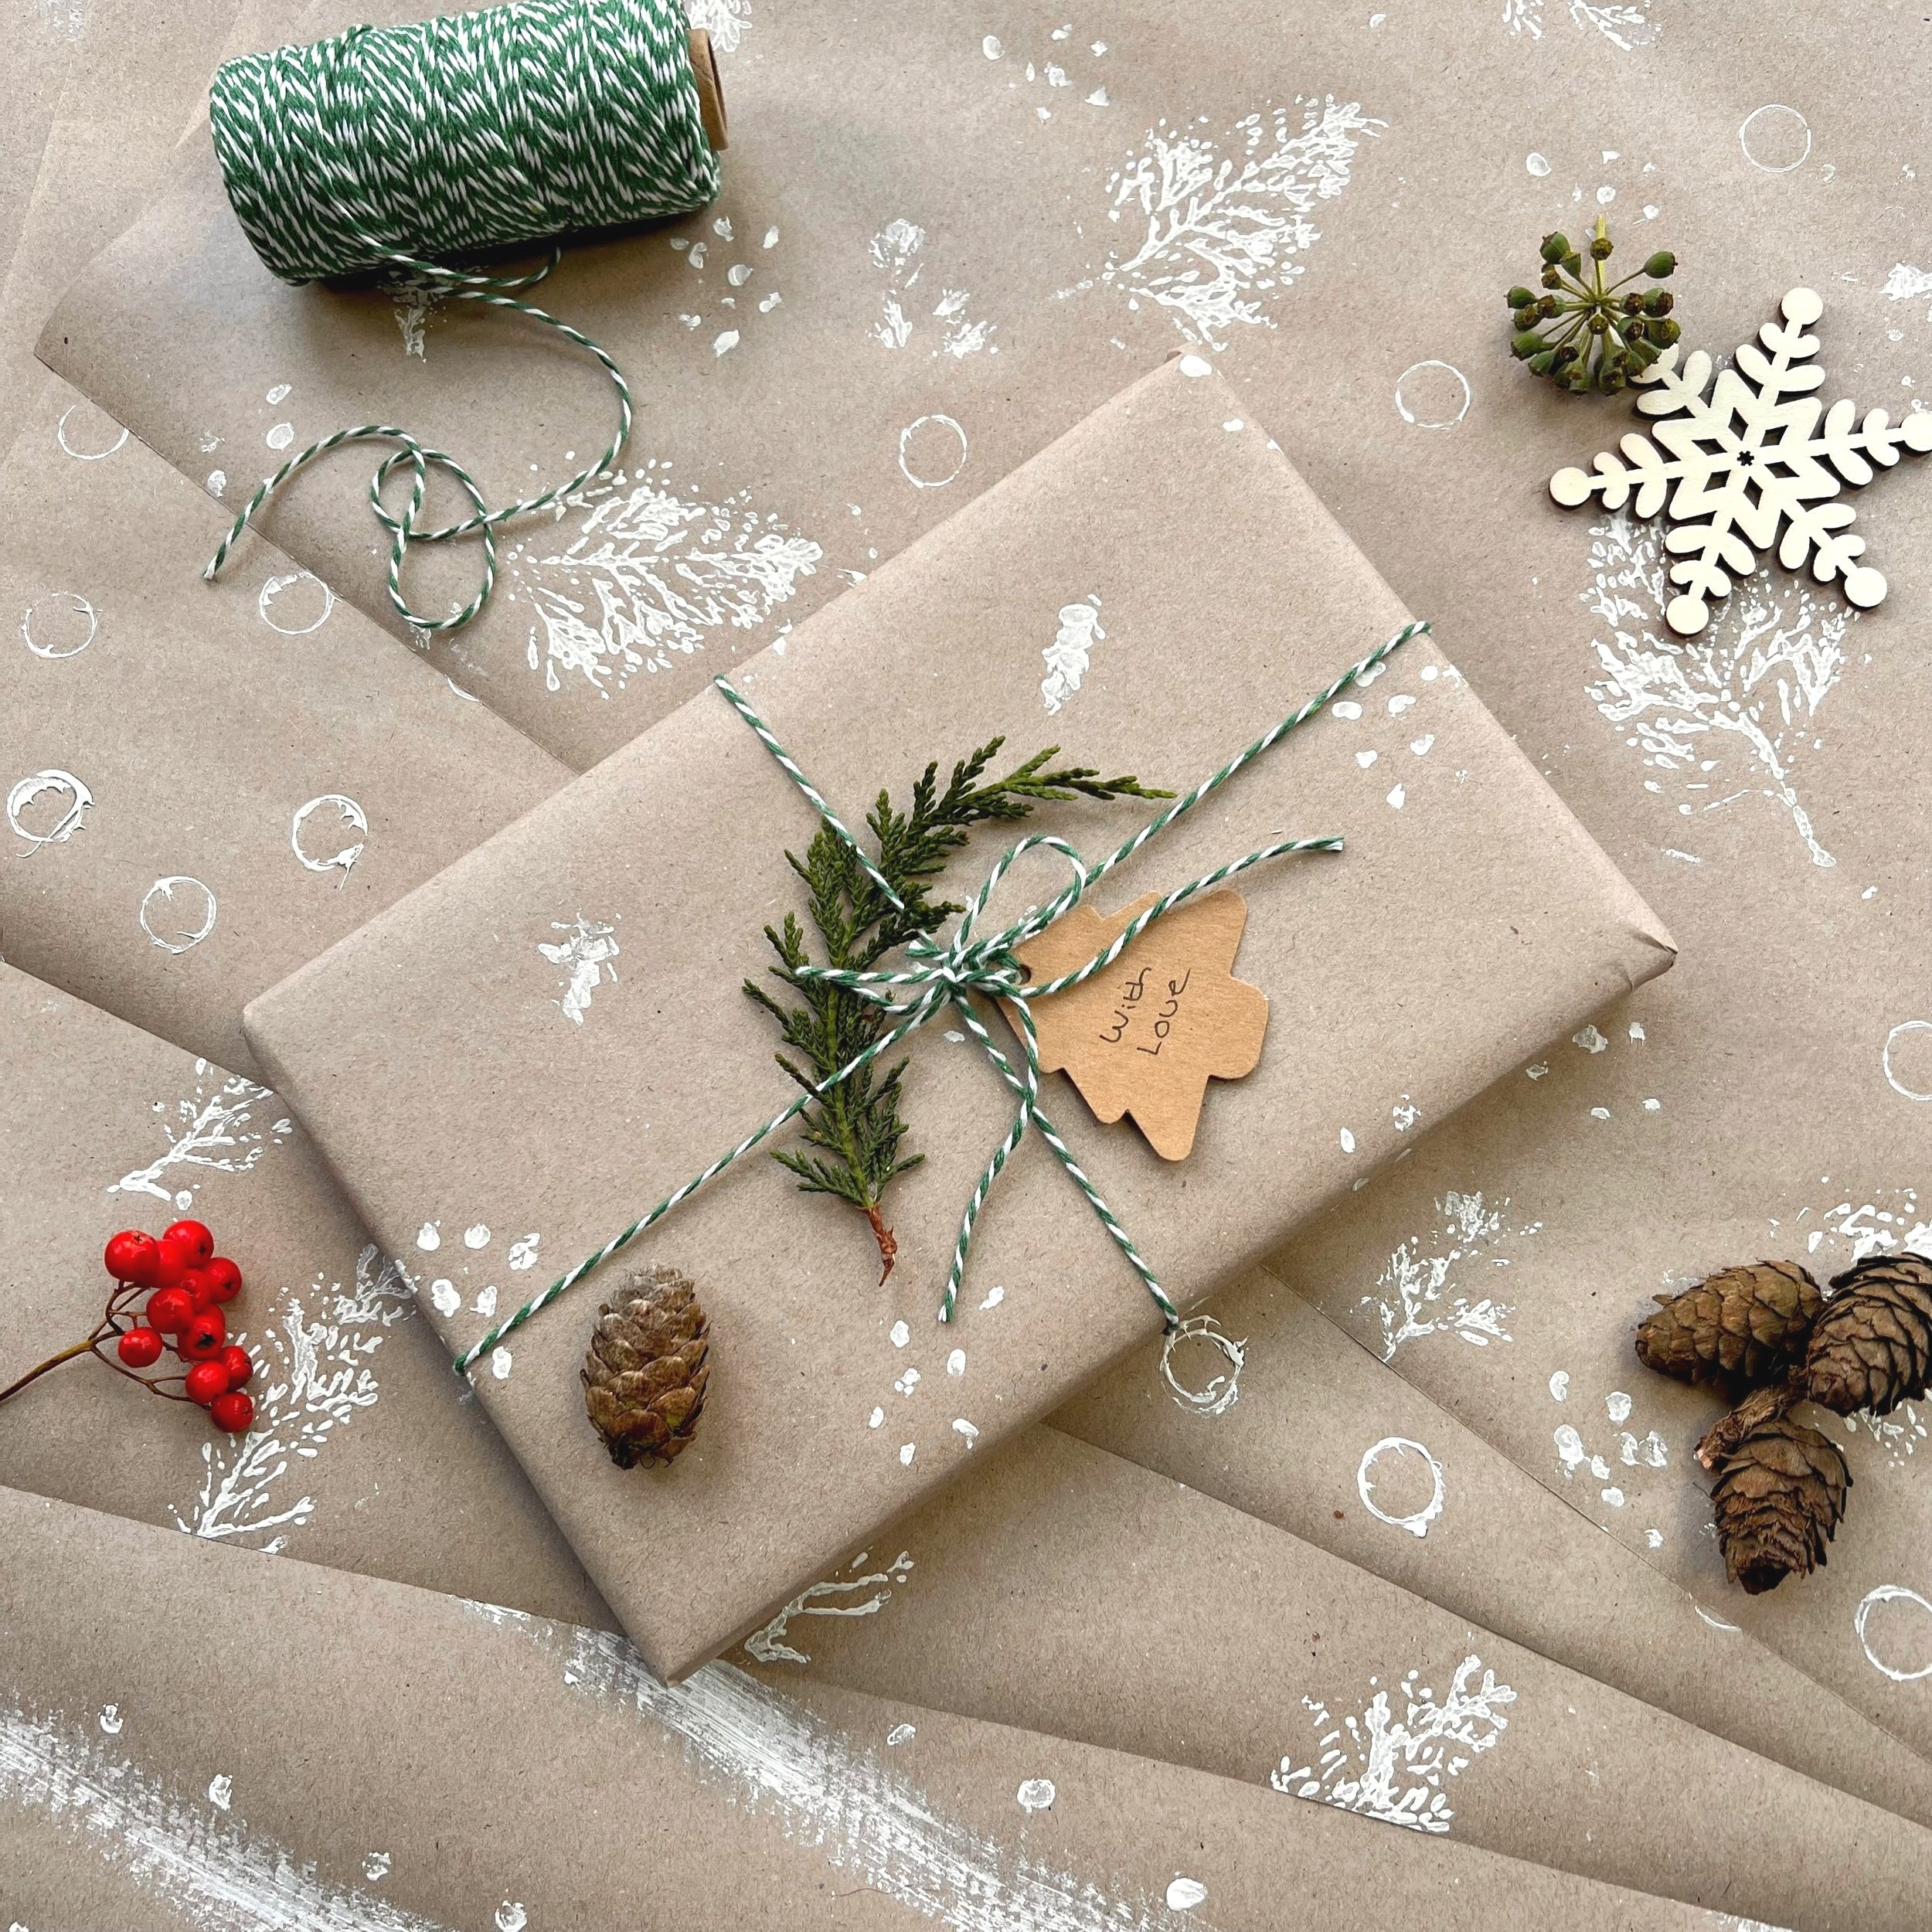
Now you can use your beautiful new gift wrap to wrap your gifts!
Author: Denise Hope, home educating mum of two boys