Make an ice cube igloo

Playing with ice is such fun and when the weather is cool, you can play outside and the ice will last a bit longer. We have previously made ice structures with blocks of ice which we used for small world play but this was our first time making an igloo so there was a bit of trial and error involved!
This activity turned into a bit of a project with lots of time spent finding out about how real life igloos were made and who uses them. Igloos have been used for over 1,000 years by the Inuit and other Native American tribes and can still be found throughout the Arctic today, built by travelling hunters as temporary accommodation. Unlike the Inuit version, our igloo was built out of ice, not from compacted snow.
What you will need:
Ice cube trays
A freezer-safe round plate or dish as big as you want the base of your igloo to be
A small bowl of cold water
A freezer (and space in your freezer for a small igloo!)
A blender
What you need to do:
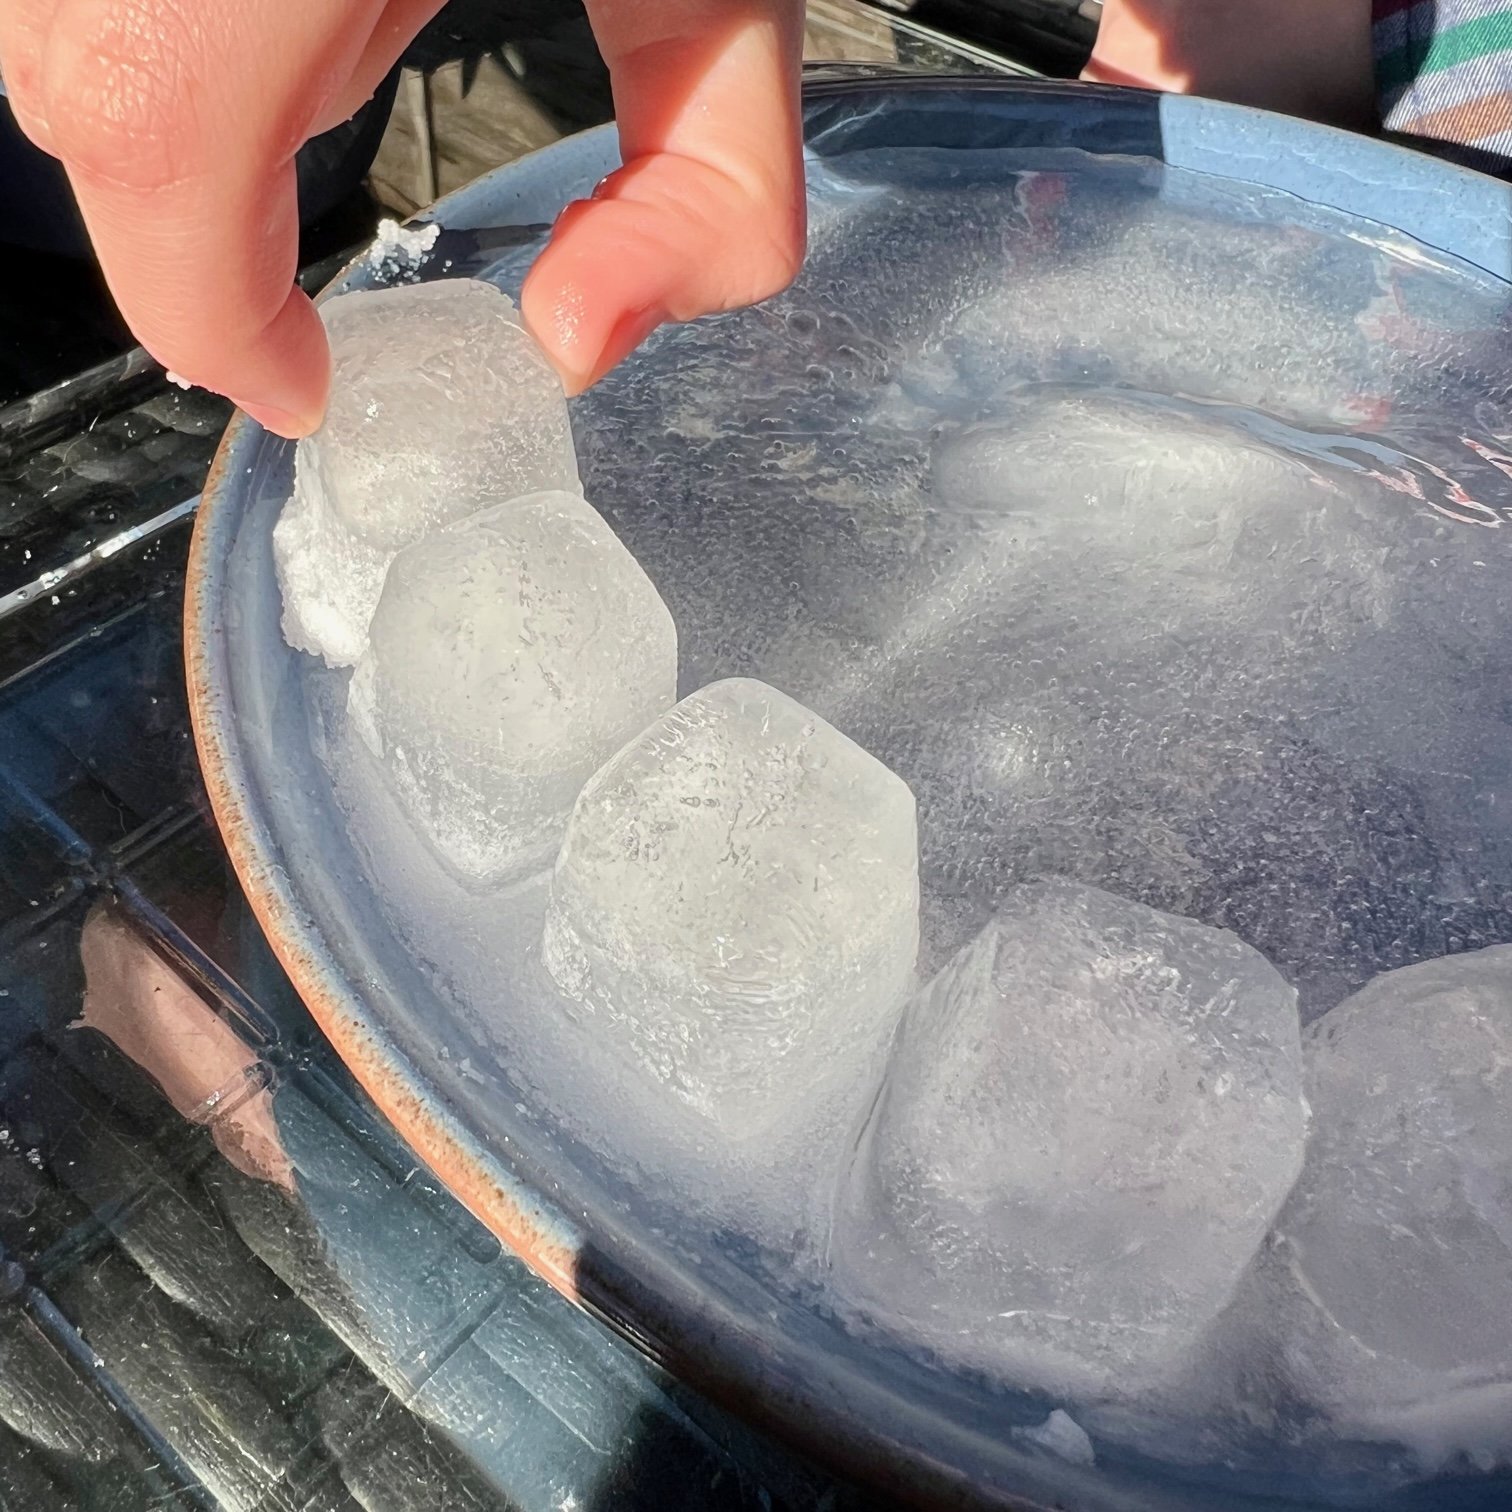
To start, you will need to freeze a tray or two of ice cubes and make a base for your igloo by freezing a shallow dish or plate filled with water. Once frozen, take an ice cube and dip it into a dish of cold water and then place around the edge of your plate and hold in place for a few seconds. When the ice cube touches the base, the water freezes between them helping them stick together.
Arrange more ice cubes around the edge of the plate to make your igloo shape, leaving a gap for an entrance. By the time you have finished your first layer, you’ll probably find that the ice is starting to melt or that the ice cubes aren’t sticking so easily to the base, so, when your first layer is finished, put the plate back into the freezer for a short while to refreeze.
NOTE: We first tried sticking the ice cubes with salt rather than water. Salt lowers the freezing point of water so when you dip ice into the salt, the ice touching the salt will melt faster than the rest of the cube. In theory, the melted water should still be cold enough to re-freeze when you put it on top of the frozen base, however, we found that we ended up with hard-to-freeze slush due to using too much salt! We found using cold water much more efficient.
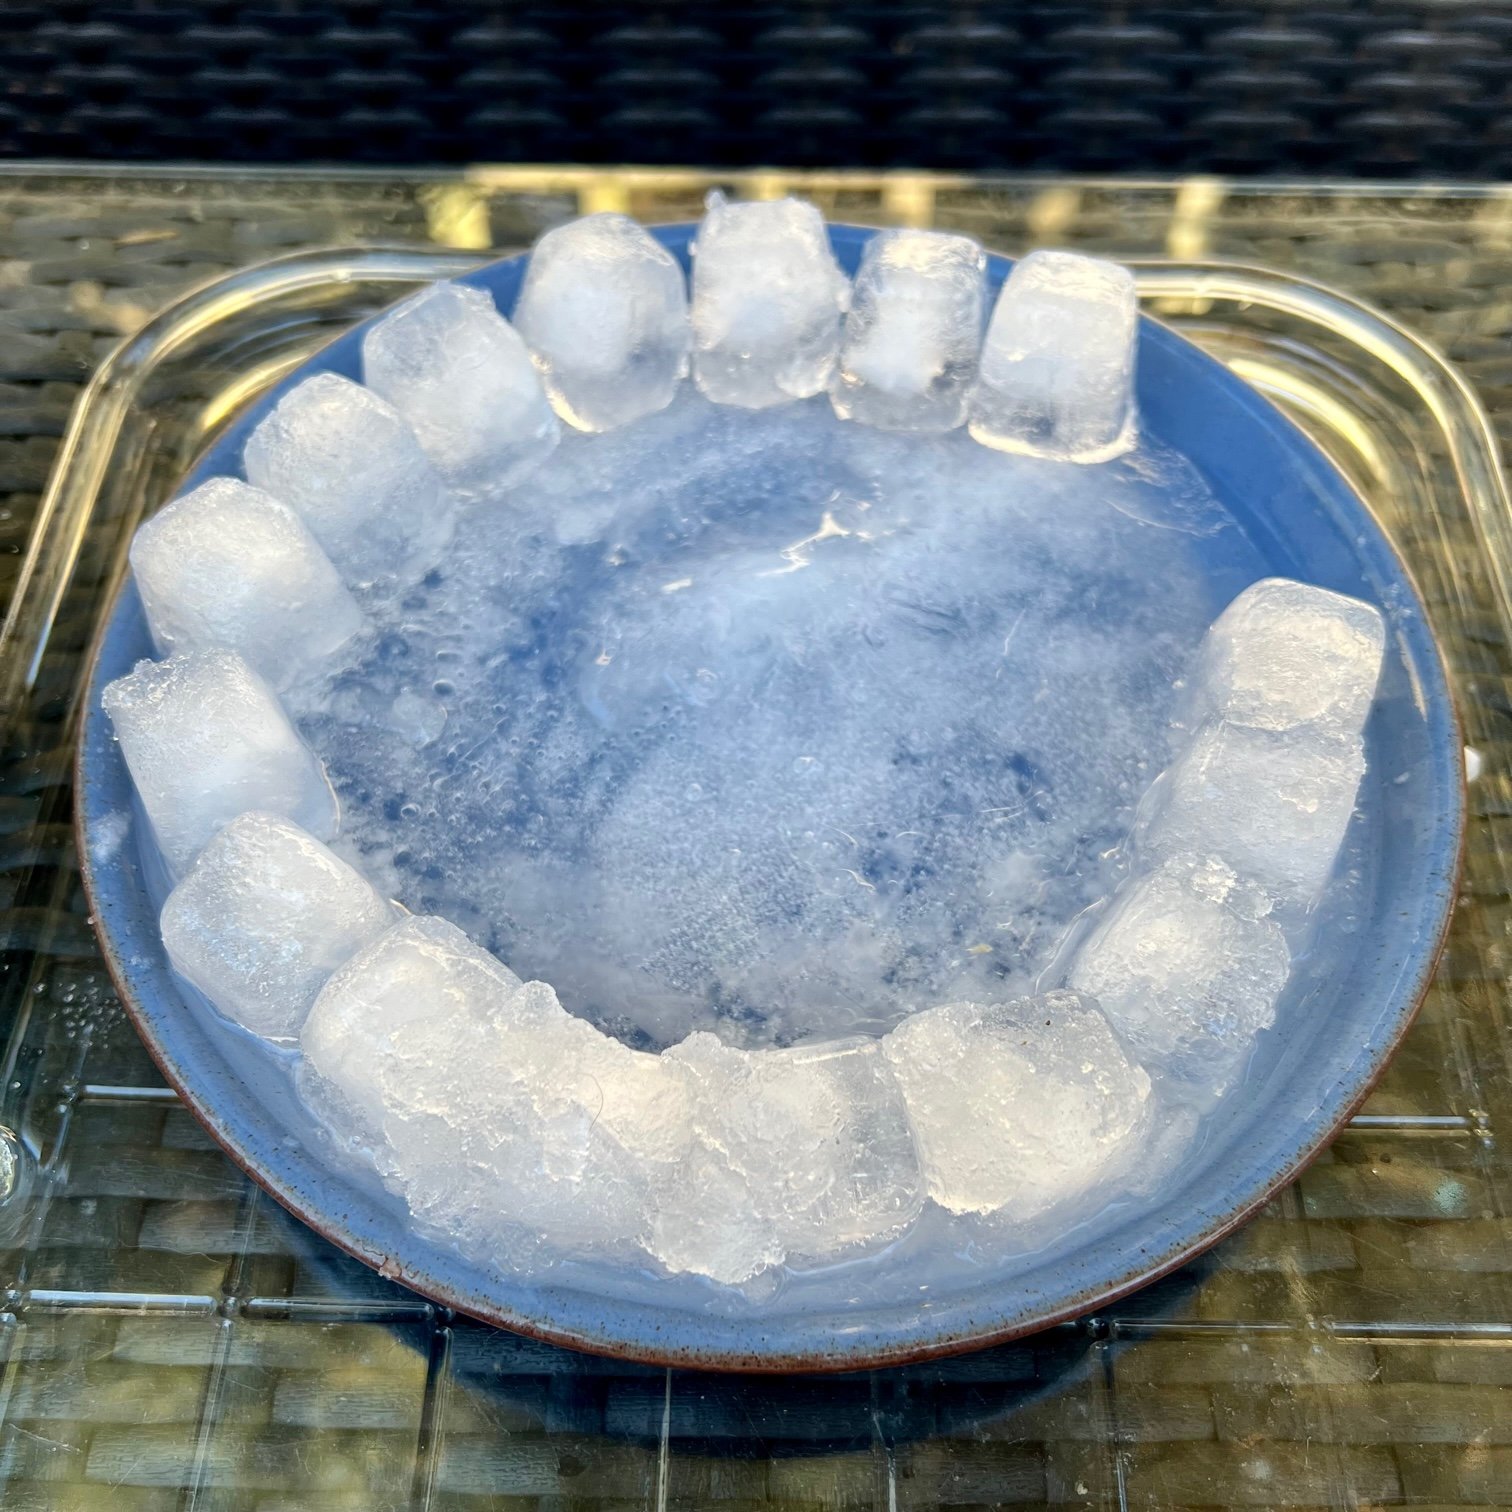
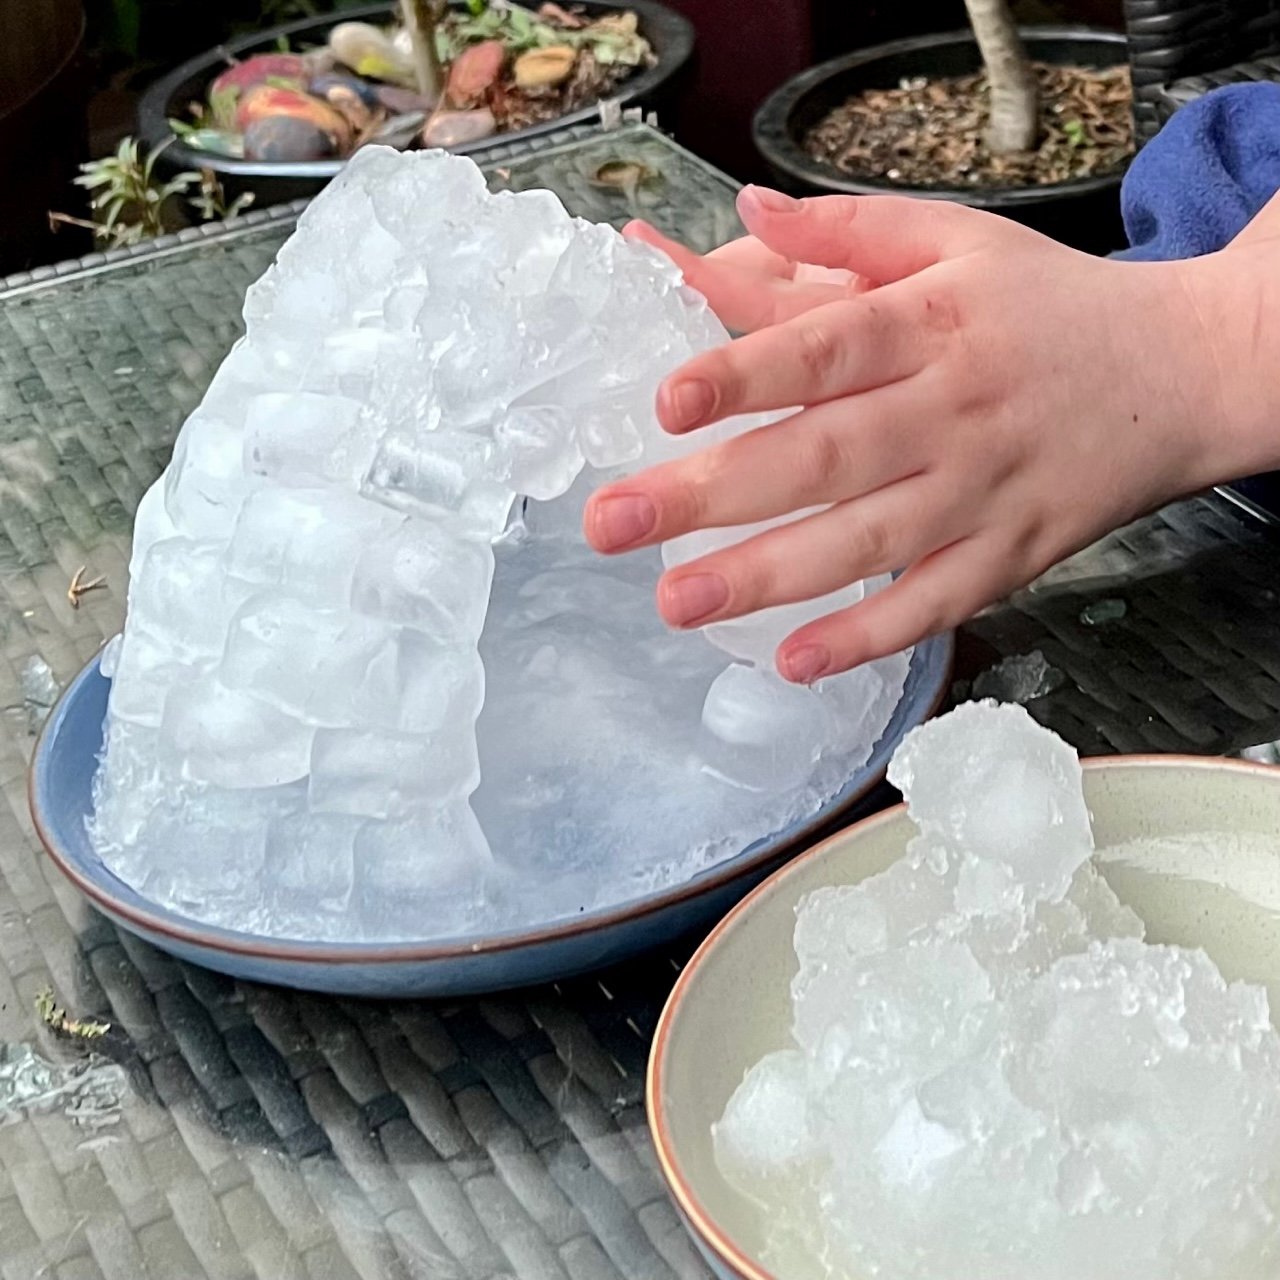
For your next layer, centre each ice cube between two base cubes like building a brick wall. You will also need to place the ice cubes so that they are slightly more towards the centre of the igloo so you can start to create a dome shape.
You can then complete each layer in the same way, refreezing the igloo when you find it harder to stick on your ice cubes. When your igloo shape is finished, pop it back in the freezer.
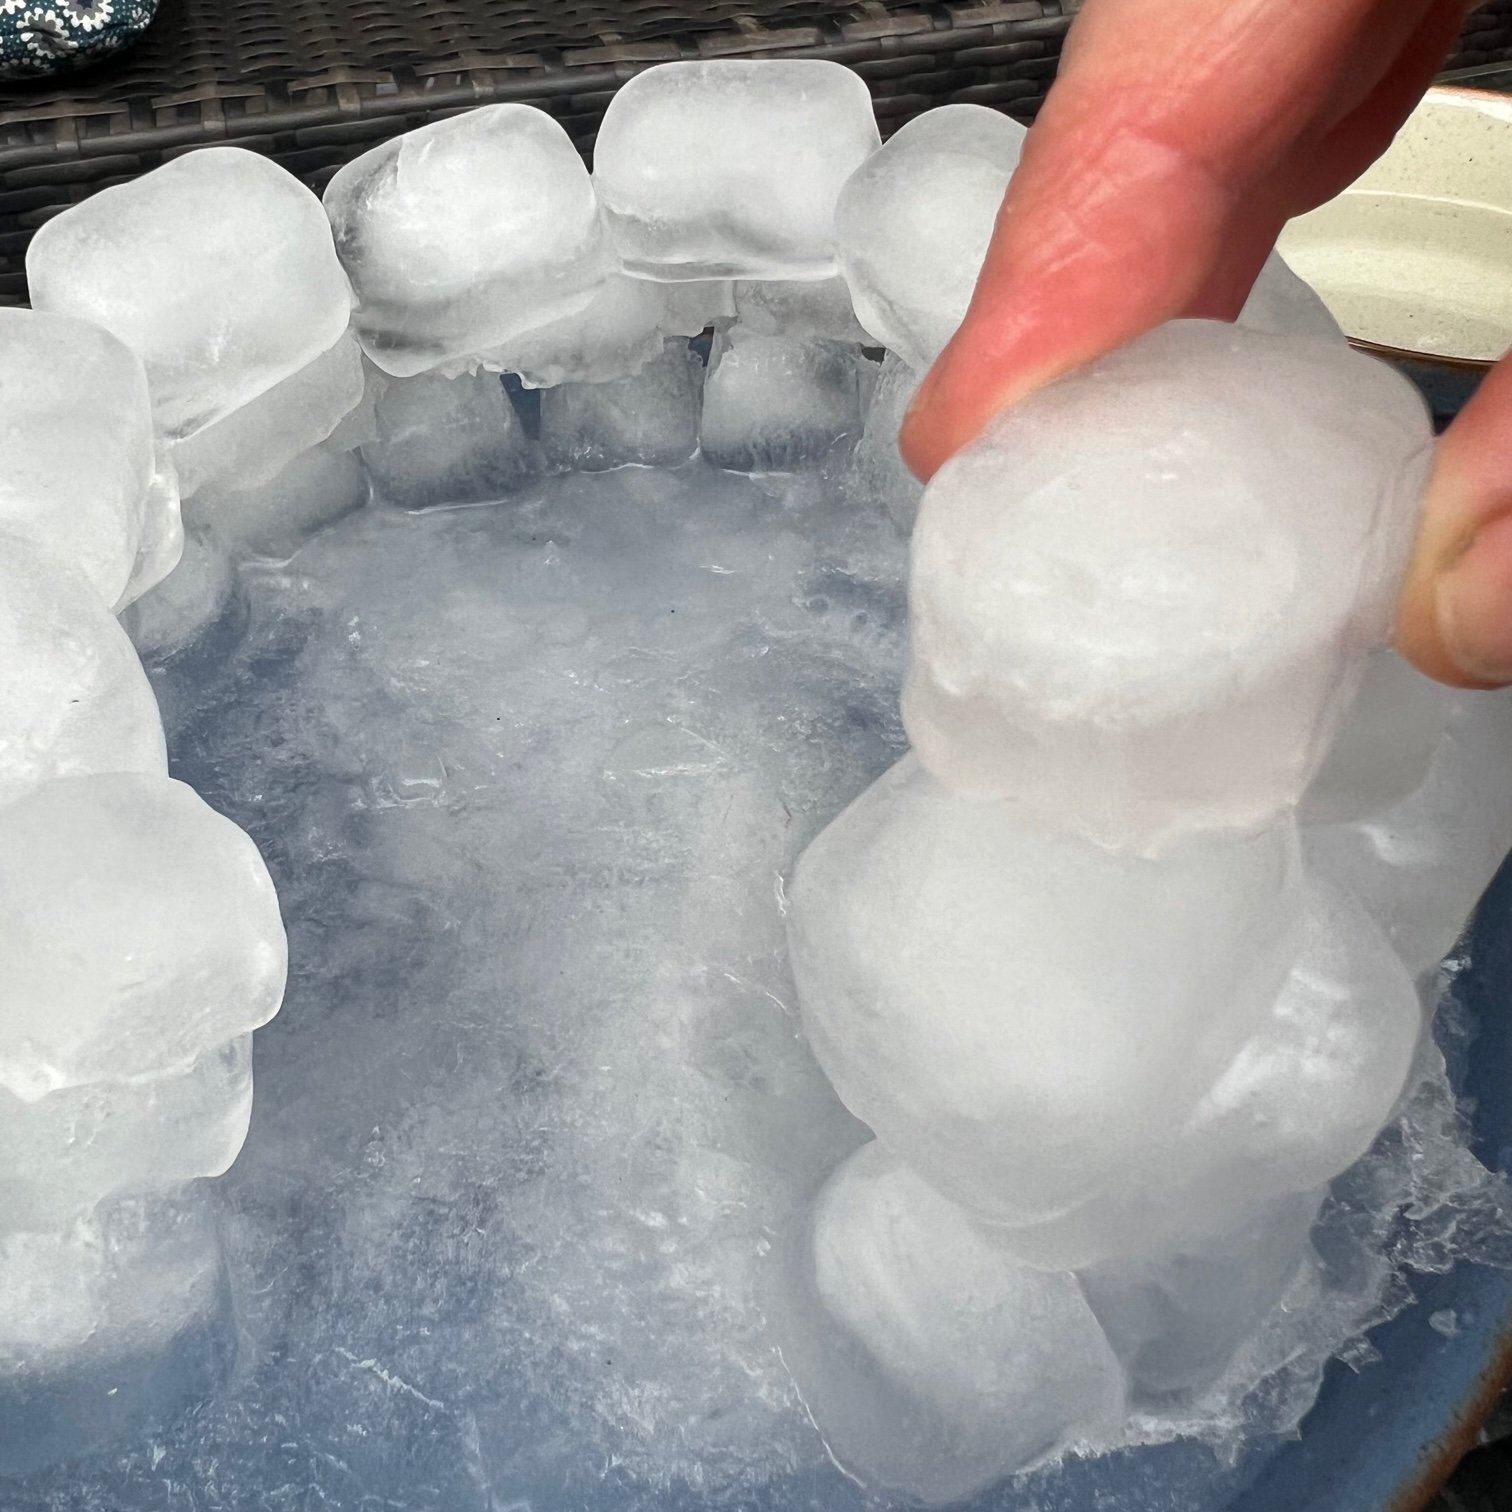

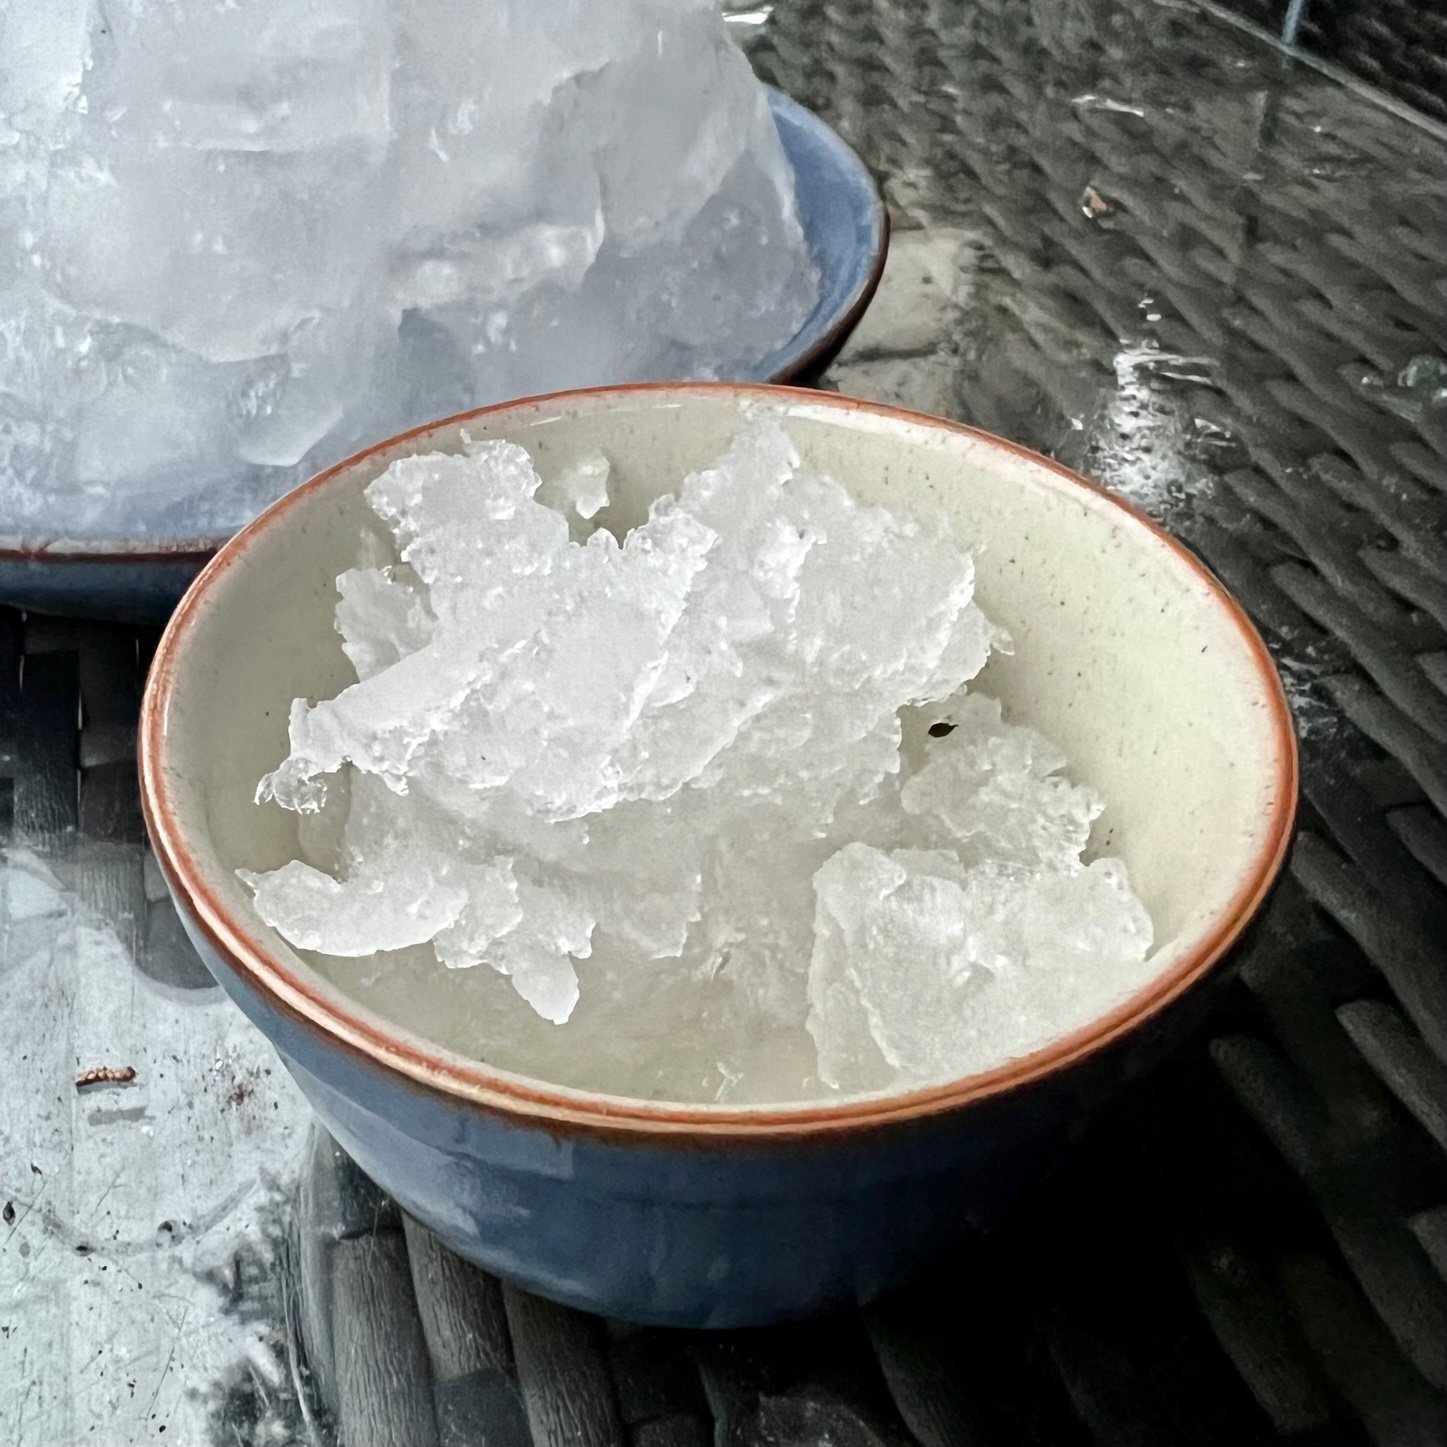
Now you can make some slushy ice to fill in any gaps and strengthen your igloo. Put a tray full of ice cubes in a blender with a little bit of water and blitz until crushed into small pieces.
If you don’t have a blender, you can wrap the ice cubes in a clean tea towel and hit it with a rolling pin. Lots of fun! Tip: Make sure the ice is wrapped tightly so it doesn’t fly out when you smash it!
Push your slushy mix into any gaps between the ice cubes. Now your igloo is done! Pop it back in the freezer to harden and then it will be ready to play with.
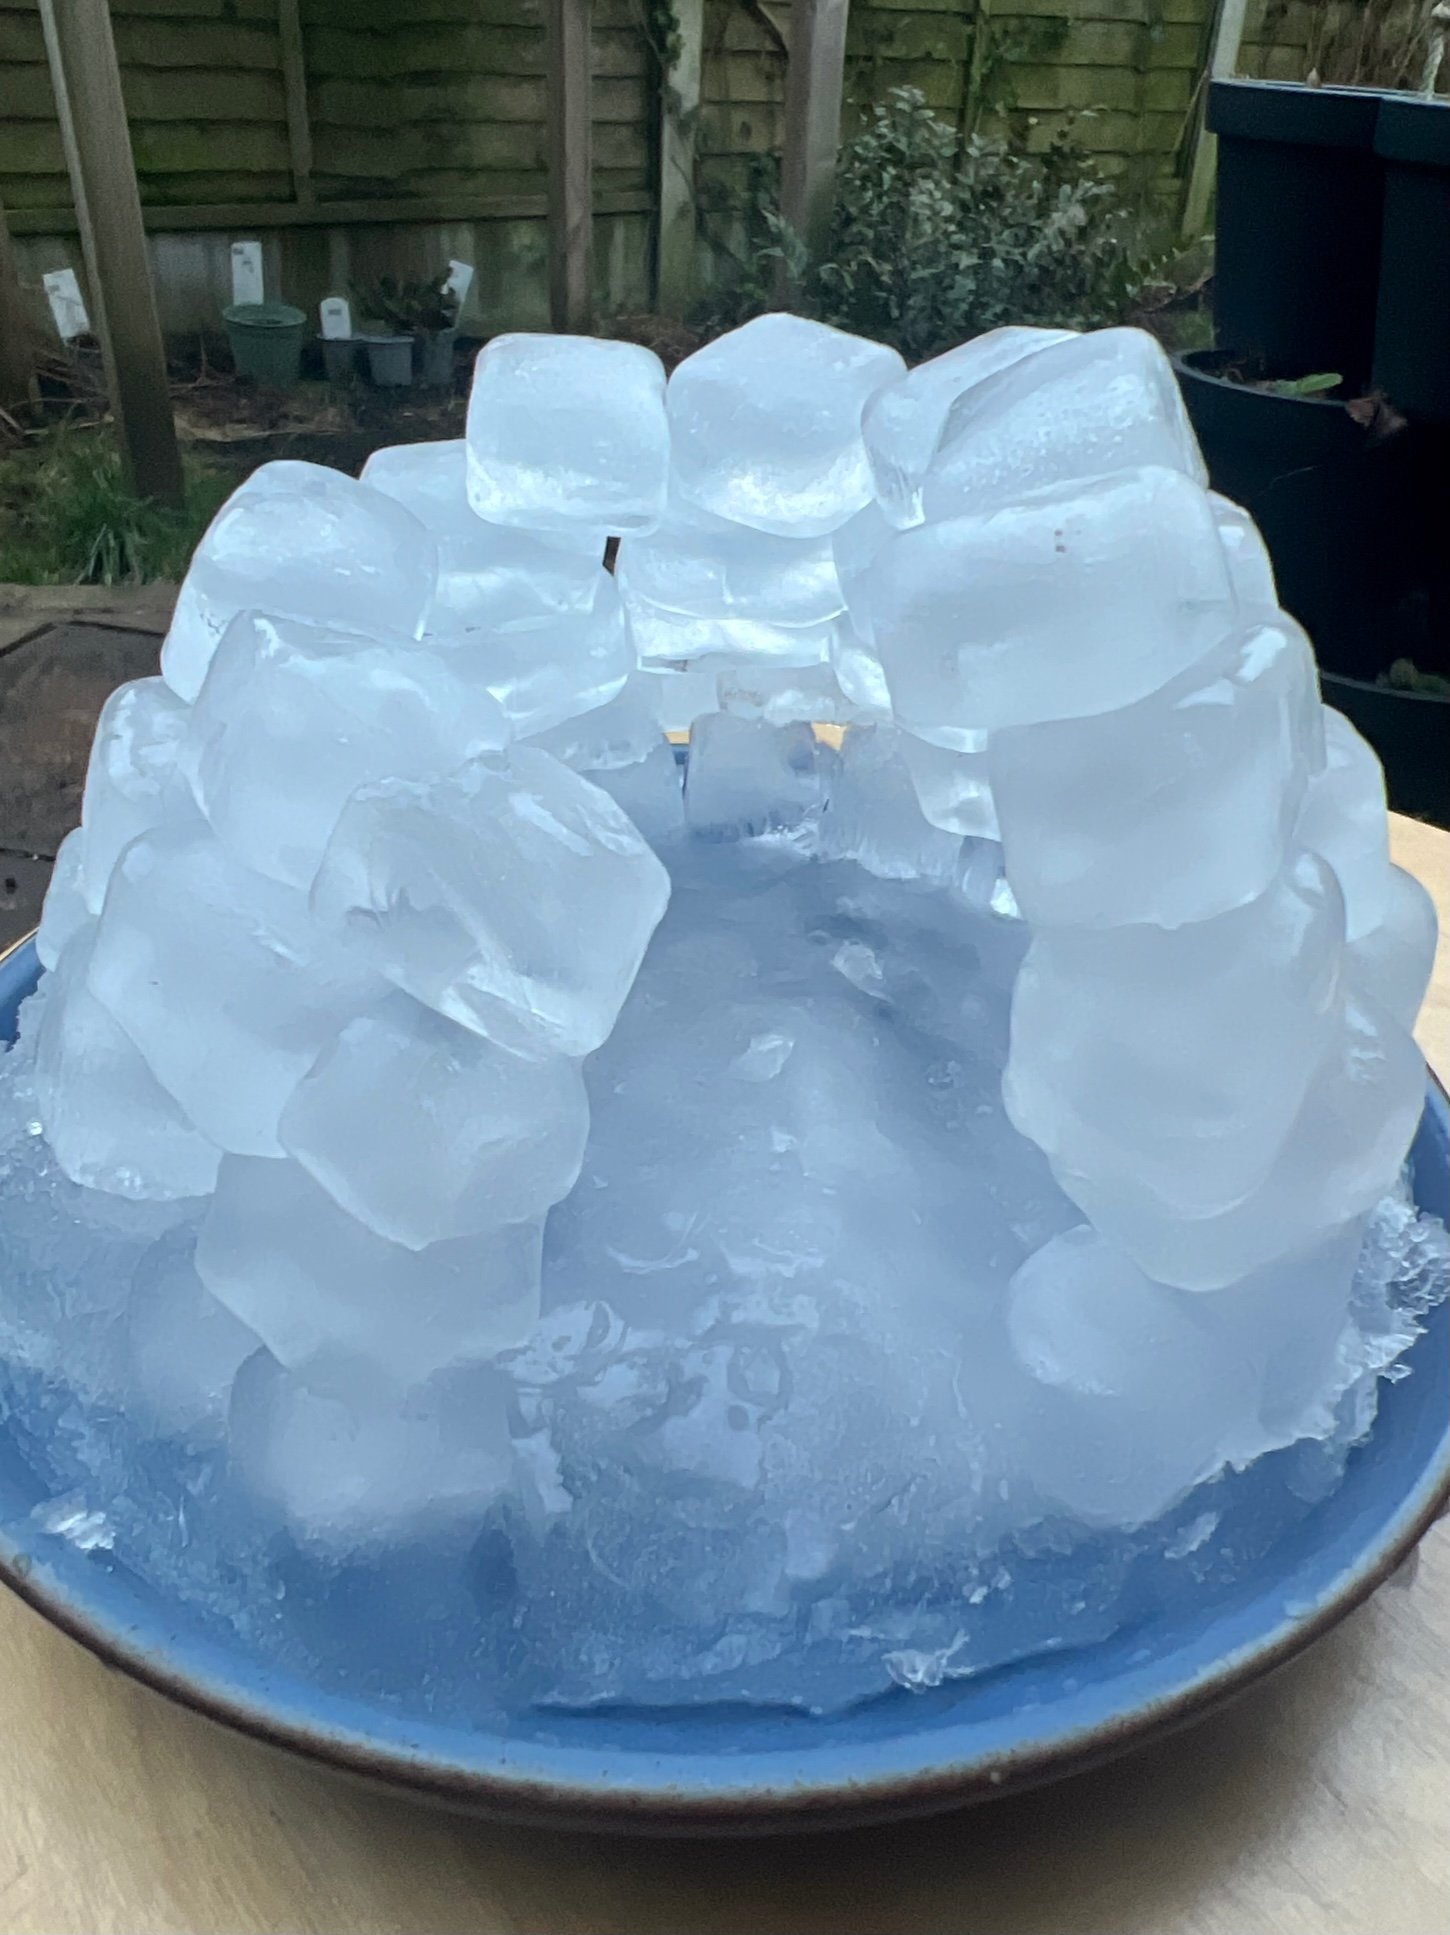
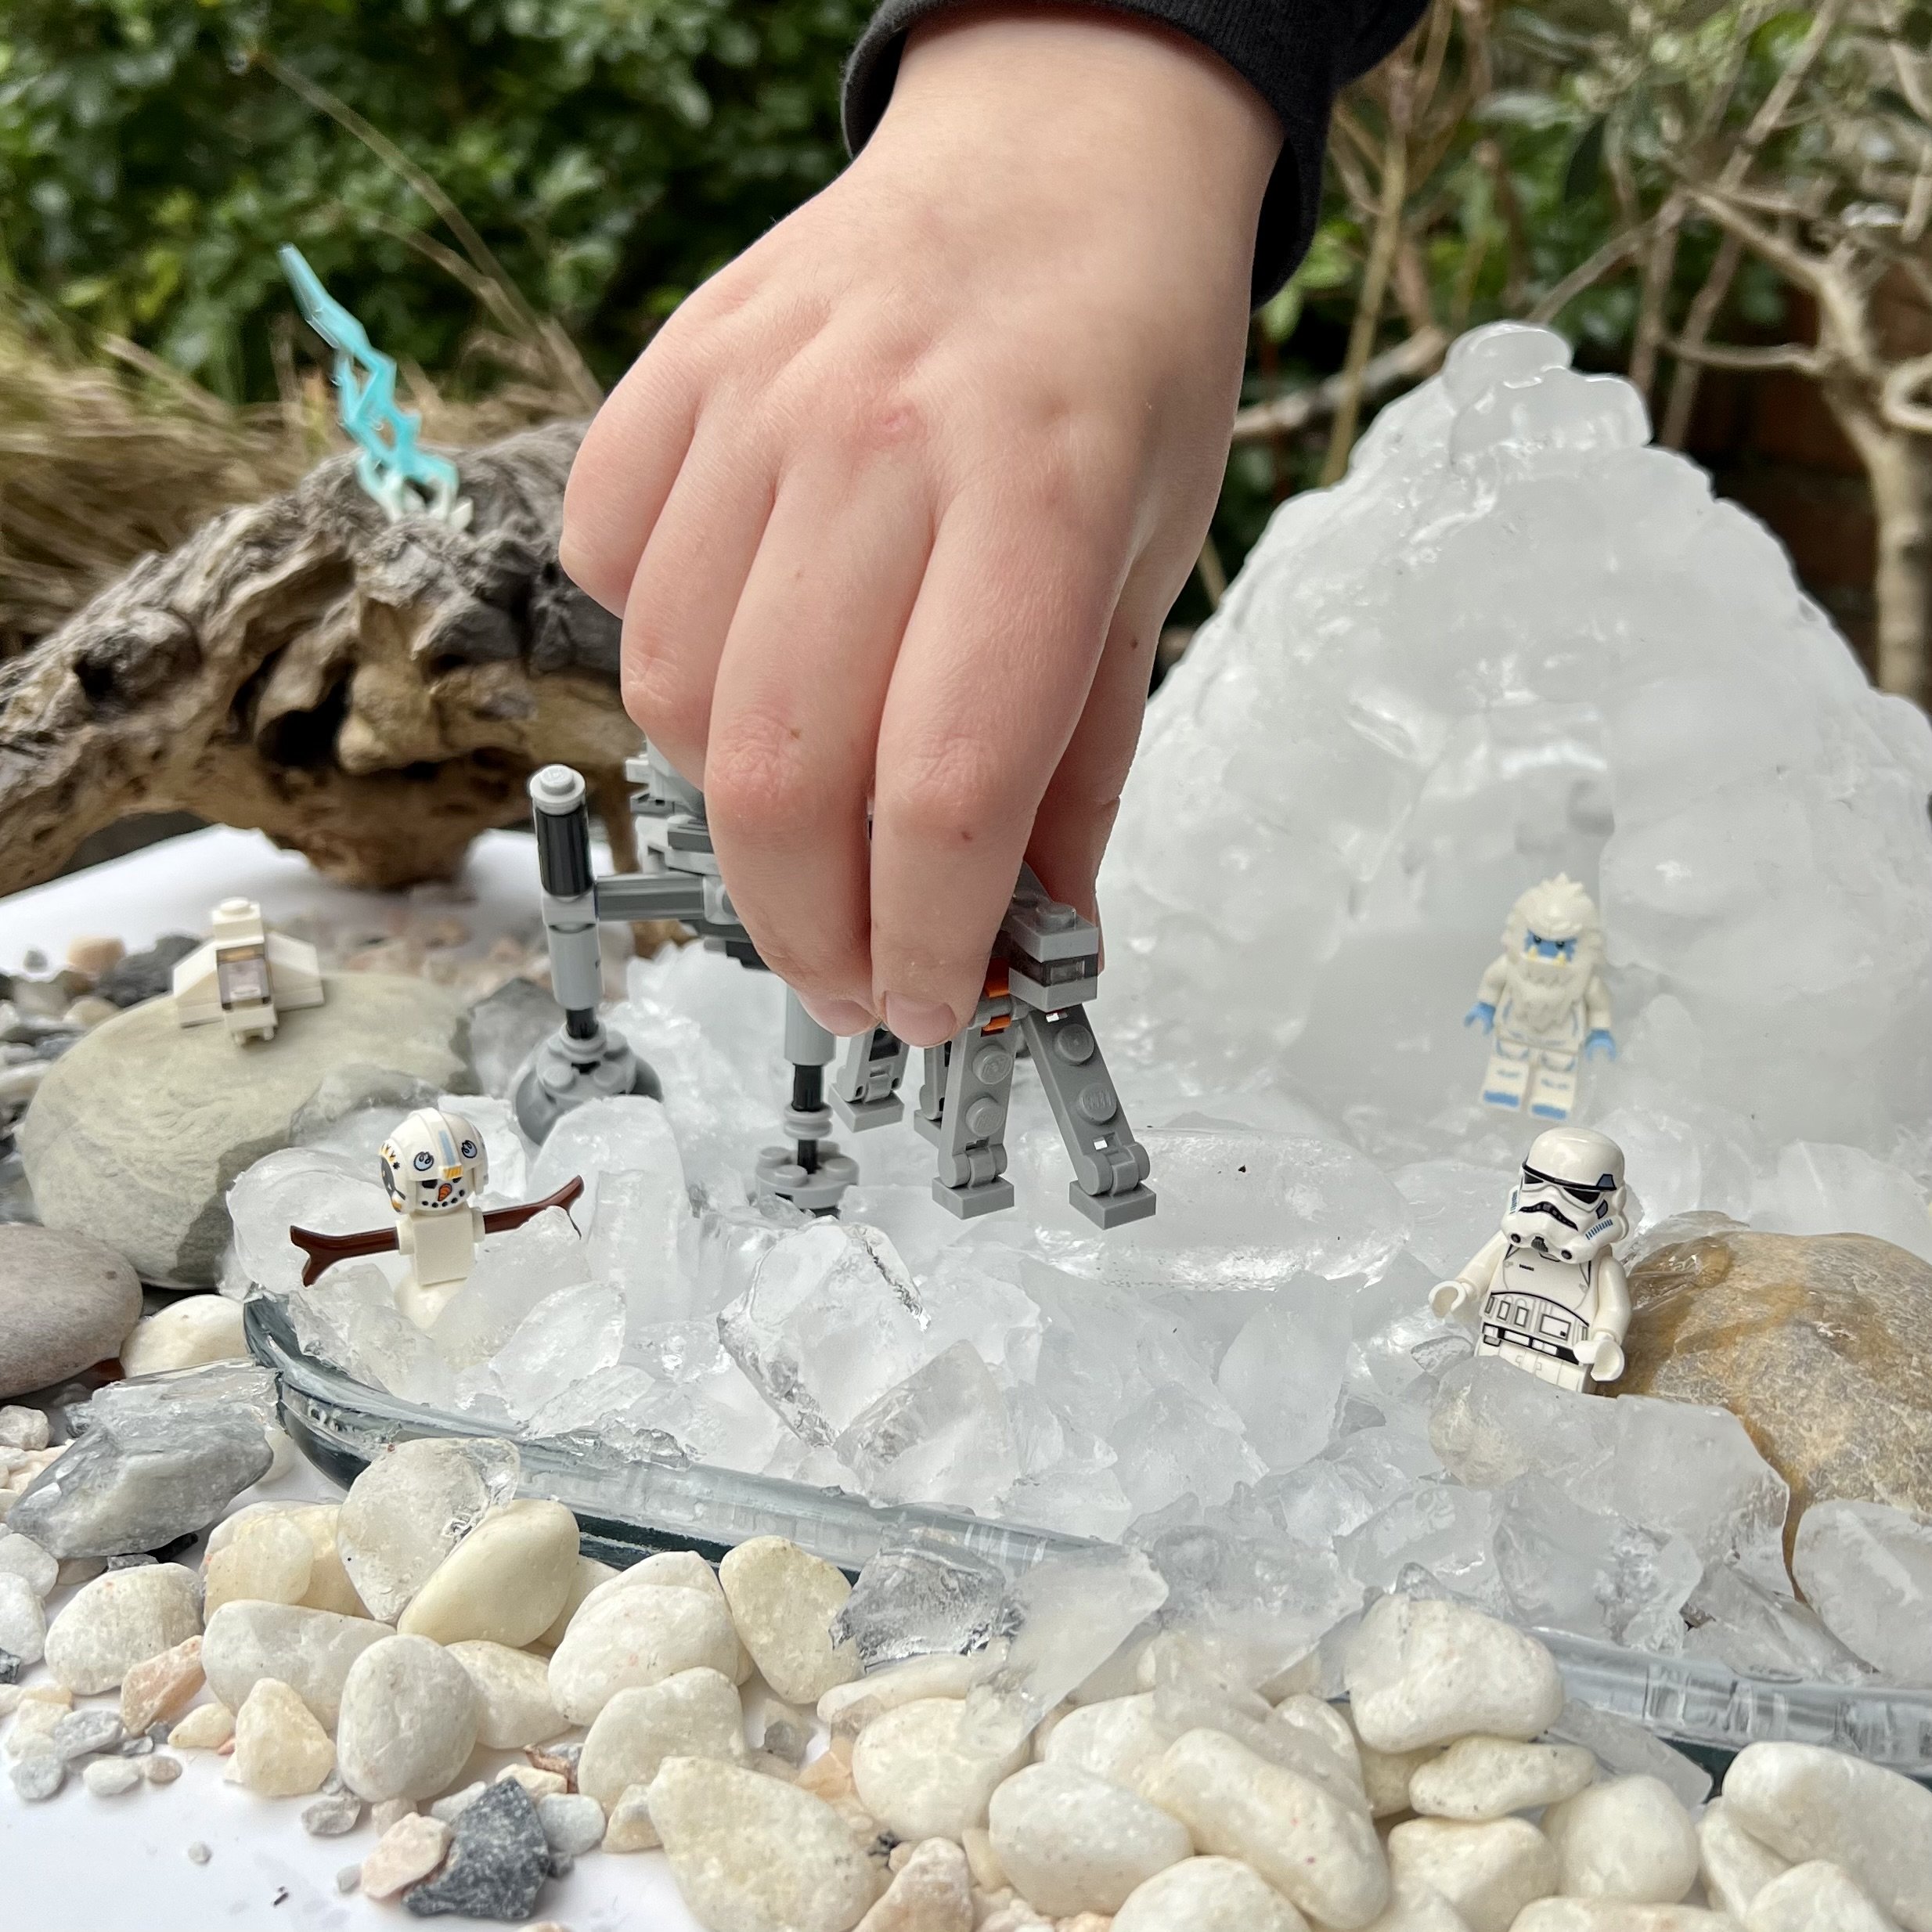
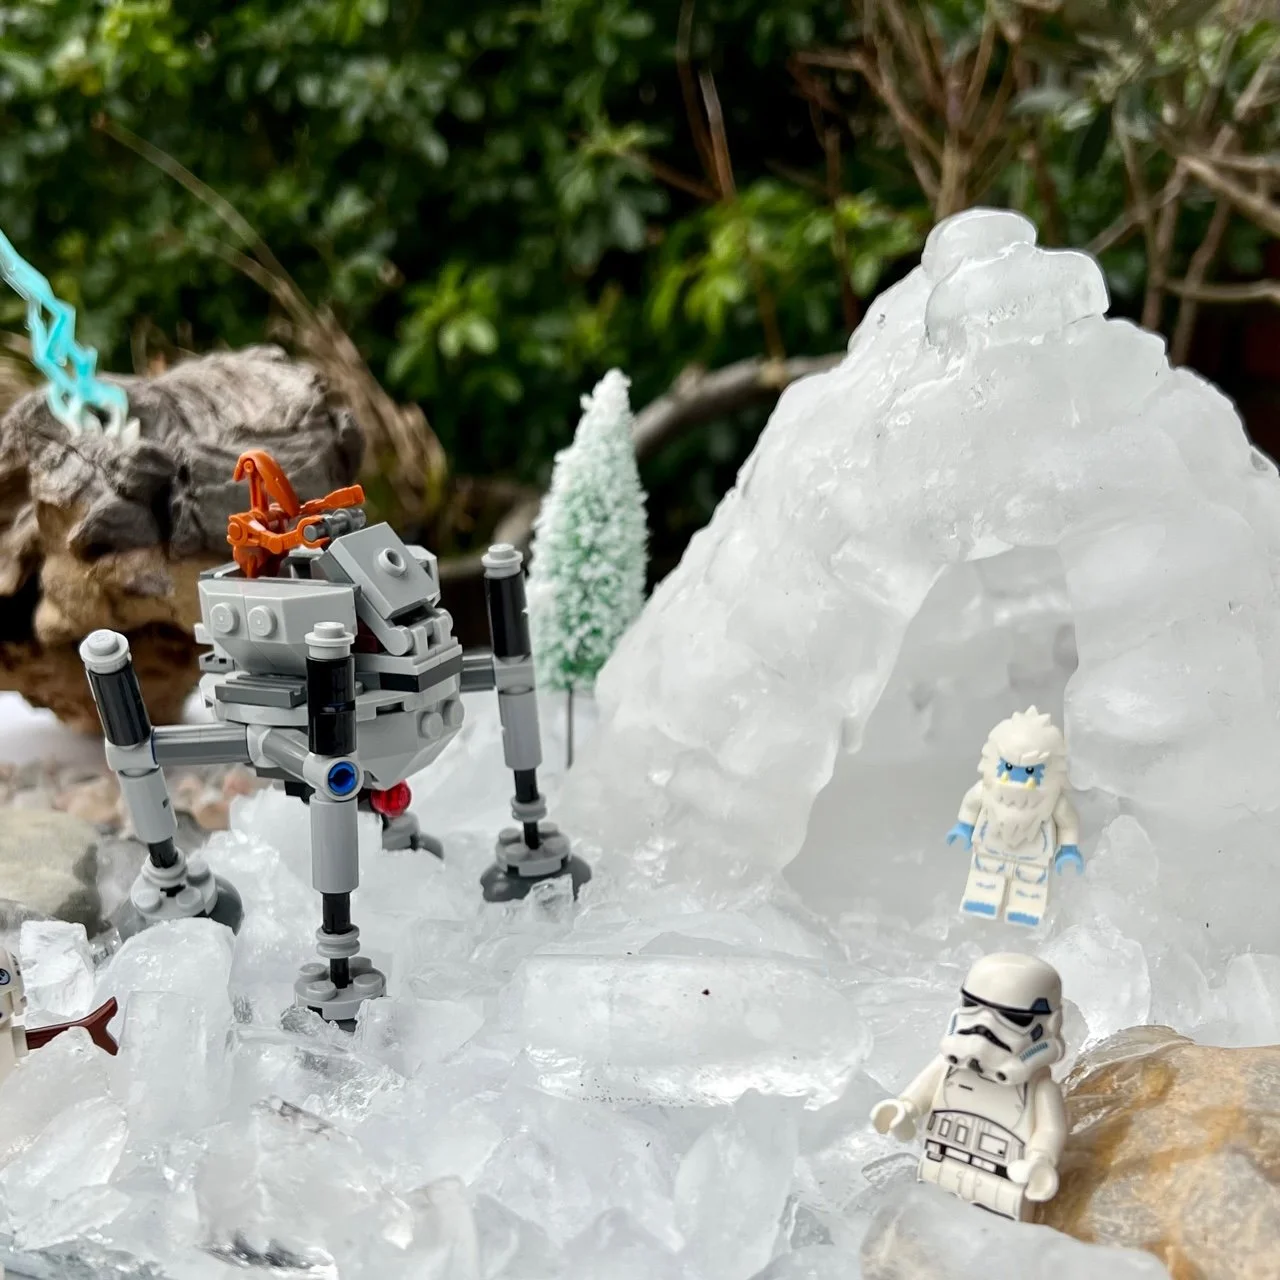
We made an ice scene, ready for some Lego Star Wars figures to move in! We placed the igloo on a bigger tray and added more crushed ice around the base. We then added some gravel and larger stones, and an interesting shaped piece of wood. You could add some arctic animals if you prefer.
It’s best to wrap up warm and take your igloo outdoors to play with as it will last longer before melting.
Have fun with your igloo!

Author: Denise Hope, home educating mum of two boys