Hammered leaf and flower prints

Creating hammered leaf and flower art is a really fun activity to do for both children and adults. By pounding the leaves and flowers you release their pigments which transfer to your paper to make beautiful botanical prints. It’s really fun to see how different flowers and leaves print - some retain their detail, others just leave a beautiful burst of colour.
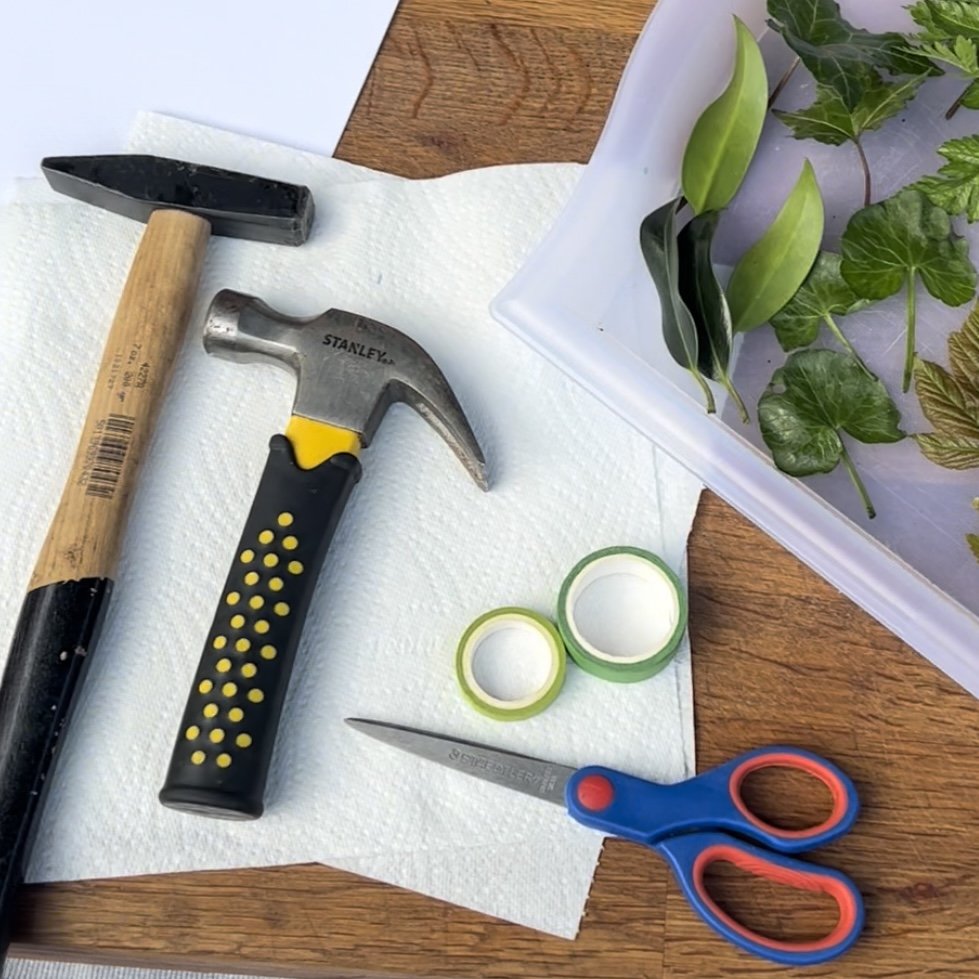
What you will need:
Leaves and flowers
A hammer
Paper (a heavyweight paper such as watercolour paper works the best)
Kitchen roll
Washi / masking tape
Scissors
a stiff paint brush
What you need to do:
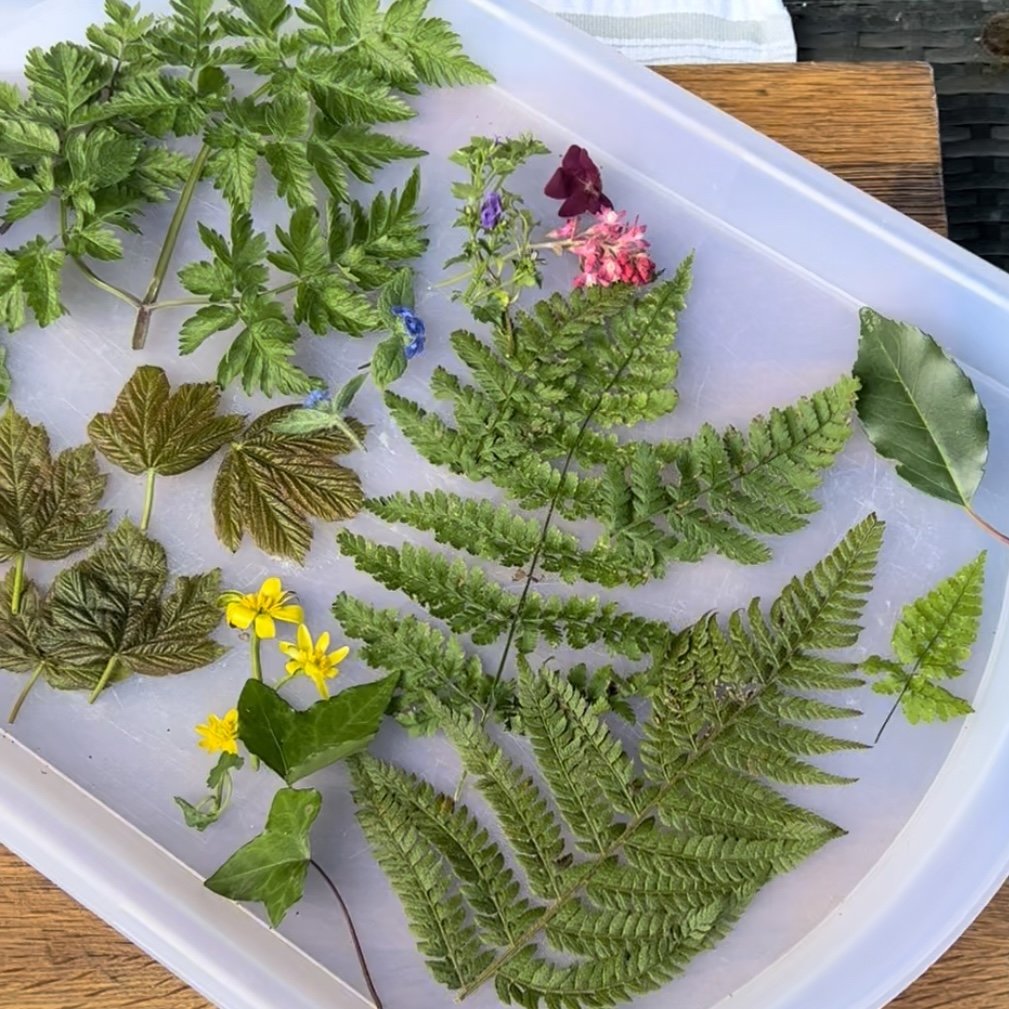
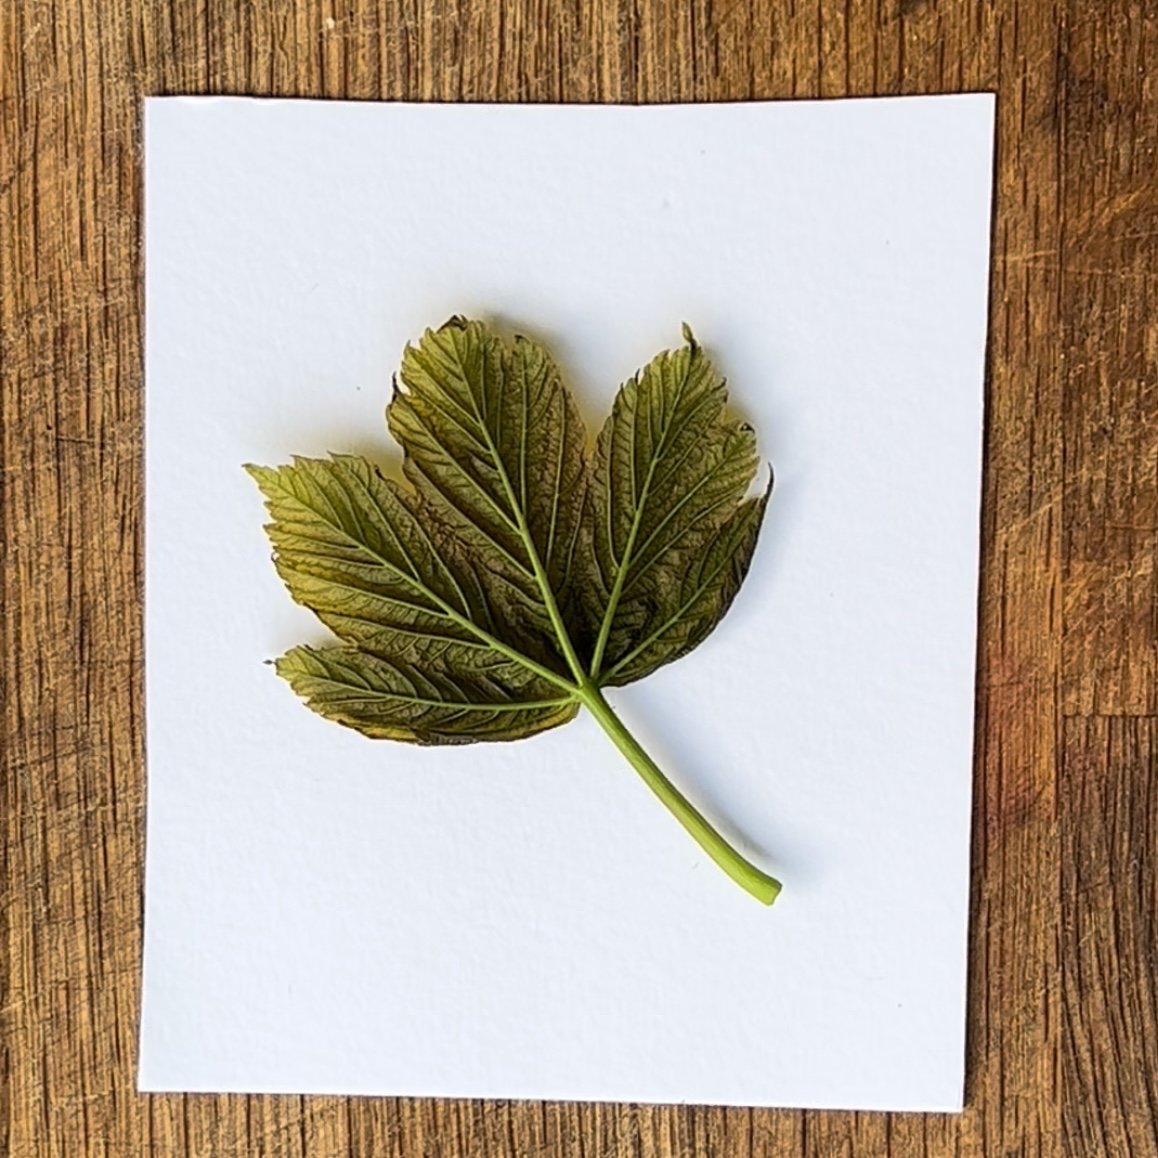
Start by going for a walk to gather some leaves and flowers. You’ll want to find fresh, juicy leaves as older ones tend to be a bit dry. Some will work better than others so it’s good to have a selection!
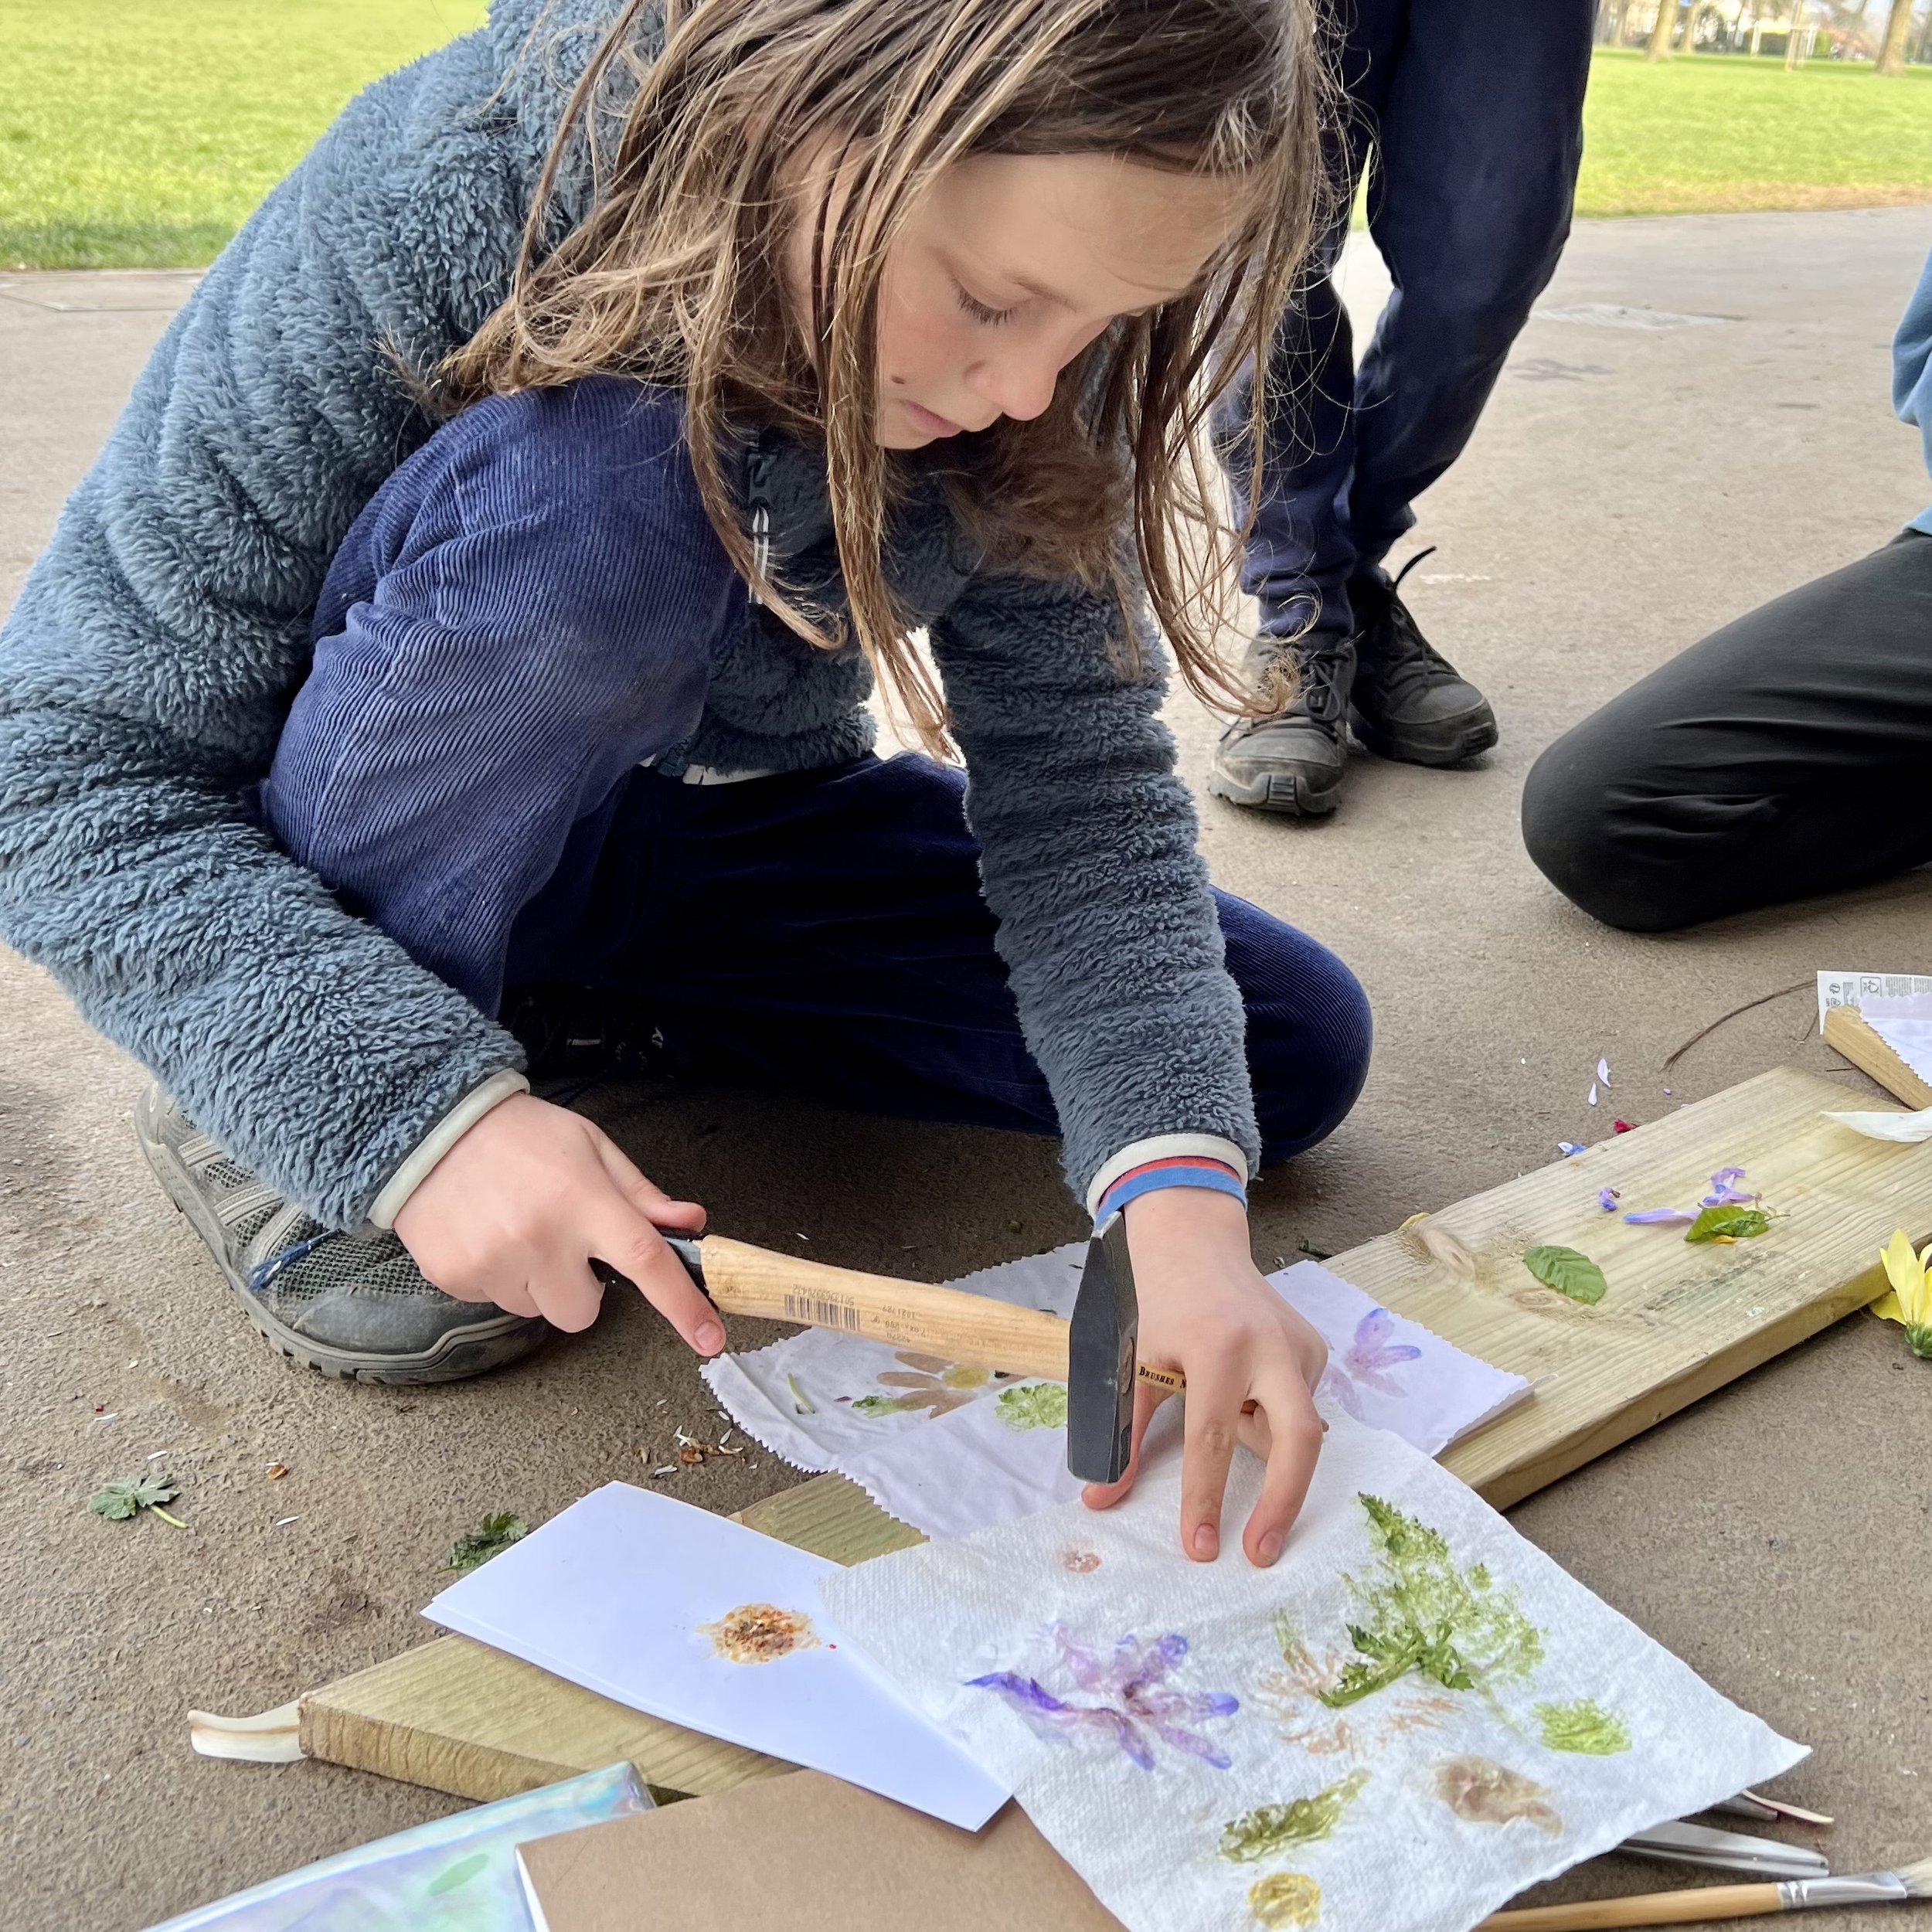
Lay your paper on a hard surface (I used a chopping board) and then position your flower or leaf. I found it easier to work with one at a time to avoid too much movement while you are hammering.
Remove the stem from your flowers. It’s also good to trim the green part where the stem meets the flower as this can create a bit of a squishy mess when hammered!
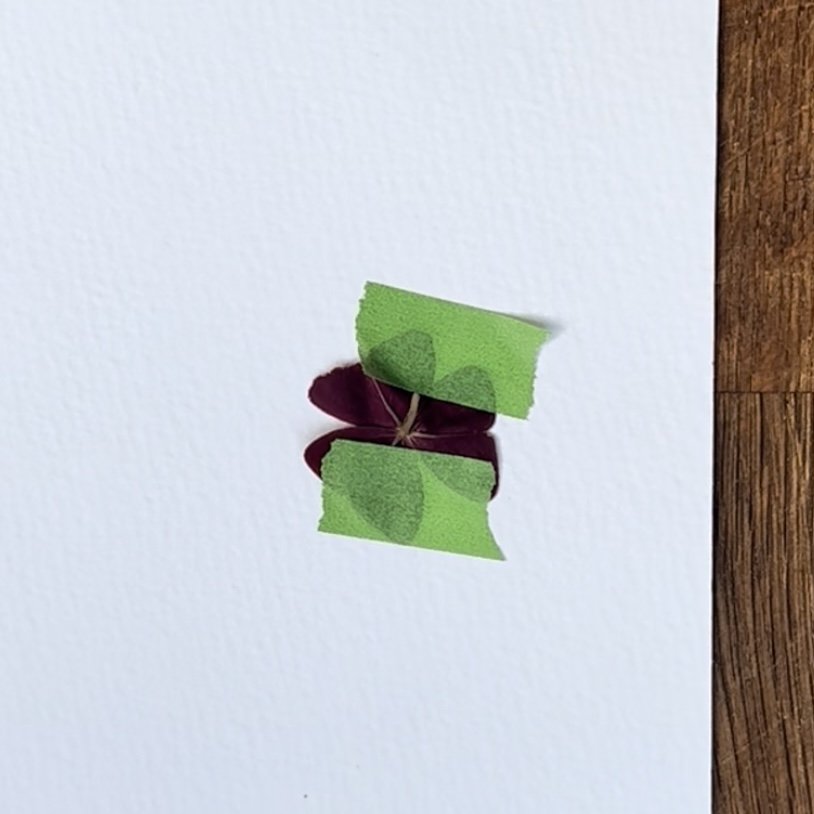
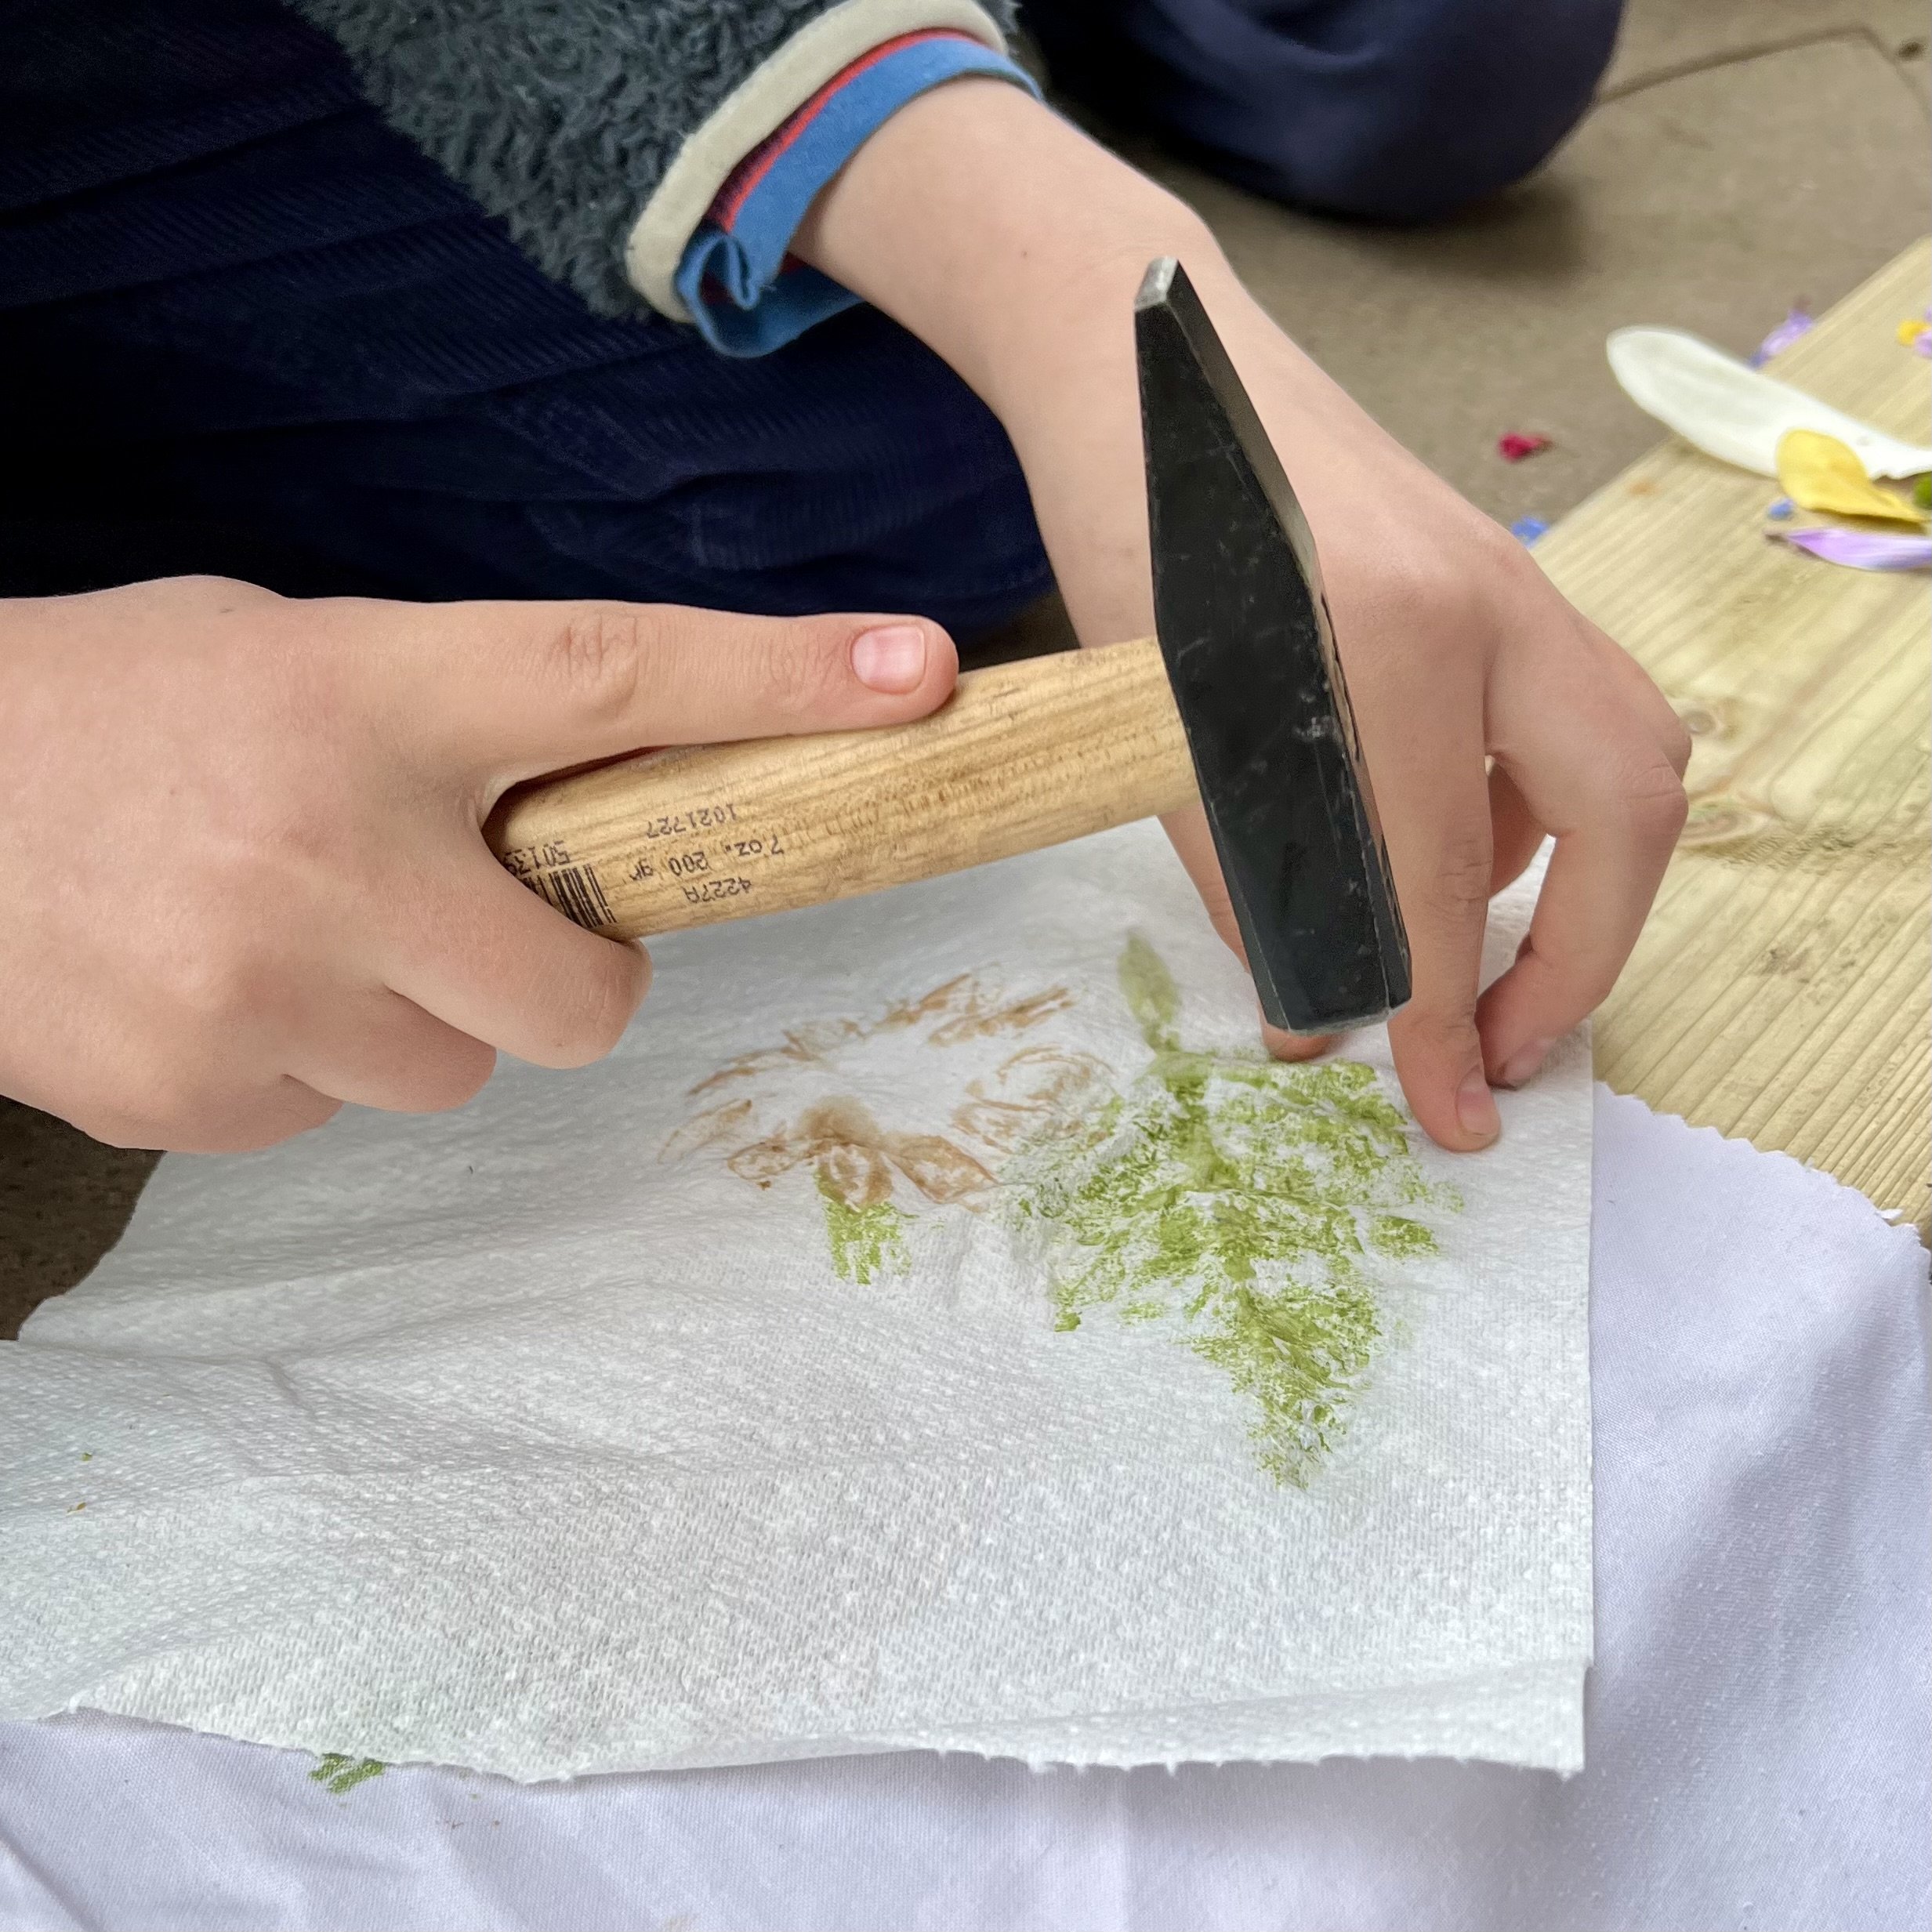
Place a sheet of kitchen paper over your leaf or flower. This helps hold your plant material in place and prevents the pigment transferring to your hammer and making prints on the paper. You could also use washi tape (or masking tape) to fix your flower or leaf in place if you find that it’s not staying flat.
You can then start hammering! If you haven’t used tape, it’s a good idea to start by lightly tapping over the entire surface of the leaf or flower to help set it in place. Then hammer all over the entire surface of your plant material more firmly. You’ll know when it’s working as the natural pigment from the leaves will start to show through on the kitchen paper.
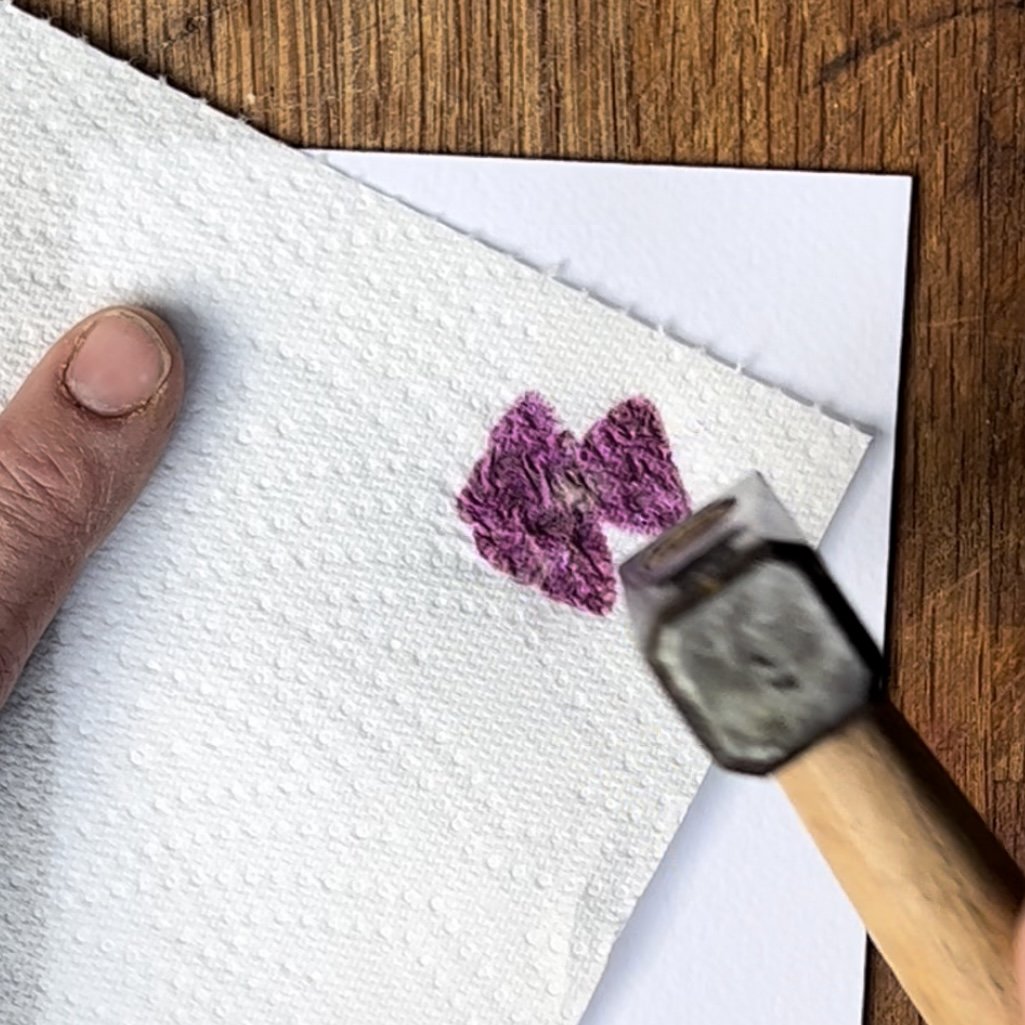
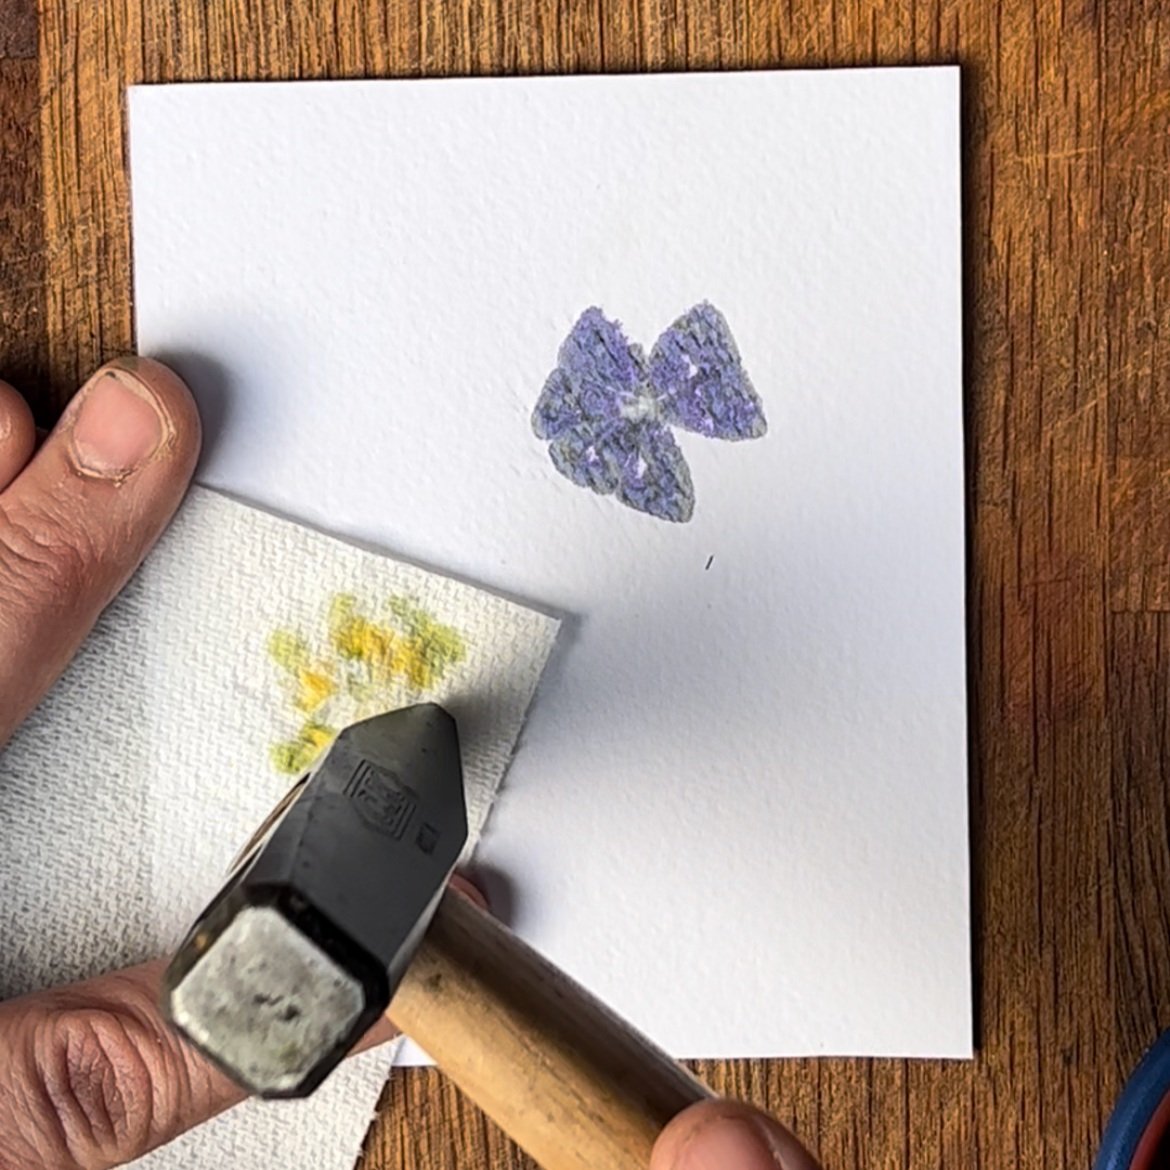
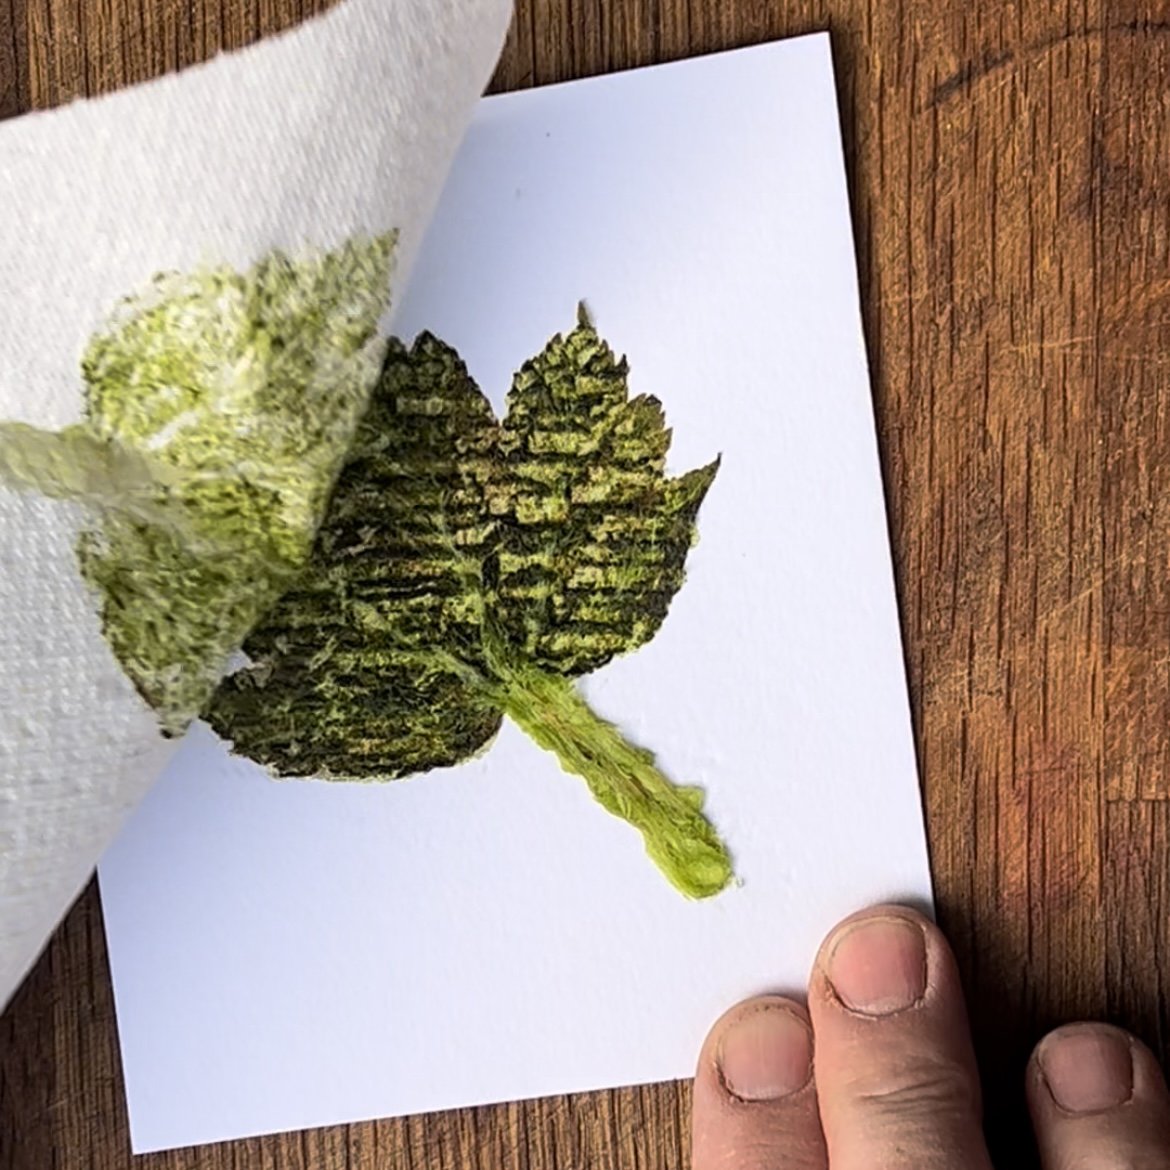
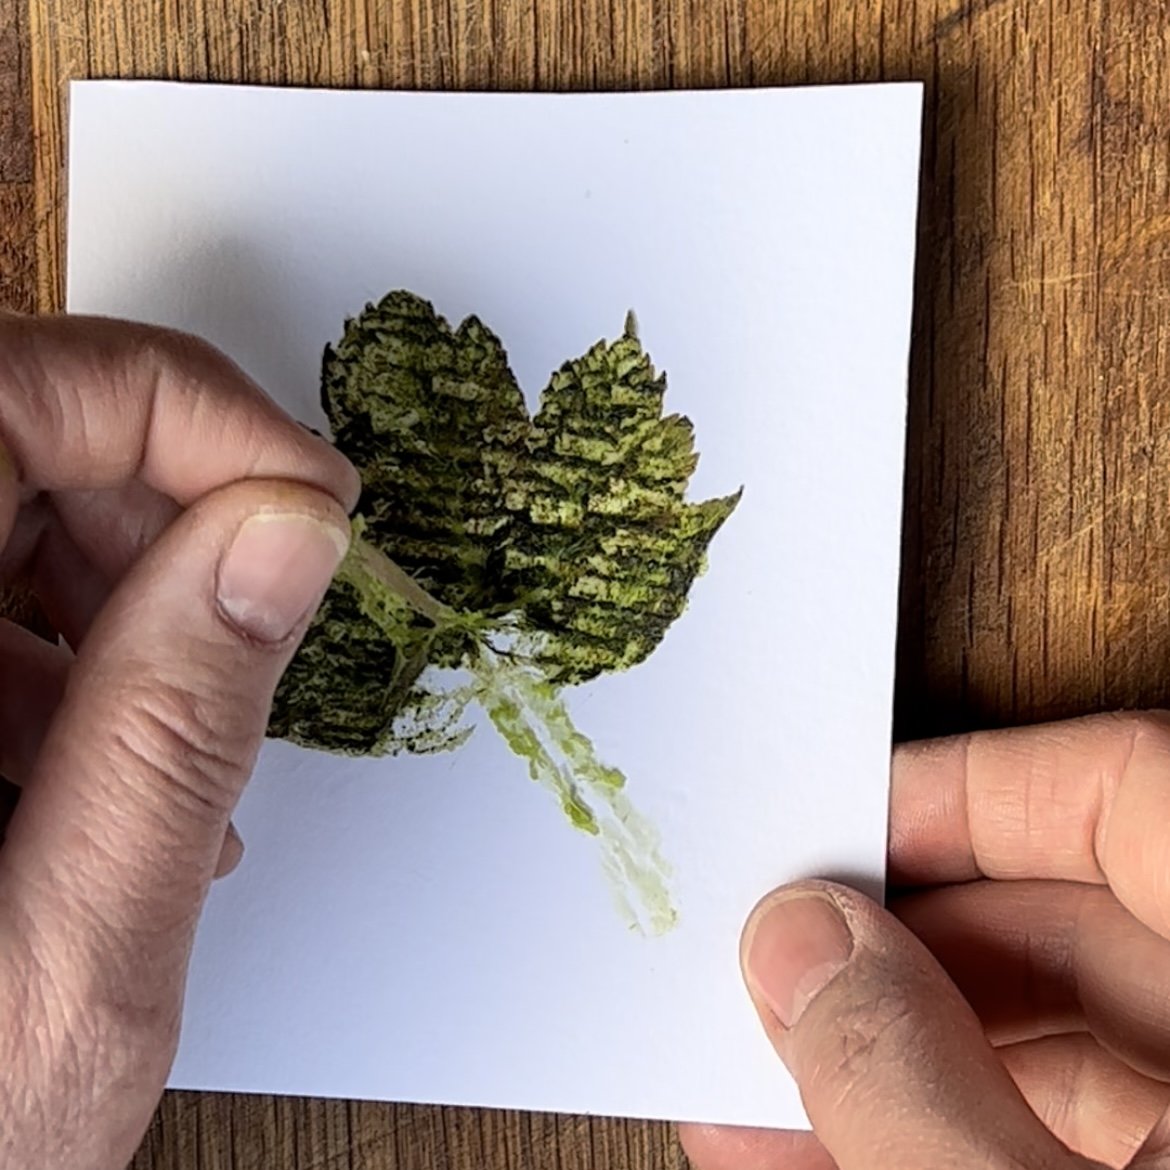
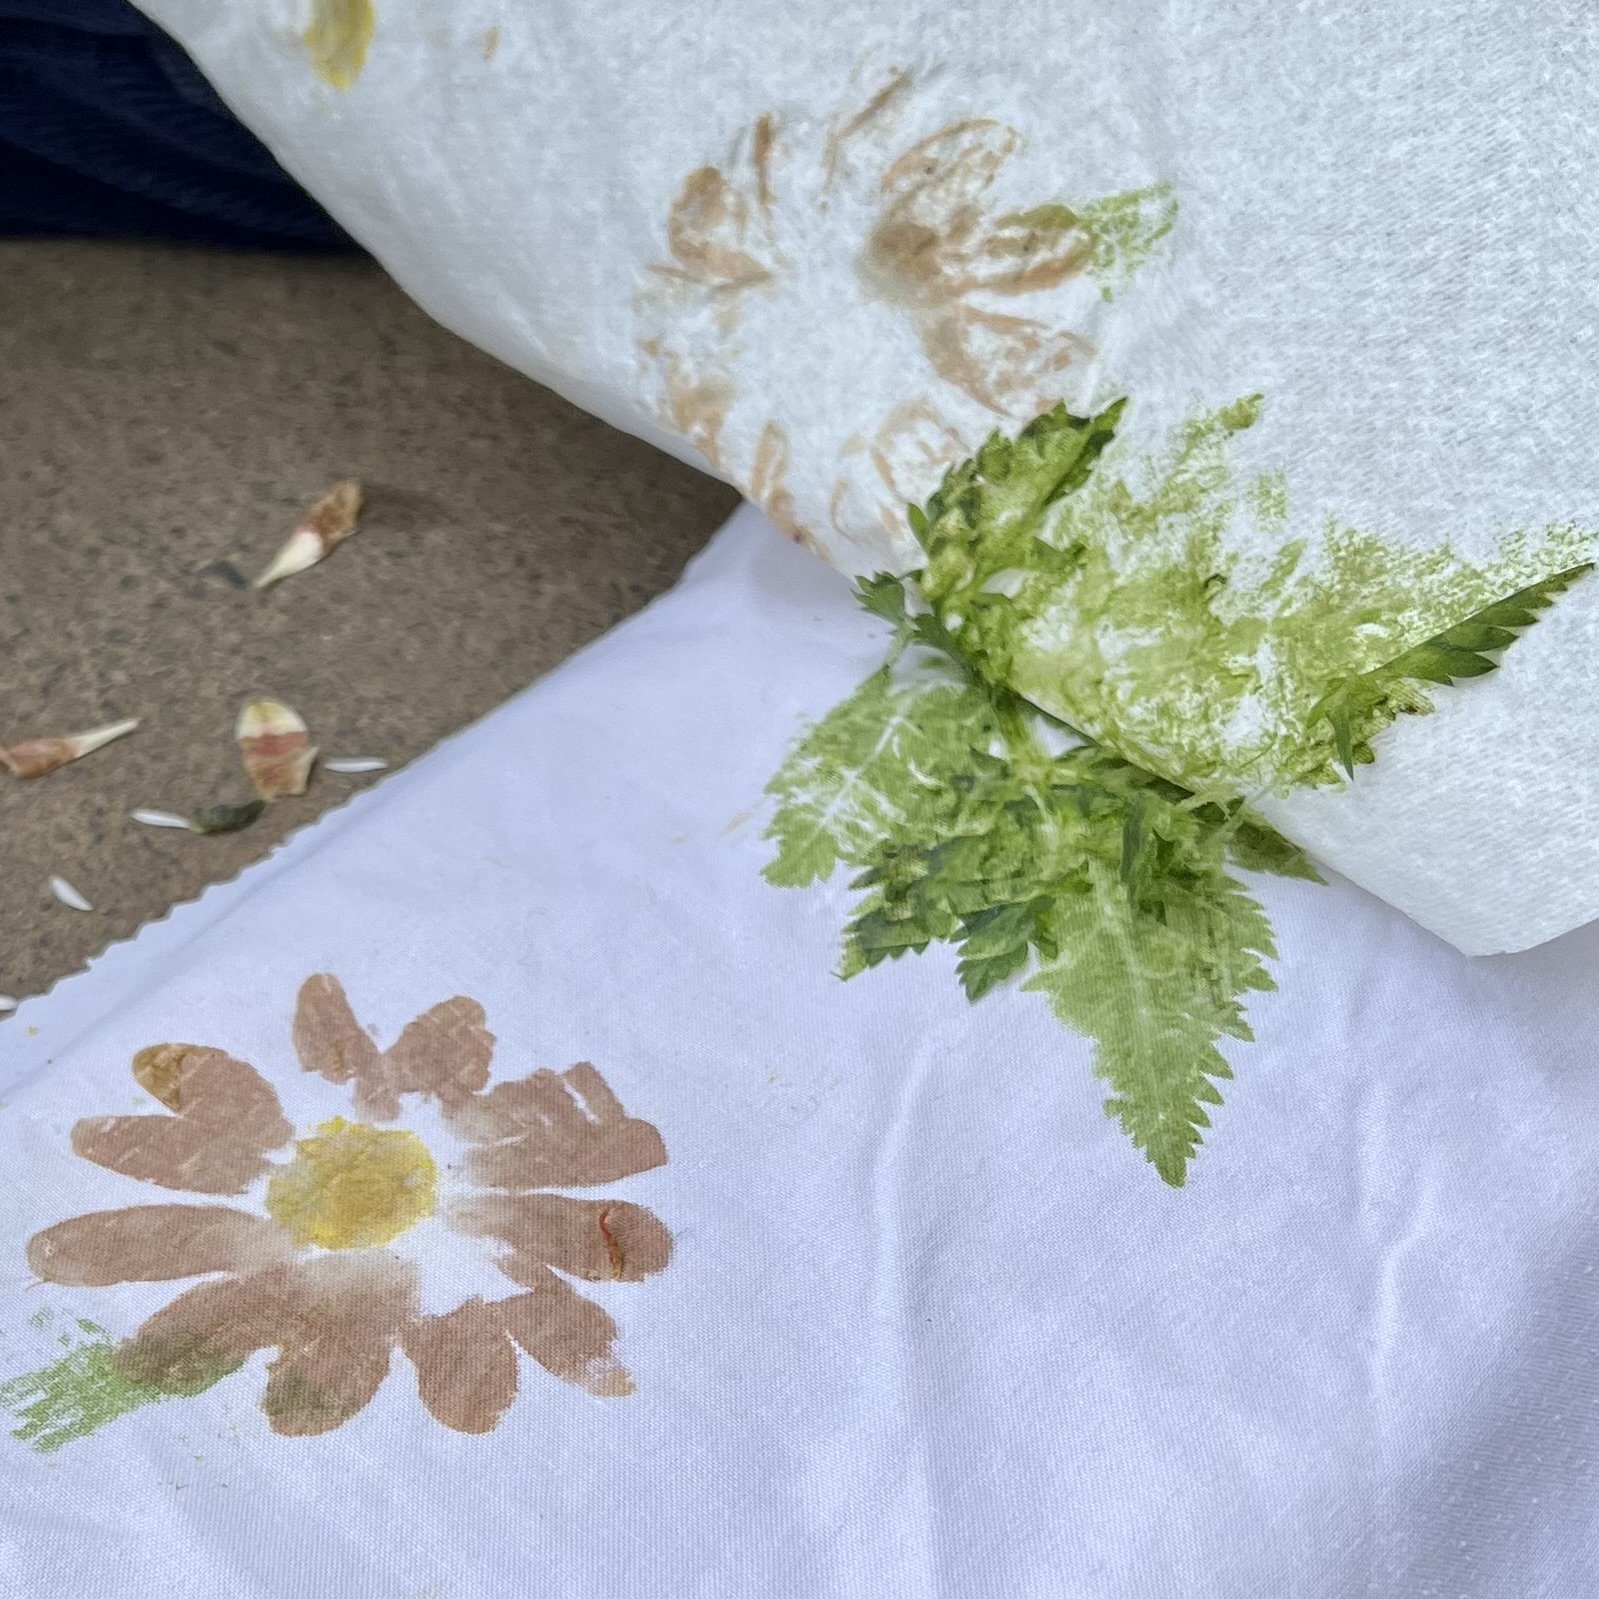
Once you are sure that you have hammered evenly across the whole leaf or flower, gently remove the kitchen roll, and peel back the plant material left behind to reveal the beautiful botanical print.
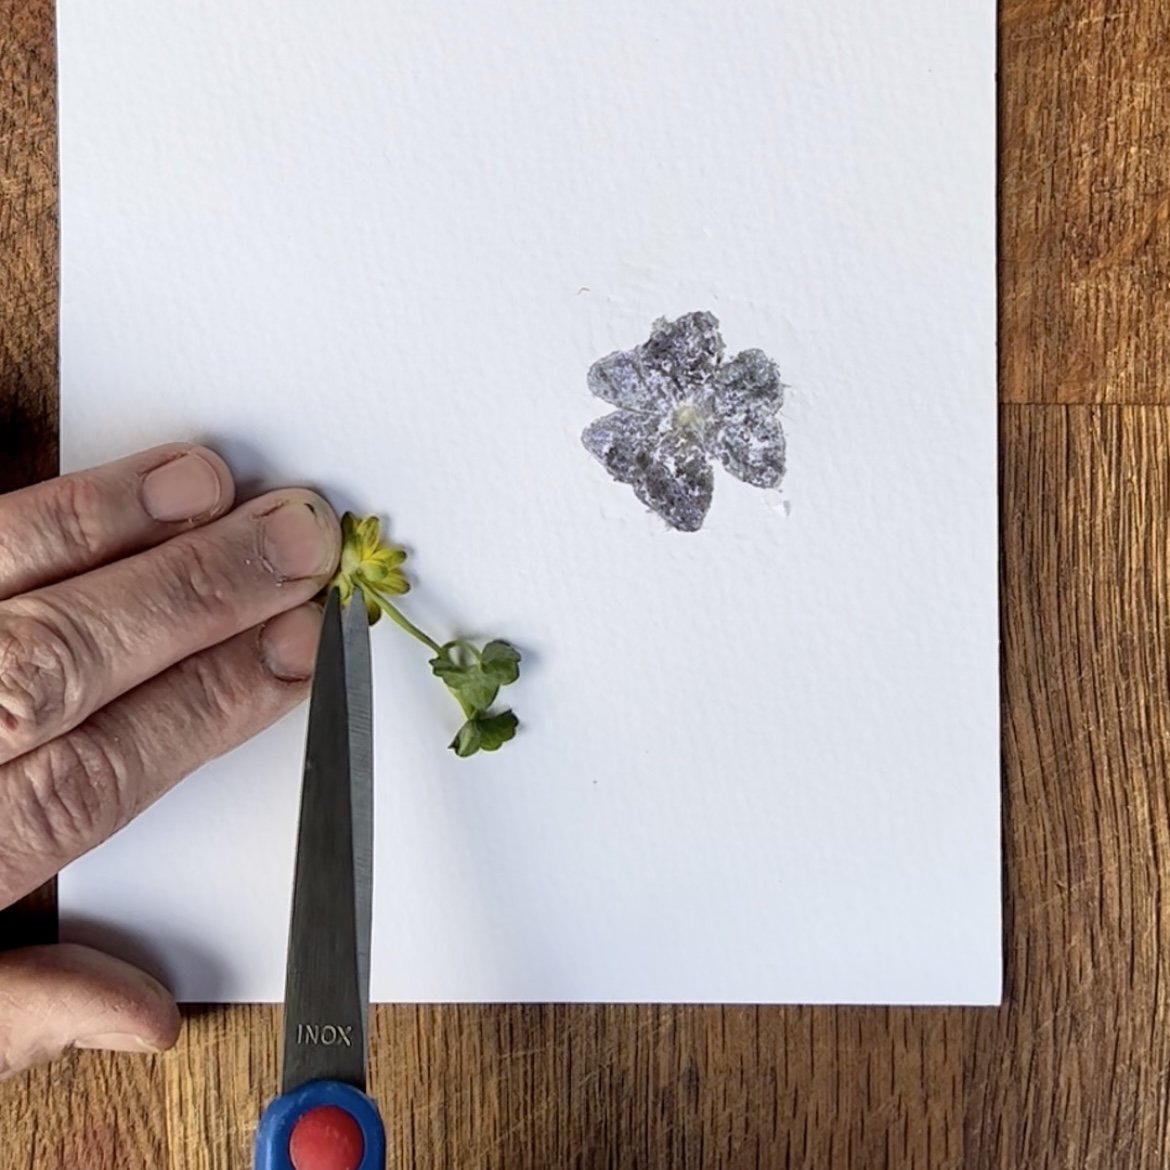
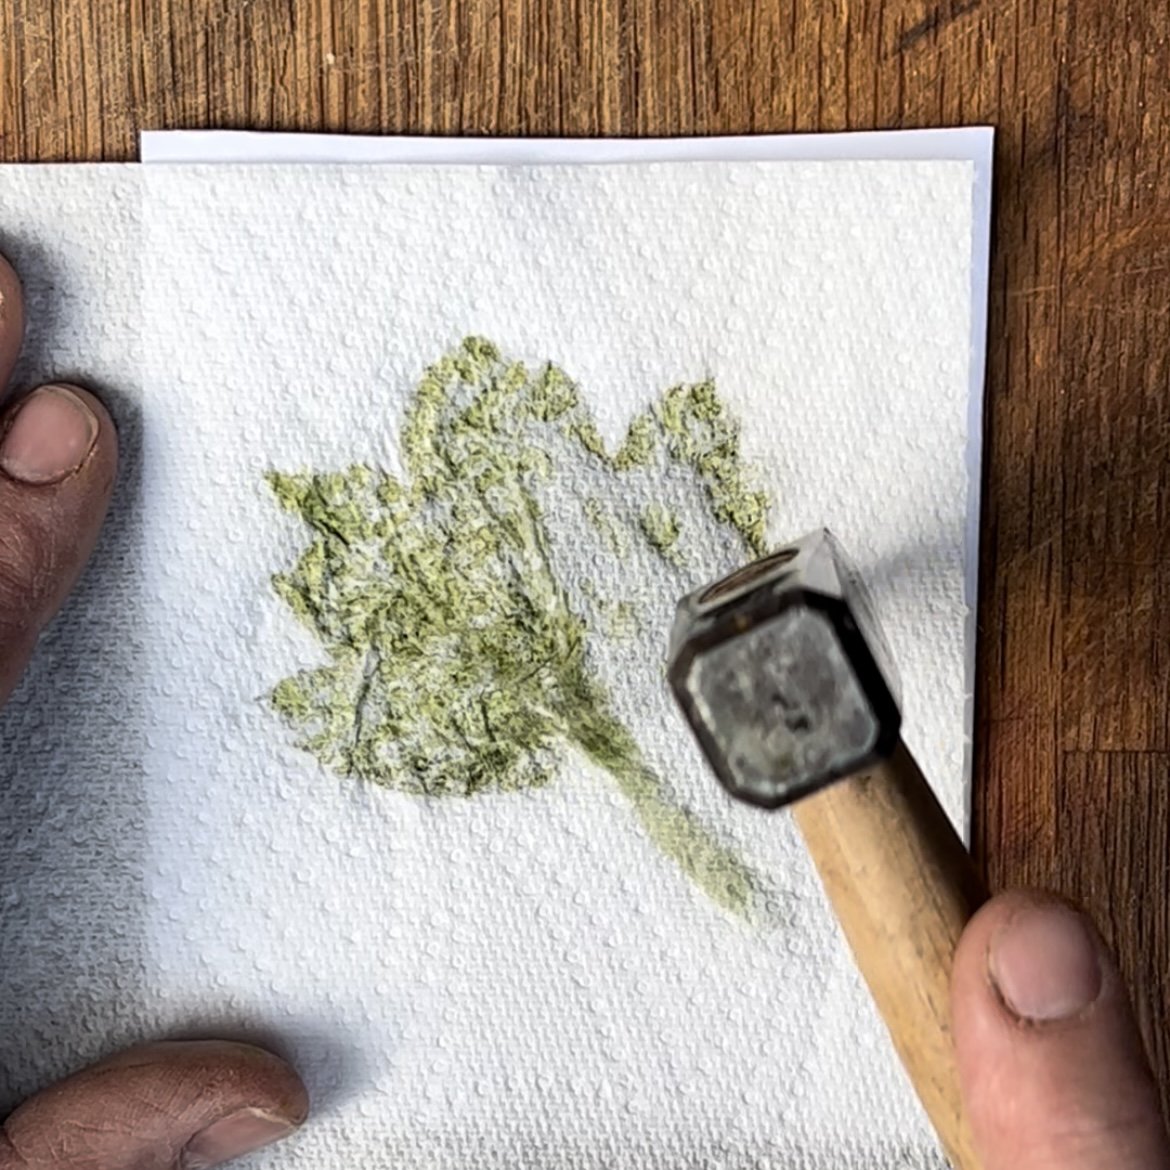
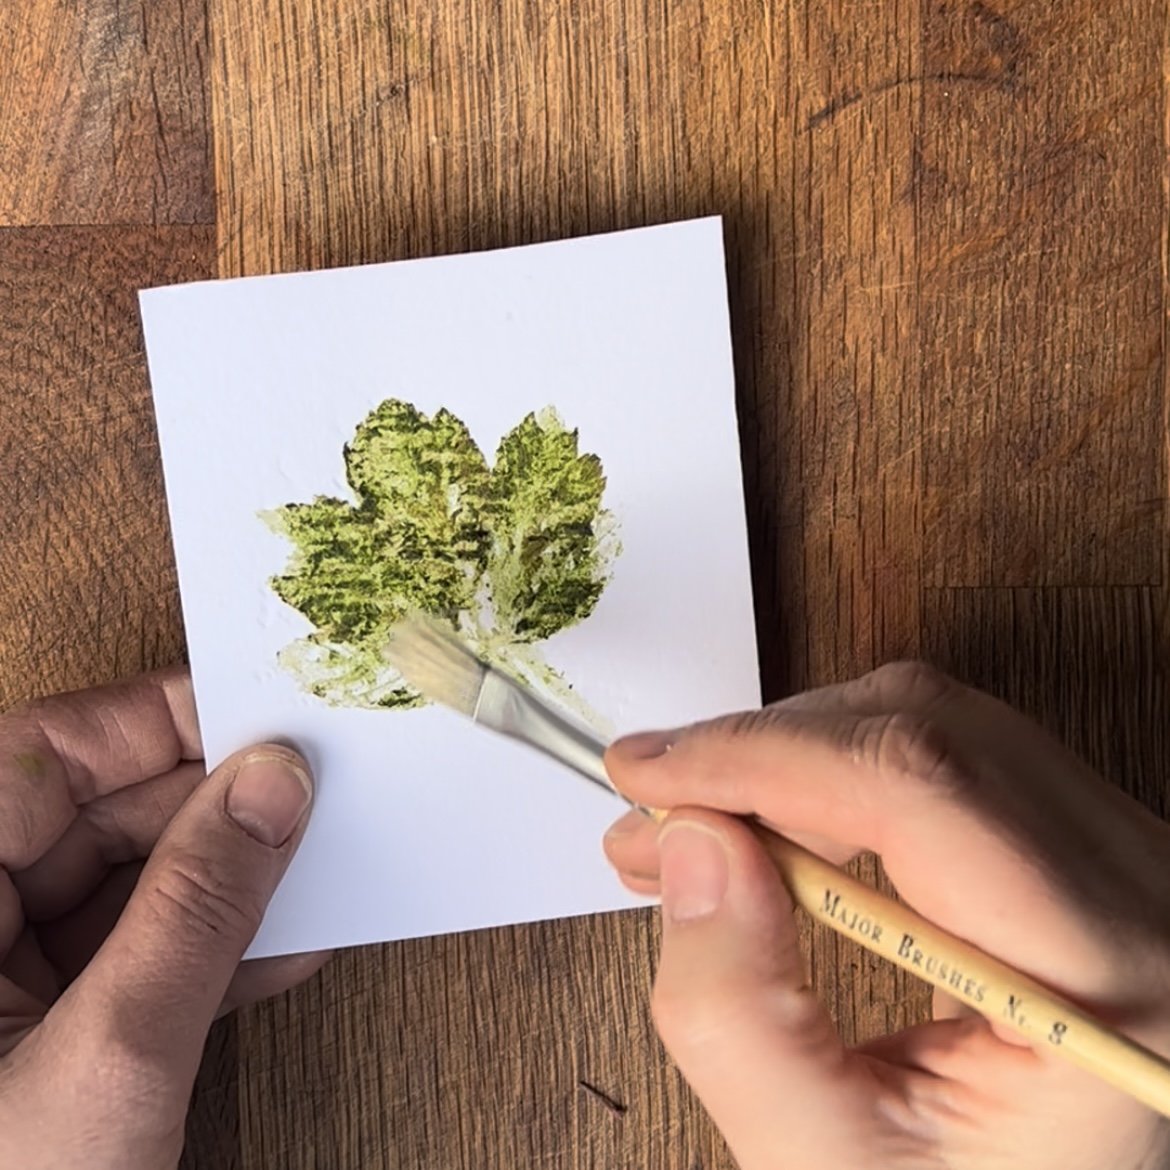
Tip: If you have hammered a little too hard (like I did with this leaf below!) and the plant material is stuck to the paper, leave it to dry and then use a stiff paint brush to scrape it away.
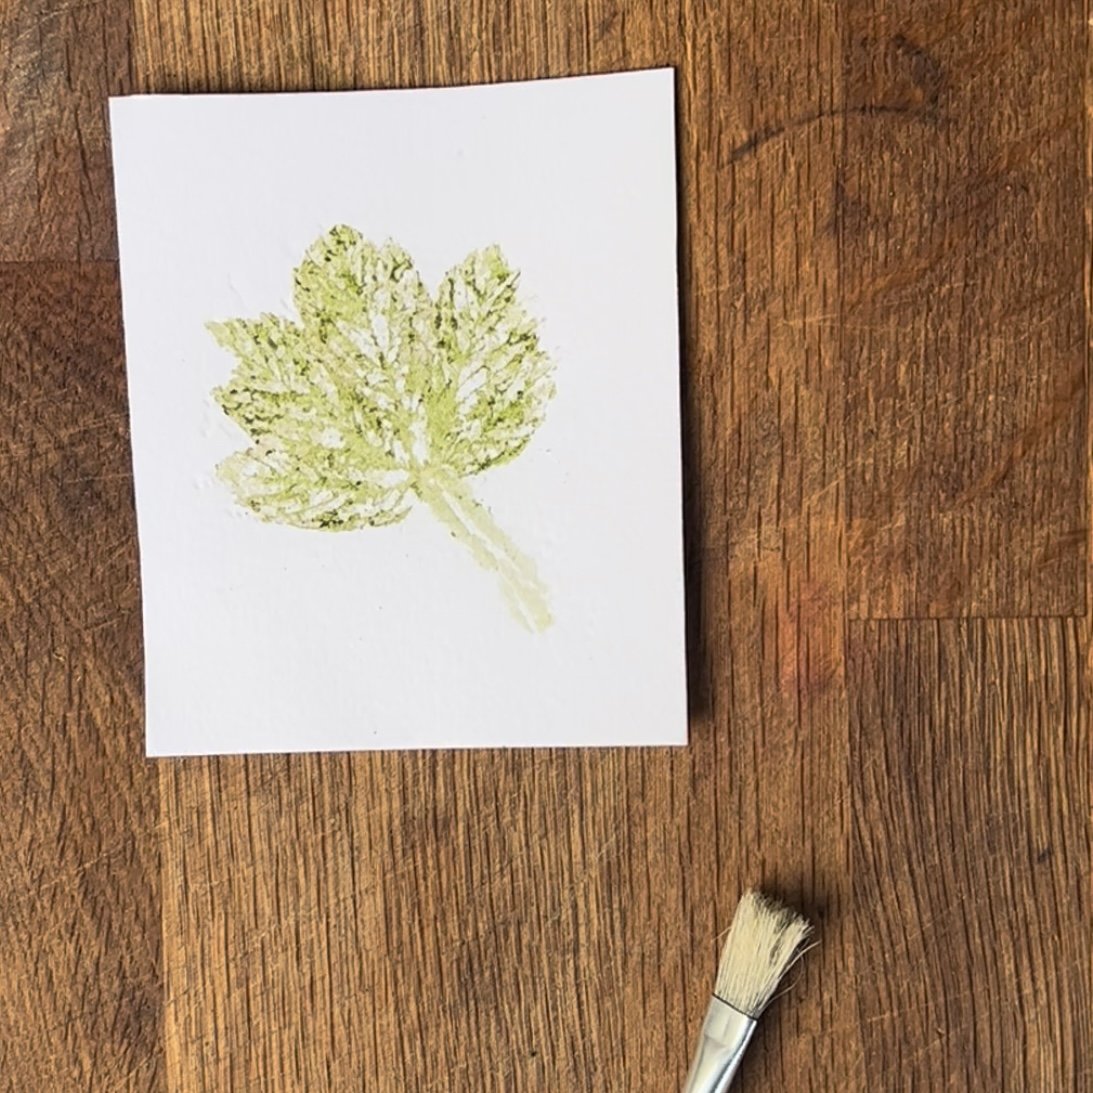
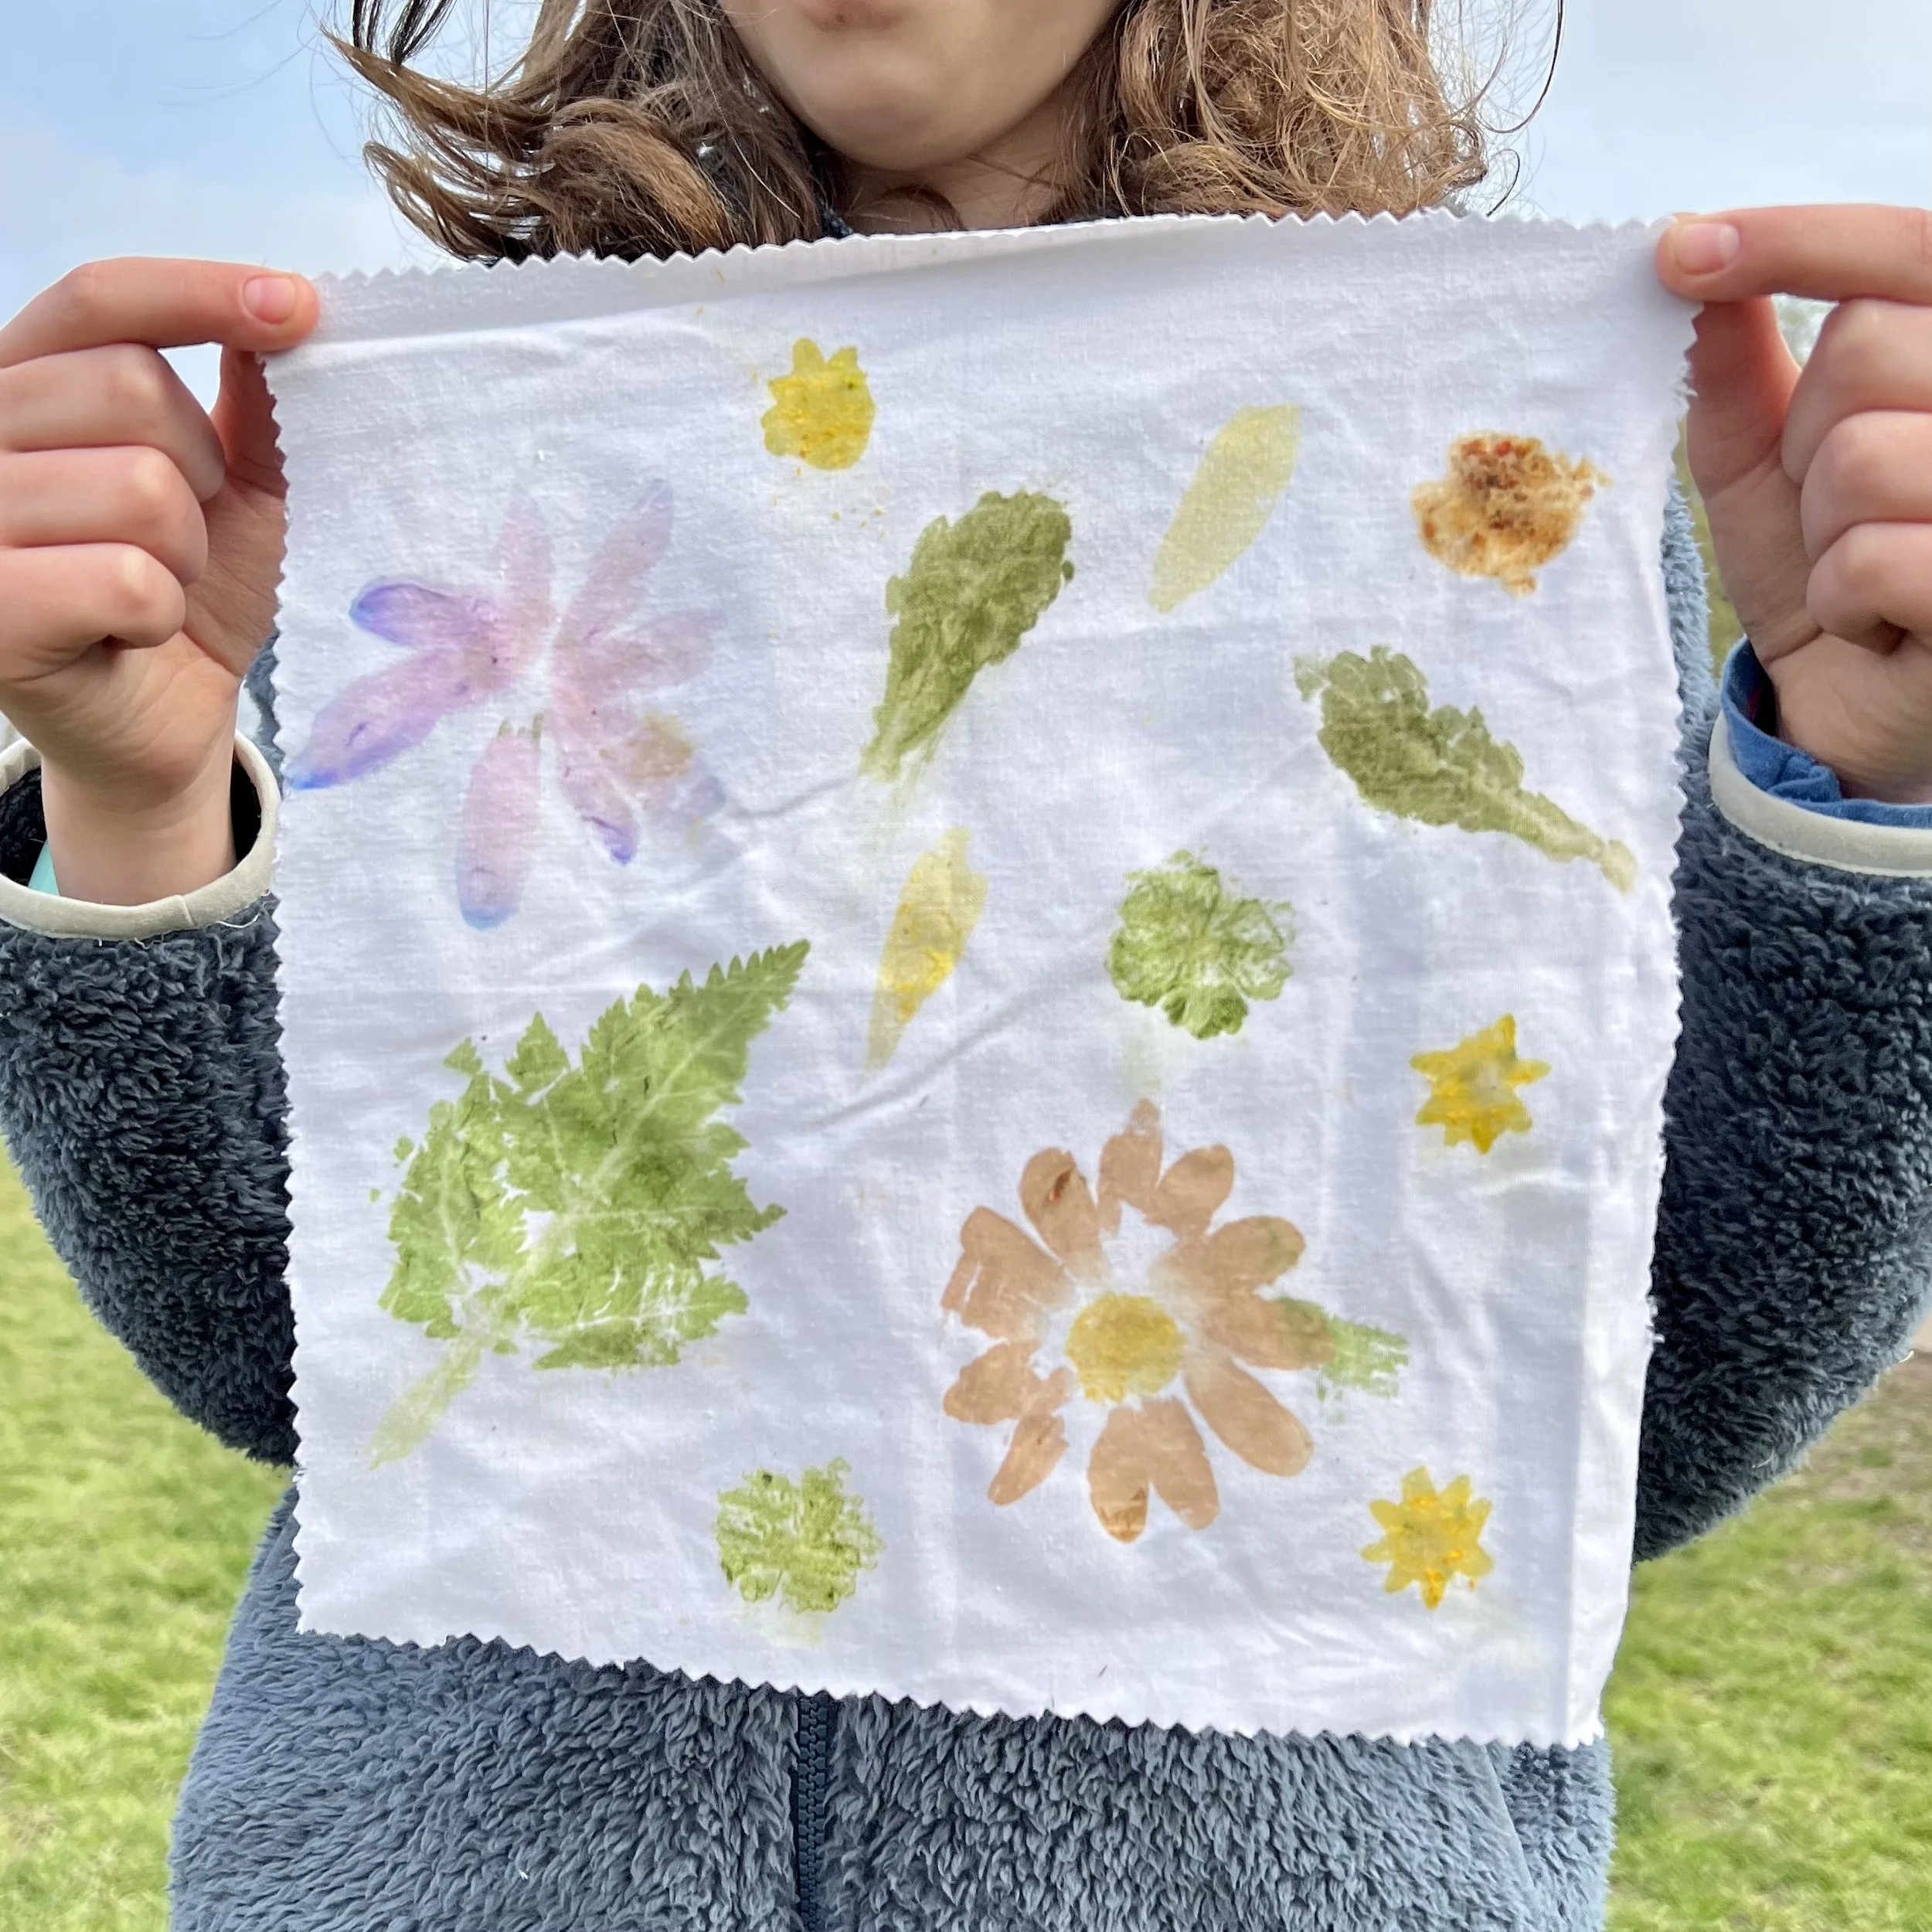
Some of the prints looked different than what I had expected. For instance, the colour of the oxalis was quite different on the paper compared to the actual leaves and also the pigment on the kitchen roll! Some leaves worked better than others, leaving very detailed prints, while others only left an outline around the outside.
I decided to turn my flower and leaf prints into greetings cards.

You can also create hammered leaf and flower prints on fabric. My son and his friends really enjoyed this activity too!
Author: Denise Hope, home educating mum of two boys