Make Elder beads
The elder is a really versatile, native tree. The flowers can be made into cordial, wine or fritters and the berries are great for making jam or natural dye. The wood is also great for crafting as it has a soft pith that is easy to remove (and immensely satisfying!), leaving a hollow branch. There are so many different things you can make with the hollowed-out elder but we decided to start by making elder beads.
What you will need:
A branch of elder
A pair of secateurs
A skewer, tent peg, palm drill or thin pokey stick
String/twine/thread and a pair of scissors
Felt tips to decorate

How to identify Elder:
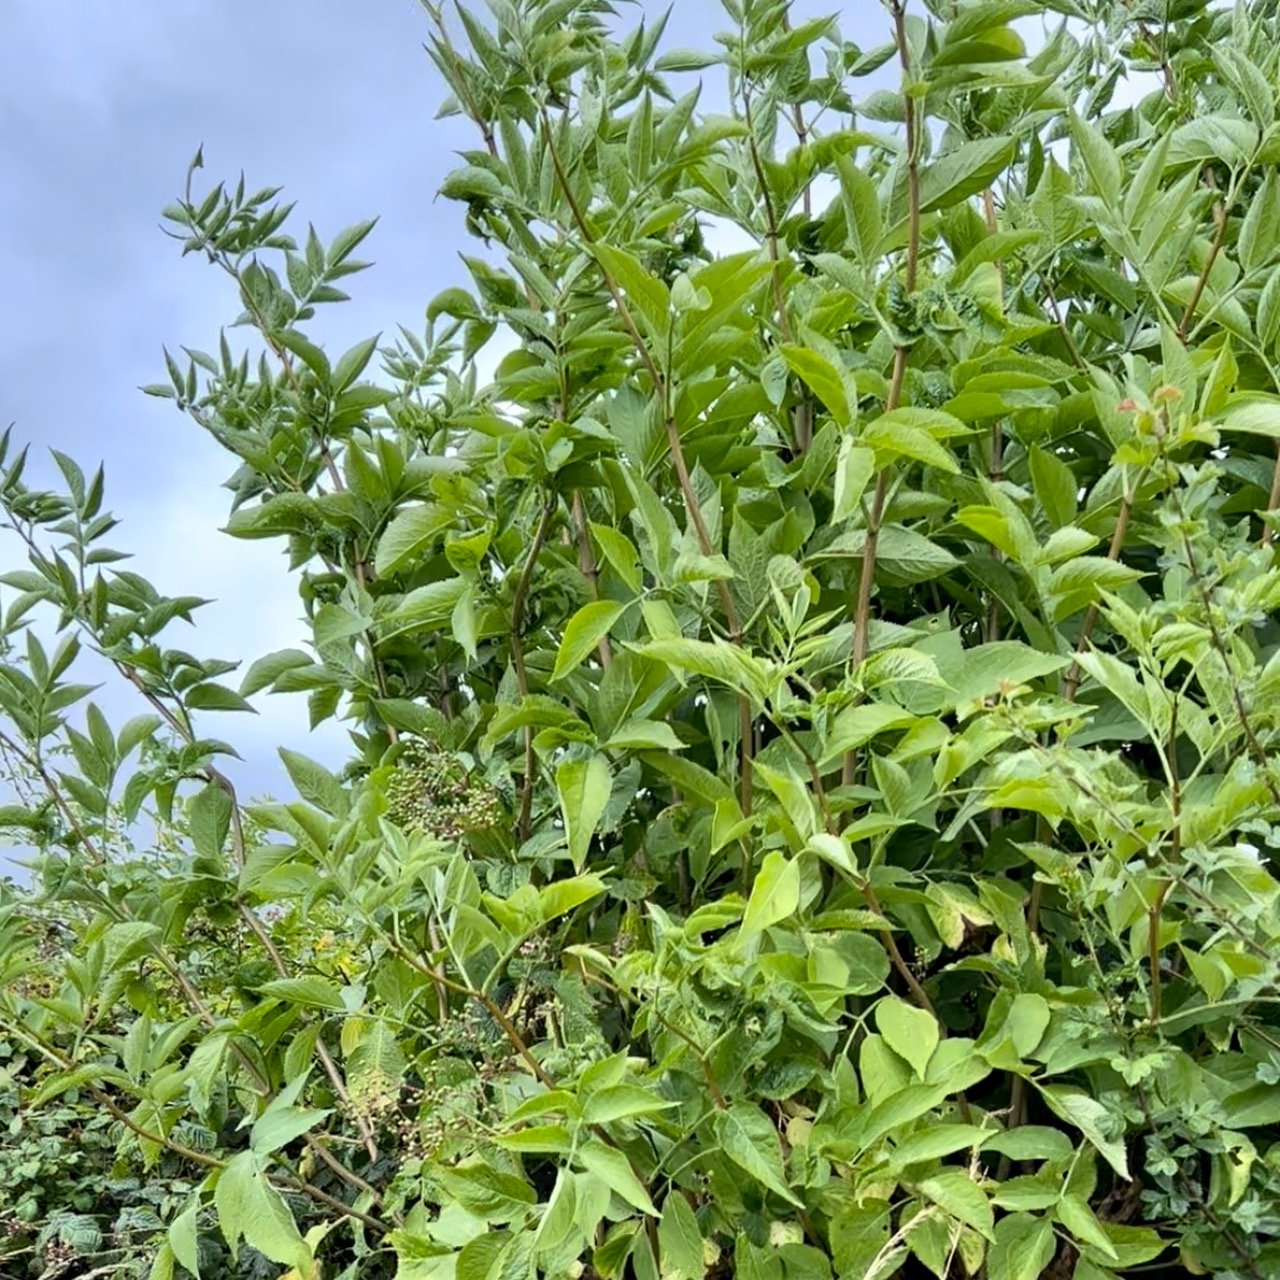
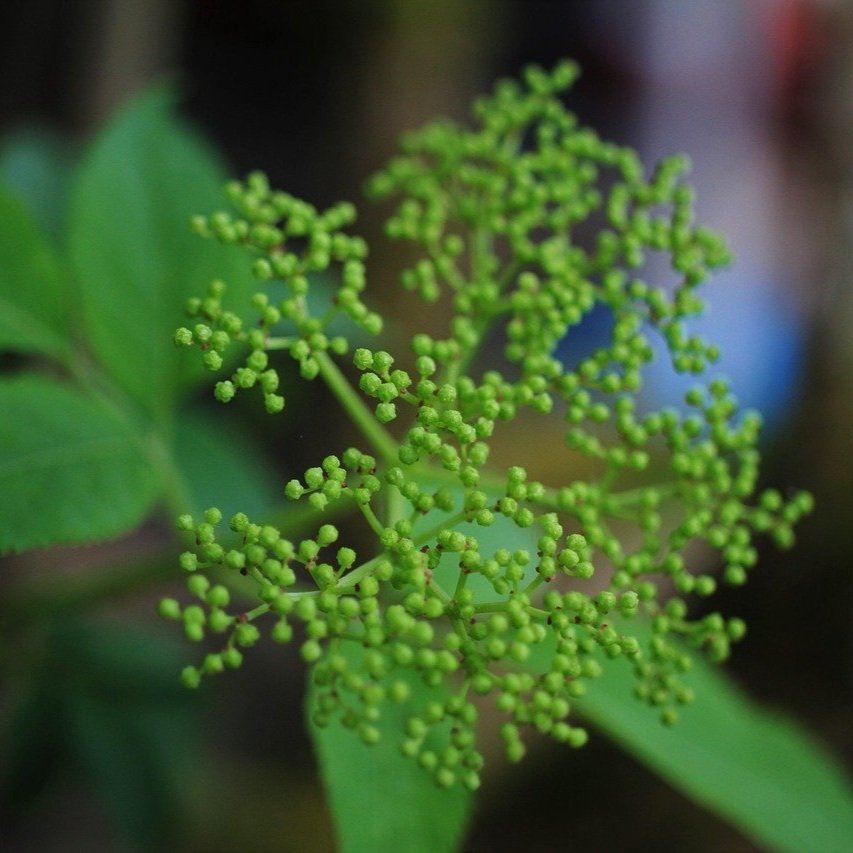
Elder is a common shrub or small tree which often grows in woodland, hedgerows and wasteland.
It has feather-shaped, compound leaves made of 5 or 7 smaller leaves. The edge of each leaf is serrated and there may be small hairs on the underside.
In June it has clusters of creamy white flowers – (you may recognise the scent if you’ve ever drunk elderflower cordial!) and black berries from late summer.

What you need to do:
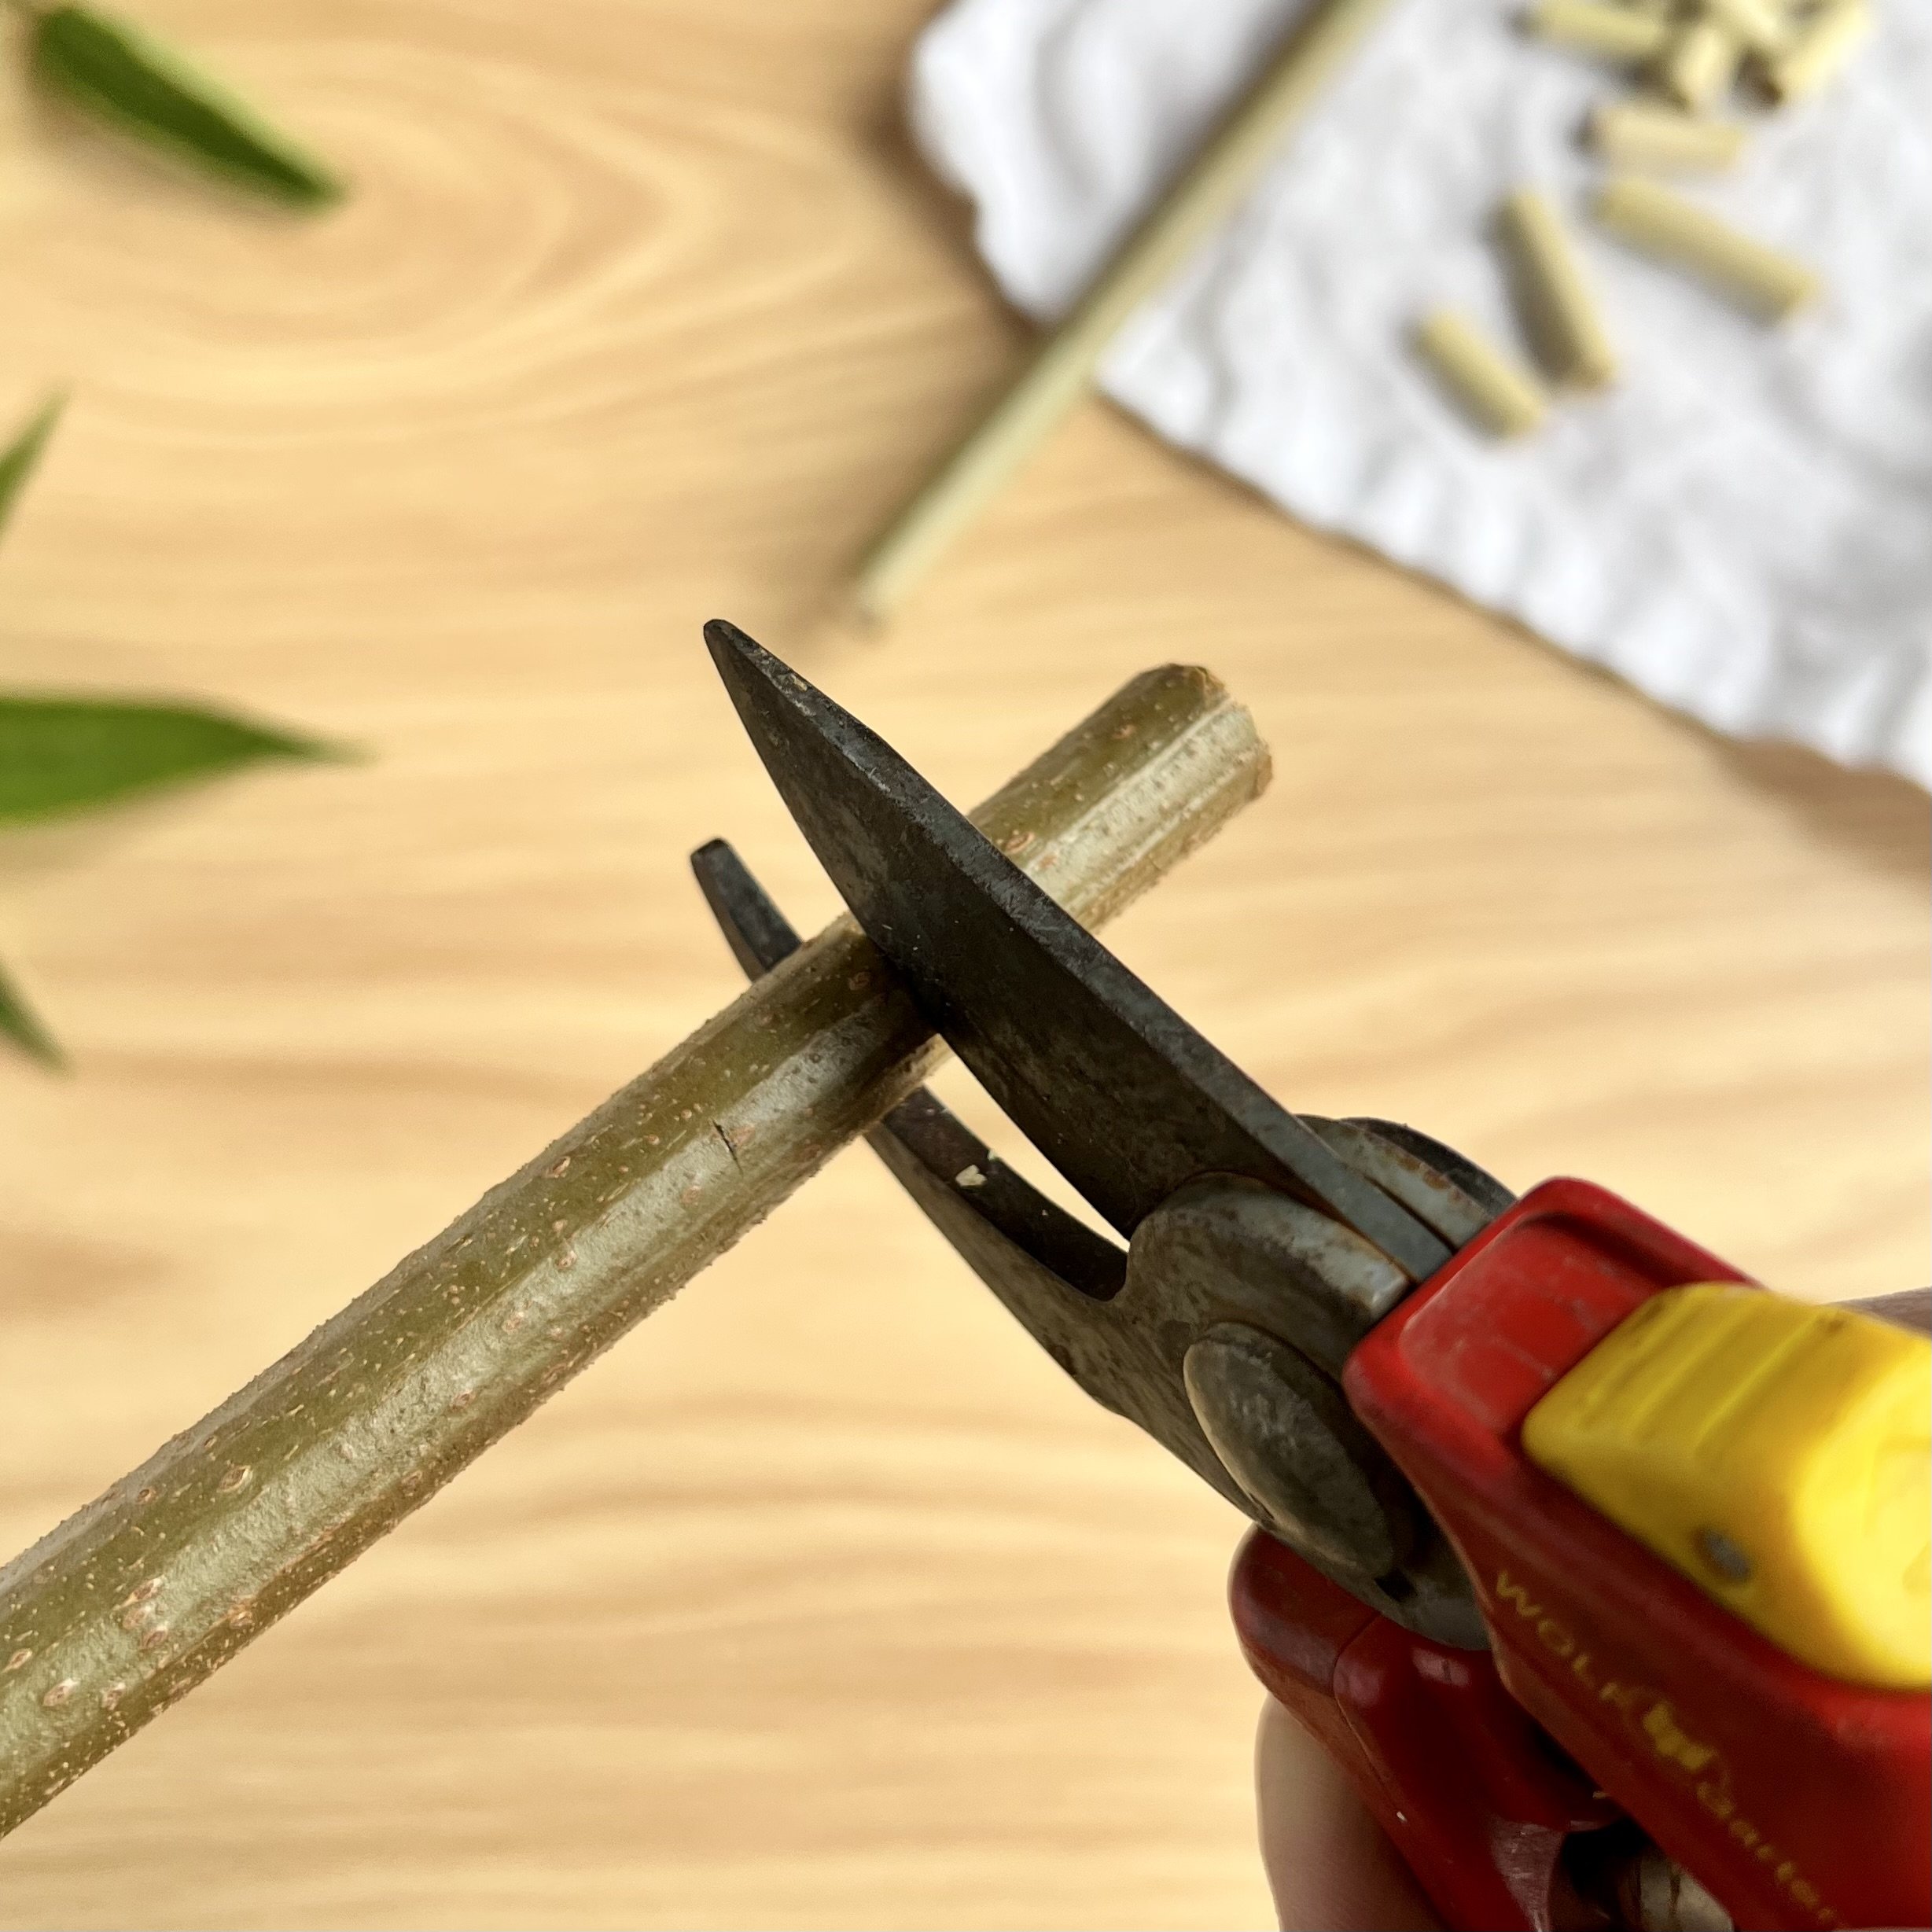
Choose an elder branch that is about 1cm in diameter - as thick as your thumb if you’re a child, or as thick as your little finger if you are an adult. It should be light grey/brown with little bumps, not green. Use your secateurs to cut your elder branch.
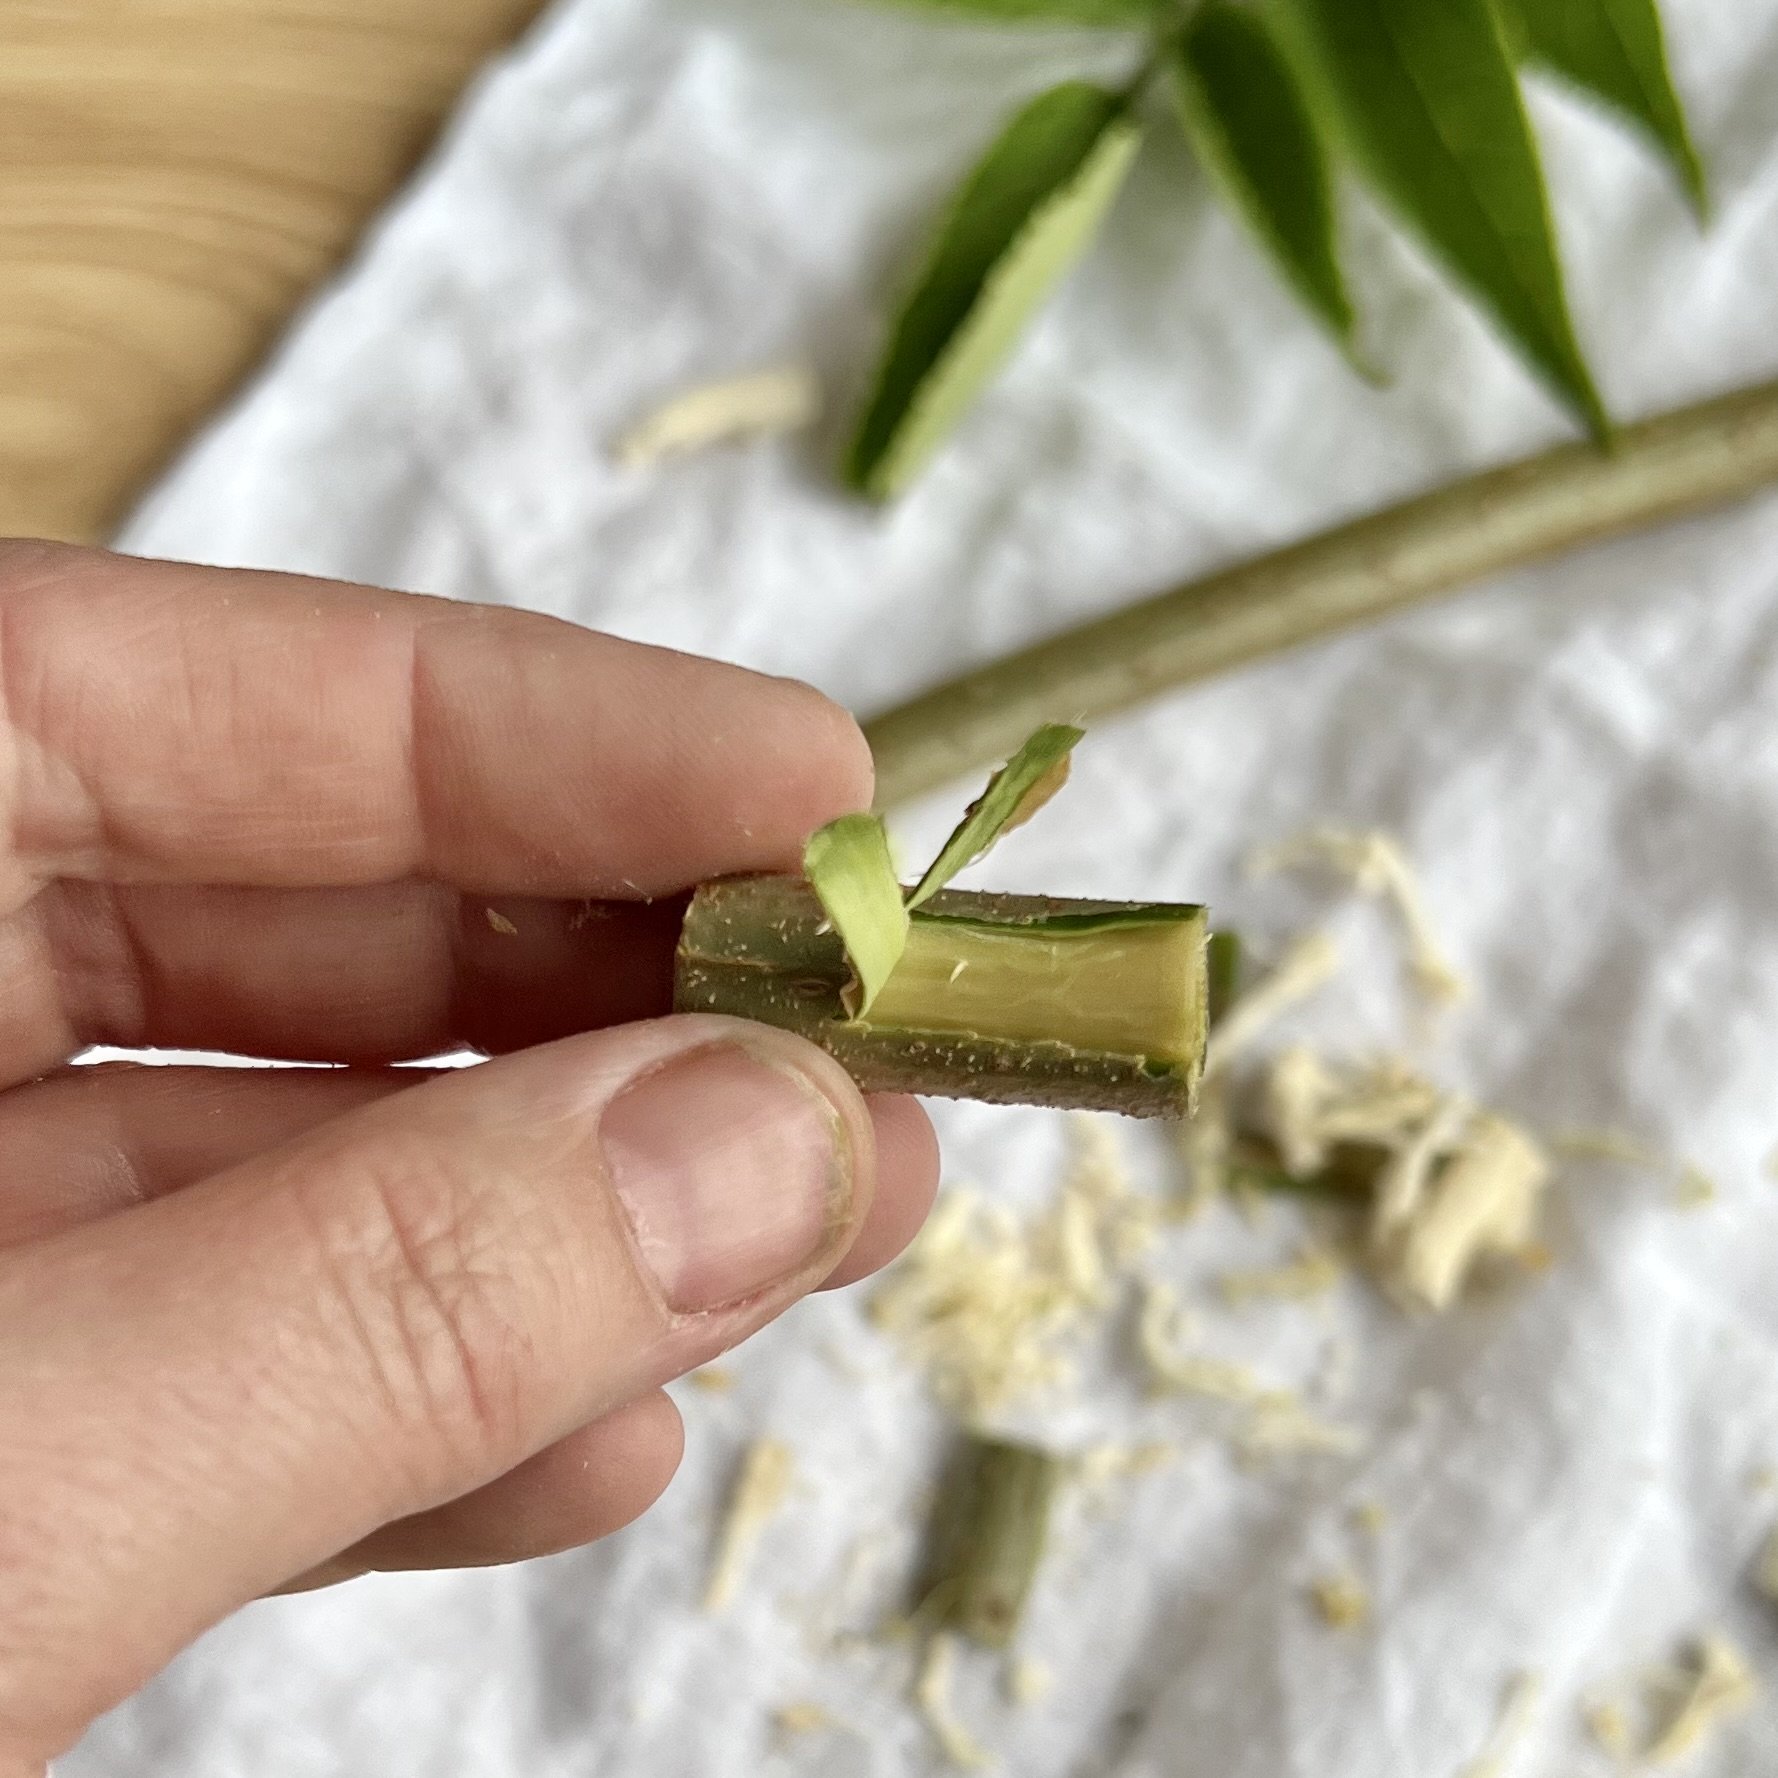
Take your elder branch and cut as many beads as you want using your secateurs. You can make them any length you like but smaller ones are easier to push the pith through so are great for younger children to work with. Discard any beads that are cut with a knot in them as it will be harder to push the pith out at these points.
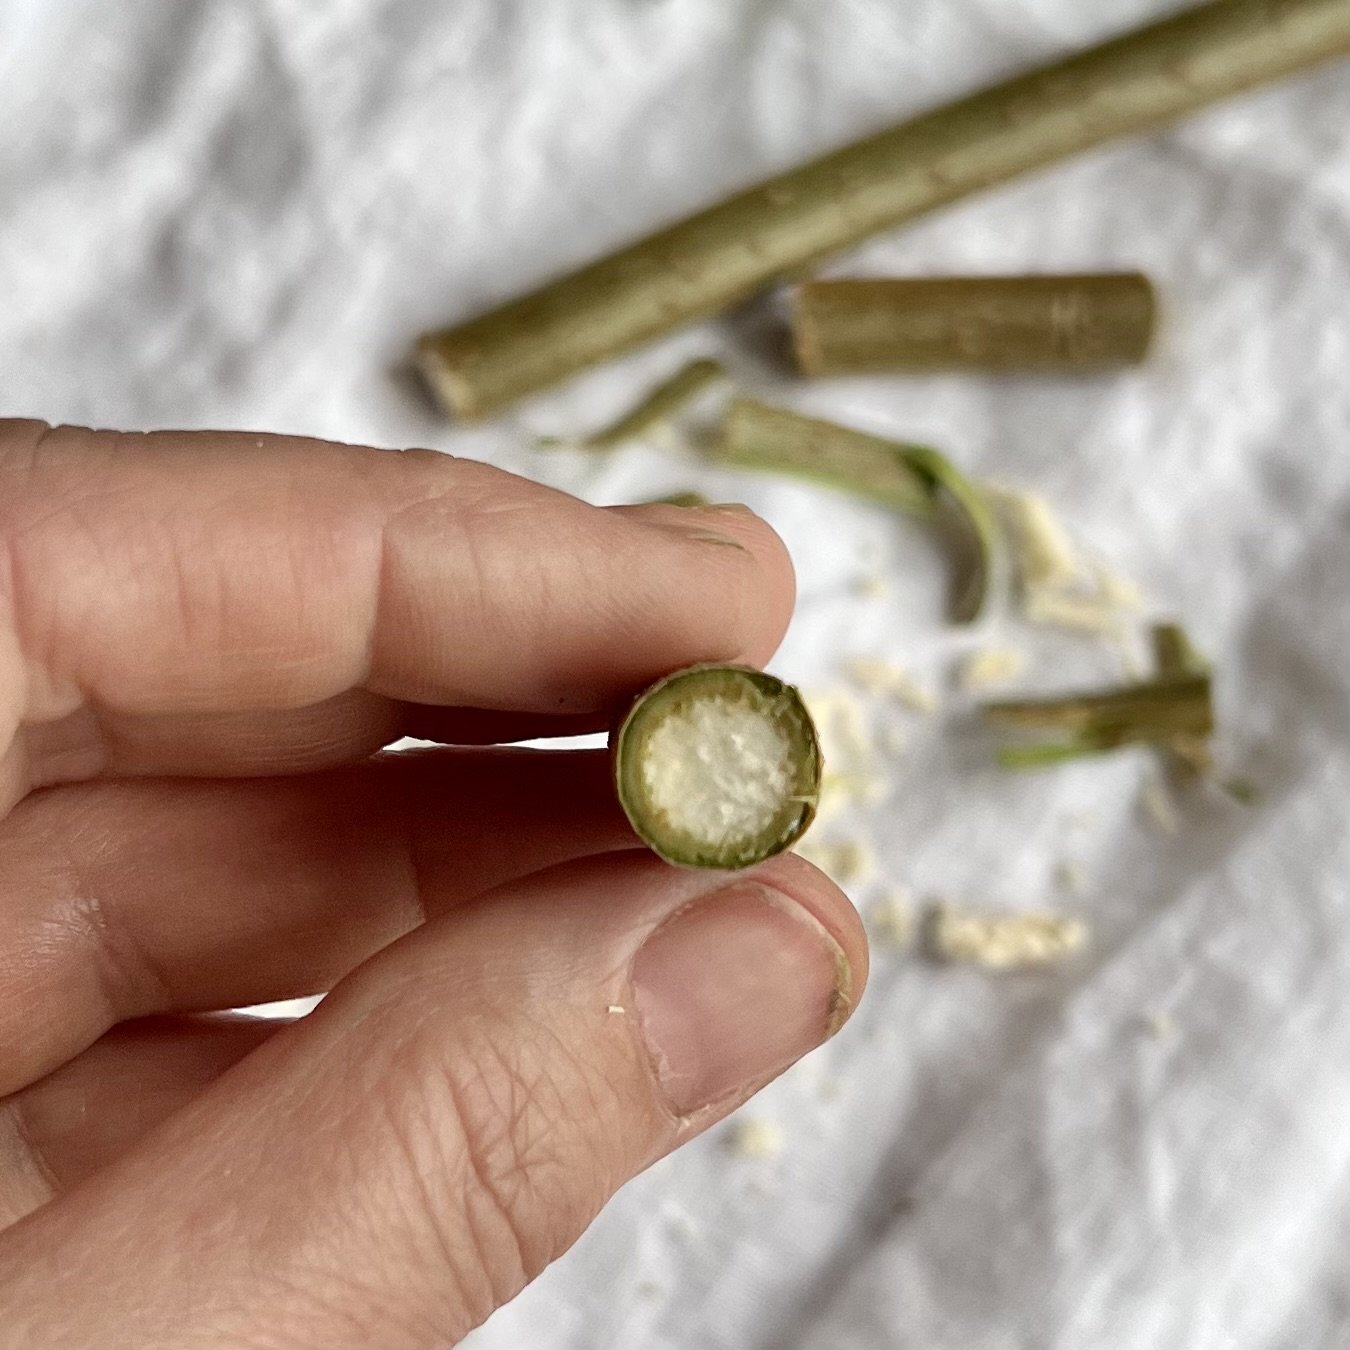
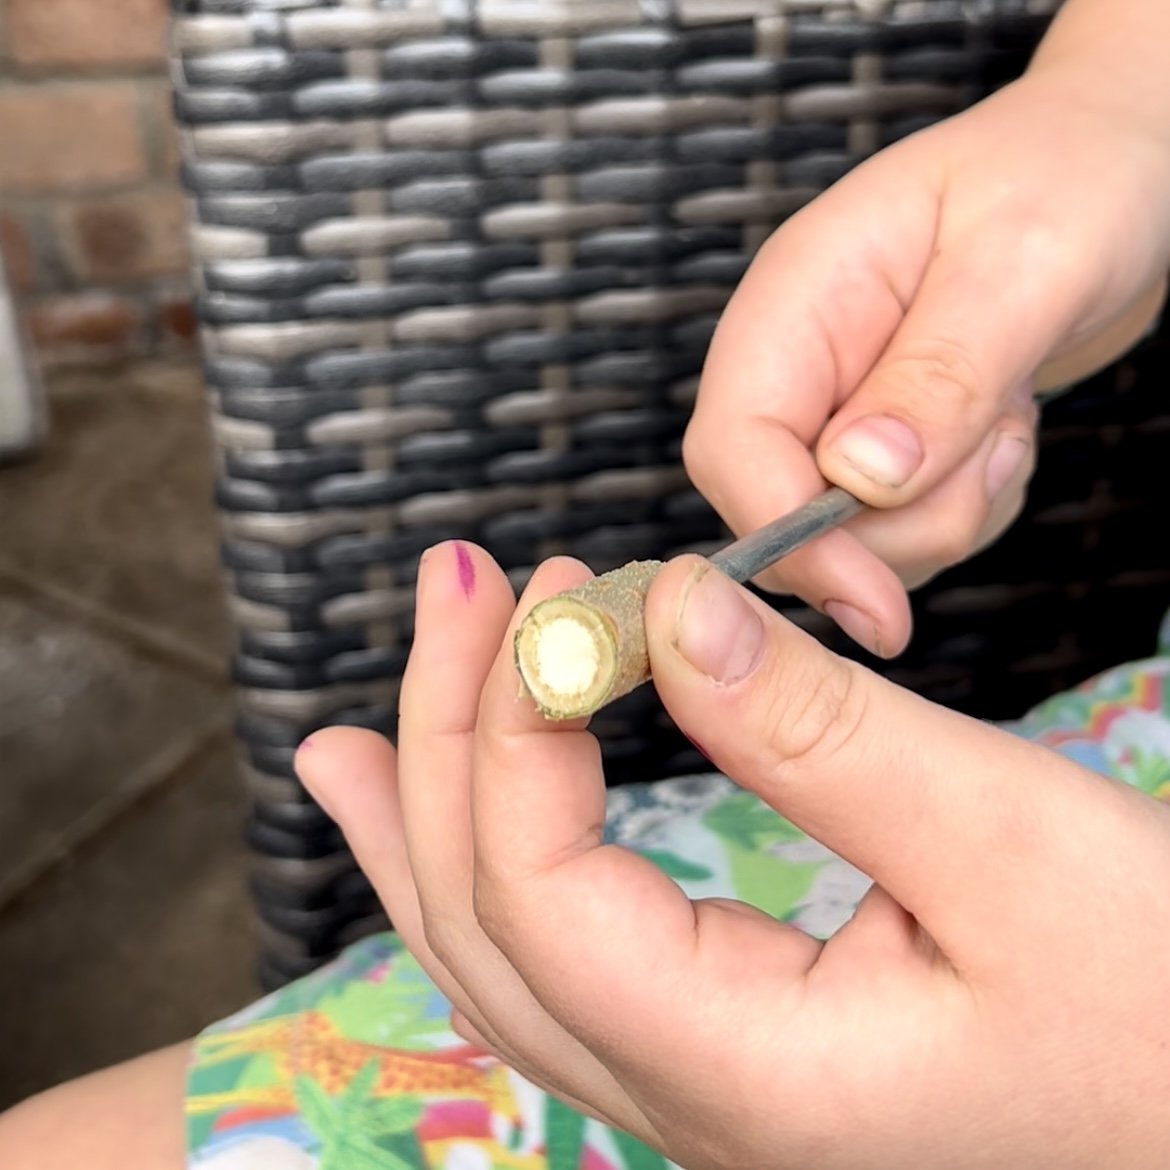
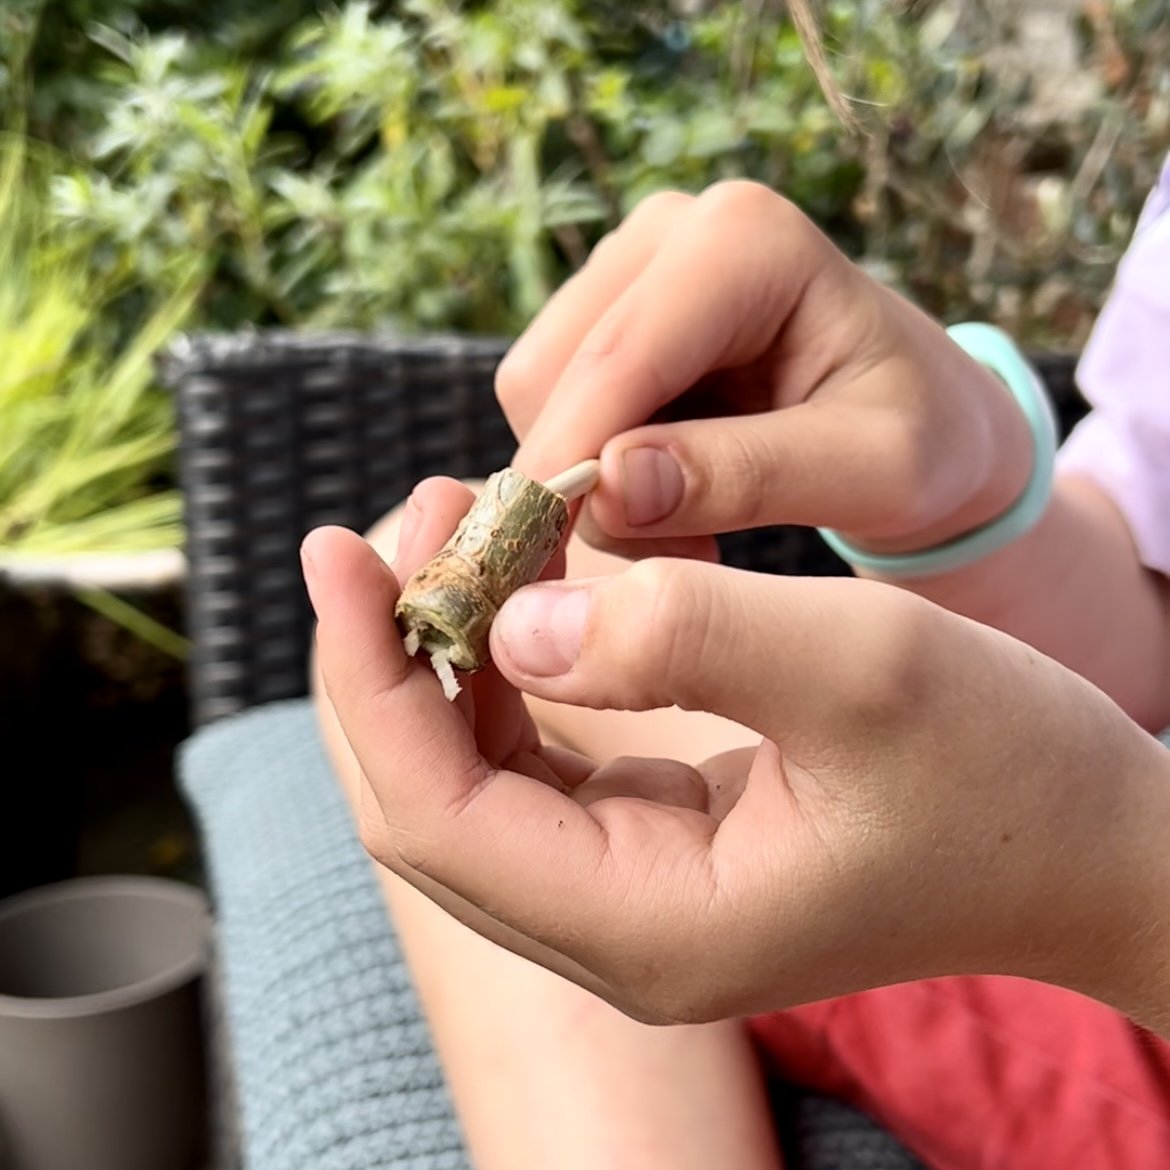
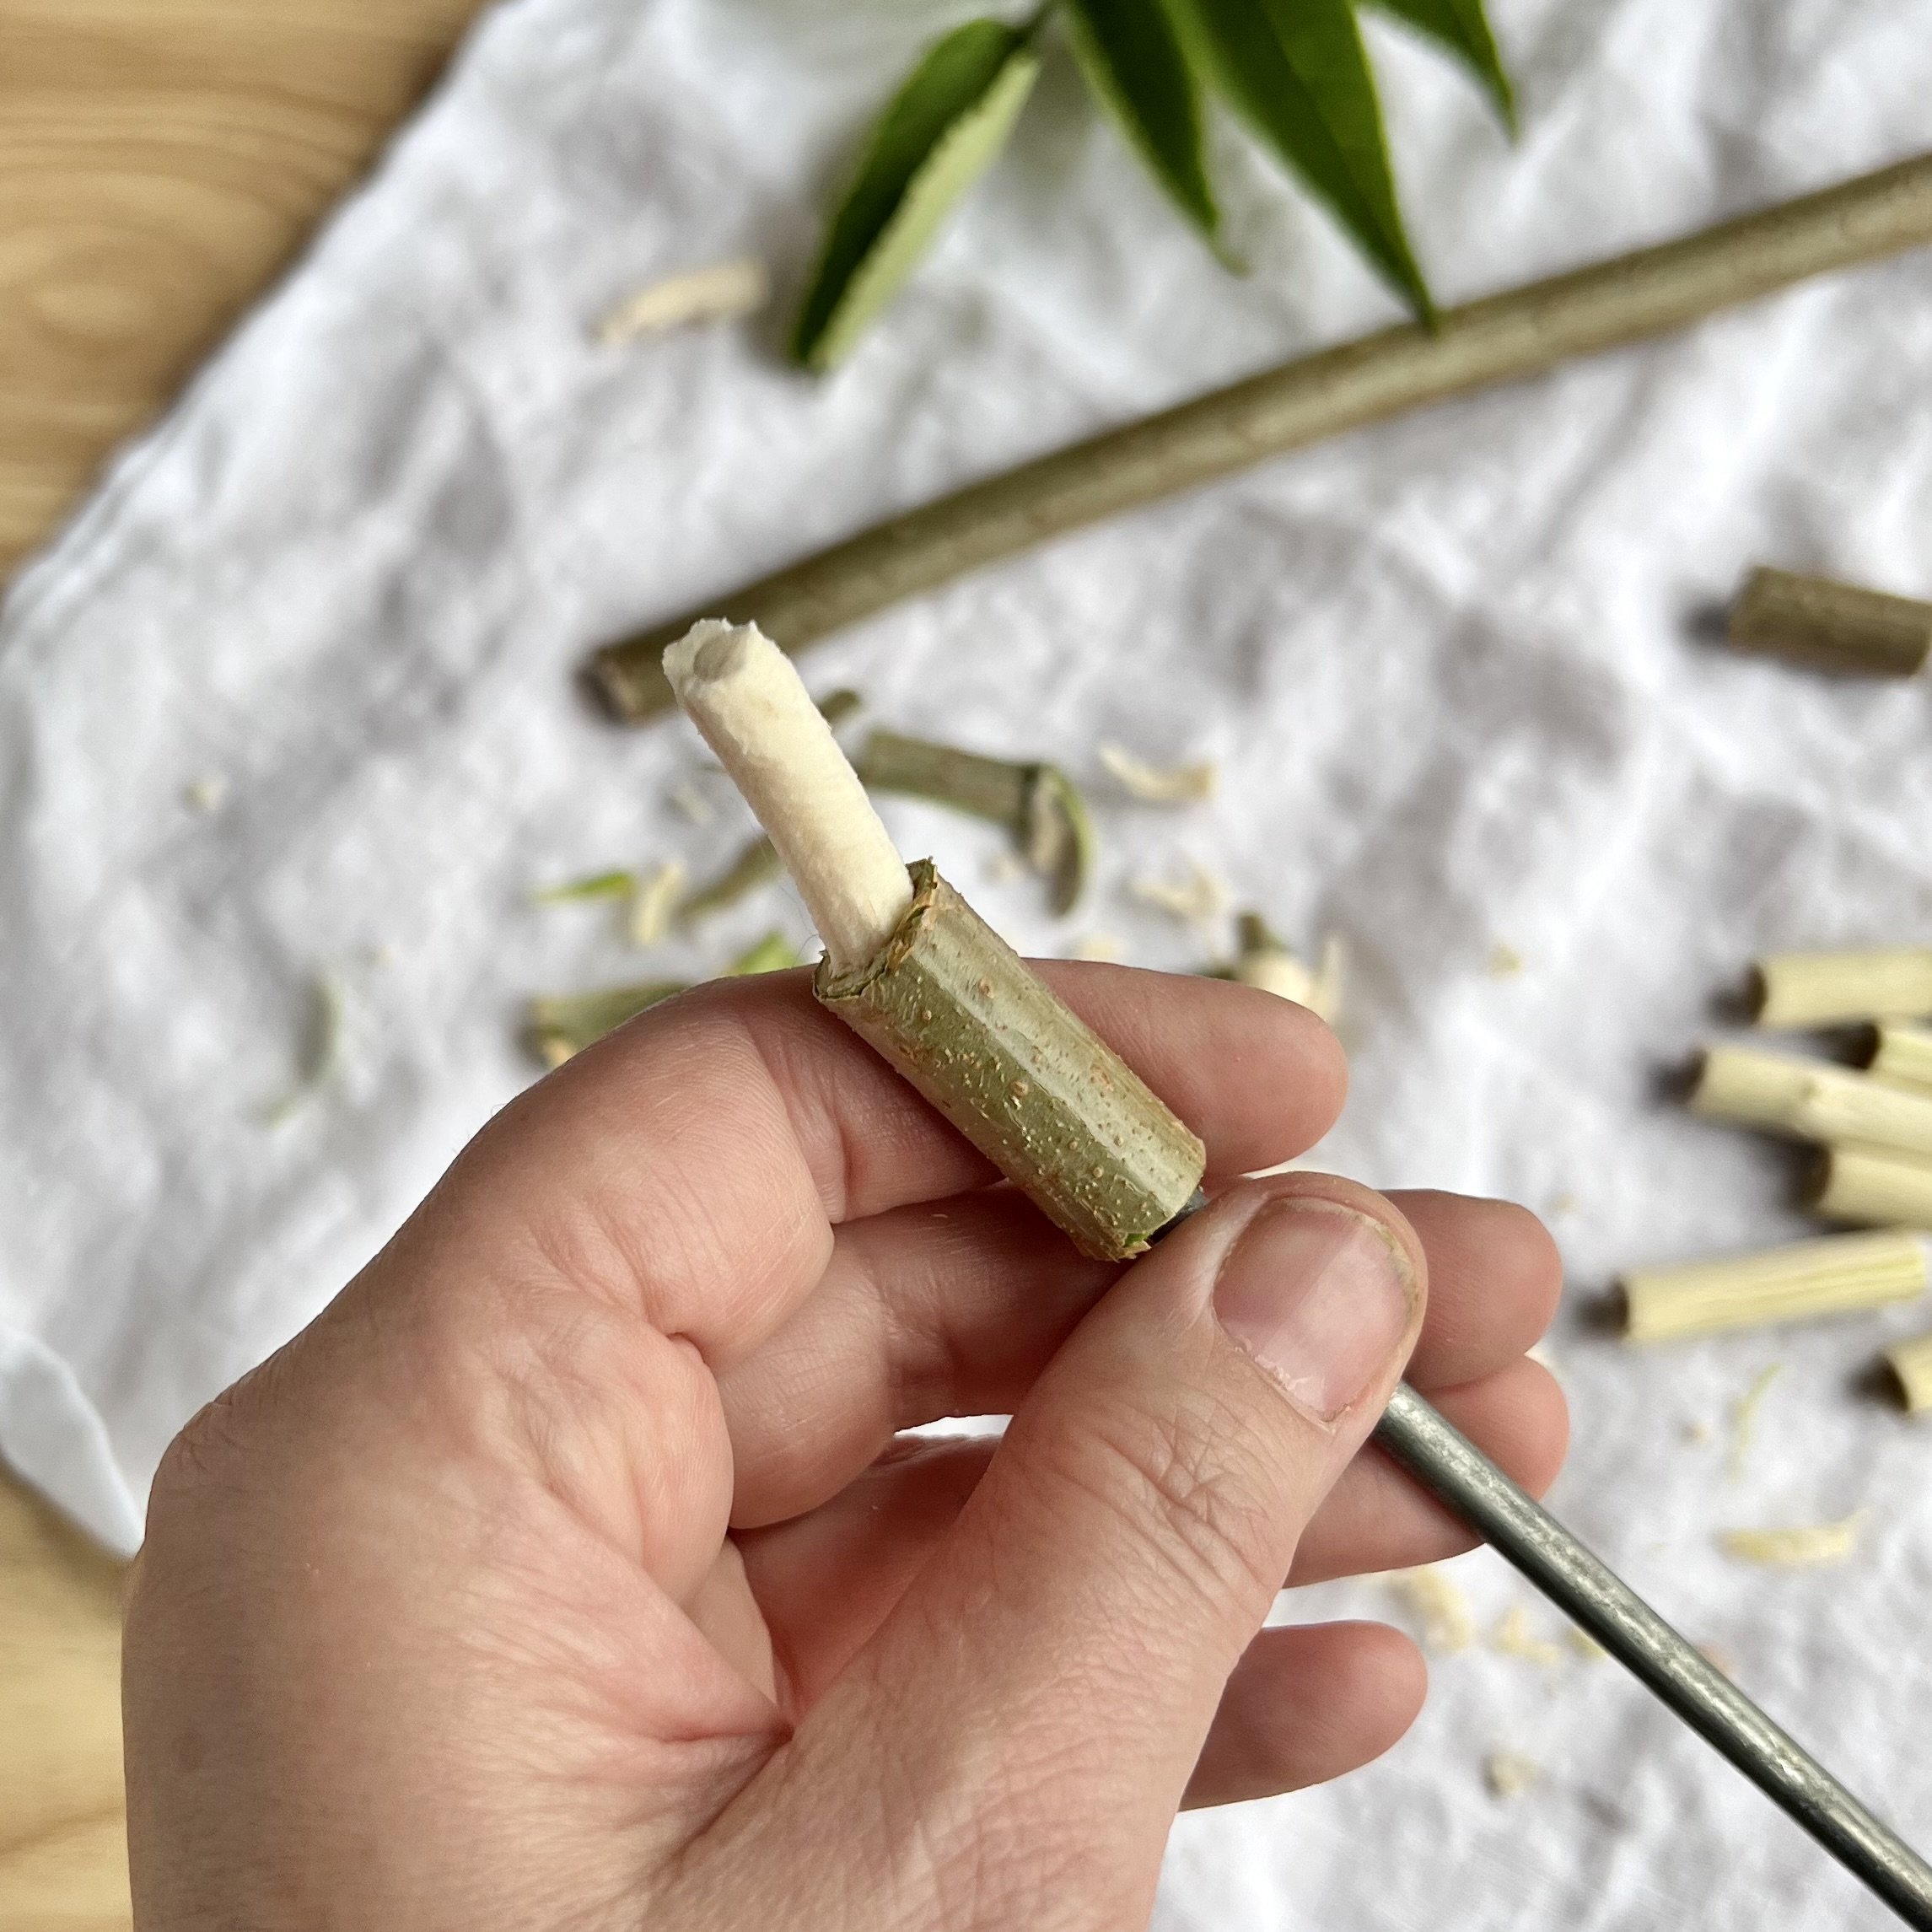
Now for the fun bit! Use your skewer or pokey stick to push and scrape out the middle. If your Elder is quite thick, then a tent peg might also work well. Sometimes the pith pops out in one length - very satisfying! - and other times you’ll need to push your poking stick through a few times at an angle to remove all the bits inside.
Make sure that you don’t drill or poke towards your other hand. If your young people find it difficult to move their other hand out of poking range, then they could place the bead on its end, on a hard surface and then push their poking stick down through the centre of the bead to remove the pithy centre and then repeat this at the other end.
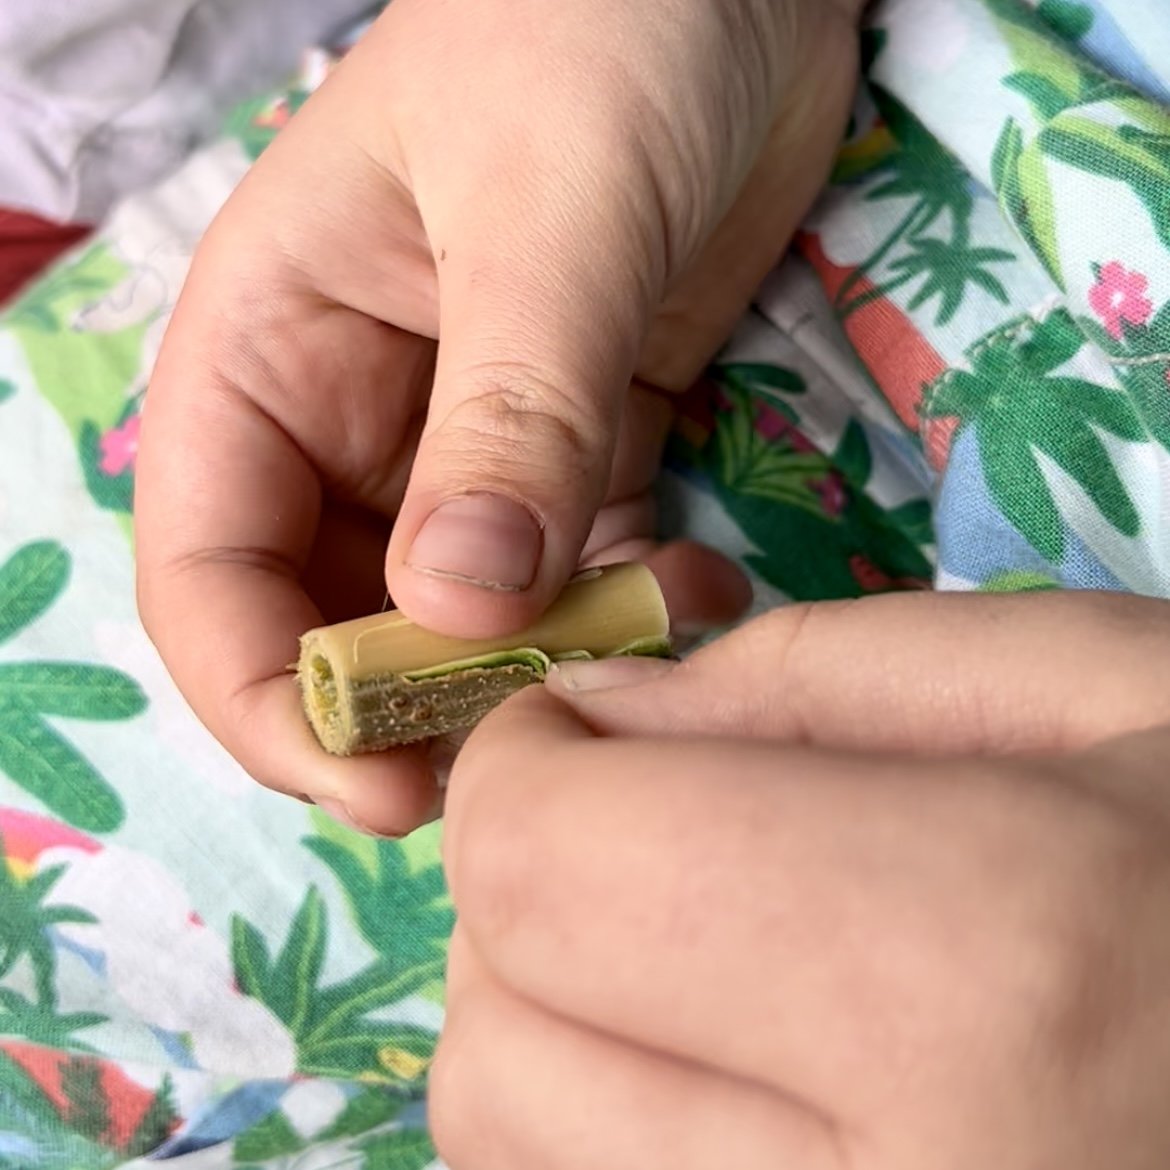
Once you have a hollow tube, use your fingernails to peel away the bark, revealing the lovely polished bead underneath.
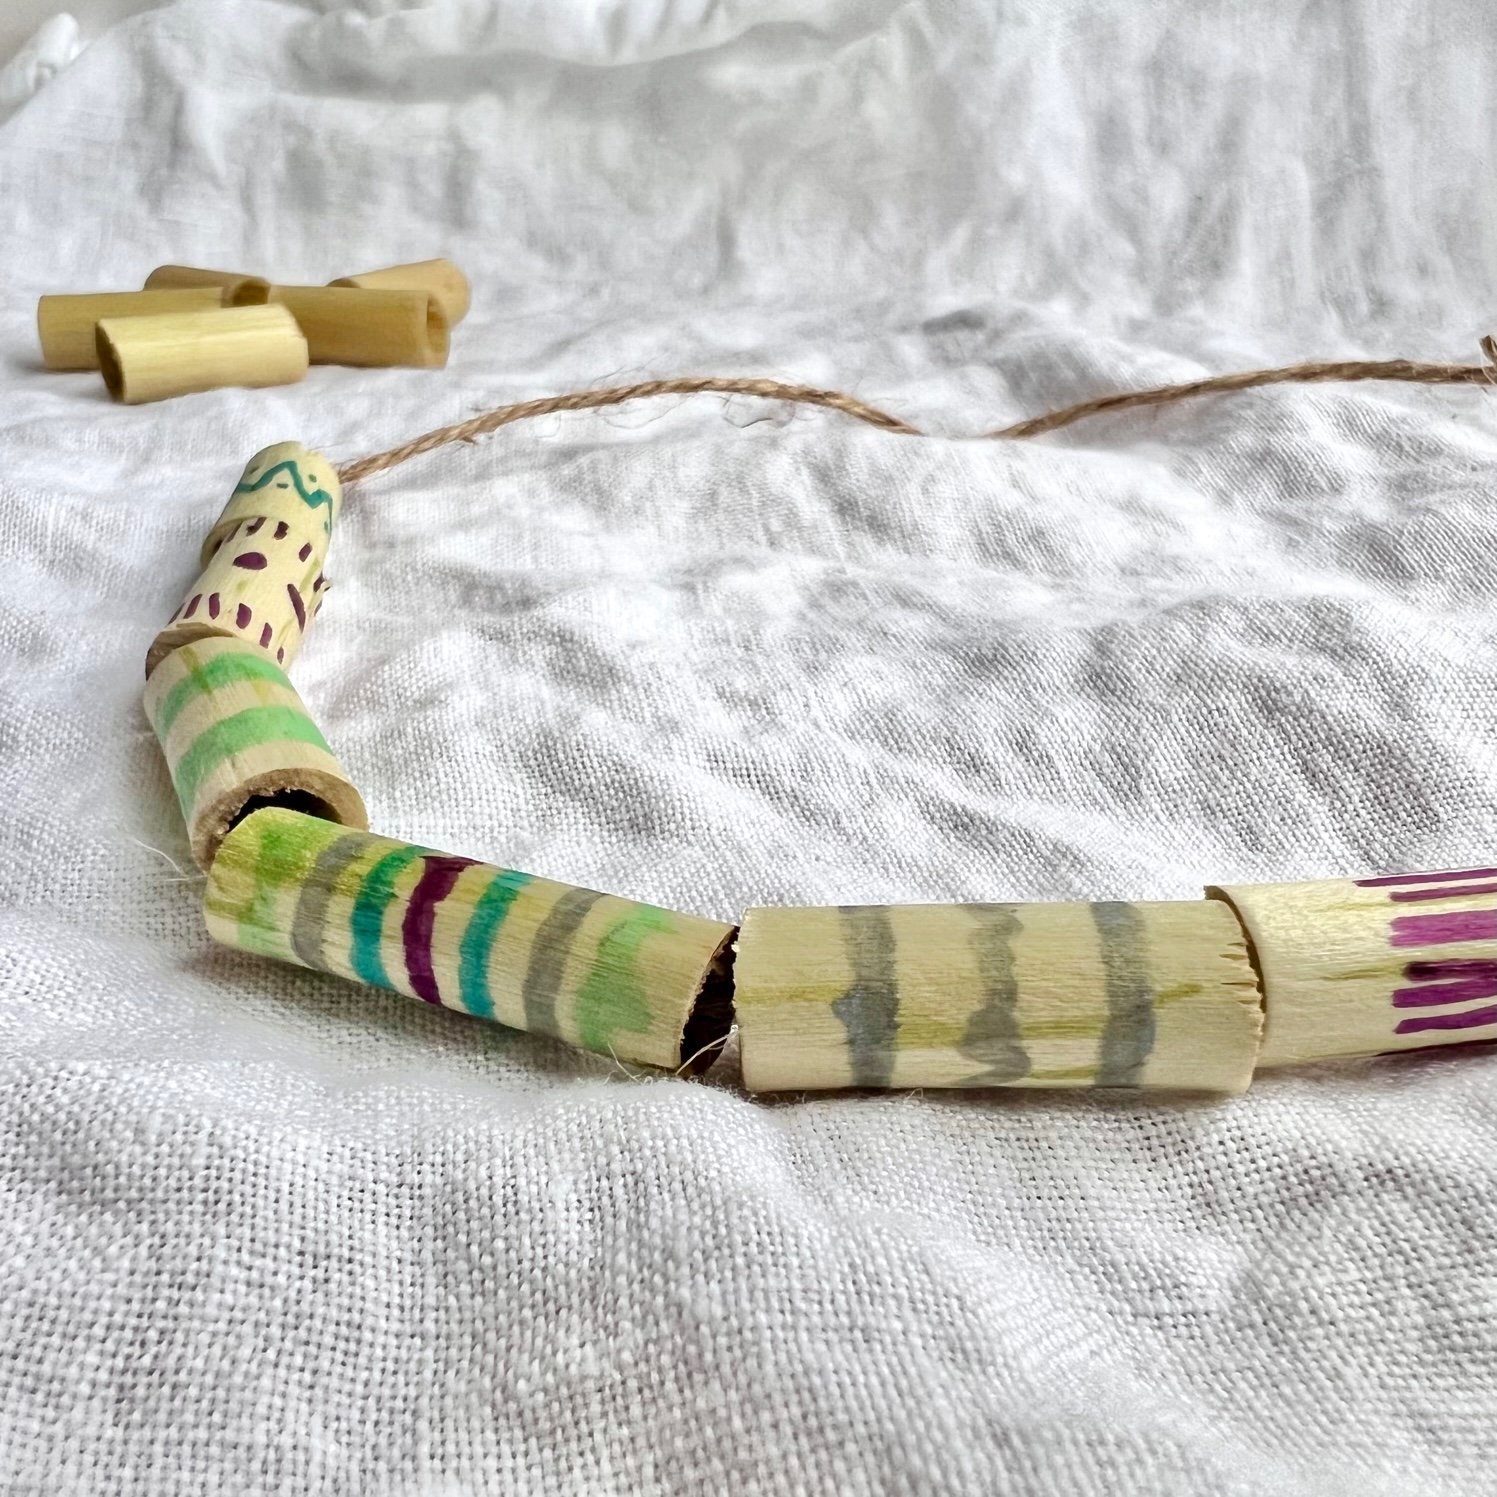
Once you’ve peeled your beads, leave them to dry before you decorate them as they’ll be a little damp.
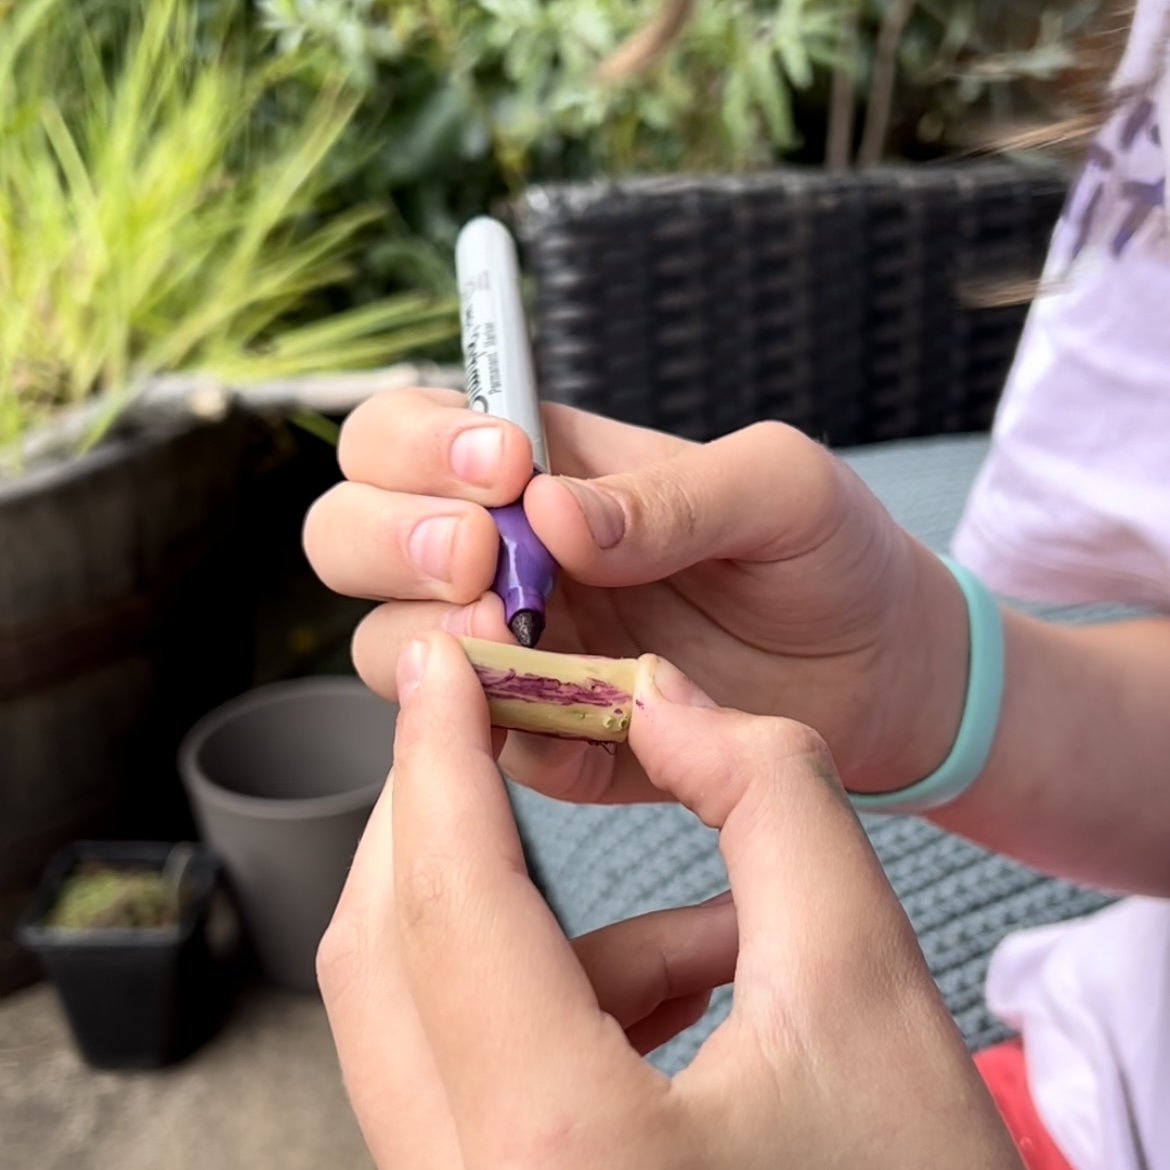
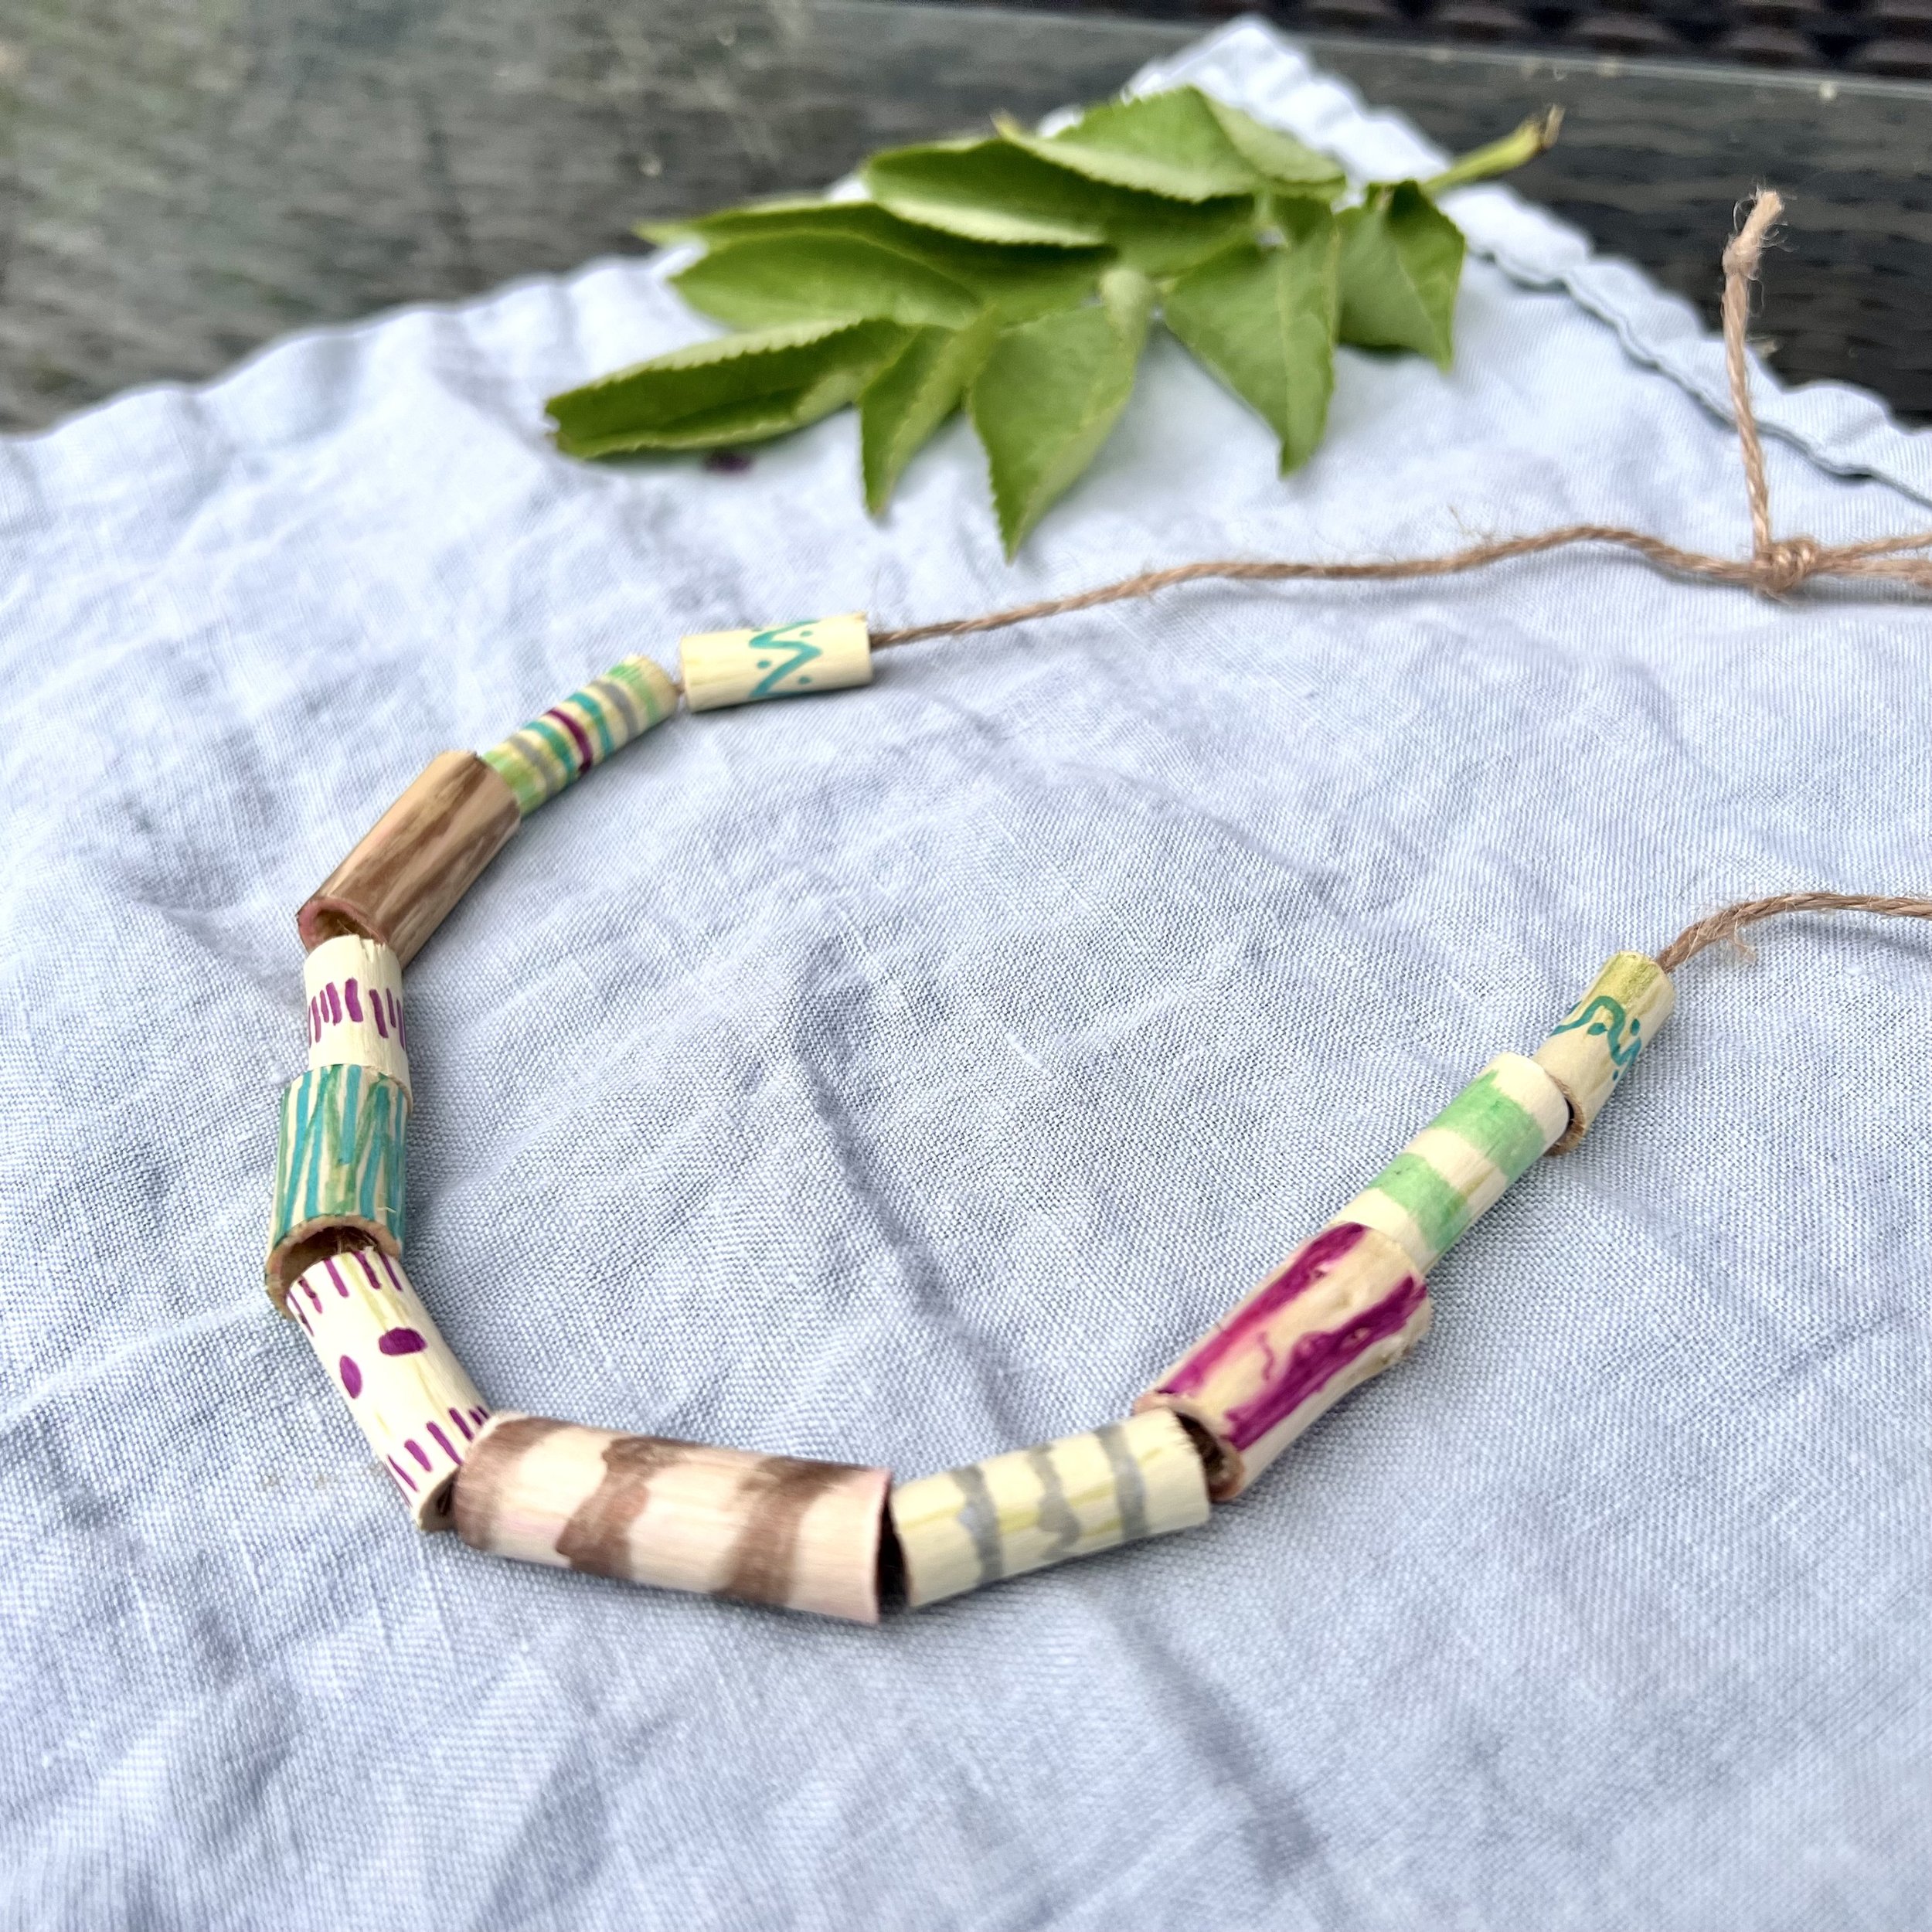
You can decorate your beads with felt tip pens or you can pull the bark off in strips or even just leave them as they are.
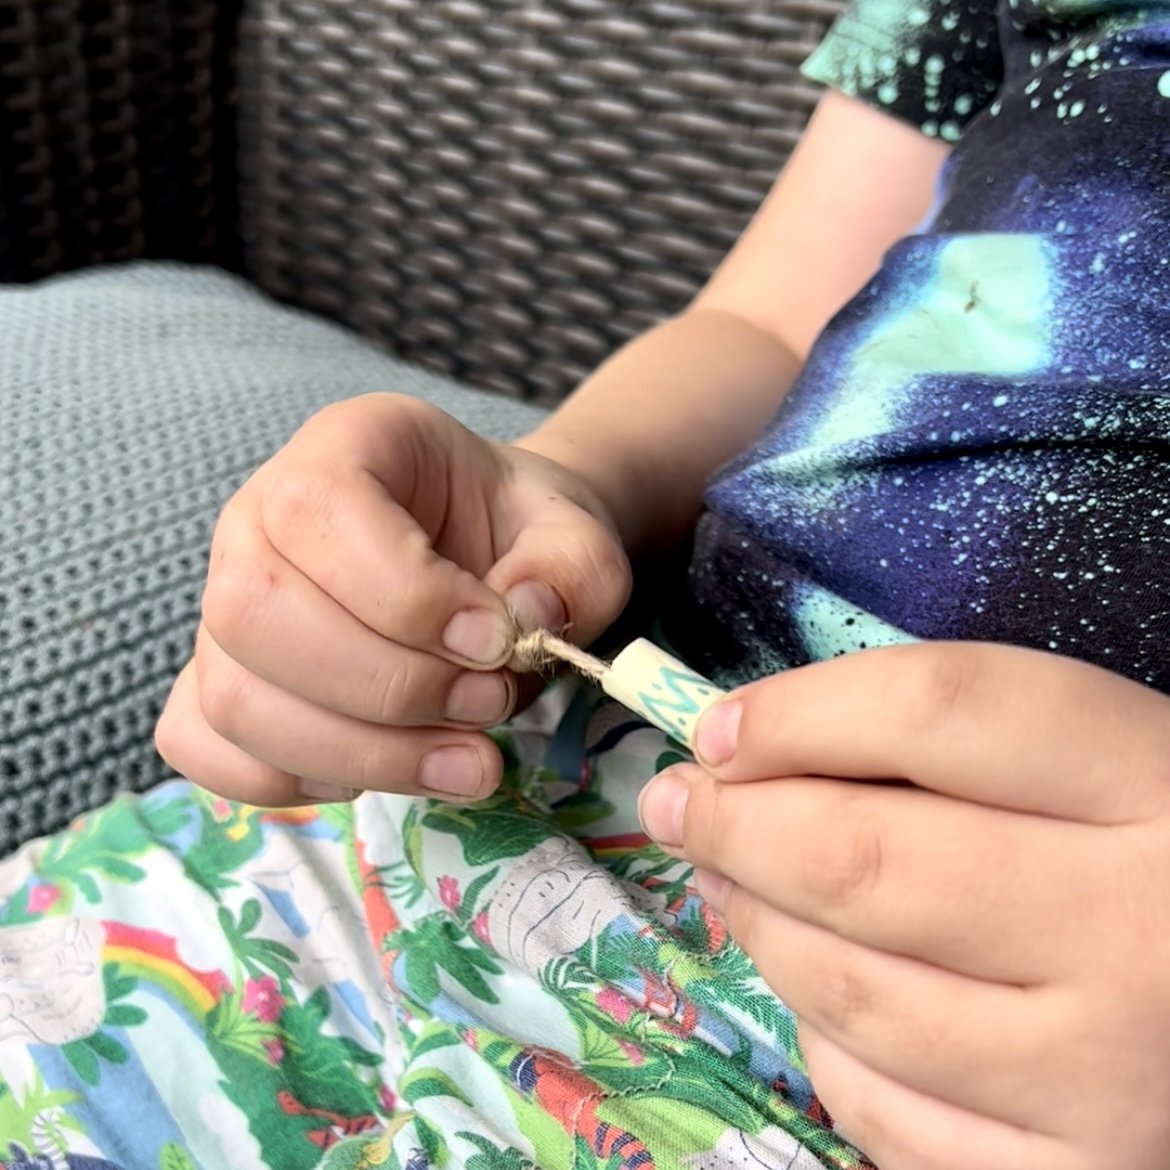
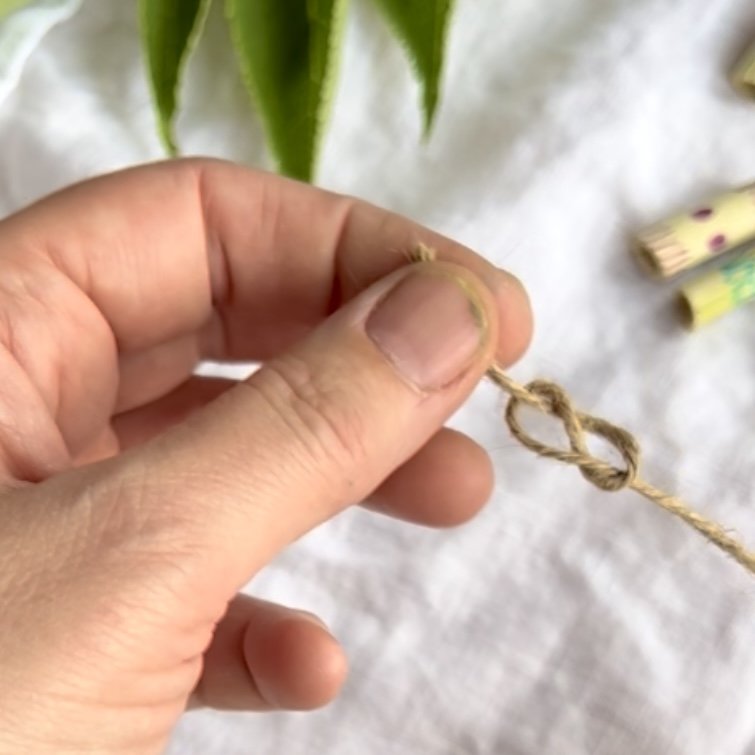
Take your piece of string, twine or thread and then tie a stopper knot at one end to help stop the beads slipping off while you thread your beads,
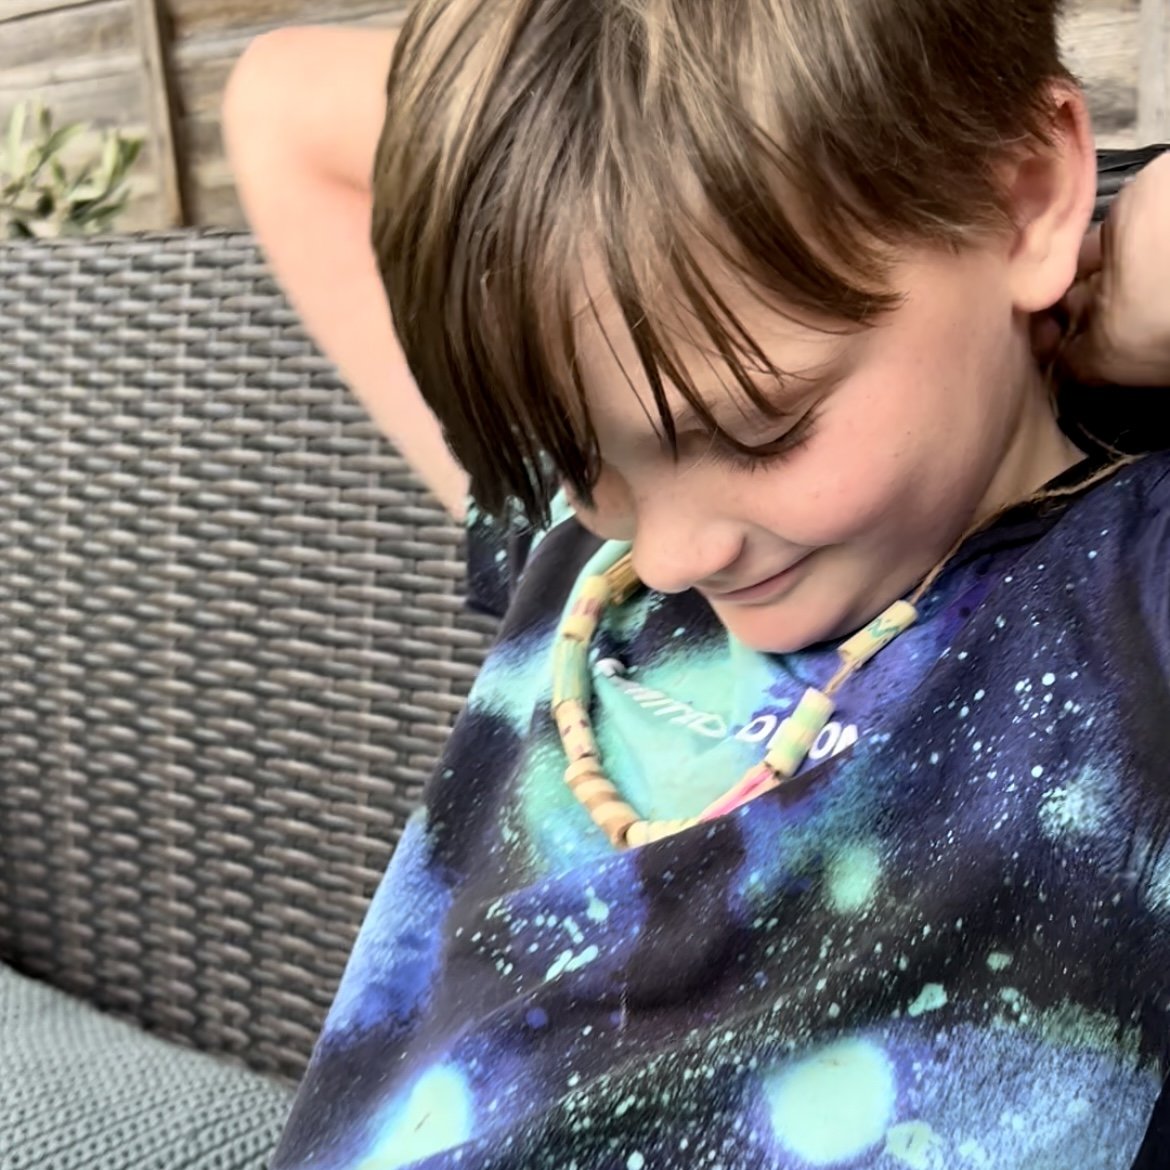
Then simply thread your beads onto your thread to make a very natural looking piece of jewellery!
Tie off your thread with a nice flat knot such as a reef knot (first end goes right over left, and then left over right) or a slip knot.
Author: Denise Hope, home educating mum of two boys
Sign up to a Mud & Bloom subscription today and receive 10% off your first box using the code FIRSTBOX10 at checkout.