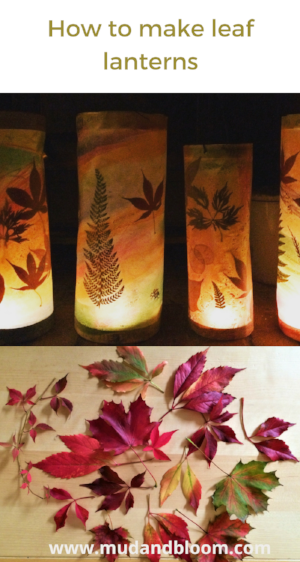
Make leaf lanterns
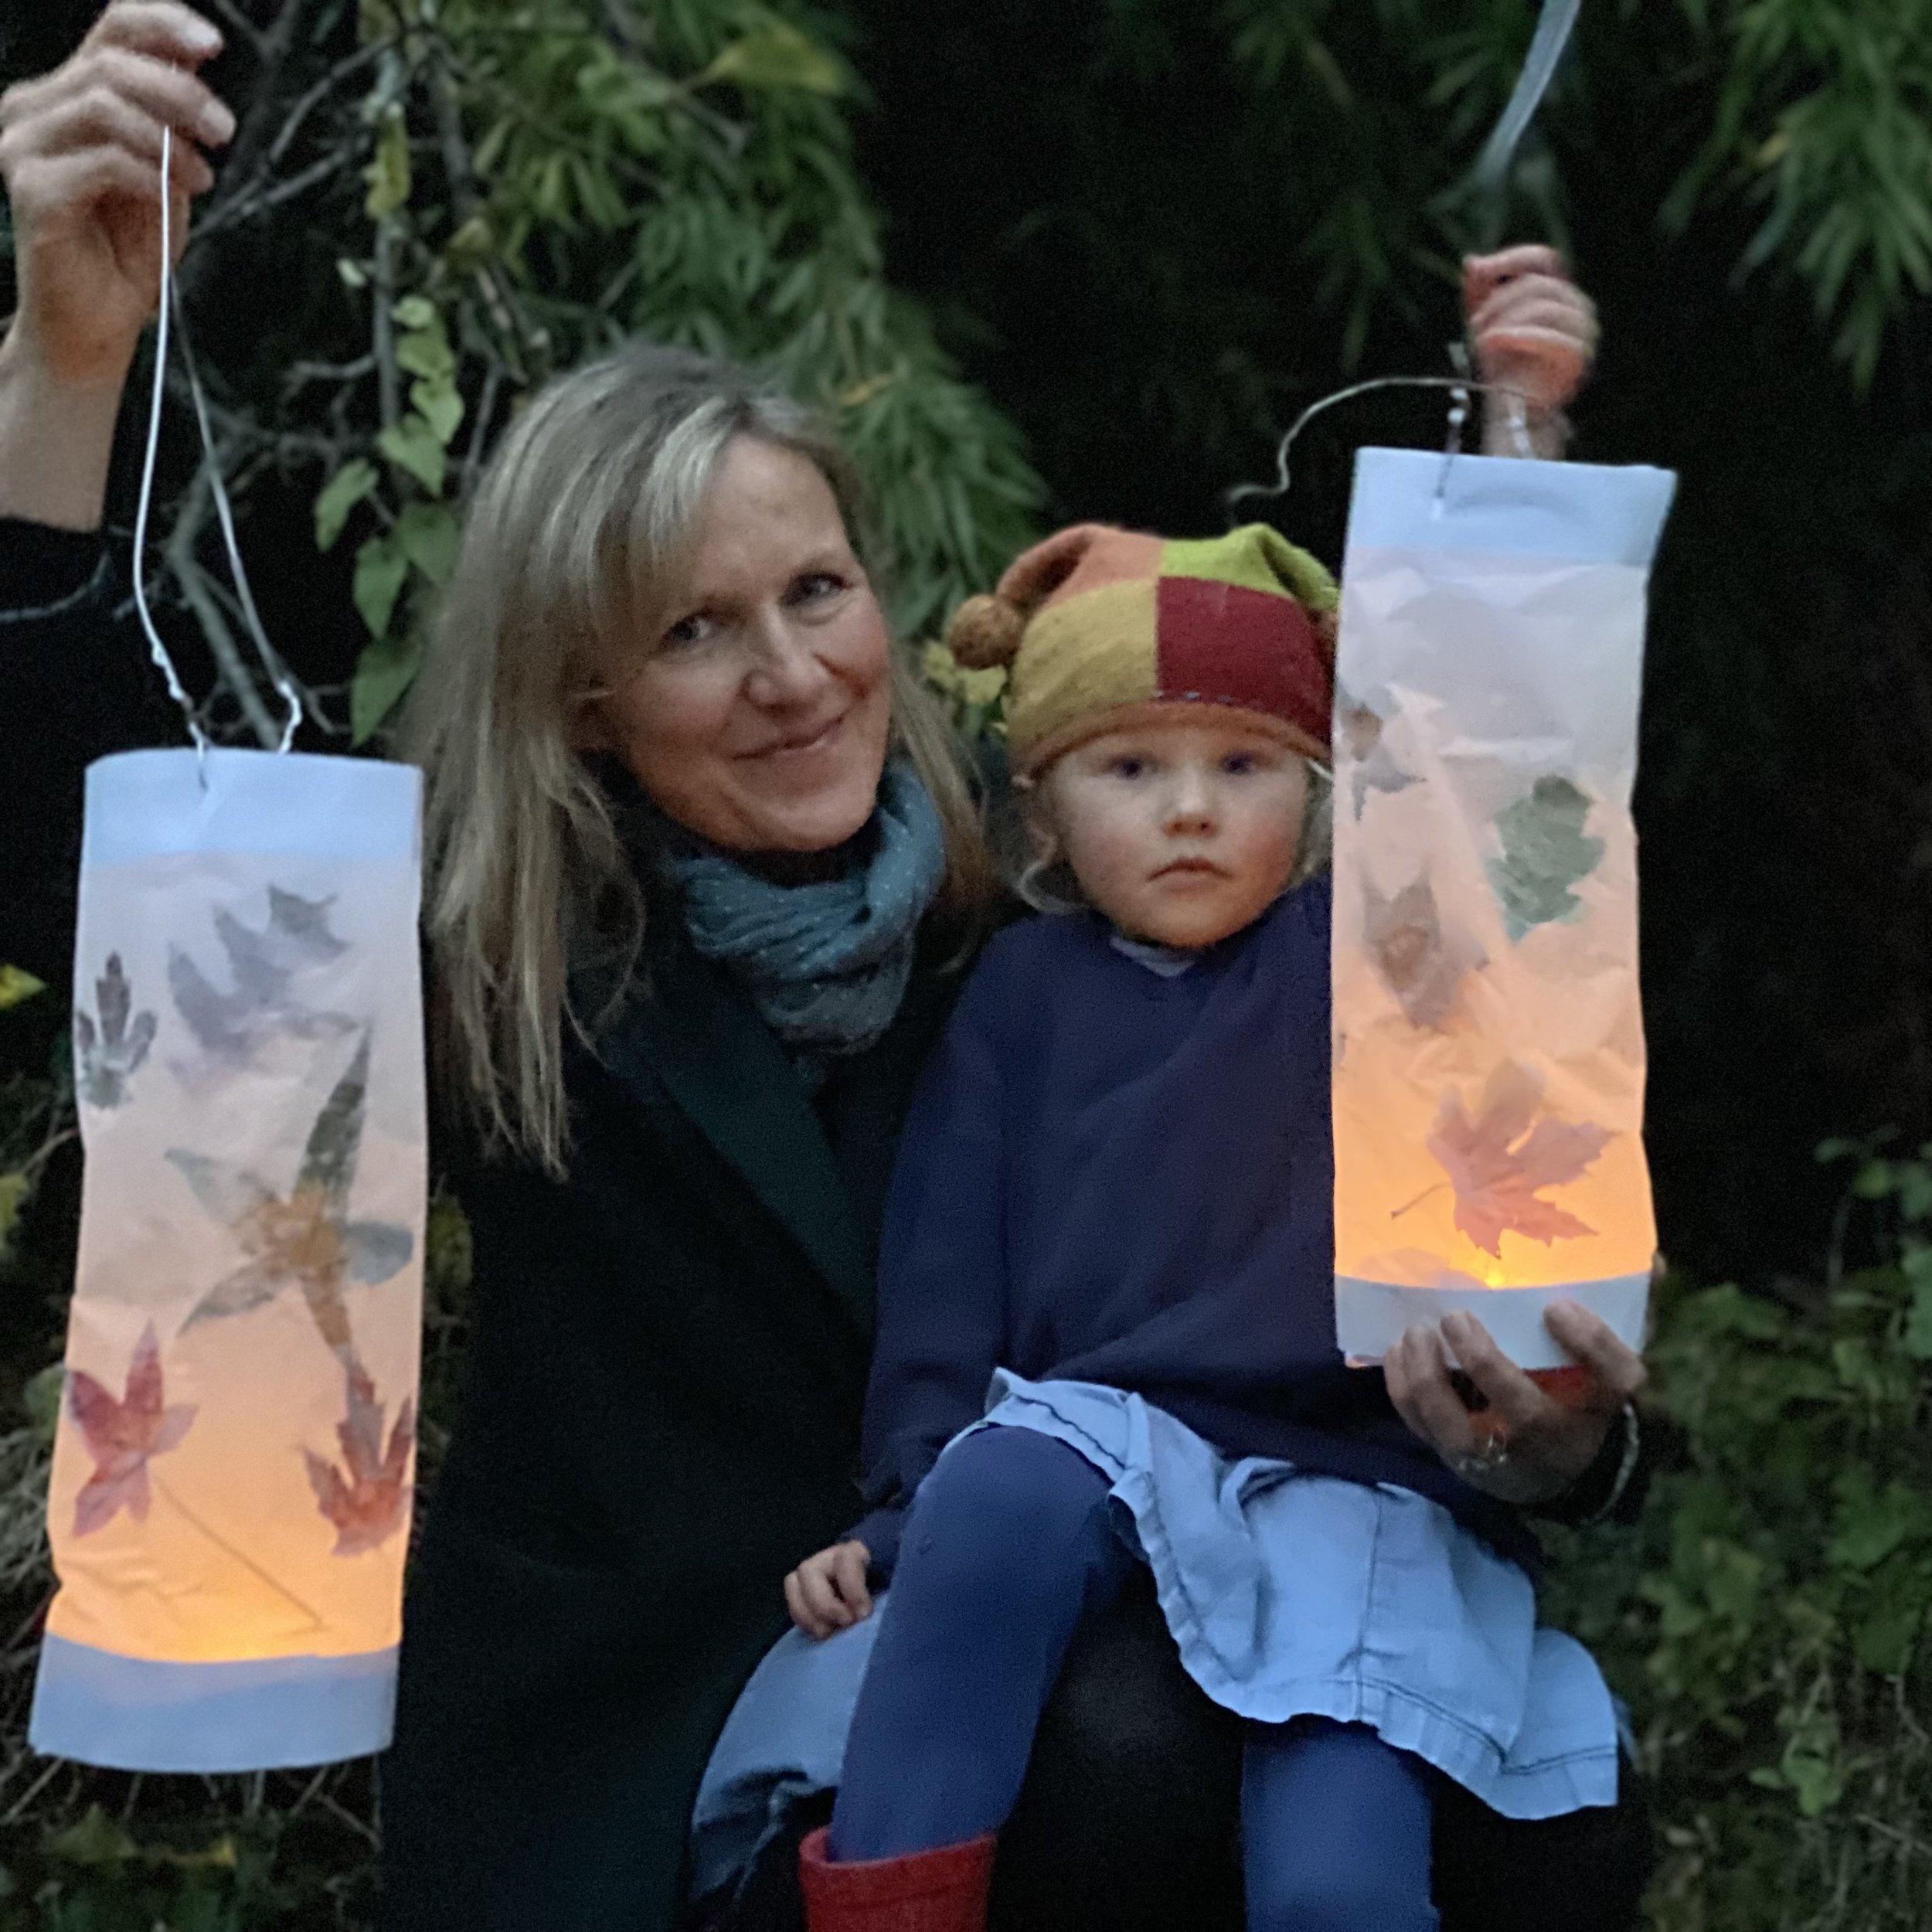
Making lanterns is a lovely activity to do at this time of year. As the evenings are drawing in, many children are experiencing being up when it's dark again for the first time in months, which my three year old is especially excited by!
Making and lighting a lantern is a lot of fun and can be enjoyed by children of all ages. If using tea lights in your lantern, your children will obviously need supervision.
What you will need:
autumn leaves
wax or greaseproof paper
glue (I would recommend using the strongest craft glue you have).
thin wire
tea lights or electric tea lights
A3 card
a pencil
scissors

What you need to do:
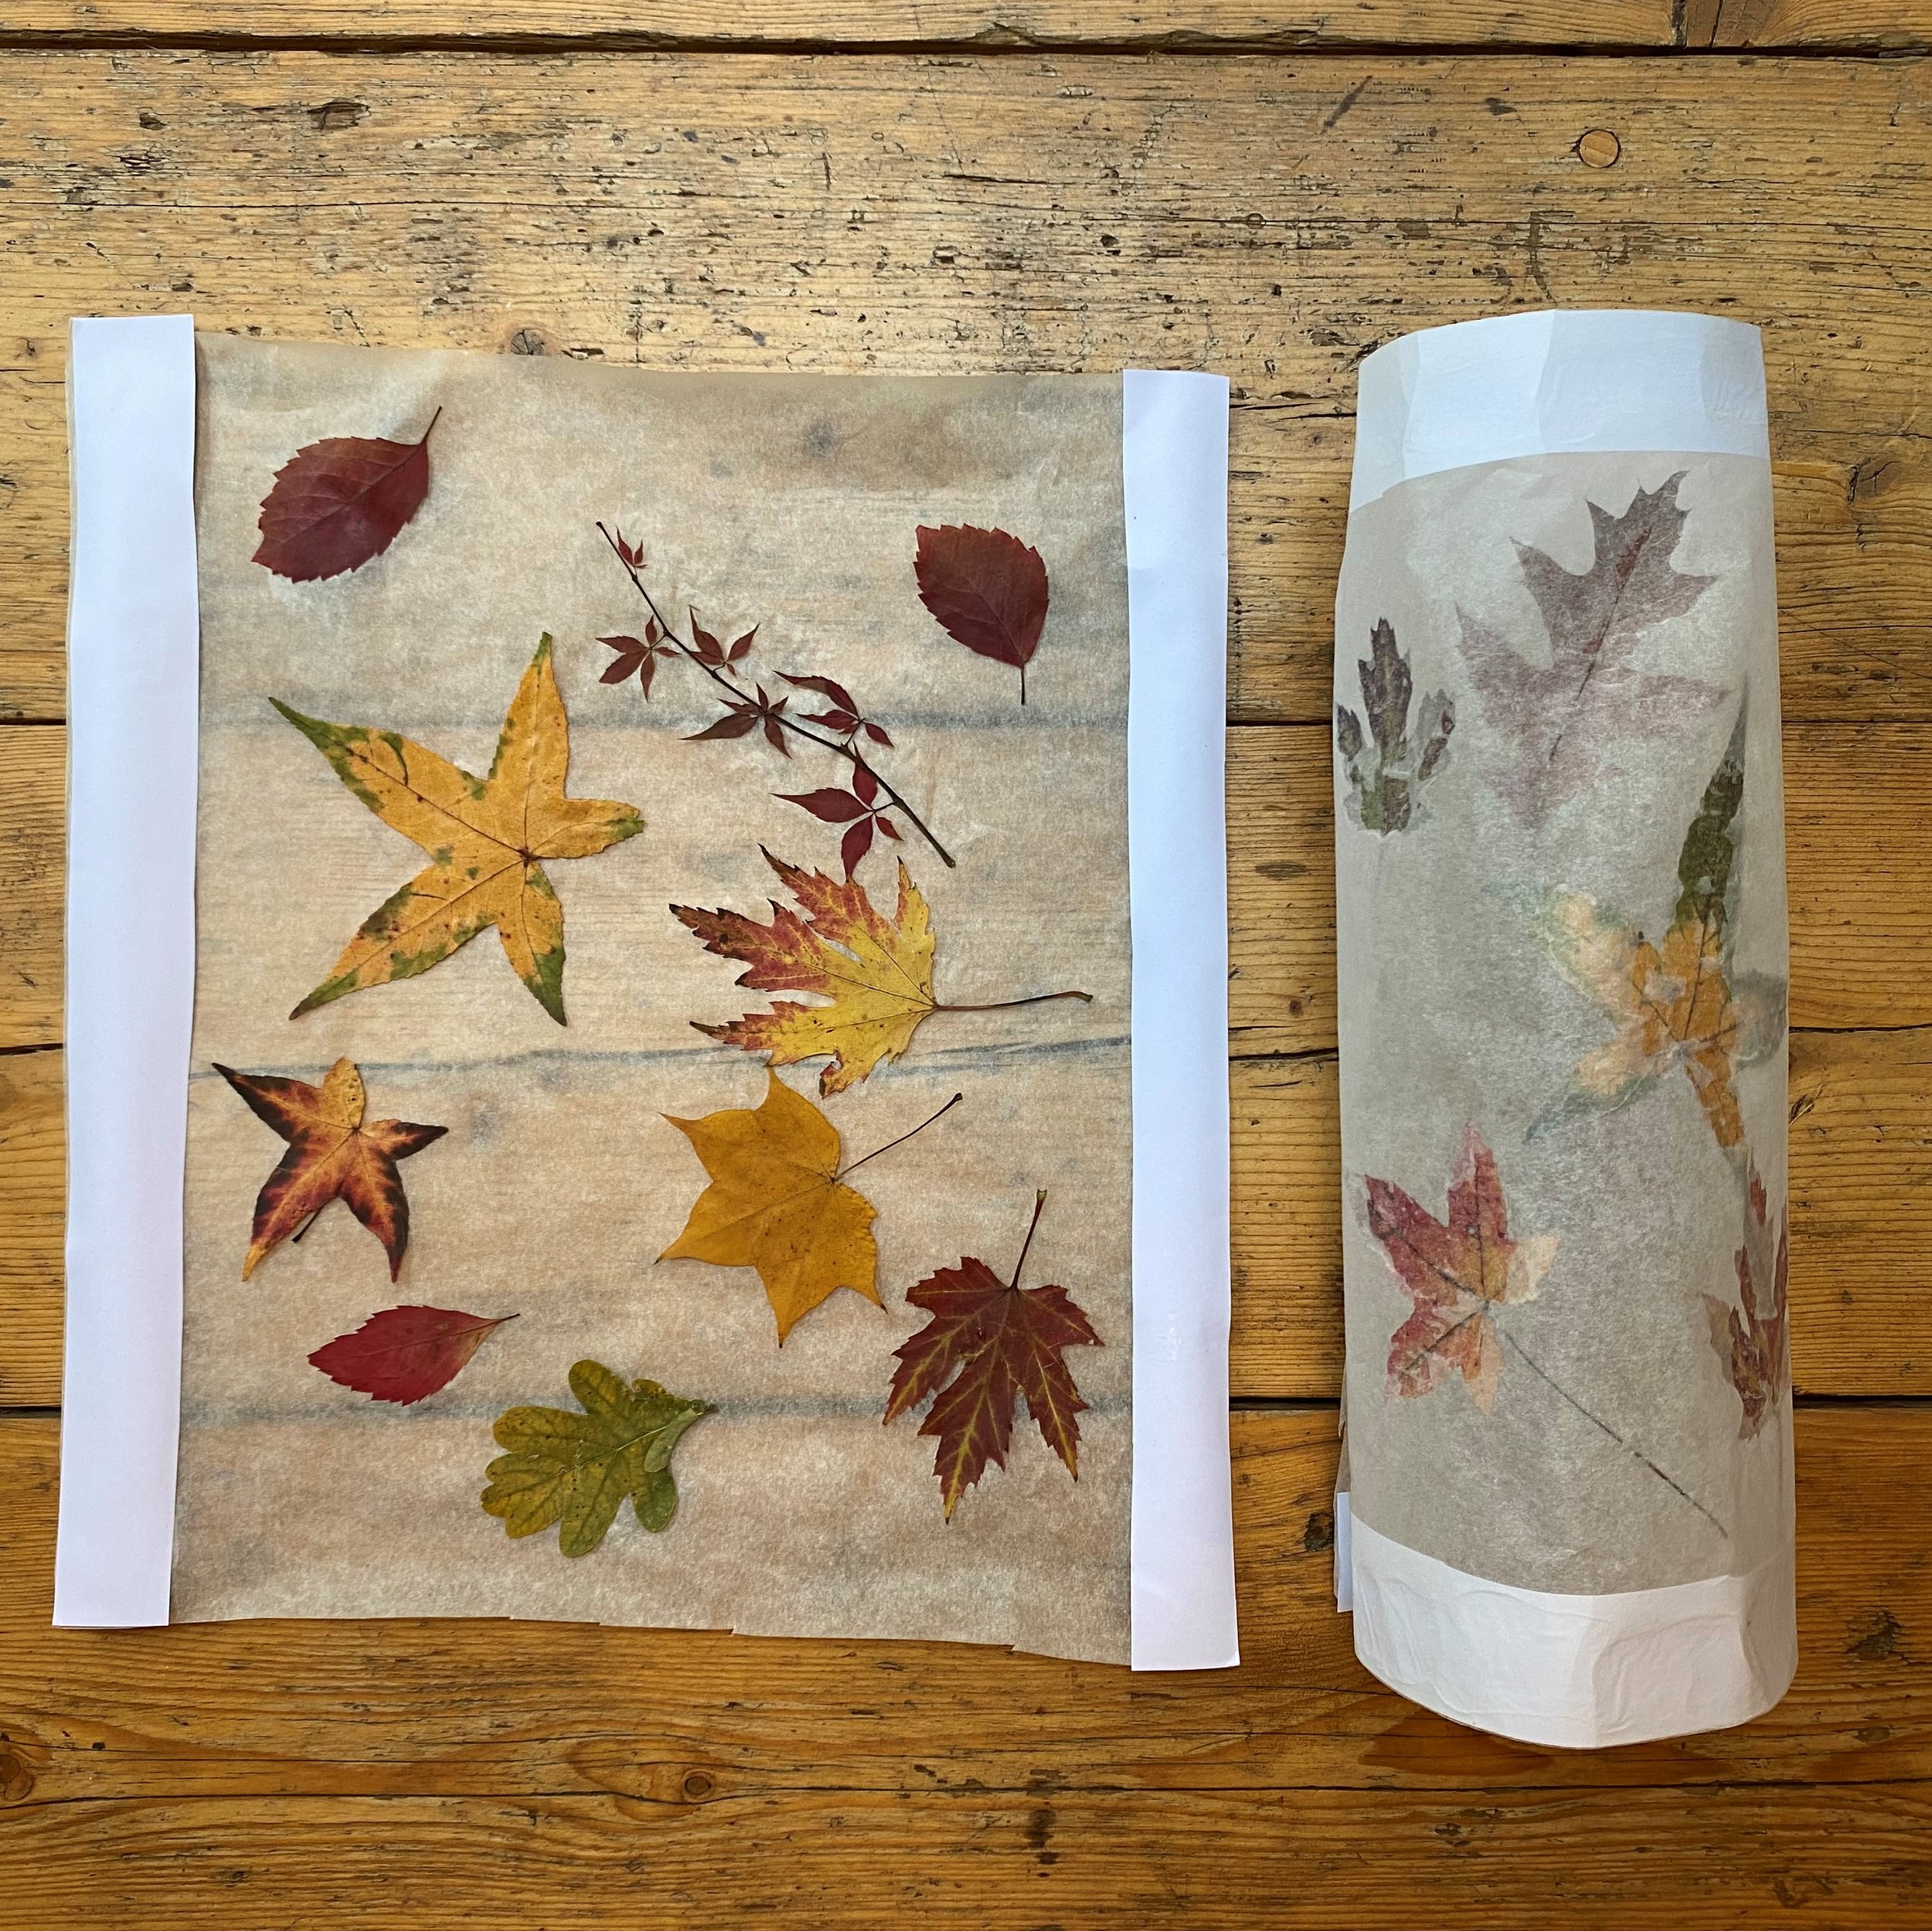
1. Go for a walk and collect some colourful autumn leaves. When you get home, press your leaves between the pages of some heavy books for two or three days, until they’re pressed flat and dried.
2. When your leaves are ready, take your sheet of greaseproof paper or wax paper and lay it on a table. You can choose the size depending on how wide and tall you would like your lantern to be. If you are using real tea lights you won’t want it to be too thin and tall, as it will be harder lighting them.
3. Take your leaves and cover them in glue and stick them down onto the paper, spacing them evenly and leaving a bit of space at the edges.
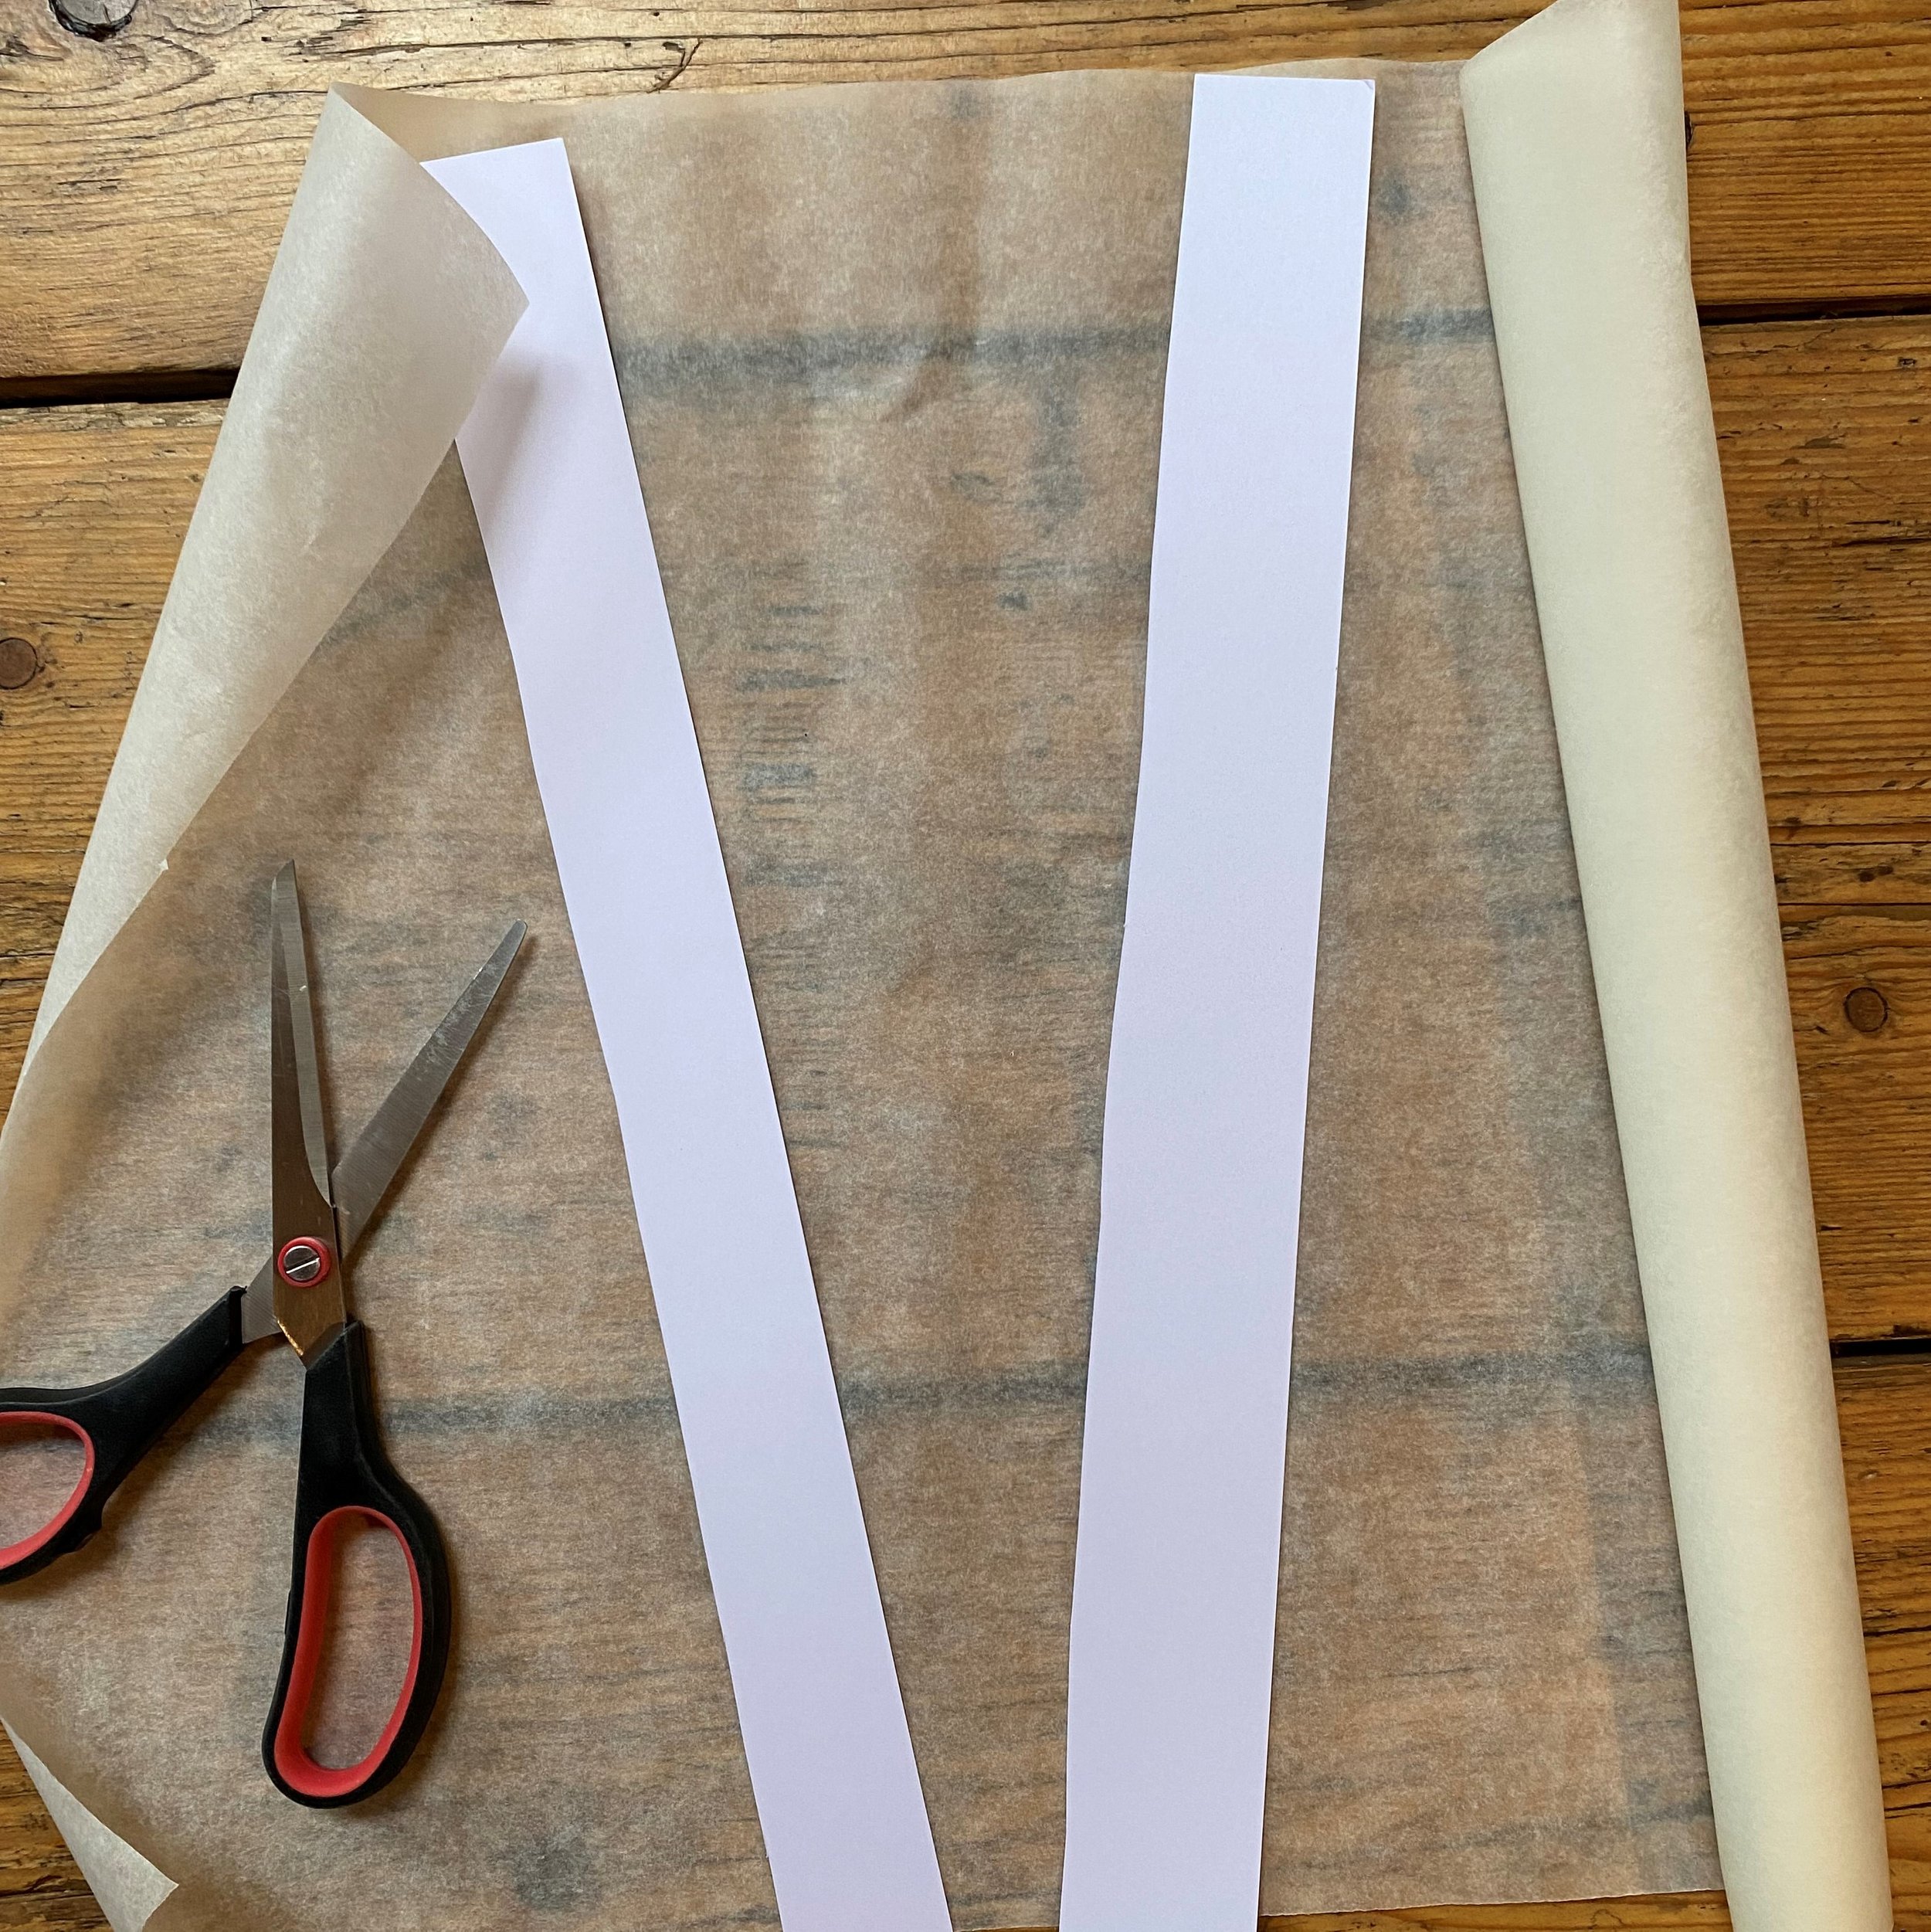
4. Cut two strips of card the same length as your greaseproof paper.
5. Take your two strips of card and stick one along the top of the paper and one along the bottom. Then leave it to dry.
6. Then gently roll your greaseproof paper into a tube shape with the strips of card on the bottom and top. The leaves and card should be on the inside of the roll. Then glue the two edges of the tube together, so they’re overlapping at least 2cm.
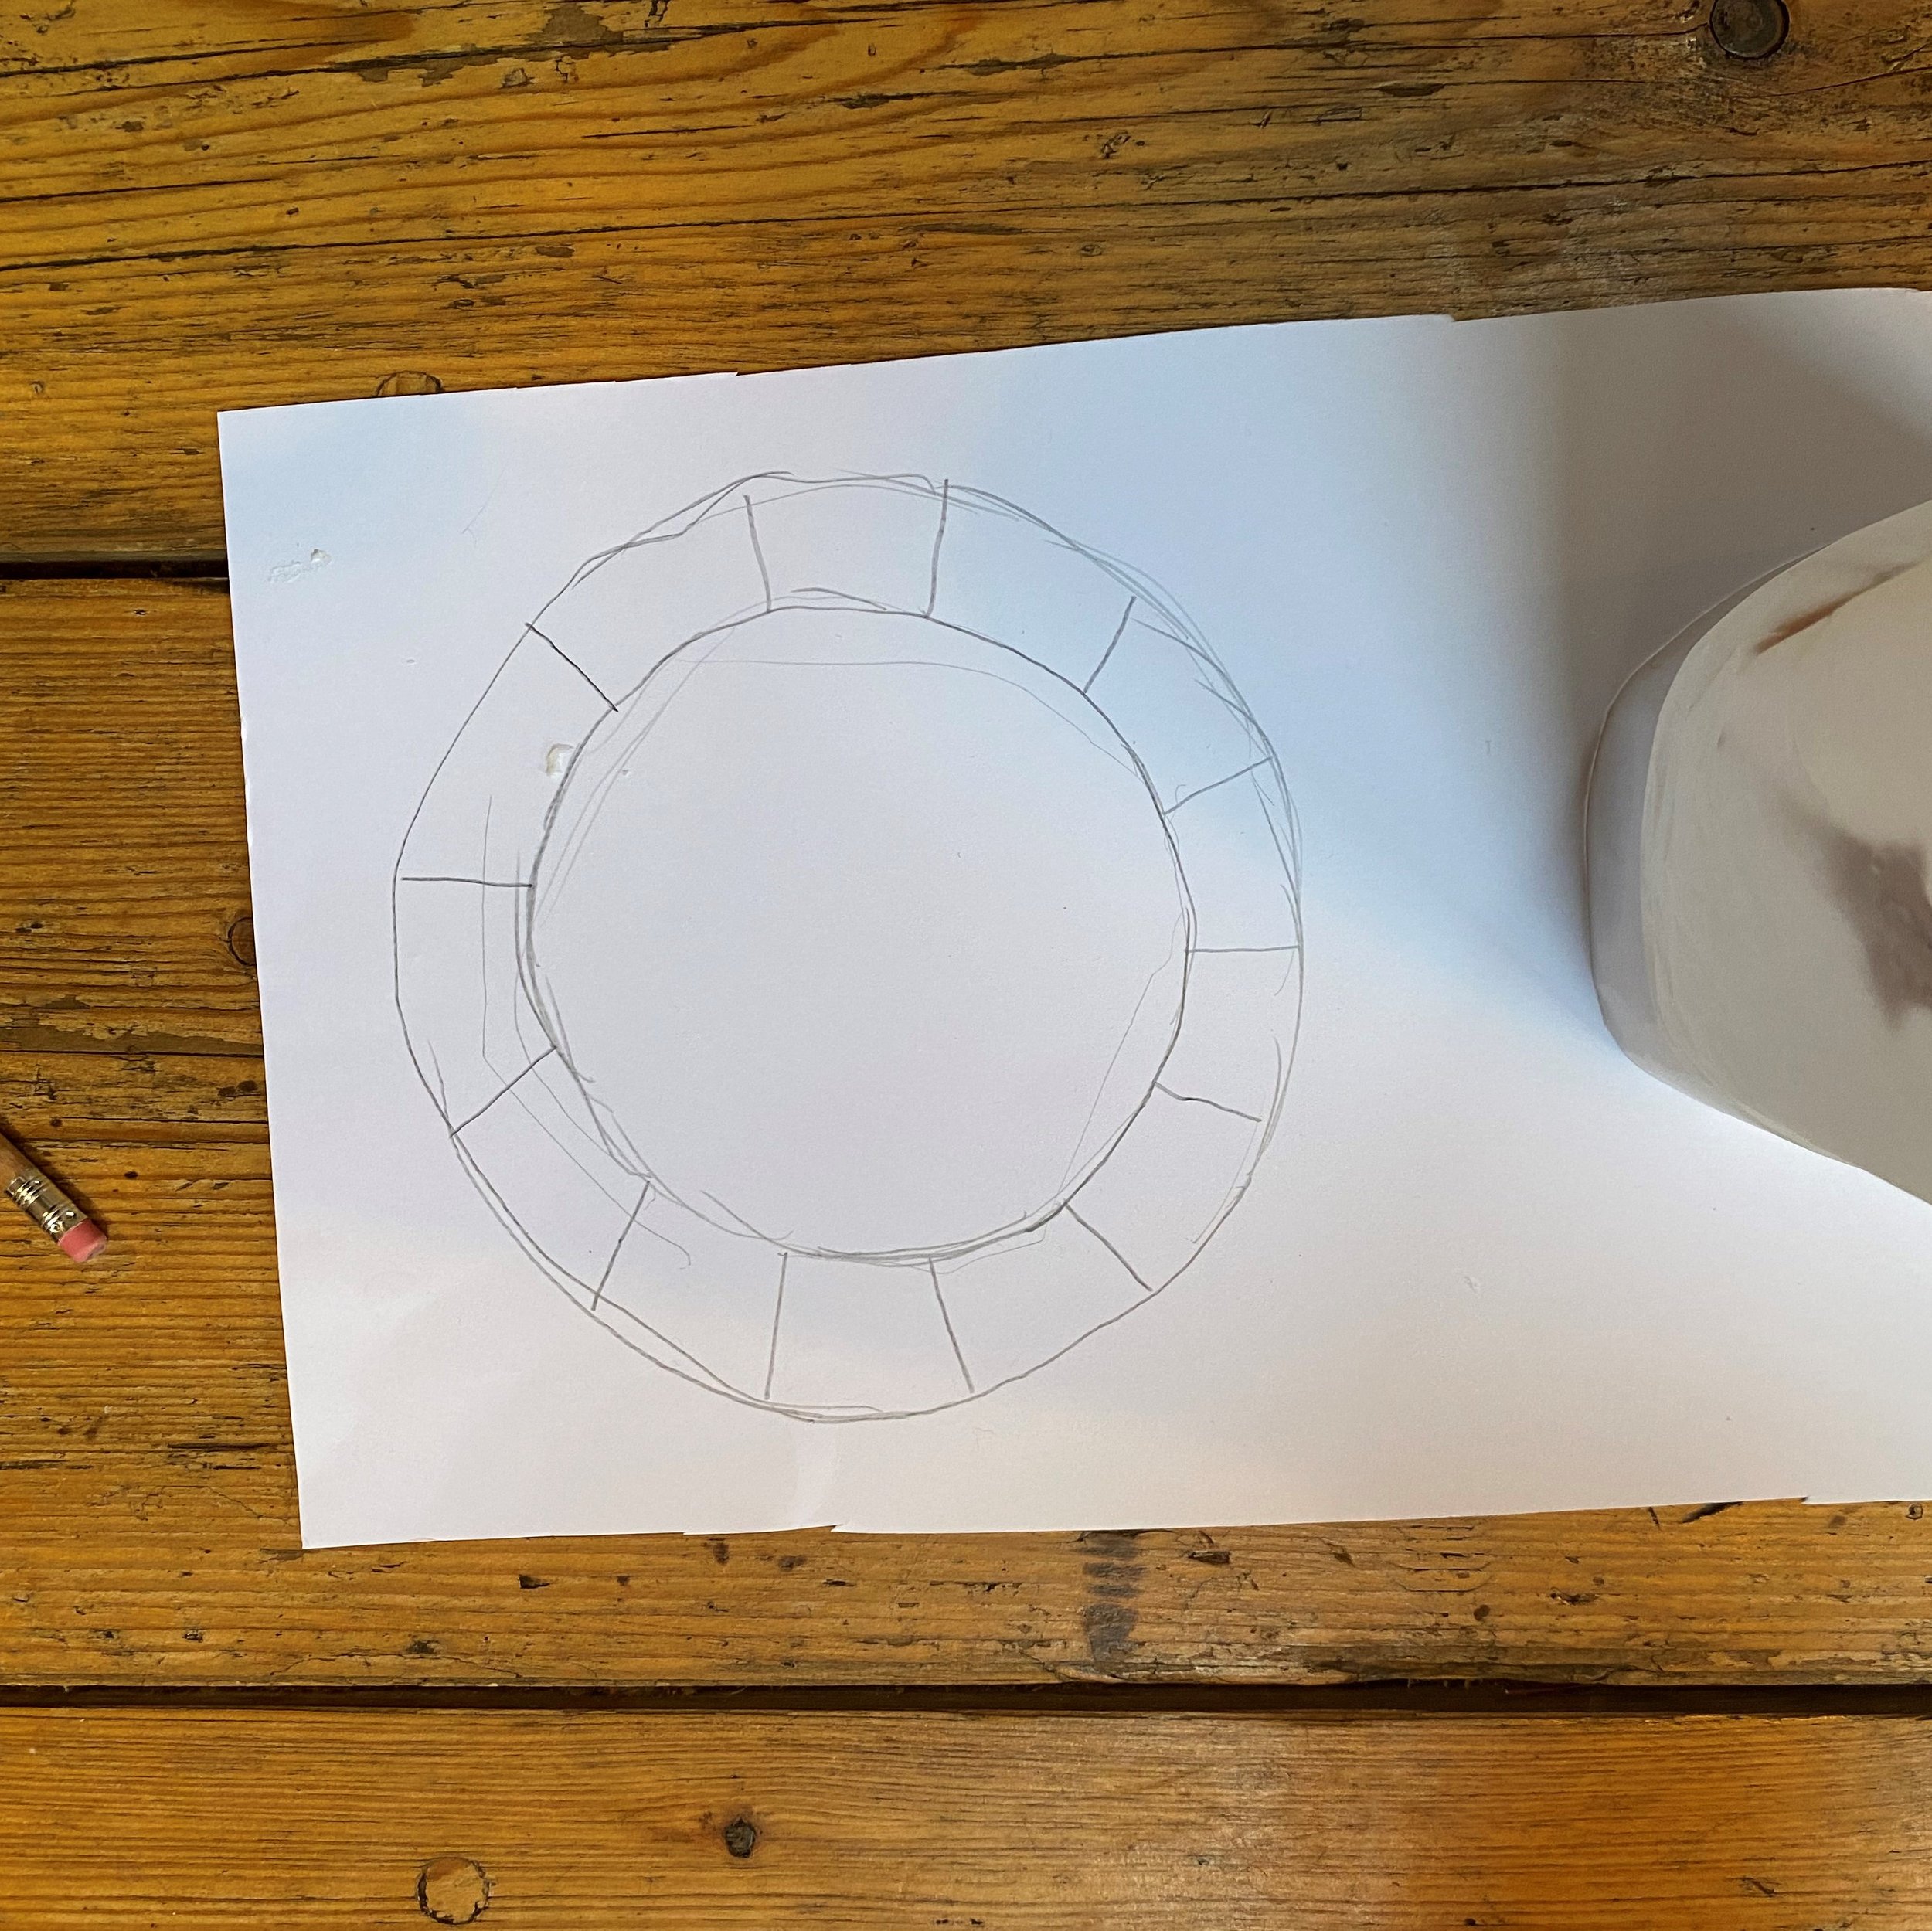
7. Take your tube and put it on top of a piece of card and draw a circle around its circumference. Then draw another circle round the first circle leaving a 2cm gap, like in the photo below. Then draw lines between the two circles, like in the photo below.
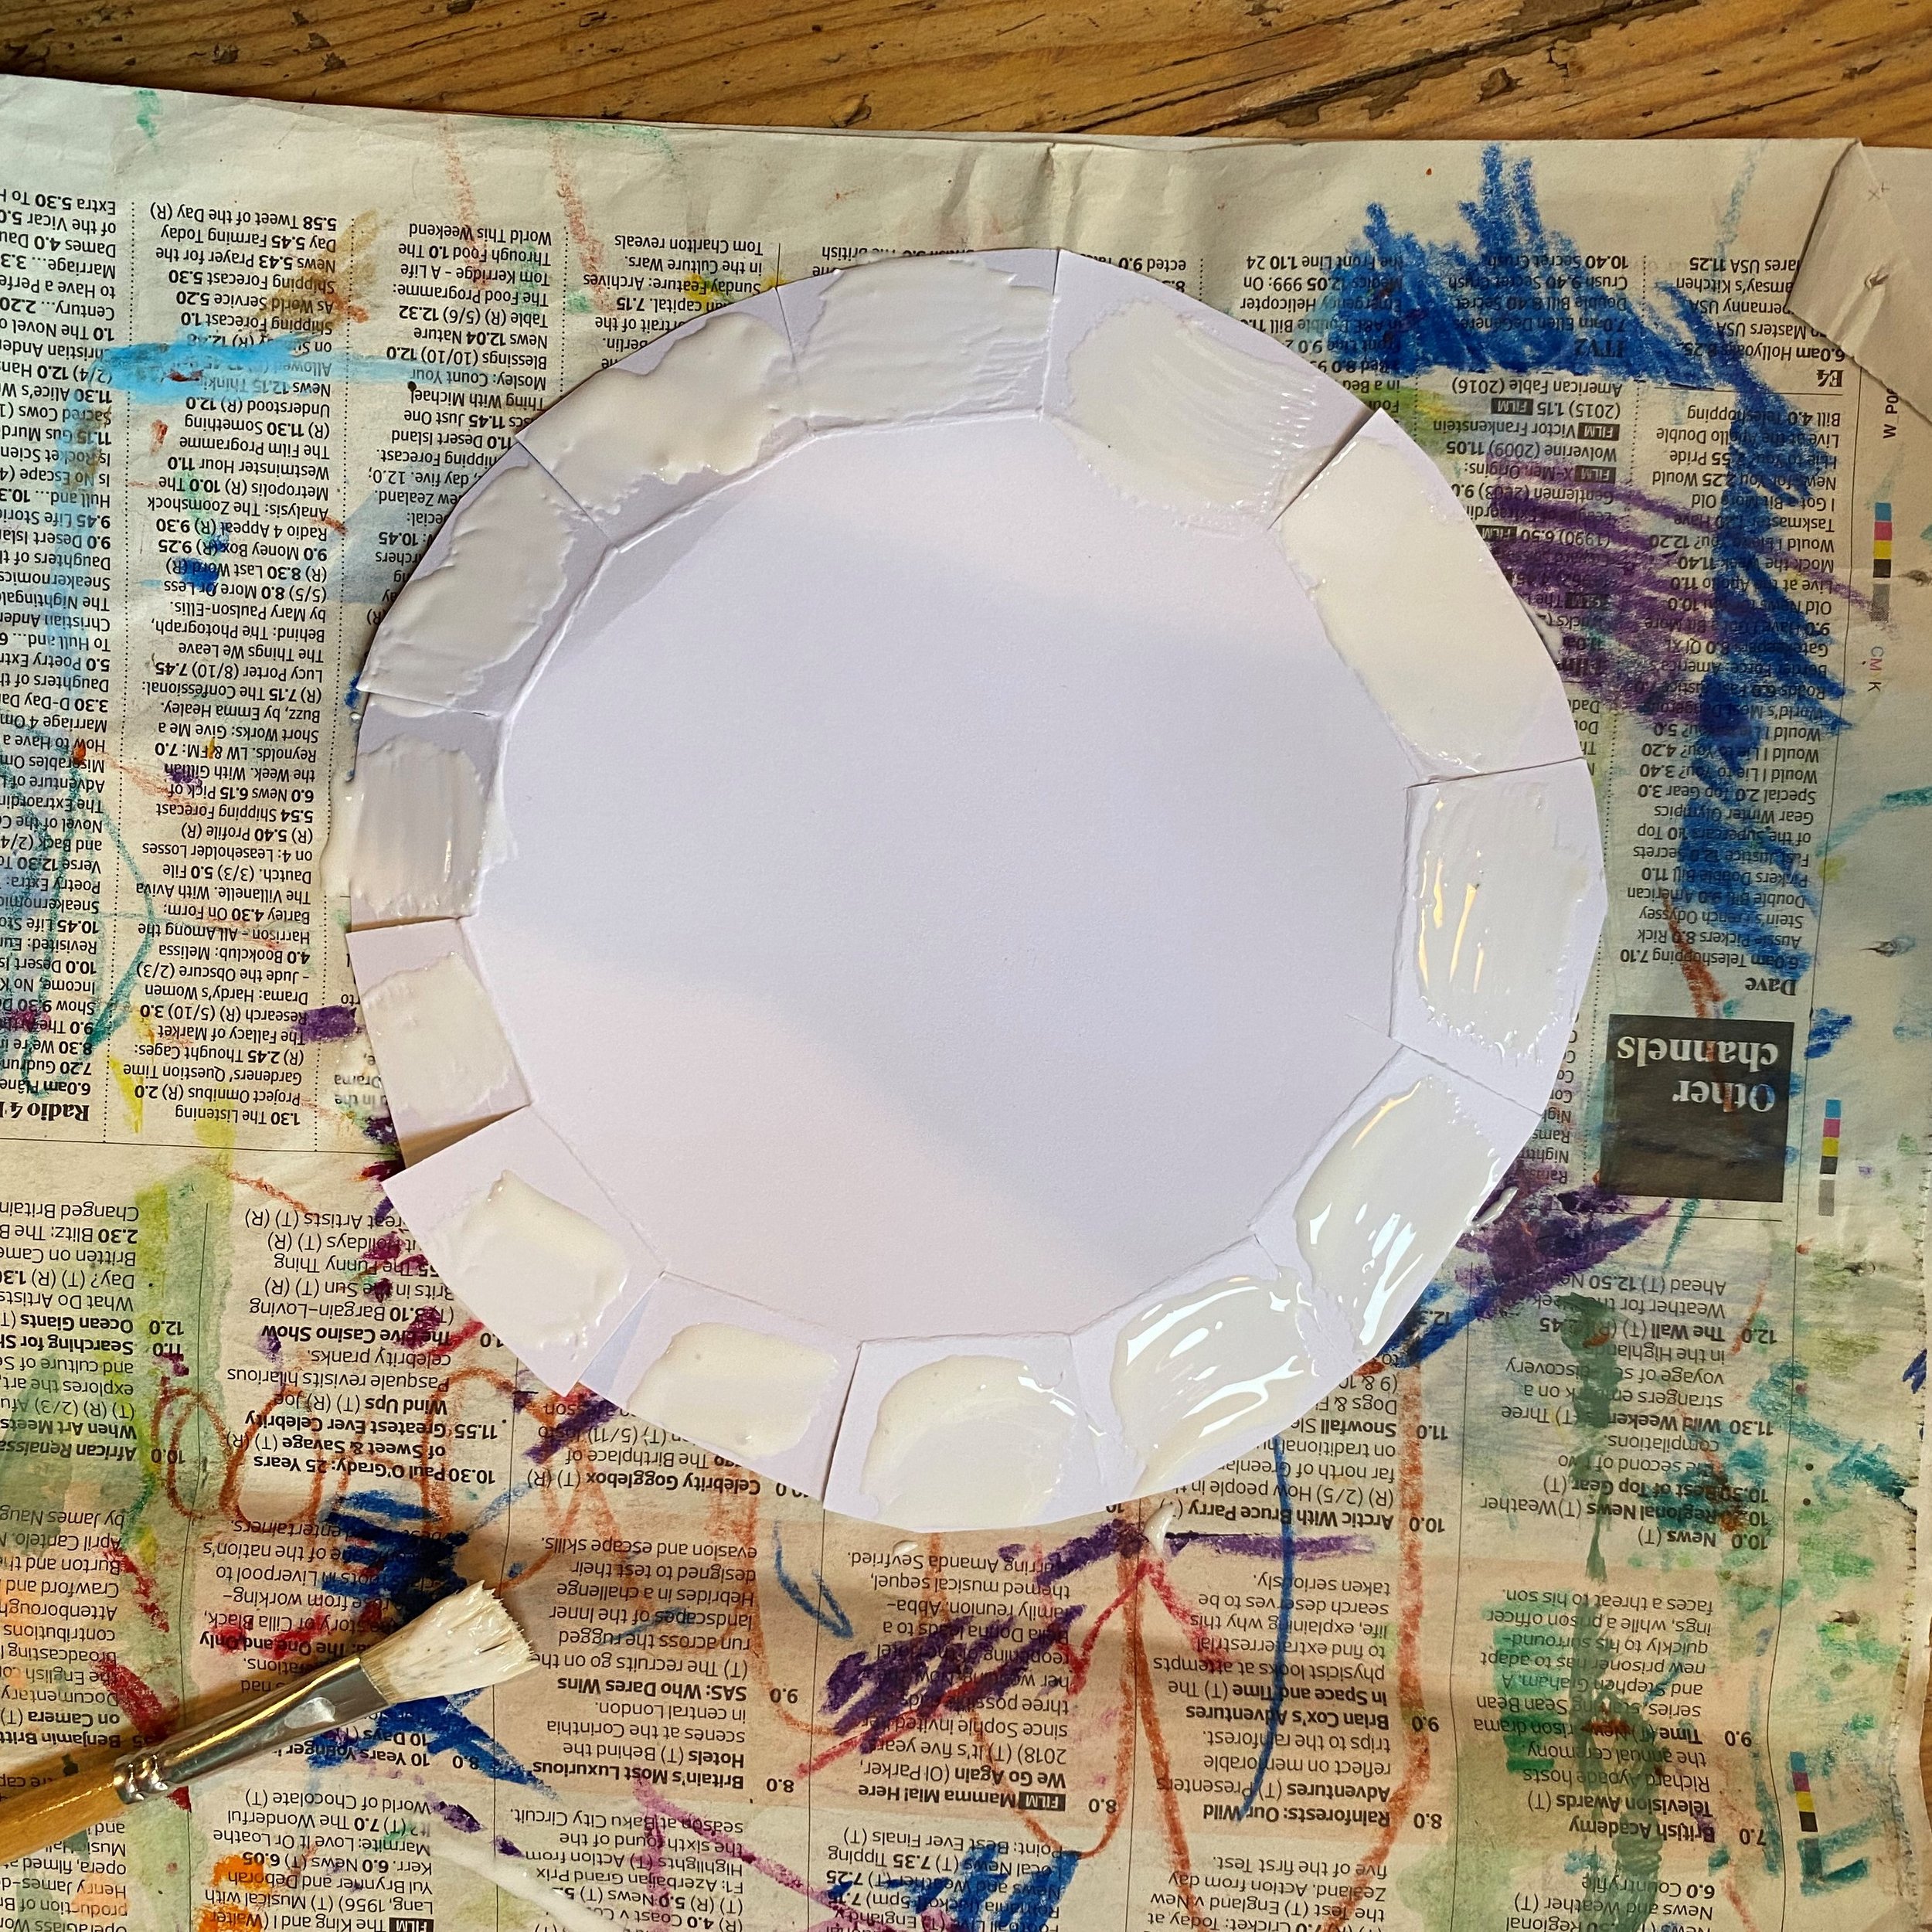
8. Cut your outer circle out and cut the lines going into the middle circle.
9. Fold the edges in so you have a bowl shape. Spread some glue over the back of the folds and insert it into the bottom of your lantern. Put your hand inside your lantern and press it from the inside and out so it sticks in place. Don’t worry about getting them perfect as it won’t be visible.


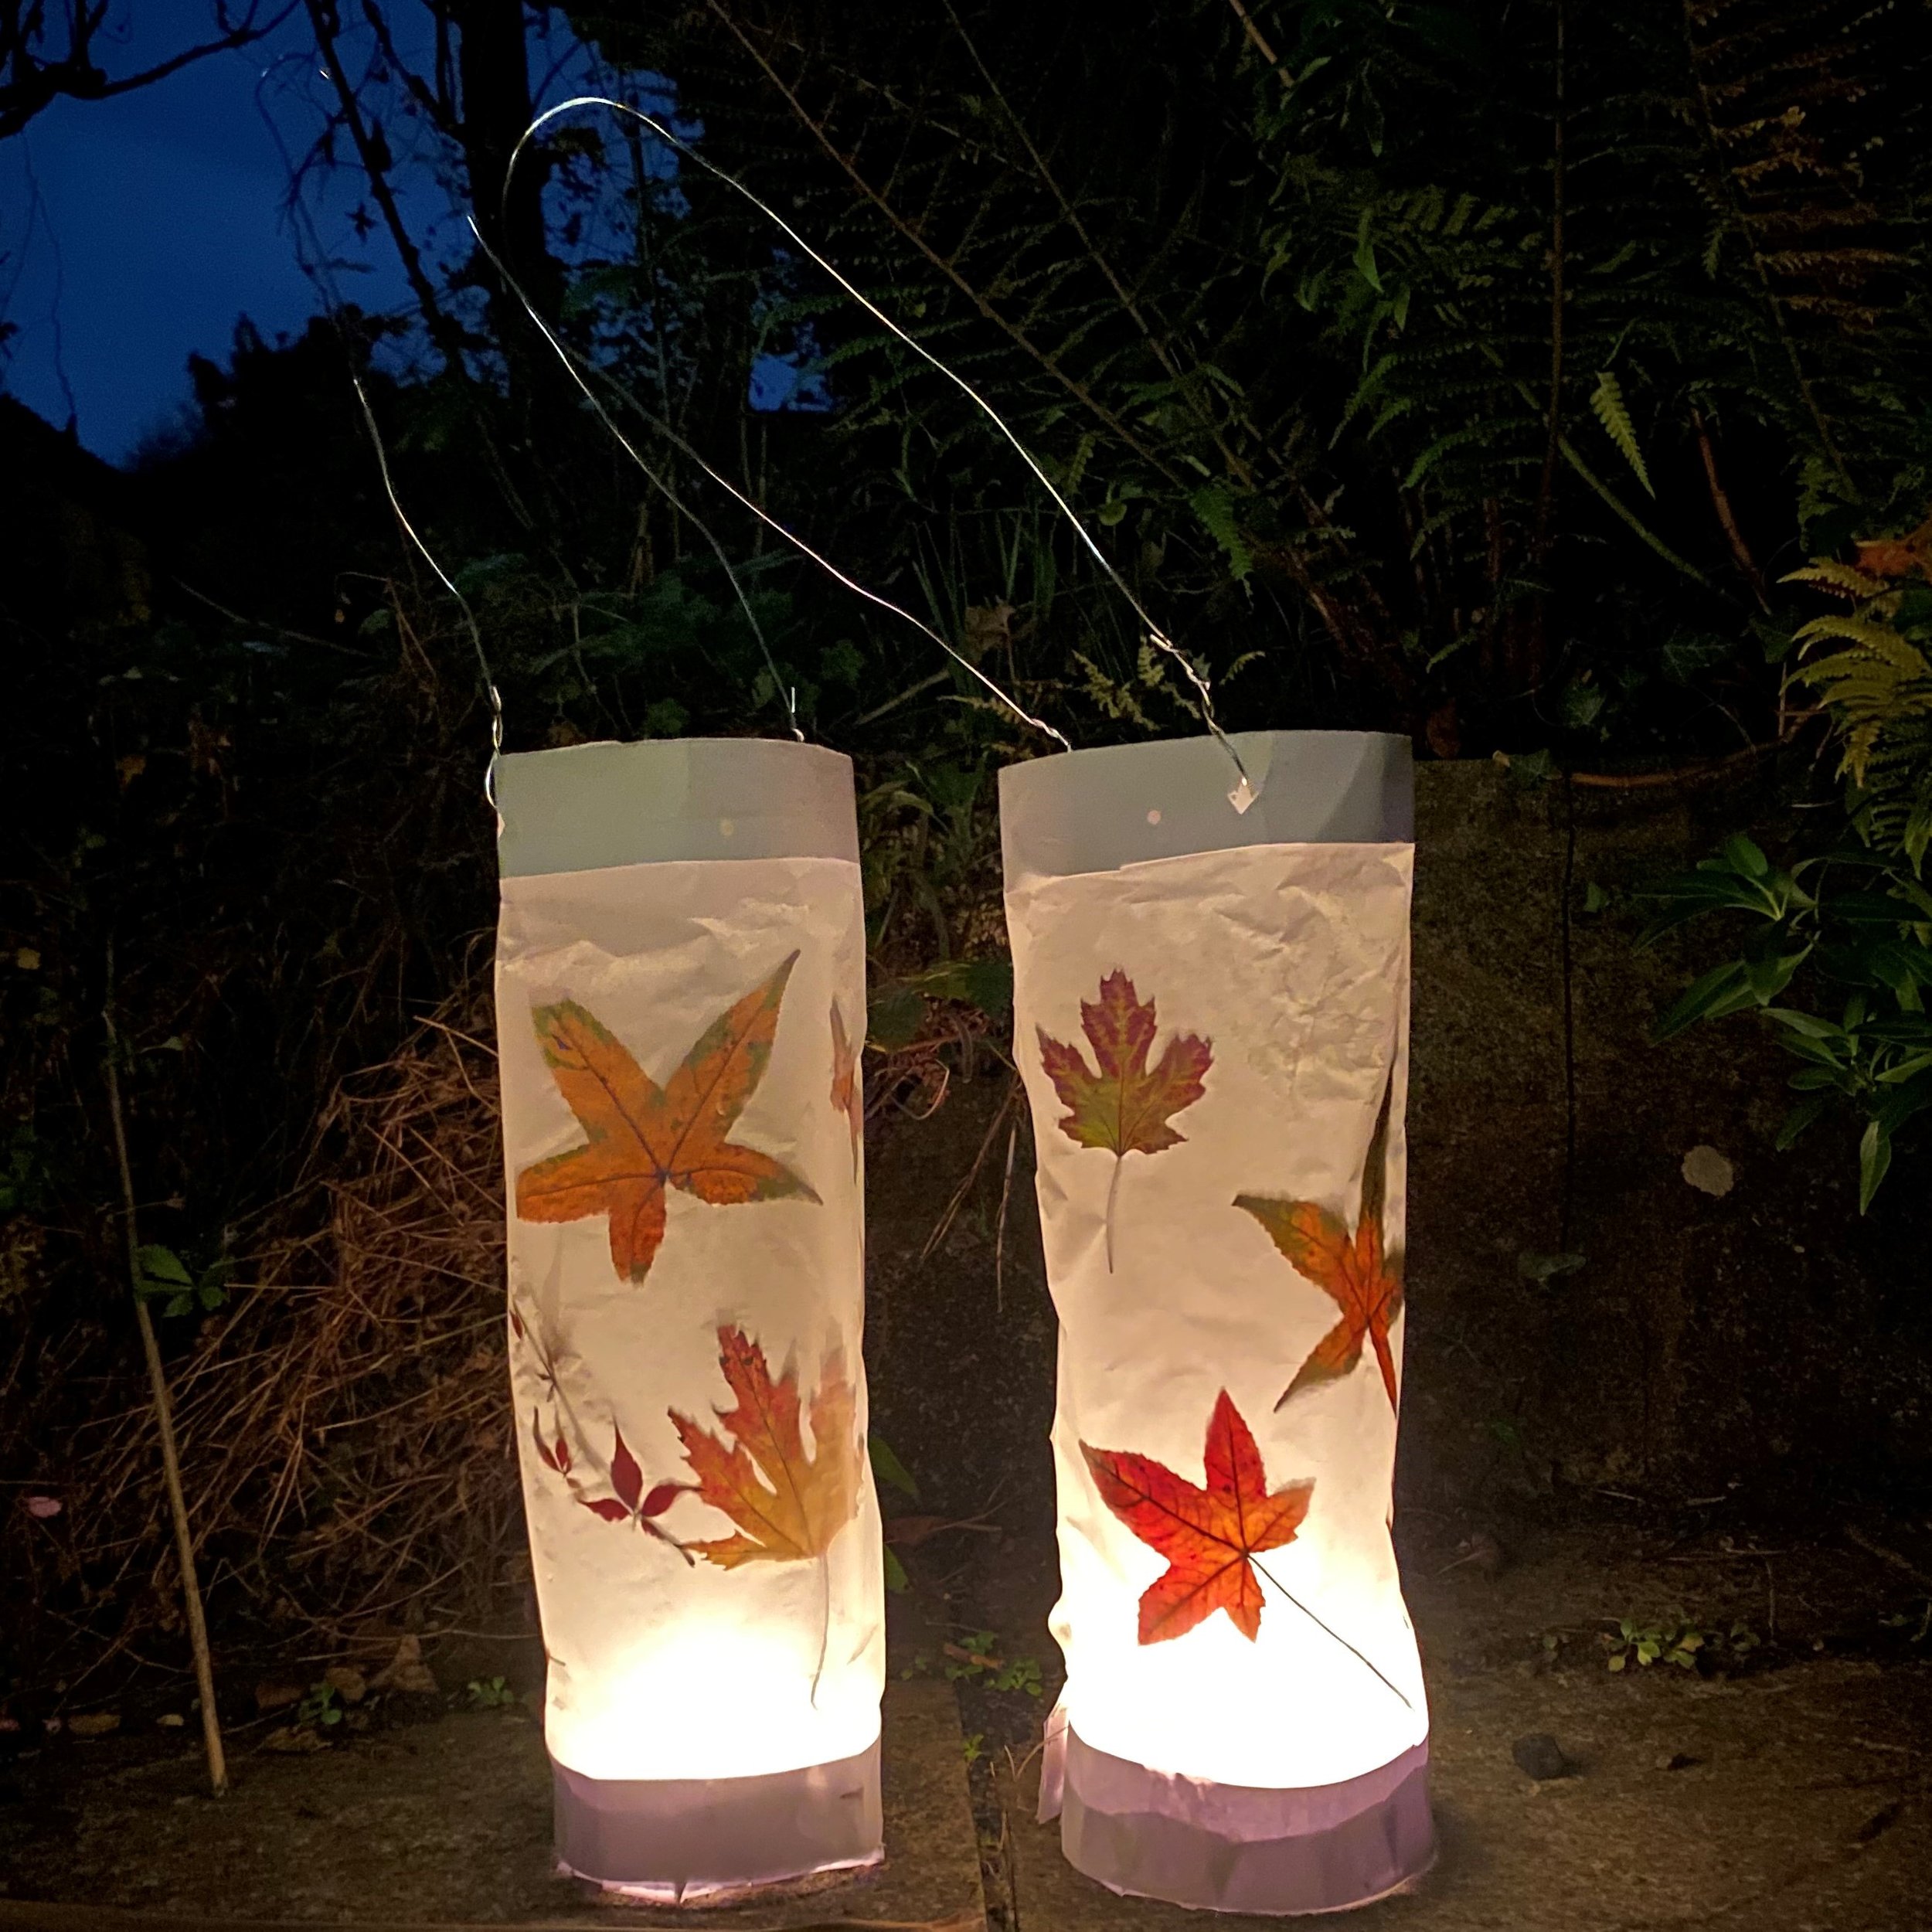
10. Make two little holes at the top of your lantern on either side and loop your wire into them. Make the wire form a bridge over the top of your lantern.
11. Place your tea light or electric light into your lantern. When it's dark go for a little walk outside with it! You might want to use some blue tack, glue or something similar to secure your candle to the bottom of your lantern so it stays in one place.